
Likes
Comments
Share


@Sparkles
Follow
Brought to u by Mars Hydro. Grow on Earth. Grow with Mars 🚀🚀
All pics and videos taken day 28.
Almost half way there. Rice is frosty, Simily not so much.
Eat. Sleep. Grow 🌲🌲

Likes
5
Share


@GanjaByDesign
Follow
Was away from them at end for a long time. Still awarded me with nice quality buds.

Likes
4
Share


@Andres
Follow
She has 104 days and is ready ... but I'll leave her one more week. She looks with compact flowers and a good smell...and also fed with fishbowl water...


Likes
285
Share


@Tropicannibis_Todd
Follow
Alrighty My Friend
well this was one hell of a grow , i had a blast , the SugarLarry exceeded my expectations in everyway ....
I would definitely recommend 👌
👉Soil Provided by ProMix.ca
👉Nutrients Provided by Agrogardens
👉Lighting Provided by MarsHydro.ca
Thanks my friends for the great support over the years 🙏 Happy Growing

Likes
29
Share


@Elpicor
Follow
Very nice plant and the biggest yield in this run, unfortunately unknown strain...

Processing
Likes
28
Share


@Elysian_gardens710
Follow
Day 22 and 23:
Going easy breezy so far!! I released some ladybugs in my tents on these Chocolate Mint OG's 21st day. So far so good lol.
Last night when I watered I gave a little real growers recharge to help with the recent transplant (it definitely gave them a boost!)
Its mid summer here in MI and 84+ temps 😬 keeping the house and tents cool has been a challenge to say the least. Thankfully all my plants are in Veg and seem to like the heat. Except the Choc Mint.they are showing mild heat stress on the top fan leaves(at least that's my guess) Tent temps have been around 86 down to 84 daytime. I lowered them so they are 24" from the lights 🤞 hopefully that helps. Other than that, no problems. And some generally happy plants! The recharge and soil combo burned them a very little bit as well.
Day 25&26
Nothing too eventful. I watered #2 on day 25. With some real growers recharge. The stuff is awesome! No nutrients needed if you have good soil!
Day 26: snip 2 fan leaves from #2(the topped one) she was getting a little bushy. And tucked the other fans under to promote some lower branch growth. #1 I'm letting roll totally natural unless I clean up lower canopy to prevent pests.
Day 27:
Plants are doing great! #1 is really getting tall and # 2 is staying short and squat because of the training. We are letting #1 go naturally. Today's update is we added some LST wire to #2 to pull down her lowest branches
My equipment and gear:
2x4 vivosun
Es300 lighting
Vivosun oscillating tent fan
Honeywell Hurricane fan
6" exhaust outside
15,000 BTU air conditioner
8,500 BTU in tent air conditioning
Some sick ass Genetics 😁

Likes
29
Share


@JeyGanesha
Follow
Anche lei è l'ultima settimana di lavaggio radici.......oggi 29/09/2024 taglio questa Ayahuasca purple...ha un profumo fortissimo....
Oggi probabilmente inizierò a pulire tt le cime e poi.via un taglio netto 😂🤣😜👍💪

Likes
9
Share


@bigolebuds
Follow
Week 8 12/22-29: Getting close to chop day.. planning to start the “flush” soon.. Trichomes looking cloudyyyy
Likes
12
Share


@m0use
Follow
plants are looking great, nice and thick and growing well. Smells are increasing and so is bud density. Giving them water and the occasional top dressing, They should be fine till harvest now. Added in some bokashi grains to the medium to help unlock even more potential for the plants and nutrient uptake. If that's how it works, more a less kitchen sink mentality and does not seem to hurt.
Going to be hard to check the trichomes on this plant as it is so dark but will need to keep and eye on it in the next few weeks and it will be getting close to its estimated 13w harvest date. I made a little tea out of some of the flower the spider mites/thrips where not touching. in hopes some of the extract will stay on the plant and prevent them from eating it, I honestly can't tell if it did a thing, I like to think it did something but doubtful. Also got my hands on a bunch of predator mites. There where a bit past the BB date so hopefully they will still be active/alive.
Side note uploading videos into the diaries is great and all, but takes to long to resize and process, can't hit save till its all done... no idea what its doing in the backend.


Likes
2
Share


@THEFROZEN710
Follow
This phenotype #4 was removed from the grow tent after 2 weeks of veg due to a deficiency I'd never seen before. From what I've researched, it could be sulfur; it didn't seem to be a disease, but it produced excessive resin.

Likes
15
Share


@JungleGym
Follow
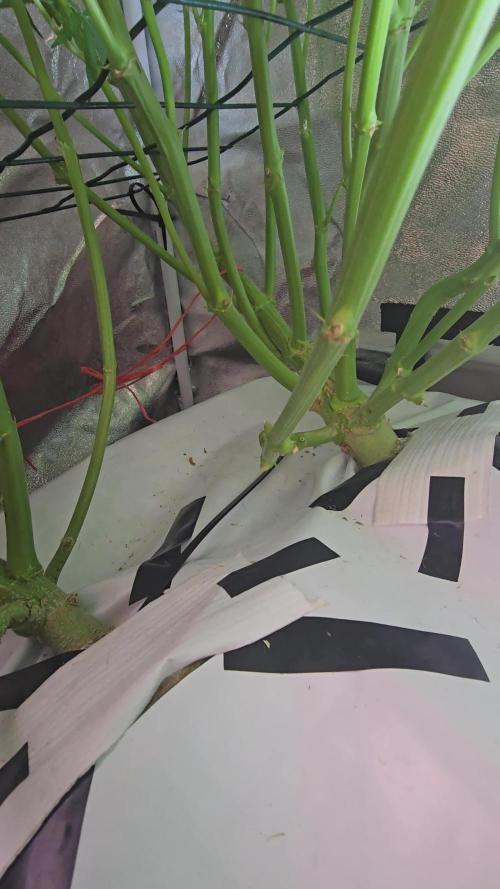
Fair amount of LST going on in there. They've been bent over and seem to be liking it. Just before pics were taken they were given some phd cal/mag water due to what I Believe was a slight mag def. starting. Ph is still remaining perfect in FFOF ( Big up dolomite ). PPM's coming out have dropped from 2000 to 1000 in one week so I'm gonna keep an eye on that. I'm watering every 3 days right now as well not every day as the drop down made me choose per day. They seem pretty happy though. I have a feeling they're about to explode. Update: I was right they needed a lil cal / mag and in 2 days yellowing has cleared up and they are absolutely exploding almost doubled in size in 2 days. Also two have started to flower.

Likes
4
Share


@TheStreetzCollective
Follow
i would like to see a bigger yield . the veg was tough for the acai stain didnt grow much but was the better smoke


Likes
27
Share


@Reaper
Follow
week 7 flowering (Day 49)
some leaves are just falling of on the critical because of the calmag issue still the buds get fatter, also the coockies start getting brown pistils but are far from ready
the only thing i give is the plagron PK booster (green sensation) with tap water


Likes
Comments
Share


Likes
16
Share


@GabbaGandalf
Follow
I started to scrog The Church (left side of the closet). I topped the plants after the fourth node. Of the 4 Churches, I didn't properly top two of them. These two are looking like they are developing the main cola as well as the two side colas equally, so it seems there are three of them.
Serious 6 is growing slowly. Two of the plants are staying small and scrawny. I'm wondering if that is the phenotype or if I messed up.
And to top it all of, there was an accident with the Autopots :-(( This is the second time it happened in my AP system: The float gauges in one of the trays got stuck and the water kept flowing. The tray overflowed and the water ran all over my wooden floor. This also happened at night and I only discovered it the next morning. Luckily, the float became unstock at one point of time and the waterflow stopped. If it hadn't, 30 Liters of water in my tank would have caused serious issues.
I was going to start the 12/12 flowering cycle next week, but looking at the Serious 6s I will postpone it by at least another week. That way the Church can scrog longer and I assume won't fill up the net as quickly as Serious 6 anyway, since it more bushy compared to the Serious 6 sativas.


Likes
11
Share


@ButterfliesLittleFarm
Follow
Hello Diary.
The first week of vegetation is over and for now everything is going well.
In order to recognize the plants, they are arranged alphabetically from left to right.
On the left is Apollo, in the middle is the Milky Way and on the right is Titan.
As for Apollo F1, so far so good.
The plant is developing nicely, getting new leaves and has reached almost 10 cm in the first week of vegetation.
Watering was not frequent, considering the size of the pot, there is a lot of moisture in the ground, so I watered it every 5 days with a liter and a half of water.
In the first week, I didn't add any supplements, considering that I mixed a lot of supplements into the soil.
Conditions on the farm are satisfactory.
The humidity is slightly higher than 50% and the temperature is around 25 degrees.
The light is set to 18/6 from the first day of vegetation.
I took pictures on the first and last day of the first week, just to see the difference in a week.
Here's a quick recap of the week.
30/04/2023 - Day 1.
Watering and photography. Officially, the first day of the vegetation.
Prepared 5 liters of water, lowered the pH. at 6.0 and with that amount watered Apollo and his two roommates with about the same amount of water.
Apollo F1 - 6 cm
05/05/2023 - Day 6.
Watering. The procedure is the same as 5 days earlier.
06/05/2023 - Day 7.
Photography. End of the first week of vegetation.
Apollo F1 - 8.5 cm
That's all for this week, see you soon and thank you all for your support.
