
Likes
Comments
Share


@AmokNewb
Follow
So starting week 3 or week 2 of veg. I upped my feed schedule to 4 times a day as well as upped the ppm to 550.
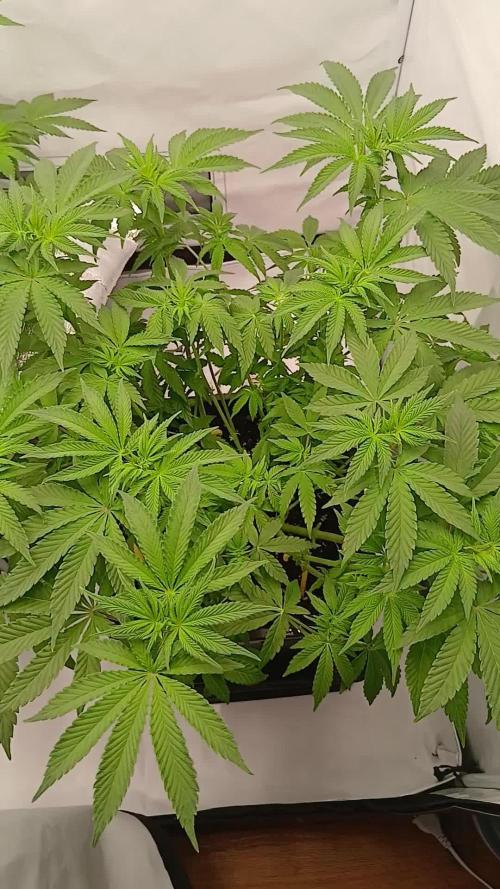
Decided to finally named the plants. Left hand side is Amy and the right is Rose. I have been using doctor who characters for my plant names 🤓.
Well it’s day 17 and rose is looking really good and robust. Amy on the other hand is still a bit small and looking like she has some sort of deficiency. Even though both plants have been treated the same. I am going to just keep doing what I am doing and hope she will catch up in time. She is slowly looking better and better.
Other than that I am hoping to start my LST at the end of this week. I will update this week as it progresses.
This actually about day 11 after sprout and starting veg. With that being said I did start a little light LST on rose. My last grow I had a similar issue where one plant was half the size of the other of the same strain. It made flowering awkward in my setup. So I am really going to concentrate on keeping rose as close to the same height as Amy. I’ll use LST as much as I can then I will be scrogging them as best I can.

Processing
Likes
10
Share


@YAKDADDYDWC
Follow
Firrst week of flower has gone well switched bulbs to 12 12.
nice heads starting to pop up during the end of week 2


Likes
1
Share


@420Cannaking
Follow
Vegetation cycle starts.
Light intensity 50% @ 16 inches
Nutrient program starts at 50% Green Planet Easy Feed and Week 2 begin Green Planet Pro Feed @ 50%.
Abit too much light for the plants finding the sweet spot on a 480watt LED,they recovered well.
Still battling high humidity and high temps. 28-31'C 65%-90%. Introducing a new dehumidifier as of next week.
Have turned AC on High between 11am-5pm (hottest part of the day) Summer only!

Likes
151
Share


@PapaNugs
Follow
These three girls got transplanted today into their five gallon fabric pots. They were looking hungry so decided to do it early. I normally wait till 3.5 to 4 weeks. They were added to my custom mix of coco with perlite and added amendments, worm castings, and purple cow soil. Watered first with dechlorinated tap water and next with added mycos and cal mag.

Likes
14
Share


@eldruida_lamota
Follow
Vamos familia segunda semana de vida de estás Tropical Zmoothie de SeedStockers.
Que ganas tengo de ver el progreso de esta variedad, las plantulas están sanas, se ven con buen color.
La cantidad de agua cada 48h entre riegos.
Esta primera semana ya añadimos nutrientes de la gama Agrobeta.
Tuve problemas de trips en un indoor y tengo todas plagadas pero ya las e tratado con aceite de neem y un insecticida genérico , trataré esta semana y la siguiente.
Estas próximas semanas veremos cómo avanzan.
Mars hydro:
Code discount: EL420
https://www.mars-hydro.com/
Agrobeta:
https://www.agrobeta.com/agrobetatiendaonline/36-abonos-canamo
Hasta aquí todo, Buenos humos 💨💨💨


Likes
10
Share


@Dirty_rich
Follow
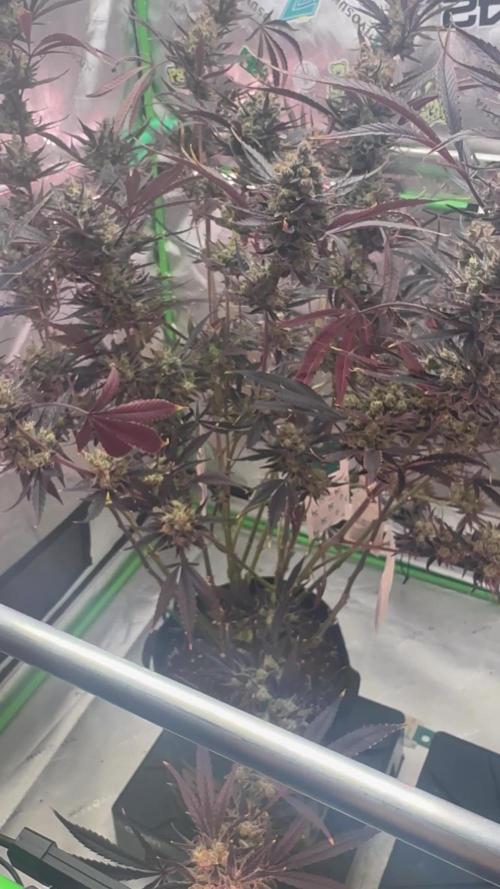
Pistilos mayormente marrones y más importante aún; tricomas 100% blanco lechosos. Esperare una oleada más de resina o al menos cosecha con tricomas 50% blancos 50% ámbar.

Likes
6
Share

@BettyFlores
Follow
06.11.2025 Last week was really busy for me, but it was not because of this beautiful couple of Agent Orange. The male moved to the window and is developing very nice. She, the female Agent, stayed in the tent and went on with her stretch. I took off many leaves and am trying to keep her inner circle exposed to the light. So happy to watch them grow 🌸
09.11.2025 Oh, she is sooo beautiful and yellow (!) flowers are appearing. I'm flashed by her stunning beauty, observing these little yellow spots showing in the centers of her flowers. This is such an surprising effect, that you wouldn't believe it if not seeing it with your own eyes. Impressive! 💜

Likes
39
Share


@BudsBanditUK
Follow
She has got about as fat as she will get now. Now flushing ready to be chopped in a few days or so. Giving off a very nice smell. Really can't wait to smoke this.


Likes
Comments
Share

@Nillenium
Follow
Der Stretch ist mittlerweile voll im gange und sie zieht sich ordentlich Wasser über die Dochte.
Sobald der Stretch durch ist, werde ich ein bißchen entlauben.

Likes
8
Share


@PestoMaker
Follow
Great bud growth with white powdery resin showing. Starting to drink more water consistently every 2 to 3 days.

Likes
20
Share


@Bread_n_Buds
Follow
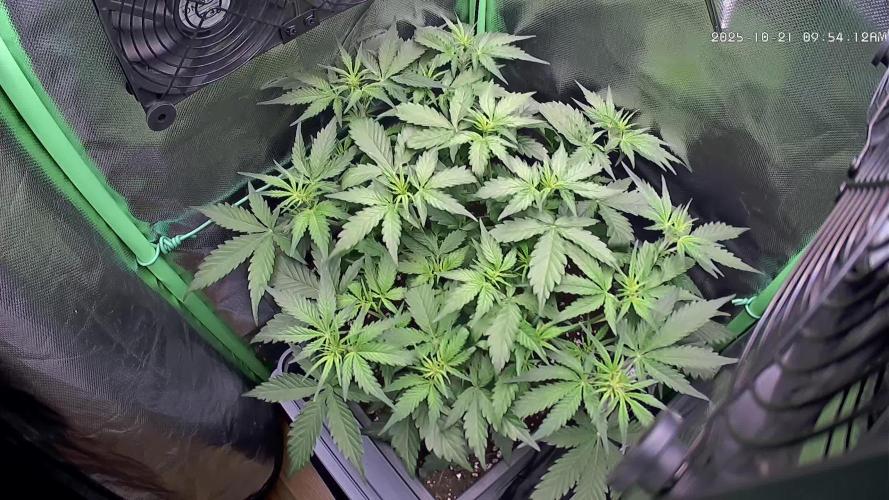
Our Zamnesia photoperiod plants have also started their journey into the magical flowering period, this is the first week.
---- The general environmental conditions are good, the heat has increased a bit again but for the first weeks of flowering it is not a big problem, let's remember to never exceed 27 degrees centigrade in the last 4 weeks to avoid jeopardizing the quality of the flowers. If necessary, open the growbox but never let it exceed 27-30 degrees
where 30 is already a lot. The good thing is that as soon as the lights are turned off the change is already visible a bit and as autumn progresses we will also improve. The humidity is fluctuating but we try to control it with two dehumidifiers when necessary, pushing both possibly not into the growbox but directly into the room. (I dehumidify the room and the air in the growbox should also be dehumidified) -
— Our two Runtz have an obvious characteristic, like their F1 and normal autoflowering sisters they are hungry, so hungry I want fertilizers for flowering like assatanate and if you don't give them you can see the signs, but I know them and I know how to keep them under
--- Technique chosen both plants grow straight
--- Feeding Program - The fertilizers are always Plagron and I am following the table that I generated on the site depending on the substrate chosen. Create your card and follow it, never be presumptuous my friend as I have been in the past, follow the card and look at the plants, not all need the same amount of fertilizer. We have arrived at the moment to give a good dose of ferrò in the first weeks of flowering, already of race life not sprayed but mixed with fertilizers.
---- https://plagron.com/en
- Power Roots - 1ml/l
- Alga Bloom - 4 ml/l
- Pure Zym - 1 ml/l
- Sugar Royal - 1ml/l
- Vita Race - 5 ml/l
--- Dehumidifier is now running between 50% - 55 %
--- The 100% Organic pack by Plagron can be found on Zamnesia at the link: https://www.zamnesia.io/it/11457 -pla gron-easy-pack-natural.html
--- We have removed the deumi diifier and now the values range from 45 to 60% we will put the dehumidifiers into operation in the 3/4 week of bloom // Strain Description // Guys, we have really reached a turning point! Our breeders have recreated one of the most sought-after strains by Californians: the very powerful and exquisitely delicious Runtz. This cross between Gelato and Zkittlez is everything you could want from a cannabis strain: tasty, powerful, balanced, productive and fast flowering. Buy the seeds and try it yourself!
- Get a seed of this fantastic strain --- https://www.zamnesia.io/it/6000-zamnesia-seeds-runtz-femminizzato.html
- Soil and Fertilizers entirely organic --- https://plagron.com/en buy on www.zamnesia.io
- Growbox and air sistem --- https://www.secretjardin.com/ - Light - Sp3000
- https://marshydro.eu/ - Music and sound --- I made my girls listen to 432hz frequencies and music from www.radionula.com
- Z --- You can find these seeds, much more from the world of cannabis, mushrooms and an incredible series of accessories and gadgets on the reference site not only mine but of many growers
—— https://www.zamnesia.io


Likes
2
Share


@kissrubb
Follow
Actualización 05/10/2024
¡Hola, growers! Perdón por no poder compartir las semanas completas, pero poco a poco volvemos a la normalidad. Las fotos que ven corresponden al día 01/10/24 y, como pueden ver, están llenas de terpenos y tricomas por todas partes. Tanto la Fruit Gum como la Biscotti x Candy Rain son dos de las cepas más resinosas que he cultivado y, además, desprenden un olor increíblemente fuerte.
La Fruit Gum tiene esos toques dulces y nostálgicos, como a chicle de mascar, que me transportan directamente a mi infancia. En cuanto a la Biscotti x Candy Rain, su aroma es como el de una clásica galleta americana casera, ¡muy intenso! Ambas cepas me están impresionando mucho por su resinosidad y aromas únicos.
Cabe destacar que las genéticas de Uktha Genetics me han sorprendido gratamente; los resultados están siendo fantásticos. Eso sí, estas cepas comen como camiones, pero mientras se mantenga un control exhaustivo de las fertilizaciones y del medio de cultivo, no hay problema de sobrefertilización.
Pronto cortaremos una de las plantas que está bastante adelantada. Espero que disfruten tanto como yo este proceso y, como siempre, ¡buenos humos para todos! 🌱💨

Likes
24
Share


@RastaGrow
Follow
It’s finally here. The last week..! All of my hard work and commitment to these ladies is about to reward me with some super sticky flowers! And lots and lots of them by the looks of it...
These buds look unreal, it looks like amazing quality flowers all over these girls. It’s dense buds that are coated in trichomes and resin.
The flowers came out a bit more dense on this grow compared to my previous soil/HPS run, which I find surprising. This could be due to a variety of improvements within the garden but I’m going to attribute most of it to my increasing horticulture skills.
Likes
3
Share


@synistergate54
Follow
It was very easy to grow this plant, she did everything by herself. The results are amazing, the taste is absolutely stunning and one joint is enough to be stoned for the rest of the day.
Likes
27
Share


@RDWCGrowing
Follow
5/23/2023
Week 7- Day 1 of Flower (Day 110 overall) (Day 49 of Flower)
There was a couple of small super small sucker buds on the lower stocks that needed to be cleaned off but that was it. Just watching them Flower!!
5/24/2023
Week 7- Day 2 of Flower (Day 111 overall)
Tucked a few fan leaves below lower buds but didn't see any blatant offenders that needed to be removed. I typically do start my checks in Week 8 but since this is a new strain I decided to go ahead and do a Trichome check just to see what was what.. Just as I thought nothing but clear glassy Trichomes. I will check again in one week....
5/25/2023
Week 7- Day 3 of Flower (Day 112 overall)
Just letting them grow today!! Smell is getting stronger I would say it is a hint of Pine and a heavier fruity smell.
5/26/2023
Week 7- Day 4 of Flower (Day 113 overall)
I did Nothing but took some pics and I enjoyed it!!!! It is nice to be able to just sit back and watch them on auto pilot.. :-) Tomorrow Water Change Day!!
5/27/2023
Week 7- Day 5 of Flower (Day 114 overall)
I admit it.. I had to defoliate a little bit.. I looked in while changing the water today and there were just a couple blatant offenders blocking the light from lower bud sites and those leaves they just had to go. Other than that I changed the water and this week is where I drop everything and start preparing them for this last phase of the grow. Loving a few of these buds they are starting to beef out very nicely.
I added 36 gallons
Mammoth Silica = .5Mil/Gal= 18Mil
Root DRIP = 1Mil/Gal= 36Mil
CalMag= .5Mil/Gal= 18Mil
FloraMicro = 3.8Mil/Gal= 137Mil
FloraGro= 2.8Mil/Gal= 100Mil
FLoraBloom= 4.6Mil/Gal= 166Mil
LiquidKoolBloom= 2.5Mil/Gal= 90Mil
TPS SIGNAL= 4.0Mil/Gal= 144Mil
ORCA = .5Mil/Gal= 18Mil
Water Temp= 70.1
Tent Temp= 76
Humidity =64 ** I have two dehumidifiers running on Ink bird controllers to try and keep the humidity down, In late in flower I like to keep the humidity above 45 but below 60.
5/28/2023
Week 7- Day 6 of Flower (Day 115 overall)
Opened the back of the tent today and boy did she need some defoliation love in the back. Other than that I took off a few little sucker buds trying to form. I did start to setup my Dry space as well as did a Trichome Check today and the brown tips are coming in nicely.
5/29/2023
Week 7- Day 7 of Flower (Day 116 overall)
Found a few baby sucker buds trying to form so I removed them. Other than that I am enjoying watching her mature.
I also started my Reverse of the Clone I took 6 weeks ago in Apr from #3. I am uploading footage of the reversing process for your viewing pleasure.
