The Grow Awards 2026 🏆 


Likes
Comments
Share
@spanish420pasiongrow
Follow
Muy caros los productos, efectivos pero me sigen pareciendo caros, probaré nuevas gamas! Un saludo

Likes
15
Share
@SweetheartOG
Follow
Girls doing well but have run into some calcium deficiency which will hopefully be fixed soon.

Likes
9
Share
@High_Grade_Dadli
Follow
By nxt week males will be pulled and remaining would be transplanted to something big n start a lil feeding and training


Likes
49
Share
@masterofsmeagol
Follow
5/24 Woke up on payday to find that my father is in the hospital. My house was robbed a few days before so I guess the hits keep coming. The plants are doing good though. I'm glad I kept them in as we had a frost last night. I moved my cage yesterday onto the asphalt and put the big pallet in. I just need to sanitize the others before they go in the cage. I'm being super cautious. I think tomorrow will be the day I make the switch to the garage while they fill out these 3's.OK.
5/25 Plants were all moved to the garage with the door open for indirect light. It's 54 degrees. At night I'll pull them back in and give them a few more hours under the hps which will also help with heat. Knocked a stem sideways but it'll pop back. Feels good to get things moving. HST seems to being going good.
UPDATE: Went back over at one and noticed that the plant I hit with a wire (or something I didn't see what happened) was almost sideways and really loose. I had tied it to a clip with flagging. That didn't work. I asked a friend and I ended up pinching off the first true leaves then mounded happy drug up around it to keep it upright. It LOOKS much happier. Of course that shit happens to your biggest healthiest plants. Oh well all the 10th planet are doing phenomenal. Can't wait to move these girls to there final homes. Plants went under lights at seven. I'm acclimenting them to the right light schedule. I don't want to jump from 18/6 to 15 hours. They did really good in the cold Temps and wind. The big one I had to fix looks like it's doing great. Once they are hardened and fill these pots they go in their final home.
5/26 Plants did great being in direct sunlight for a few hours and staying in the garage at night. They look super healthy. I'm planning on watering tomorrow. Wondering if I should start to add some silica to strengthen the stalks. Also wondering if I should add more soil to some of the pots like I did to the other one as the stretched a little. This is something I may do tomorrow before I water.
Went back over to switch the lights on and pull the plants back and lock up at 7:30. Forgot my phone of course and these girls were looking amazing. I have to water tomorrow. I coukd add more soul to some of the pots but I'm reluctant due to stem rot. They'll get buried much deeper in there final homes. Don't want to mount up soil and then water and promote rot. Anyway plants are adapting amazing. Dialing the light closer to normal here. This is a great transition place for them to he. I've noticed a few wrinkled leaves but thats to be expected. Oh, I got my free pure Michigan seeds from premium cultivars!!!
5/27 WATERED EVERYTHING TODAY WITH HALF A Powerade BOTTLE APPROX. 16OZ. Plants are in direct light in the mornings and I haven't seem any burning yet. I noticed a small spot on one of the first true leaves but I think it's just a bite from an insect. Everything is green as hell. I'm wondering if I should add fresh soil to the pots but I didn't want to do it on a watering day. Plus the plants will be going in there final homes shortly. Very happy with progress this far.
UPDATE Went over at 1230 and everything looked great. I sanitized the cage AND the pallets. Also bought 3 more 30 gallon grow bags. Once they go in there they will explode! I can't wait. I'm considering ordering netting for moths. Depending on price i might get some. If not I'll keep using the BT.
UPDATE: Went and checked around 430. Temps were in the 70's and they had a few hours of direct sun. No burns evident as of yet. Pallets fit in the cage like puzzle pieces. Now I need to sanitize my grade stakes bamboo and trellis and setthat stuff up. I'm going to screw the grade stakes to the pallets and attach garden rods and bamboo with zip ties and I'll have a horizontal trellis. Once branches are a little bigger I'll begin LST. The plants that I topped AND the ones I FIMed are doing great. The FIMed ones with at least three colas some have four. Hoping the plants took that time growing roots.
5/28 Plants are all standing up tall. They loved that water. Haven't noticed any burns and they get direct sunlight in the mornings. Soon I can put them in the cage and start setting up my trellis and supports. Fan leaves on soms are bigger than my hands. These girls are probably the healthiest plants I've grown. I usually do clones and end up starting with problems. This is great starting with seeds and have no problems.
UPDATE: Went back around two because Temps had reached 92f and rh was only 20%. Nights cool off greatly so it's a dramatic temperature shift. Plants looked great. All standing up looking great. Put plants in at 7:30 ,and continue the light until 9 and have it turn on at 4am. Then they are out by sunrise. Did notice some burning on one of my plants a large fan leaf. What can I say? It was extremely hot. I'm surprised they did as well as they did.
5/29 Everything standing up perfectly looking great. Plantscget an extra hour of sun at night and morning and are on 19/7 with the extra added light. Trying to acclimate and finish hardening off this week. I'd love to be able to at least put them in full sunlight for the day. I think they'd be fine. I'm really impressed with how they are growing. Second guessing not HST all of them. However I think I might light dep a couple. We'll see. I've still got work to do.
UPDATE: put the plants in around 7. One of my lights shit the bed. They are just 150 watt hps but I was using them to finish hardening off my plants and slowly adjust them to the natural light. The on/off switch fell off. I'm sure my cousin can fix it bit the one is pe9bably fine as I'm only going fir a few more days. The thing about having this many plants to choose from is that I can pheno hunt and put the VERY best into the final containers and if I decide too I could light dep.
5/30 WATERED EVERYTHING TODAY WITH HALF A POWERADE BOTTLE. My cousin can probably fix the other light but I don't think it will matter. Within a week I'm going to have these girls in their final homes. I just need to sanitize the trellis and posts and then screw them to the pallets. I'll have this all taken care of before the plants go in the hole. I did notice another burn on a leaf. Def glad I'm taking the time to do this right.
UPDATE: I put the girls in the barn around 7:30 and flicked the one 150 watt HPS light I have working on. I added a half hour more of darkness to try to acclimate them quicker. Light stays on until 9 qnd came back on at four but i changed it to 4:30. I'm usually there by 5. I'm looking through my surveillance cameras and it doesn't even look like the light is on. Of course its super bright out but I should be able to see from that image. Luckily the building the go in has massive windows up top to let light in and windows on every side so the light is probably unnecessary. However due to my bullshit luck last year I'm being as cautious as I can. Tomorrow is supposed to be extremely hot again as is the next day. I think I'll leave the door down a little, open the other and move the plants back so they have no direct sunlight and adding a fan. That way they can continue to recover. They seem bigger everything I see them.
5/31 Another hot day. I figure a few more days (under a week) and I can transplant these girls! Supposed to be 85 today and 90 tomm. It was 45 when I got here. These girls are doing well handling this bipolar weather.
UPDATE: IM AN IDIOT AND THIS IS AN 8 DAY WEEK lol. Maybe I'll do a six day week next time to get back on track. Went back over at two and noticed some burns. Sent a video to a friend andcwith the sun we've had and the weather in the 90's he agreed the damage was minimal. However there was someone there working who opened more doors which let a lot more light in. It's supposed to be in the 90s tomorrow too. I may leave the doors shut. There are windows on everyside and an enormous cone at the top so the get plenty of sun. He also grows and I've been careful to not let anyone that grows go around my plants. I'm going to have to talk with family about this. To be honest I'm kinda pissed. Next watering I may add some kelp me kelp you and start a small nute regimen.
UPDATE Went back over at seven after having a panic attack. Half stoned half asleep. Stupidly I was looking at a plant and thought "shit" the FIM must not have took but in reality I was just stoned and tired so I topped a plant that had already been fimmed so we'll see how that goes. Purple punch is so far behind everything else it's not even funny. There might be one that's doing pretty well and that of course is the one with no HST. Branches on the other strains are thick and ready for LST though. What I think I'll do is transplant the 10th planets and the blueberry cheese ones that are ready and hold off on the rest for a while. Hopfully I'll be able to show plants in final homes next week.


Likes
6
Share
@gr3g4l
Follow
Iniciamos la semana alegremente, con buena temperatura y poca humedad relativa.
Las plantas muestran buen aspecto
Comentaros una curiosidad. la nº3 creció como diploide y después de cortar el apical y bifurcase en dos una de las ramas tendió a Triploide, tan solo una de las ramas, la otra rama es bien diferente, ni tan solo salen dos ramas por nudo, ni tan solo seria una diploide convencional.
A finales de semana volvieron a bajar las temperaturas en el exterior y se hizo algo mas complicado mantener un buen ambiente.
We started the week happily, with good temperatures and low humidity.
The plants are looking good. Here's an interesting tidbit: plant #3 grew as a diploid, and after I cut the apical bud and it split in two, one of the branches tended towards triploid. Only one of the branches, though; the other branch is quite different. It doesn't even produce two branches per node, nor would it even be a conventional diploid.
At the end of the week, the temperatures outside dropped again, making it a bit more difficult to maintain a good growing environment.


Likes
Comments
Share
@GrowDiaries
Follow
First day at the biggest cannabis fair and we’re already amazed!
Likes
6
Share
@Bingbings_garden
Follow
Hey guys,
Cut the first k#1 3 weeks ago and now in jars. Will be a Wedding present
Second k#1 is beautiful and will be harvested 4/4. Kush by far the best of the bunch.
See ya next grow

Likes
3
Share
@Sugahmama
Follow
They got a Magnesium deficiency and it was time to change the water and give them nutrients. The next day they showed a explosive growth. By the end of the week they should be Back on track. Nice.
Its Day 21 and I decided to top 3/4.
I give them one day to recover and going to do some LST

Likes
7
Share
@Chubbs
Follow
420Fastbuds-FBA2504
I'm excited as it's tester time. Germination week is complete. I planted 3 seeds and had all 3 sprout within 48hrs of being in the soil. I do soak them for 48hrs in a glass of water before planting. I can't wait to see what the weeks to come will have in store. Happy Growing
Likes
4
Share
@Xabii
Follow
Transplanted the plant to the NFT Setup.
Values are average of the day.
DATE - EC(us/cm)
20250412 ~1000
20250413 ~1000
20250414 1458
20250415 1492
20250416 1517
20250417 1535
20250418 1541
DATE - PH
20250412 ~6
20250413 ~6
20250414 5.65
20250415 5.67
20250416 5.66
20250417 5.65
20250418 5.64
DATE - ORP (mV)
20250412 #
20250413 #
20250414 -42
20250415 -45
20250416 -14
20250417 -37
20250418 23
DATE - °C - RH% (Tent Temp/RH)
20250412 22.1 41
20250413 22.7 39
20250414 23.5 49
20250415 23.4 54
20250416 23.7 52
20250417 23.6 51
20250418 23.6 51
DATE - °C (Reservoir)
20250412 #
20250413 #
20250414 19.8
20250415 20.2
20250416 20.3
20250417 20.1
20250418 19.6
DATE - CF
20250412 #
20250413 #
20250414 14.58
20250415 14.92
20250416 15.17
20250417 15.35
20250418 15.41

Processing
Likes
1
Share
@B33rmatt
Follow
Transferred outside when the day temperatures were warmer. A mistake because the plants in the coming weeks started to die 😞 read on...

Likes
26
Share
@Brujha77
Follow
Beginn 4. Blütewoche
Heute wurde nochmal entlaubt und es wurde einiges unten ausgeschnitten..
Da ich den Run mal wieder komplett waschen will, denke ich werd ich die 3. Nun so lassen.
Mal schaun ob sie ins Zelt passen💪😏
Likes
6
Share
@eldruida_lamota
Follow
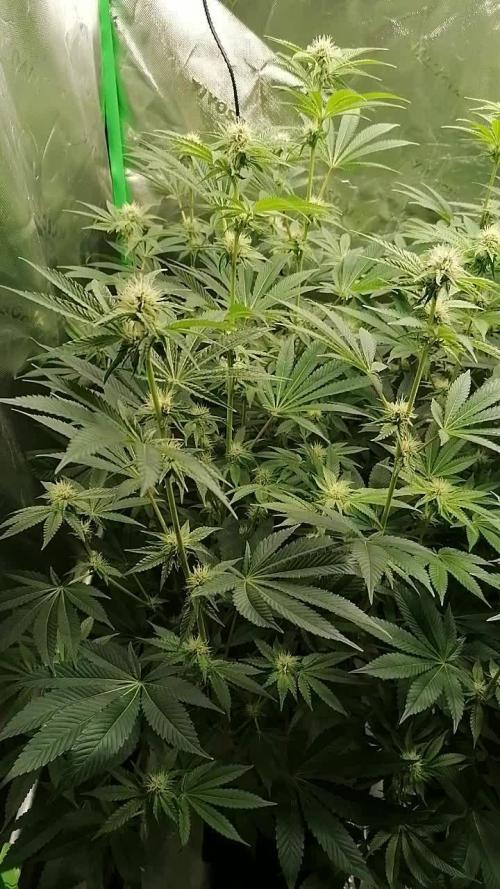
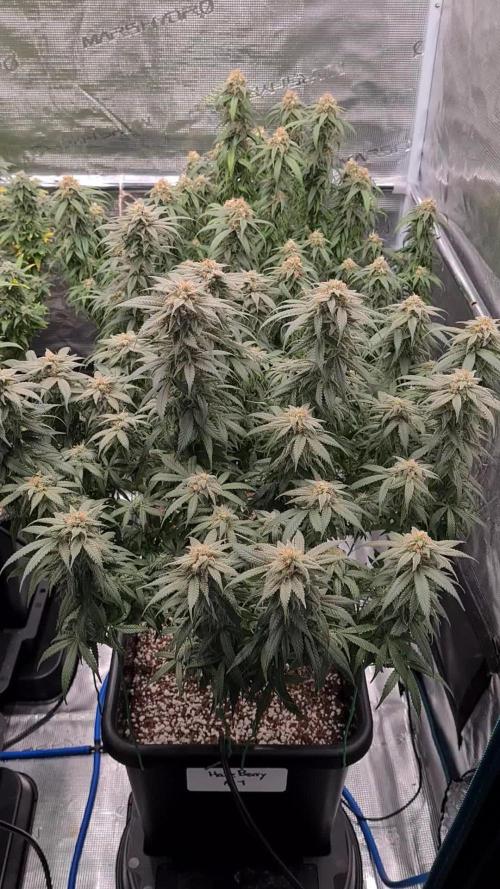
Acabamos la séptima semana de floración de las Original de GrowBarato familia, y no podéis imaginaros lo bien que huelen.
Tienen un buen color, se ven sanas, y van progresando adecuadamente la flor va poco a poco engordando y tirando bien de tricomas.
Creo que seguiré abonando una semana más , ya iremos viendo estos días que hago pero si creo que una semana más es necesario.
Agrobeta:
https://www.agrobeta.com/agrobetatiendaonline/36-abonos-canamo
Mars hydro:
Code discount: EL420
https://www.mars-hydro.com/
Las maximas de temperatura no superan los 26 grados y las mínimas no bajan 20, así que no me puedo quejar.
Los niveles de humedad también son los correctos van entre 45%/55% de humedad relativa.
Por supuesto el Ph lo estamos dejando alrededor de 6.
Hasta aquí es todo, buenos humos 💨💨💨.

Likes
5
Share
@Mr_nugs_lover_David
Follow
As I said, she has become a single fat dense and sticky main cola, very compacted, looks like it's just 1 huge fat nugget. Very nice aroma but not stinky at all. I'm enjoying her, she's not very big but she's literally a single big fat nugget.
Likes
8
Share
@AERO_Grower
Follow
8° Semana- Aeroponía - Están muy bellas las raíces, están 100% sanas. Sólo crecimiento de los cogollos, muy contento con el crecimiento actual.
---------------------------------------------------------------------------------------------------------------------------------------------------------------------------------------------------------------------
8th Week- Aeroponics - The roots are very beautiful, they are 100% healthy. Just growth of the buds, very happy with the current growth.


Likes
3
Share
@BLAZED
Follow
Week 20 (28-10 to 3-11)
28-10
Temps: 18.4 to 25.3 degrees
Humidity: 49% to 57%
29-10
Temps: 20.1 to 25.4 degrees
Humidity: 49% to 58%
Watering: Both 500 ml.
Lowered the light a bit.
Dry Weight #1: 3.2 kg. #2: 3.1 kg.
30-10
Temps: 19.4 to 24.2 degrees
Humidity: 50% to 59%
Watering: Both 500 ml.
31-10
Temps: 17.9 to 25 degrees
Humidity: 47% to 58%
Watering: Both 500 ml.
1-11
Temps: 18 to 24.1 degrees
Humidity: 49% to 55%
2-11
Temps: 19.7 to 23.8 degrees
Humidity: 45% to 56%
Watering: Both 650 ml.
3-11
Temps: 16.6 to 22.8 degrees
Humidity: 51% to 63%
Watering: Both 500 ml.
Likes
10
Share
@4F1M6
Follow
I started germination of 2 M.A.C beans on 29/12/2020. I pre moistened my rockwool cubes with ph balanced water to 6.4. Made sure the plugs were just damp and not soaked. Using a small wooden dowel I increased the size of the plugs pre made holes. Than I sowed my beans into the holes. Ripped off a small piece of rockwool and mulched it up. Lightly filled the holes in with the mulched rockwool. Than stuck the plugs into a misted humidity dome, to complete germination.
Shouldn't take anymore than 4-5 days to see some sprouts. Once I see some cotlydon leaves bursting to the surface. I will get the plugs planted into some 1 gallon pots. Plus get these ladies situated into their home. Cant wait!
Been itching to give this variety a go! Never givin pev seeds a try but... hopefully they keep this amazing powerhouse true to its name. Guess this grow will double up as testing the waters with pevs genetics. Always intresting to dive in to different breeders.

Likes
Comments
Share
@dwotTV
Follow
Moving along into flower nicely, spent a day and change inside hiding from the rain and wind from the hurricane remnant. Back outside now.