
Likes
Comments
Share


@Zurbena
Follow
We moved on to the second week.
The root has already reached the end of the pot.
I am amazed by the root development.
I did not expect such a big root and I think it could have been transplanted a little earlier.
On the twelfth day, he moved to a 22.7 L pot.

Likes
8
Share


@Slobasian
Follow
Stacking up on my plant genetic options for mothers and what to grow out green house diary coming soon with some of these plants. I ready for ethos genetics to enter my tent and green house


Likes
12
Share


@Ieiogrow94
Follow
Eccoci qui...
Tutto va per il meglio, questa settimana non ho applicato stress alla piccola, ma ho guardato l'evoluzione che ha avuto dando i nutrienti.
Ora ha un odore davvero intenso ed uno strato di resina pauroso, vediamo come si riprende dalla defogliazione che ho fatto settimana scorsa.
L piccola sta ancora recuperando speriamo spinga alla fine...
Seguiranno aggiornamenti, grazie a tutti per il supporto🔥🌲❤️


Likes
7
Share


@weedrevolution
Follow
An important event marked this week: plants were indeed heavily defoliated.
This was possible also due to their strong (and positive) reaction to the tea (Organic Compost Tea by Soil With Attitude) received last week. All plants are literally exploding with life. 💪
Likes
7
Share

@Mexicanasseeds
Follow
Fase de Maduración y Protección Antioxidante (Semana 8)
Estado Fenológico: Octava semana de floración (Híbrida de alta densidad).
Estrategia de Senescencia Programada: Se ha ejecutado una transición nutricional específica para inducir la senescencia programada, enfocada en la translocación de nutrientes y la eliminación efectiva de nitratos residuales en el tejido vegetal.
Desarrollo Estructural: La integración de Silicio biodisponible en el programa ha permitido obtener una estructura de flores significativamente más compacta y tallos con mayor resistencia mecánica comparada a cultivos anteriores.
Protocolo de Protección de Tricomas: Durante esta semana, el riego se ha realizado exclusivamente con agua de ósmosis inversa (250 ppm de ácido ascórbico + 100 ppm de ácido cítrico). Esta carga de antioxidantes actúa protegiendo los tricomas glandulares de la oxidación prematura provocada por el estrés hídrico y la lixiviación de sales y se utilizo silicato de potasio como buffer para calibrar el PH en 5.5.
Análisis Visual: Se observa una maduración óptima con una preservación excepcional de la resina, confirmando que la arquitectura floral y la salud metabólica están en su punto máximo antes del cierre del ciclo
Likes
5
Share

@GoodTimesOrganics
Follow
Welcome Back!💚
Die siebte Blütewoche ist nun vorbei und die finale Woche zieht ein. Sämtliche Trichome sind inzwischen milchig.
Die Pflanze hat eine eher schmale Blütenstruktur, bildet aber einen starken Trichomwald aus.
Es entwickelt sich ein süßes fruchtiges Aroma, mit starken Nuancen nach Kräutern.
Die Werte im Zelt sind durch den Regen und der steigenden Luftfeuchtigkeit nochmal etwas anders. Aber im Rahmen:
———————
🌞 Temp: 24°C
🌚 Temp: 20 °C
💨 RH: 56%
VPD: 0,98 kPa
😎PPFD: 830 mqm
———————
Stay Tuned! 💚

Likes
10
Share


@CANNASIM
Follow
Hello, long time, no grow. I’m trilled to start on a new grow project, i’m away from growing a long time, but my love for ot was always present, i miss it a lot so i have got a few strains from Fastbuds to test and come back with a minimal setup.
I have got the Festberry, Bluedream, and the 1:20 cbd, they have sent in the Banana Purple punch
Ok, so what is a minimal setup? For this grow i have choose to grow in my balcony, it is fairly big and i gave good sunlight, we are in summer now, so temps are high, swinging a lot. It is raining often as well so I did not need to water much.
For the nutrients i will go organic i think, in my substrate i have about 30% warm castings, so i’m good for till mid grow length +-, i might add a bit of nutrients in 30 days mark.
The objective of this experiment is to use as little as possible, 360 degrees.
For the germination process i have used a mixed process method, that i have learned from Fastbuds and i have loved it, 24h in a glass of filtered water, paper towel for about 24h -48h and then the Floraflex gremination pellets, i have tested on the jiffy and worked fine as well. Cool about this method, if you are more on the anxious side or like to control more the process this is the way, you can follow the hole process and see the development in parts. I will add images later on, for this breakdown.
Well that is it, lets hope for a cool, safe journey for this girls.
—
The Blue dream i had germinated two and both look great so I have decided to keep two in one vase. Never done it, so let’s see what will happen.
Processing
Likes
154
Share


@CBD_Sweden
Follow
@FAST_BUDS,
Hi all the happy people here in GrowDiaries.
This is my second cultivation ever and it will be fun to try a bigger space than my closet grow.
First, I'm just going to say I'm done with the construction of my new growroom.
I put some pictures on the construction here in week one.
The room is 2.14 meters by 1.7 meters and has a ceiling height of 2 meters.
It provides a floor area of 3.6 square meters.
I use a 54 Watt Lightwawe T5 for germination and 2 Pcs 400 Watt HPS lamps.
I have a channel fan that replaces the room air about 40 times an hour to get a comfortable environment in the room, the air enters a fresh air intake from the outside.
The air is purified through a carbon filter to then leave the room to the rest of the basement.
Then I use that heat to heat the rest of the basement.
I will use 8 pcs 15 liter Autopots to grow with and a 100 liter water tank that supplies the pots of water and nutrition.
I will grow completely organically in soil and will watercure my buds to get the best possible medicine for me.
But there are no cultivation rooms to be displayed here, so I continue with what is most important.
Today I have put my seeds in my moisture dome and hope the seeds have germinated within a few days.
I am very excited to see how the new growroom will work and how this new secret CBD plant from @FAST_BUDS, will turn out.
..............................................................................................................................................................................................................................................................................................................................................
Update 2017-08-15. Both seeds have germinated and planted in small pots inside the humidity dome.
I'm so glad it worked so well and now it's just hoping they'll start growing and become 2 big healthy girls :)
...............................................................................................................................................................................................................................................................................................................................................
Update 2017-08-16. I have mixed my own soil today. Its 40% sieved peat harrow H2-H4 0-30 mm, 45% sieved peat harrow H4-H6 0-30 mm. 5% sand and 10% of compost soil. And i use 15% of perlite and mix it all together.
....................................................................................................................................................................................................................................................................................................................................................
2017-08-21 The 2 sisters are doing great, Nr2 is a bit after Nr1 . Some new pics.
............................................................................................................................................................................................................................................................................................................................................................................
2017-08-23. Transplanted from humidity dome and the small germinating pots to 15 liter autopots.
................................................................................................................................................................................................................................................................................................................................................................................
2017-08-27. The girls have settled in to there new home of the 15 liters autopot after a little transplant chock. Now the real week 1 starts for me and the girls. 4 new pics.
---------------------------------------------------------------------------------------------------------------------------------------------------------------------------------------------------------
2017-08-29. New movie of the girls. Its no water for 3 days now so the roots develop more and match the plant above the soil. The temp controlled fan is awesome, its easy to set what temp you like to have in the room. Right now its 28 celcius. And humidity is 56%.
--------------------------------------------------------------------------------------------------------------------------------------------------------------------------------------------------------------------------------------------------
2017-08-29.
Hello to you who read my diary, I just want to say that I am pleased that you have chosen to check in with me and in my diary.
I just want to say that I do this for myself and for a steady flow of my medicine.
Everything you read and see in my diary is 100% honest and I will never distort or beautify anything here.
I document my crops so that I can learn from my mistakes and also to look back at those different crops.
I try to update with pictures every day and with text if something special has happened in the garden.
This is my strainhunt for the best medicine and the beginning of my journey with cannabis and the cultivation of it.
-----------------------------------------------------------------------------------------------------------------------------------------------------------------------
2017-08-30. Cleaned the room this morning, just vacuuming and cleaning with chlorine solution. Im testing the fan to control temp and humidity, it works great.
Added some pics with measurements and a movie. Everything is looking great right now.
-----------------------------------------------------------------------------------------------------------------------------------------------------------------------------
2017-08-31. New video of the girls.
-------------------------------------------------------------------------------------------------------------------------------------------------------------------------------
2017-09-01. New pics and videos. Gave each of the girls with 2 ml Alg-A-Mic, 4ml Bio-Grow, 4ml Bio-Heaven and 10 ml Formulex mixed in 2 liters of water.
I hope they like it :)
-------------------------------------------------------------------------------------------------------------------------------------------------------------------------------------------------------------------------------------------
2017-09-02. New pics and the girls liked the water and nutrients yesterday.
-----------------------------------------------------------------------------------------
2017-09-03. Video of the girls this morning.
Kl 16.00. Did some defoliation on the girls. Videos added.
KL. 23.00. New video.
Likes
53
Share


@Hempy_The_Kid
Follow
08/10/22 watered with Recharge.
Welcome to motel 6
More ladybug porno. Now have yellow ladybugs
8/14/22 this plant is a magnet for ladybugs 🐞

Likes
12
Share


@chronicon
Follow
i removed a bit of half dead leaves from plant 1 at the start of the week and i have been flushing both plants since thursday, they both will go into extended darkness this coming wednesday
Likes
4
Share


@MasterKush714
Follow
06/10/2024 Roots roots Rootz!!!!
Had to take out a few that weren't moving along!!!
06/14/2024
They going in lfg!!!!

Likes
16
Share


@HowtoBubatz
Follow
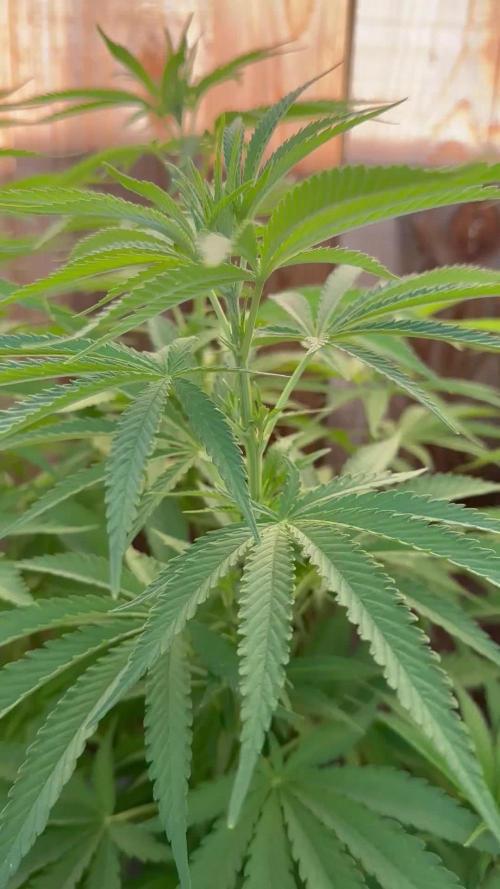
I defoliated the Plant for the first time and adjusted the LST to the growth of the plant.
I found the first white pistils shooting out from the plant which shows me she is ready to go into flower.
Until now i am very happy with the progress, still no issues :)

Likes
Comments
Share

@grimm420
Follow
I did notice these three have yellow leaves on the bottom, I wish I used a bigger pot size but this was just for science lol. Just pluck em off!
Likes
49
Share


@Chucky324
Follow
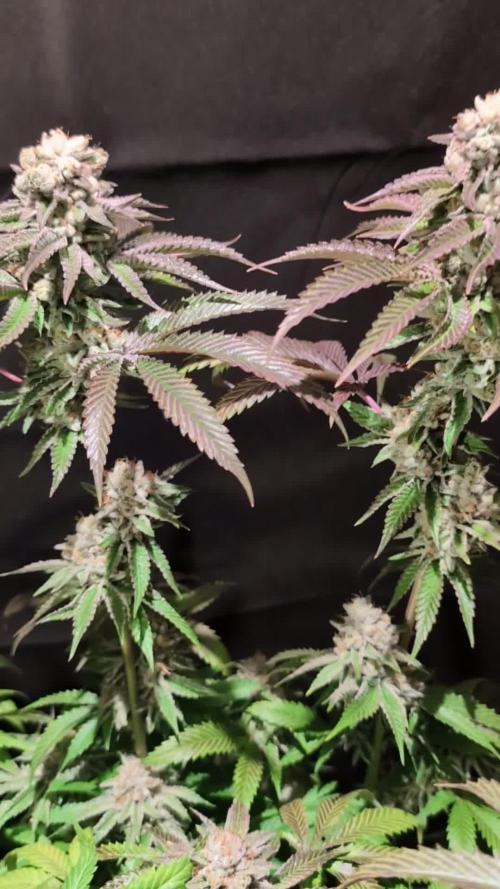
Hello. This is the end of week 3 and the beginning of week 4 of flowering
I did the last trimming/pruning till harvest this week past. The plants have recovered and are going into resin production now.
I have stuck my nose in the tent when I first open it after the dark period and I hardly get any smell. Just a bit of a citrus/hash smell which is interesting because this is supposed to be a strong strain, which in the past has meant a strong smelling strain as well. Makes you go Hmmm isn't that interesting.
This weeks puzzle is a maze. Feel free to print it off and solve it. Please don't write on the screen or it might come off if you use one of those dry erase markers. but printing is better😂 Answer next week.
It's been a quite wood splitting week for me.
Keep growing straight. Chuck.

Likes
11
Share


@Lahuertade_Bototo
Follow
🌱🌱🌱Continuamos este cultivo, con esta hermosa cepa de FastBuds, Girl Scout Cookies Auto, en las ultimas semanas de Floración .🌱🌱🌱
👨🍳👨🌾🏻 Nutrición y Bitácora 👨🌾🏻👨🍳
-Día 57. Se riega con una solución de 3 Litros con Plagron Sugar Royal (3 ml) y Plagron Pure Zym (3 ml).
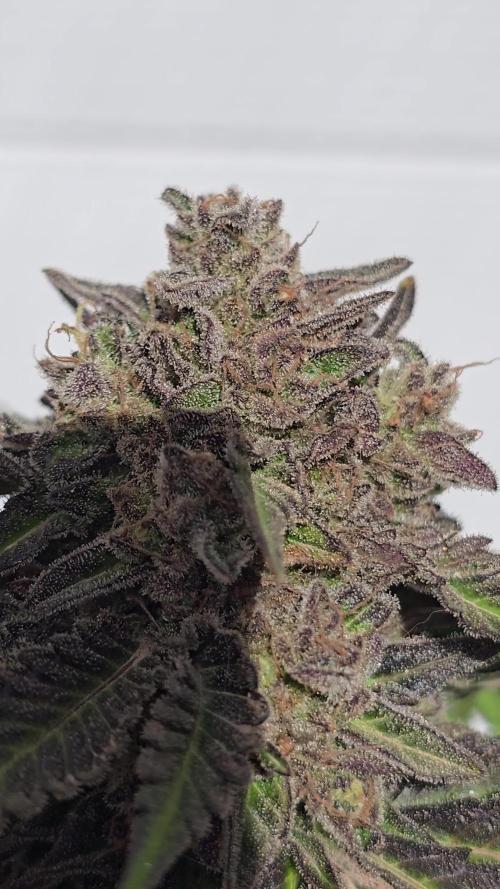
-Día 58. Luce sana y fuerte la planta, se observan tricomas con lupa, la mayoría están claros y algunos blancos lechoso, muy pocos ambar, van madurando bien los tricomas.
-Día 59. Se riega con una solución de 3 Litros con Plagron Pure Zym (3 ml).
-Día 60. Los tricomas siguen madurando se comienza a ver tricomas ambar en las sugar leafs.
-Día 61. Se toman fotos y revisan los tricomas con lupa x40.
-Día 62. Revision de tricomas con microscopio electronico, está lista para cosechar, se hace prueba en fresco para comprobar la potencia, se nota su gran potencia con un efecto cerebral intenso seguido de una relajacion corporal completa, tiene un delicioso aroma dulce, afrutado y cítrico 👨🌾🏻.
-Día 63. El tan esperado dia llego! Dia de cosecha, una planta hermosa con colas grandes y gordas, llenas de flores, muy pegajosa y un tremendo aroma, incluso las hojas estaban cubiertas de resina, ideal para extracciones 🍪🍪🍪.
Fue un hermoso viaje, dio sus frutos el entrenamiento temprano con LST y SCROG
🚀Equipamiento🚀
Indoor de 60x60x159 cm y una iluminación BlackCob F320, se activa solo 1 modulo (160w) a 45 cm del canopy por el resto del cultivo. Intractor de 135mm, extractor de 135mm, filtro de carbón, ventilador "oscilofan", ventilador "clip fan", este ultimo ventilador se ajusta en la parte baja de la carpa para mejorar la circulación de aire bajo el canopy, 2 termohigrometros y una malla SCROG de kanovi a 15 cm de la maceta.
Acompáñenme para ver los resultados de este hermoso desafío, un saludo cultivadores 🔥🔥🔥
Processing
Likes
3
Share


@YOREEL
Follow
Just germinated - waiting to go into pots!
22/04/20 - Germinated 2 Purple Punch seeds - soaked in water with a drop of seaweed. All germinated fine.
24/04/20 - Added to rooters
28/04/20 - Putting them in their starter pots today to see which out of the two is the strongest.
Starter medium will be soil - Biobiz light & pro with a tiny amount of worm castings and perlite. i really don't have a clue if this is going to be too hot for them but we'll see. After two weeks we'll see which has rooted out proper and put the winner in it's final home! 😃
Track ID - The Jimi Hendrix Experience - Purple Haze.

Likes
8
Share

@zenderman
Follow
14/7/26 day 43 of flowering,beginning week 7.
second video-20 days old clone,roots forming in process,was taken bud(🌲21 days flowering).
🌱
The clone was cut and planted directly into the soil,previously watered with Terra Vega and under a transparent dome with 18 hours of light.this method means manyfolding from one bud and ideally for scrog/LST technique.🤙🏻

Likes
44
Share


@Ukfarmer420
Follow
Easy grow, nice pretty plant, kept it small and performed lst early on, nice dense hard buds, wish I had space to run them all. I will be running the rest of my seeds very soon.

Processing
Likes
6
Share


@ladyjane
Follow
8/10 - In prep for flower I've got some Compost Tea brewing with a little Terp Tea Bloom by Roots Organics. .Also did a little selective defoliation
8/11 - Flipped the ladies to flower today! And all is good in the 8x4.
8/12 - Watered all the ladies with the Compost/Terp Tea. Also did some more defoliation and added some mosquito bits for added pest prevention.