
Likes
Comments
Share


@Hashy
Follow
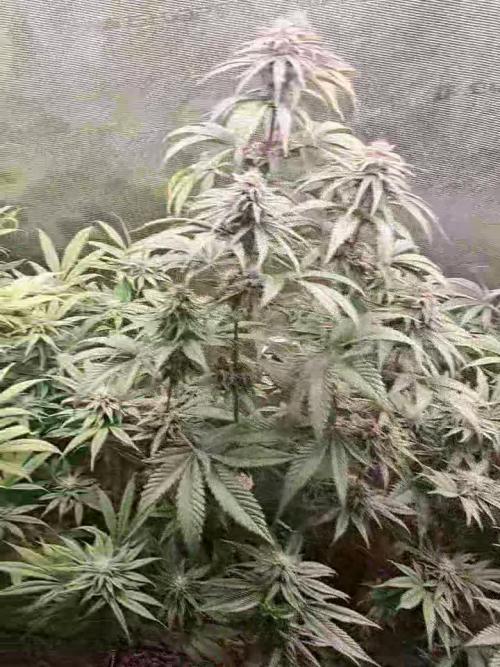
This week has gone well. 6 plants in such a small space is playing havoc with the humidity but I feel I'm just about on it enough not to cause any rot.
The Caramelicious is just plain awesome so far, bending the main cola 90 degrees hasn't effected her at all. She has a couple of issues but she is my favourite so far. I normally give a 90 day slot for each grow, but this one may finish a bit earlier with how rapid its developing.
Notes.
Extractor settings.
Temp 28c step 2c
Humidity 50% steps 2%
Max speed 8
Min speed 1
Day 43 Saturday 15/10/22
Feed= autofeed 2hrs
Volume= 10L, Ec= 1.51, PH=6.2
Left= 4L, Used= 6L = 1L each
Runoff= 0L, Ec= , PH=
Lifted light 4cm
Day 44 Sunday 16/10/22
#3 H=CM, D=CM, DLI=36.0, PPFD=500
Day 45 Monday 17/10/22
Feed=autofeed 2.5hrs
Volume= 10L, Ec= 1.5, PH=6.2
Left= 2.5L, Used= 7.5L =1.25L each
Runoff= 0.7L, Ec= 2.3, PH=6.1
Big defol on all 6. Humidity to high really.
Day 46 Tuesday 18/10/22
Extractor settings.
Temp 26c step 2c
Humidity 55% steps 2%
Max speed 10
Min speed 1
#3 H=CM, D=CM, DLI=35.2, PPFD=490
Day 47 Wednesday 19/10/22
Feed=autofeed water 3hrs
Volume= 10L, Ec= 0.2, PH=6.2
Left= 1L, Used= 9L = 1.5L each
Runoff= 1.8L, Ec= 2.2, PH=6.1
Day 48 Thursday 20/10/22
Day 49 Friday 21/10/22
Neutral 0.1ml/L
Silicon 0.75ml/L
Calmag 0.25ml/L
Bloom 3.0ml/L
Boost 2.0ml/L
Pk boost 1ml/L
Ec 1.85
Ph 6.6
Feed=autofeed 3hrs
Volume= 10L, Ec= 1.85, PH= 6.6
Left= 1L, Used= 9L = 1.5L each
Runoff= 1.8L, Ec= 2.12, PH=6.1
#3 H=57CM, D=43CM, DLI=36.7, PPFD=509
Viparspectra xs2000
75% power 7 days
£0.30 /Kwh = £7.56 for the week.
Thanks for stopping by.
Take it easy.

Likes
79
Share


@JUNGLE_B4RNS
Follow
Week 18, week 8 of flowering
Final last week. Second week of flush, finishing with using water only since the 2 last weeks. Starting harvest, it will take a few hours to take down everything.
Cellmax BIO Soil and Nutrients did a great job as usual, they can provide big quantity and the quality of an organic growth, making it the perfect BIO solution for your crops.
After testing Mars-Hydro LED during a bit more than a year, using their SP 250, here is my feedback. Their LED has definitely a better light penetration than an HID. Under Mars-Hydro spectrum the plant is able to grow nugs instead of fluffy popcorns in the bottom of the plant. Mars-Hydro has actually the best quality price on the market.... so, in conclusion, I’m rebuilding the room with 6 x Mars-Hydro FC 6500 Commercial Samsung Multi Racking quantum board, nothing can stop me to reach the 2.5gr/watts now 😎
And finally, I would like to say thanks to SPLIFFSEEDS.NL for sending these wonderful genetics. I would definitely suggest and recommend this seeds bank to pro and new growers. The strains are stabilized and traits of the genetic mapping locked perfectly. I’m extremely happy with this crop, well done SPLIFF SEEDS 👏👏👏
________________________________________
Stay tuned for harvest reports folks
________________________________________
For the new growers, in this diary is everything you need to know to recover from a shitty start, to catch back the delay, to avoid a Die-Back after the stretch around week 5 of flowering, see different deficiencies.... and finally harvest a great yield.
________________________________________
Thanks to the followers and for all the Likes 👍 Stay tuned my friends, I promise you an Epic setup for next crop 😎

Likes
9
Share


@newenglandgrowers
Follow
First Week of Flower. Been going through some deficiencies this week still not exactly sure what it is it's either a magnesium/calcium deficiency or phosphorus deficiency. Stems turning red/purple and some leaves losing their color turning more of a dirty green/brown color with brown/orange spots on the leaves (ONLY HAPPENING ON STEMS AND LEAVES ON THE VERY TOP OF CANOPY) so it makes me feel like its a CalMag issue.

Likes
14
Share


@Belivitez
Follow
Today i 50/50 wet dry trimmed first choped plants, and harvest all my plants. Buds are rock hard with amazing smell 🤤 this is stran i want to grow again in my tent some day

Likes
15
Share


@420TouristguideDWC
Follow
9/28 Day 24. Raised air pumps above the water line using two 5 gal buckets. Removed the inline air backflow valve and this increased aeration greatly!
- Feeding day. Red TDS 850. EC 1.8 / Blue TDS 800. EC 1.7 / Yellow TDS 785. EC 1.6 / 10ml CalMag, 10ml Micro, 5ml Grow, 5ml Bloom, 2ml UC Roots. Will check TDS & EC through the week as they are starting to drink up the water.
- LST started today. I will be adjusting them daily to pull off shoot branches in different directions.
9/30 Day 26. Added water for the first time. Used purified drinking water from the grocery store (Ph 7.45 TDS 95 EC .2) and PH'd it down to 5.9
10/1 Day 27. Readjusted the LST wires and added some new ones on the stems that can now be pulled in different directions. Red suffered a break on the main stem that went 1/2 through the stalk. I decided to use the LST wire to push it back together so that it can heal. I will still train the other shoots in different directions and let the main stem just do it's thing. Blue and Yellow pulled in new directions to open up the middle and spread out the stems.
- I defoliated (light amount) some of the 3 leaf blades that were touching the container lids, and any larger 5 leaf blades that were blocking light to any new shoots with new stem growth and potential bud sites. I wanted to allow the air flow at the lower section of the plant.
10/2 Day 28. Everyone is bouncing back from the LST. Keeping a close eye on Red and the injury healing. I've decided to do a 1/2 of a weekly feed every 4 days instead of a mass feeding once a week. I will test the TDS and EC, see what the plants are telling me before I feed of course.
(All values before feeding)
- Red PH 5.98 TDS 720 EC 1.512
- Blue PH 6.17 TDS 728 EC 1.544 / Will add .25 PH down and re-test all in an hour after the feed to check PH values.
- Yellow PH 5.93 TDS 708 EC 1.497
Feeding: 5ml CalMag, 5ml Micro, 4 ml Gro, 2ml Bloom, 2ml UC Root Guard.
Post Feed values:
- Red PH 5.78 TDS 808 EC 1.695
- Blue PH 5.90 TDS 846 EC 1.796
- Yellow PH 5.73 TDS 803 EC 1.700
Lessons learned week 4.
1. Be a little more gentle on LST.
2. Mark the water sight gauge at each 1 gallon increment so that I can track water replenishment levels.
3. Started a spreadsheet to monitor feeding value changes.

Likes
34
Share


@JonnyKush
Follow
Day 15 🌱
everything is going well but I have accidentally decapitated N1, in reality I had topping already N3 but with N1 I broke without doing it on purpose. hope for the best.
Day 16🌱
wow today N1 I see it well it does not seem to have accused the topping. everything seems to be going well for N3 too, he seems to be growing very strong. N2 is in excellent condition.
Day 18 🌱
i am struggling a bit with "lst" but i guess because i started early. otherwise they seem to be growing well
Day 20 🌱
I let them rest for two days. some training again today, they look fit and grow great.
Day 21🌱
N1 and N3 grow great and look great. N2 grows well but has yellowed leaf tips as if I had given too much fertilizer, I think due to the pre-fertilized soil. Now I continue with water and I will check the drain ph
Thanks for viewing.
if you like my diary leave a like and a comment.
come back to see me 🎂
good cultivation and good day💚🌱

Likes
15
Share


@ProfessorNusters811
Follow
Started flushing however acting on more experienced advice going to refeed and continue bloom for a while longer. Buds are really solid compared to previous grows. Really excited to do final weigh in at the end of this grow and only want to beat my personal best for weight. Hope the 5 days of flushing didn't hurt her too much as leaves have become a little brittle from over watering.

Likes
2
Share


@R_atata
Follow
Sieht alles gut aus. Ich hab die Beleuchtungszeit in der Mitte der Woche auf 15 Stunden und jetzt auf 14 Stunden gestellt. Die Lampen stehen jetzt auf 60%. Das Gesamtsystem zieht aktuell 190 Watt und hat bisher 100 kWh verbraucht.


Likes
207
Share


@DogDoctorOfficial
Follow
One more week here we go, and this girls are ready to Flower, I’ve defoliate them a bit, gave them some foliar feeding and provably tomorrow or so i will put them to sleep for 24 h and wake them up at 12/12.
Color on the leafs is back were i like and there for the time is now, the only reason I didn’t do it yet is because i want to take some clones from them just in case something outstanding comes out of this run, better safe than sorry and this way i can save the pheno with i like the most 😇💚
As for the LED department, i believe this VIPRARSPECTRA P2000 is just perfect for this 3x3 closet, PPFD numbers are on point and my girls are loving the spectrum coming out of it. Pretty soon the real testes begin and in flower mode we will see how it goes 🤩😇💚 for now i have to admit that im pretty surprised with it all, the quality on building and materials, the amount of heat it produces,the spectrum, etc etc , the amount of photons released seems to be just perfect and the correct ones 😅🤩💚🙏 Thank you VIPARSPECTRA for this opportunity and for the quality of your product, so far i have nothing but good things to say about it 🙌🙌🙌💚💚💚🙏🙏🙏
Decided to give my girls couple days more before flipping them to 12/12, also decided that was perfect time for scrog net to go in and with it spread the canopy true the all tent and try and maximize this 3x3 space, i know they look thirsty in this last photos 😆😅 they wore watered minutes before them pictures 😆 i will post better ones asap 💚💚💚🙏🙏🙏
Better photos uploaded 😆😅💚 I normally dont let them dry to that point 😆
You can check out last week timelapse https://growdiaries.com/diaries/126067-grow-journal-by-dogdoctor/week/686411 and if you in to timelapse stuff i have just recently uploaded the Magnum auto Timelapse just for fun here https://growdiaries.com/diaries/105893-grow-journal-by-dogdoctor , hope you guys enjoy it 💚💚💚 growers love and one more week up we go 🙏🌱💚
And with enormous honor and pleasure that i start collaborating with Zamnezia and Viparspectra
For this run i will have the pleasure of growing some Runtz genetics from Zamnezia seeds that they wore kind enough to send me for test and review 🙏🙏🙏💚💚💚🙏🙏🙏 and for the testing and reviewing i was blessed with the VIPARSPECTRA model P2000💚💚💚🙏🙏🙏 they wore amazing and send me this LED light for me to do some testing and some reviews. Special thanks to Zamnezia and to Viparspectra for this opportunity, lets make magic together 💚💚💚🙏🙏🙏
All i grow is medicine for myself, for me and for my best friend with is me 😆 nothing to sell, so don’t even ask 😅💚💚💚
All info and full product details can be find in can find @
https://viparspectra.eu/collections/grow-lights DISCOUNT CODE 5% - DOGDOCTOR ( all store )
https://www.zamnesia.com DISCOUNT CODE 10% - GROWITGD ( just for seeds )
https://aptus-holland.com/
More info and updates @
https://growdiaries.com/grower/dogdoctor
https://instagram.com/dogdoctorofficial
https://youtube.com/channel/UCR7ta4DKLFMg2xxTMr2cpIg
💚💚💚Growers love to you all 💚💚💚

Likes
16
Share


@HowtoBubatz
Follow
Today marks the 7th week of flowering for my cannabis plant, and it's truly fascinating to observe the changes that are taking place.
The stretching phase has officially come to an end, and now the plant is fully focused on developing its buds.
I can see that the buds are starting to swell and gain size, which is a promising sign of a healthy flowering process.
I've adjusted the feeding schedule with BioBizz products to match the plant's current needs.
Overall, the plant looks healthy and vigorous. The pistils are turning a beautiful shade, and the resin production is beginning to increase.
I’m excited to see how the buds will continue to develop over the next few weeks. I’ll keep monitoring closely and make sure everything stays on track.
Be excited for the coming weeks 💚🌱🌱

Likes
22
Share


@Oklahomasunrise
Follow
We are getting a nice quick start just like always from fastbuds. I'm starting this week now with a video of our 5 gallon home. I will add more pics through out the week. Please come back to follow along! I'm so excited about this grow!
It's been a few days but I wanted to update you all. The #1 plant got eaten by something.
I threw that soil out and started over again.
The # 2 plant has a tap root showing and is in the pot as of today May 30th. I'm keeping a close eye on the bug situation.
May 31st- the replacement seed for plant 1 has cracked open has a tail and will be popping up any time now!
I do have fungus gnats, I did a soil drench with sns 709 and put out stick yellow traps. Hopefully this will do.


Likes
21
Share


@Dunk_Junk
Follow
Almost doubled her height this week since transplant!
Lets see how she goes over the next few weeks.
Likes
46
Share

@DogDoctorOfficial
Follow
Week 4 Veg & First Flowering Report: Runtz Battle 🌿✨
Hey, green warriors and cannabis aficionados! 🌱🔥 We’re rolling into week 4, and it’s time for the exciting transition into flowering. Our Runtz plants have been thriving, and we’re gearing up for a spectacular bloom phase. Let’s dive into the progress and celebrate the journey!
Week 4 Veg Progress 🌟
As we wrap up week 4 of the vegetative stage, here’s a snapshot of how our Runtz plants are doing:
• Healthy Transition 🌿:
• All plants are looking robust and healthy, with vibrant foliage and strong growth. The transition into flowering is approaching smoothly, thanks to the solid foundation laid during the veg stage.
• F1 Compactness 🌟:
• The F1 strain is showing impressive compactness, with a well-structured and dense canopy. This trait is ideal for maximizing yield and ensuring even light distribution during the flowering phase.
Flowering Phase Begins 🌸🚀
We’re officially entering the flowering phase, and the excitement is palpable. Here’s what’s happening:
• Flowering Transition 🌿:
• Our plants are beginning their journey into bloom, and the change is evident. The initial signs of flowering are emerging, setting the stage for a productive and beautiful flower cycle.
• Autopots Activated 💧:
• The Autopots are now fully operational, allowing gravity to manage our watering system efficiently. This setup ensures consistent hydration, freeing up time while maintaining optimal moisture levels for our plants.
• Environmental Conditions 🌡️:
• Water Levels: We’re maintaining consistent water levels with TDS at 400 and pH at 6.2, ensuring optimal nutrient absorption and plant health.
• Temperature: The room temperature is set at a cool 18°C, providing a stable environment conducive to healthy growth.
• Room Conditions: With a room temperature of 30.3°C and a relative humidity (RH) of 51%, we’re keeping the environment balanced to support robust flowering.
Nutrient and Care Strategy 🌱💧
As we move into flowering, our nutrient and care approach is key:
• Watering and Nutrients 🌿:
• We’re continuing with the Regulator and CaMg Boost in the reservoir, as the soil is rich in biolife and nutrients. The goal is to see if these organic inputs, combined with the soil’s inherent nutrition, can sustain the plants through the flowering phase.
• Environmental Control 🌡️:
• Maintaining precise environmental conditions is crucial for a successful flowering phase. The combination of stable temperature, balanced humidity, and the Autopots system ensures our plants have everything they need to thrive and produce high-quality buds.
Looking Ahead 🌟🌿
As we step into the flowering phase, the anticipation is high. Our Runtz plants are set to showcase their full potential, and we’re excited to see the results. Each week brings new developments, and we’re committed to nurturing these beautiful plants to their fullest.
Stay tuned for more updates as we continue this journey. Here’s to a fantastic flowering phase filled with growth, discovery, and green magic. 🌟💚
#RuntzBattle #Week4Veg #FirstFloweringReport #Autopots #CannabisCommunity #FloweringPhase #PlantHealth #GreenMagic #NutrientStrategy #GrowStrong #StayPositive
Germination method 🌱 @thecannakan
Genetics Runtz F1 @zam.nesia Runtz auto @kannabiaglobal
Nutrition
@aptusholland 🌿
@aptus_world 🌎
@aptus_es 🌍
@aptusbrasil 🌱
@aptus_thailand 🌿
@aptus_portugal 🌳
@aptususa_official 🍀
@aptusplanttechnz 🌺
@aptusplanttechaus 🍃
Ambient controls🎮
@trolmaster.eu @trolmaster.eu.support @trolmaster.support @trolmaster.agro
Soil @promix_growers_eur @promix_cannabis
LED - @lumatekeu
Watering- @autopot_usa @autopot_global
Love and attention- @dogdoctorofficial
#aptus #aptusplanttech #aptusgang #aptusfamily #aptustrueplantscience #inbalancewithnature #trolmaster #trolmastereurope #trolmastersecrets #Autopots #RuntzBattle #KannabiaVsZamnesia #GreenJoy
As always thank you all for stopping by, for the love and for it all , this journey of mine wold just not be the same without you guys, the love and support is very much appreciated and i fell honored and so joyful with you all in my life 🙏
With true love comes happiness 💚🙏 Always believe in your self and always do things expecting nothing and with an open heart , be a giver and the universe will give back to you in ways you could not even imagine so 💚
More info and complete updates from all my adventures can be found ⬆️ link in the profile description ⬆️
Friendly reminder all you see here is pure research and for educational purposes only
💚Growers Love To you All 💚

Likes
17
Share

@Grow4ever
Follow
Blüte geht voran. Die Raubmilben Amblyseius (Neoseiulus) cucumeris sind schnell da gewesen 🙏 Ich hoffe, sie halten den Thripsbefall bis zum Ende der Blüte unter Kontrolle. Bisher kann ich noch nicht viel zu den Terps sagen, sehr dezent alles. Zudem haben die Pflanzen die Tage zum ersten Mal einzeln einen Fermakor-Hydrolysat als Blütenbooster in sehr gering konzentrierter Dosis erhalten. Danke geht hier nochmal raus @yan420 Ich verspreche mir durch die direkte Verfügbarkeit der Nährstoffe P und K und den Aminosäuren einen metabolismischen Boost.
Bin auf die Endergebnisse wie immer sehr gespannt.

Likes
4
Share


@CannaIGrow
Follow
This plant plus one more started to wilt earlier on in the week, I figured it was probably time to transplant seeing as they had been in the solo cups for 2 weeks. After transplant plants seemed to be happy again. I introduced amino acids this week as well. They are getting the grease spray and drench program
Likes
13
Share


@Phaleg
Follow
Hello!
Northern Lights from Sensi Seeds is a great strain to grow. It is easy and resistant to most things except my stupidity (*) .
I grew them in Central Europe, in pots of 17L on a basic windows growth, with decent soil with additional mycorrhizas.
Generic multi fertilizer like Nitrophoska was added in beginning as granules + I added some poo from rabbits.
Plants grew nicely also with the light from the large windows, but I felt they preferred a warmer and sunnier climate. (next time you can try cool or continental climate strains).
After 25 weeks, I harvested 2 of them (one was harvested couple weeks before, read below for details) and I got 573g of material before drying.
I will try to update the value when it is dried.
Now they are drying like in the video I uploaded.
Thanks for reading my diary.
*) Once I opened the windows and I bent the central stem of the third plant, the smallest since beginning. I put a stick to keep it up and it still survived until flowering. I had to harvest it couple weeks before the others 2 plants, because after this "injury" the plant started to have some mites that were spreading in the plant. In this country, you cannot buy BIO products against parasites, so I preferred to harvest sooner.
For the numbers of this last harvest report, I counted only the 2 that I harvested together and 573g is the wet weight of these other 2.

Likes
8
Share

@MadeInGermany
Follow
Flowering Day 9
Since time chance
To 12 / 12 h
Hey guys :-)
She grows great and is doing well in the flowering tent :-) .
Today everything below was cleaned and defoliated :-) .
A lot was removed because this time it was quite cramped in the tent and you don't lose your energy in the lowest shoots :-) .
This week it was poured twice with 1.2 l each.
Everything was checked and it looks like all trips are slowly but surely gone :-)
have fun and stay healthy 🙏🏻💚
👇🏼👇🏼👇🏼👇🏼👇🏼👇🏼👇🏼👇🏼👇🏼👇🏼👇🏼👇🏼
You can buy this Nutrients at :
https://greenbuzzliquids.com/en/shop/
With the discount code: Made_in_Germany you get a discount of 15% on all products from an order value of 100 euros.
👇🏼👇🏼👇🏼👇🏼👇🏼👇🏼👇🏼👇🏼👇🏼👇🏼👇🏼👇🏼
You can buy this strain at :
Clearwater Seeds
Water 💧 💧💧
Osmosis water mixed with normal water (24 hours stale that the chlorine evaporates) to 0.2 EC. Add Cal / Mag to 0.4 Ec Ph with Organic Ph - to 5.8 - 6.5
MadeInGermany


Likes
9
Share


@420DeepGrow
Follow
Semana 8:
La Grease Monkey está en modo bestia esta semana.
Los cogollos han seguido engordando con fuerza y cada vez se ven más densos y cubiertos de resina. Las flores principales ya empiezan a tener ese aspecto compacto y brillante que promete potencia, mientras que las hojas cercanas están totalmente salpicadas de tricomas, como si las hubieran rociado con azúcar glas.
La alimentación sigue basada en XpertNutrients, sin cambios drásticos. Solo he ajustado mínimamente las proporciones para no frenar el ritmo que lleva. El riego sigue afinado al detalle: lo justo para mantener activa la microbiota del sustrato y evitar saturaciones.
Los Adlite continúan haciendo un trabajo brutal. La penetración lumínica está ayudando a que incluso los cogollos de las zonas medias e inferiores mantengan una buena densidad. Todo el dosel está funcionando como una unidad, lo que se traduce en una floración muy equilibrada.
Las condiciones ambientales siguen bajo control: 22-25 °C de temperatura, y humedad en torno al 55%. Estoy reforzando la ventilación para prevenir cualquier susto ahora que los cogollos empiezan a cerrarse más.
El aroma se está volviendo todavía más intenso: una mezcla cremosa, dulce y con ese fondo diésel que le da el toque agresivo típico de esta genética. Los tricomas siguen lechosos en su mayoría, con alguna señal de maduración incipiente, pero aún no es momento de pensar en tijeras.
Crecimiento firme, flores con presencia y resina a punta pala…
¡Seguimos creciendo fuerte! 💪
