


Likes
4
Share
@FicoCG
Follow
Liebe Leute,
Die Woche 8 ist im vollen Gange!!!
Ich habe mir heute die Mühe gemacht und das Vorschaltgerät der Hauptlampe aufs Dach mit einem Blech zum Schutz gelegt, damit die Temperatur etwas runter geht!
Ich habe jetzt für die letzten Wochen die Lampe nochmal auf volle Power gedreht und hoffe, das ich jetzt bei den Außentemperaturen bei nicht mehr als 29 Grad Celsius im Zelt Lande.
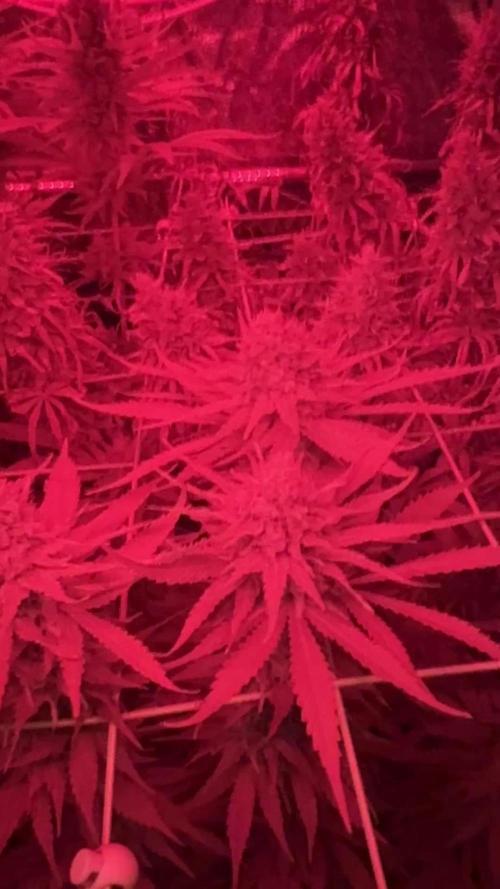
Die GG#4 und Purple Haze, haben den Düngeschock gut verkraftet und gehen top in die letzten Wochen der Blüte.
Leider hat es die Lemon Skunk (Red No.2) etwas erwischt, aber sie müsste es auch bis zum Ende durchhalten.
Die Trichome sind noch klar und warten nur noch darauf zum Höhepunkt zu kommen. Ich ernte aus Erfahrung wegen der Wirkung bei ca. 10% Bernstein. Also die nächsten zwei Wochen Augen ganz weit auf und die Lupe aus der Hose kramen.
Ich hoffe euch gefallen die Bilder und wie die Lady‘s aussehen!
Liebe Grüße, euer Fićo


Likes
24
Share


@TerpTurtle
Follow
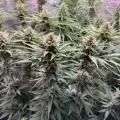
White Truffle x Red Pop by Detroit Seed Co
BuildASoil 3.0 LOYAL TO THE SOIL
Strawberry truffle | Vivosun 2x4 | Mars hydro sp3000 | 7 gallon pot
Chem 91 x Red pop | AC infinity 2x3 | AC Infinity Iongrid 24 | 5 gallon pot


Likes
36
Share


@Salokin
Follow
I think she has finally completed her stretch, it’s getting very shiny and sticky in the tent and the buds continue to grow nicely. She continues to be super thirsty and I think i will shorten the tank change intervals. From the 11 cuttings I took in flower around 9 made it and started to root quite nicely. However I think I was a bit to generous with the nutrients, which is corrected for the next week. A third net was installed in anticipation of the main colas getting to top heavy at a later stage. I also increased the canna boost by another 25 ml.

Likes
34
Share


@Krisis
Follow
01/27/25. Welcome to the start of week 4.
This little lady is lovin life. As I mentioned last update, she was a bit smaller than her friends previously, but she has been playing catch up. Shes doing a great job. She now has the same amount of nodes as most of her friends, that being 4.
Her leaves and stature are just a bit smaller.
I will top her as soon as she hits 5 nodes.
I think she’s definitely favoring the temperatures being a little warmer. It’s still not where I’d like it, but an improvement.
She was just watered yesterday, slowly, until a bit of run off. I’ve upped her food to 2.5 across 3 parts, as well as upped calmag (1) and silica (2).
I pulled a dip shit move and left my measuring tape in the flower tent and it’s lights off, so I’ll have to come back tomorrow to update that. I doubt she’s much different than last measurement though honestly.
Update: 01/29/25- updated measurement and watered with food.
01/31/25- topped and plain watered. Also added picture/video. Went ahead and topped at 4th node because with the node spacing it seemed a better spot for this one. I did wait until 5th was there though.
Thanks for lookin. ✌️

Likes
6
Share


@Hommero75
Follow
End of week 4 for GG4 Sherbet FF and it seems that this week was good for her. She is bouncing back little by little from her issues. She stretching slowly she is taking her time and that is ok with me. She just got fed some Goldleaf feterlizer and I did some defoliating on her to remove some of the bad leaves.. let's see how week 5 goes.
Likes
12
Share


@Cheeba_Inu
Follow
As of day 21, the Blackberry plant is doing well! It is growing vigorously and will need to be controlled as it increases in size. The FIM has already helped a little, but I have started some LST with the Atlas plant trainer to start making the canopy wide and flat.
A few of the newest leaves have the very start of yellowing in their tips, so I think this plant is maxing out at 1.1-1.2 EC. I am going to keep it around 1ec for the rest of vegitative growth, as EC can drift upwards in the reservoir very slightly while the airstone is running. Runoff, PH, and other parameters are right where I want them! I have a new gallon of Calimagic coming, so I am switching back to it this week in preparation for early flowering.
Thanks for reading, happy growing, and stay safe! 👍🌱
Day 24: LST continues, the plant is growing quickly and is very lush. Outside of removing a few low growth tips that will never develop, I am going to try to leave as many leaves as possible. If this maxes out my humidity I will start taking a few lower leaves, and those that are too tightly squeezes in the center of the plant. Considering the plant's size as of day 24, I am hoping the flowering stretch isn't too strong or I will have to really work to contain this plant!
Day 25: earliest signs of flowering.
Day 26: runoff quantities were edging towards being too low as the plant has more foliage to transpire through, so watering adjusted to 5x per day, 15 second intervals. This is an increase from 60 seconds per day of watering to 75, and should accommodate the needs of the plant as it continues to grow.
Likes
21
Share


@Siriuz
Follow
Day 37
We started with nutes today
Then all day long outdoors
From 6AM to 6PM
Plus CFL afterwards
They rest for 3 hours and then CFL again
Btw accidentally snapped one part of one big leave but that okay
Since we don't do defoliation on her
We guessing it's okay she will recover soon
Day 38
Since she's such a queen we wanted to upload a video showing how she starts flowering for the record, thanks a lot
You can Always follow me at Instagram
@cannagrowersiriuz
Also don't forget to add your comment below, it is important to us!
We want to learn, any tips, suggestion, more than welcome my friends
Happy Growing
Day 39 Some mins before installing ScroG
Day 40 Wonderful, she's out of there already so huge, full of buds
Day 41 she's actually doing great full of buds but those 2 first leaves are a little bit sad looking weird plus those black dots idk and it's turning yellow in between I decided to remove it and well, I'm hoping she's doing well what else I could think of guys any help or concerns?
At the end of the day, she's overall healthy and strong
Day 42 Time to feed the babies, so we added 900PPM (300ml) floranova grow
Followed by 1590ppm (300ml) flora nova bloom to make sure she's got all nutrients balanced well, also added 400ml of plain water after that so they could get a nice run off.
I think they're happy and we gonna check on them in a couple days to see how they go, Ph is around 6.2
which is great
Temp outdoors from 7-@
1pm around 25C to 36C
Then back indoors
Temp is 28C and drop to 22 at night and dawn so they're good and comfortable
Keeping humidity lvls around 40/65% top
Nice AC and Fan for air circulation
Thank you all for your support

Likes
10
Share


@littlenugget
Follow
I checked the trichomes w. ~70X for the first time at the end of week 7 and they were clear. I checked again on the following day (day 51) and they had started turning milky so, I flushed with (with regular pH-ed water) until runoff was reading ≤150 ppm. I'm a little worried I'm late on the draw with flushing, but I'm seeing very few amber trichomes at this point. They are getting chunkier by the day! Let's hope I flushed well enough.. home stretch.
Likes
20
Share


@bhanga_garden
Follow
This week has progressed nicely - the plant is starting to work on fresh leaves and is pushing the second node now. This plant is looking really healthy and strong so far! Today marks week three - so I will be switching my light to 18/6 until flower - which wont be for a while since I do mainlining - generally my veg time is stretched out quite a bit because of that. I will be keeping this updated as I go along and I am excited to share the progress!
This is organic living soil - no bottles - nothing made in a lab. Today I harvested about two pounds of worm castings from one of my worm bins - you can see in the pictures some friends decided to come along for the ride! I mixed the castings with basalt, glacial rock dust, crab meal, kranja cake, kelp meal, and neem meal - then top dressed with that mixture, working it down into the soil a bit with my fingers, and then watered that all in with about a gallon of water. I really like to grow in this large raised bed - its the entire size of my tent which makes it completely impossible to move during a grow cycle but I love the fact that each plant in this 2x4 raised bed essentially has 50 gallons of soil all to itself!
Thanks so much for checking out my grow - if you have any questions or comments don't hesitate! Cheers to a great community of growers!

Likes
9
Share


@Hypnogrow
Follow
King tut is foxtailing, I had two hours where the temps got to 90 in the tent three days in a row. I've seen some others mention foxtailing on king tut in general.
With the ROI-E680 a few people complained about foxtailing on the first couple grows. I turned the light down to 60% from 80 and the dehumidifier set on low so it would stop spiking the tent temp and keep the humidity in the 50s as best I can.
Fingers crossed!


Likes
10
Share


@CanadianFillmore
Follow
Week 8, the last feed! Defoliated to let more air flow and light penetrate down into the lowers of the plant. Bud's are insanely sticky, plant is covered in frost, the pics don't do it justice.

Likes
2
Share


@Bluemels
Follow
Tag 113: Die letzte Woche hat begonnen. Ich versuche so weit es mir möglich ist die Luftfeuchtigkeit und Temperatur zu senken. Momentan funktioniere ich im Automatic Modus, habe viel um die Ohren gerade 😯
Likes
49
Share


@MadeInGermany
Follow
Hey everyone 🤗.
This week you've put a lot of energy into growing your buds.
You look very beautiful :-)
Next week I'll add some Pk 13/14.
I wish you lots of fun with the update, stay healthy and let it grow 😎
Strain : Sour Diesel
☝️🏼😍
Genetic:
Diesel x Northern Lights
👍
Vega Lights : 2 x Todogrow Led
Quantum Board 100 W
💡
Flower Lights : 2 x Todogrow Led
Cxb 3590 COB 3500 K 205 W
💡 ☝️
Soil : Canna Terra Professional +
☝️
Nutrients : Canna Terra Vega, Canna Terra Flores, Rizotonic, Cannazym, CANNA Boost, Pk 13/14,
Canna Cal/Mag, Canna Ph - Grow,
Canna Ph - Flores
☝️ 🌱
Water:
Osmosis water mixed with normal water (24 hours stale that the chlorine evaporates) to 0.2 EG. Add Cal / Mag to 0.4 Ec Ph with Organic Ph - to 6.0
💦 💧


Likes
16
Share


@Northern_Ent
Follow
July 13: first heat wave of the year was last week, and there is another forecast for next week, but for now this is pretty ideal cannabis weather.
Added a third Scrog layer and tied it off to some weights (partly filled water bottles) to open up the canopy further. Works, simple, and easy to move around the yard as needed.
I really like this plant and how it’s going so far.
July 14: re-scrogged again to widen the canopy further. Supercropped the ends to maintain the same elevation at the various growth tips. Four stems in middle were topped to keep them from getting ahead of the others. Experimenting to see how it goes.
July 16: hot again. Increased water volume and sometimes misting air with garden hose water for the evaporative cooling. She looks great.
July 17: another 32 C day. Watered four times today so likely 7-8 L in the heat with the growing plant.
July 18: hot again. Mixed Power Bloom and malted Barley with some soil and added as a top dressing.Hit 34 C and 20% relative humidity which is far too hot and dry for cannabis. Lots of watering, and misting of leaves and air to provide some moisture and cooler temperatures.


Likes
13
Share


@MR_FLEXOPONIC
Follow
Week 6
6/20/22 - 6/26/22
Day 39 of veg
Midway week #6
6/23/22 (today)

