
Likes
Comments
Share


@iMeus
Follow
As I said in the review this was a tough challenge. I'm hopeful that my second attempt at this strain will be successful. Growers Choice Seeds sent me a few more to give it another go. Alex from their customer service department was very helpful and asked to be kept updated on the progress of the CBD. I'm not sure if GCS will ever see this but here's a big thanks <3
Thank you guys (GD) for all the love and support! It was so awesome seeing the get well messages when I was well enough to sit down and check my computer. Seriously, I didn't expect all of that. I am better, still have a few open wound areas but the healing is happening! :)
Much love you guys!
Meus <3

Likes
13
Share


@Luv2Grow
Follow
Day 50 - Starting week 8 and she’s as good as she can be right now. After reading some advice I may be giving her too much water so gonna slow down how much I give her from here on out. Even though this girl won’t produce as much as I’d like, I’ll still get something and will be growing another one soon.
Day 52 - She still seems to be doing ok right now and the leaves are starting to fade a bit so will probably give her another round of nutes in the next couple of days but it might be too little to late for this girl.
Day 53 - She’s starting to put on a bit of weight now. All her bud sites are all starting to lean over so might have to start using the yo-yo’s to keep her propped up. She’s just about dry so she’ll get some water tomorrow.
Day 54 - She’s still doing good right now and gave her about half a gallon of water and nutes today. She still seems to be fattening up on a few of the buds but some are still pretty fluffy. She’s still pretty young right now so holding out hope that she’ll beef up, though I’m not seeing much more pistil development but all her trichs are still clear with a couple cloudy mixed in there.
Day 55 - All still going well but nothing much to speak of right now. She took well to the watering yesterday and just took her out for some updated pictures and such.

Likes
Comments
Share

@birdmountain
Follow
Die Seven Freeze erinnert mich ein bißchen an die Frisian Dew, die ich vor drei Jahren angebaut habe. Sehr stark in der Struktur und schnell wachsend. Ich habe mir den unteren Strunk der Frisian Dew (ohne Wurzel) von damals aufgehoben, sie war meine stärkste Cannabispflanze bisher. Mal sehen wie weit es die Seven Freeze bringt.
Eine sehr stürmische, regnerische Woche, kein Problem für die Seven Freeze, auch ohne Stütze.
Sie hat ähnlich große Blätter wie meine Blueberry, wenn m´nicht sogar größer, ist aber etws offener und lichter in der Srruktur.
Vielen Dank für euren Besuch.
Likes
22
Share


@SirBudAlotts
Follow
Just look at her....
Like I mean really look at her.
What a wonder on the eyes! 😍💚.
Everything is uniform.
Closest lady I've ever seen to perfection 👌


Likes
65
Share


@Dedon
Follow
Hi everyone !
Everything is OK, buds are frostier each day.
They look more dense and tastier than my first try, i really want to taste them to compare the dfference between this grow and the previous one.
Today i bought a new tent, ballast and lamp, so i'll start the next grow tomorrow 😋 i don't need to wait for plant to be dry before start a new grow now o/
Thanks for your support and see you next week !

Likes
21
Share


@MadeInGermany
Follow
Info:
Unfortunately, I had to find out that my account is used for fake pages in social media.
I am only active here on growdiaries.
I am not on facebook instagram twitter etc All accounts except this one are fake.
Have fun with the update.
Flowering day 40
since time change
to 12/12.
Hey everyone 😊.
It gets more beautiful from week to week 😍.
The buds are getting thicker and thicker and already smell very good :-).
The time has come when she no longer puts her strength into growth but into the flowers :-).
It was poured 3 times this week with 1.2 l each time.
When watering, there was 1 g of GHSC enhancer per liter of water as every 2 weeks 👍.
Of course, as always, the tent was cleaned every day and the humidifier refilled.
The complete filter system was also checked again.
I filled the tank with fresh osmosis water for the coming week.
I wish you all a nice week.
Stay healthy and let it grow 🙏🏻👍
You can buy this Strain at
https://www.amsterdamgenetics.com/product/kosher-tangie-kush/
Type:
Kosher Tangie Kush
☝️🏼
Genetics:
Kosher Kush
X
Tangie
👍
Vega lamp:
2 x Todogrow Led
Quantum Board 100 W
💡
Bloom Lamp :
2 x Todogrow Led
Cxb 3590 COB 3500 K 205W
💡💡☝️🏼
Soil :
Canna Coco Professional +
☝️🏼
Fertilizer:
Green House Powder Feeding
☝️🏼🌱
Water:
Osmosis water mixed with normal water (24 hours stale that the chlorine evaporates) to 0.2 EC. Add Cal / Mag to 0.4 Ec Ph with Organic Ph - to 5.5 - 5.8 .

Likes
4
Share

@Xabii
Follow
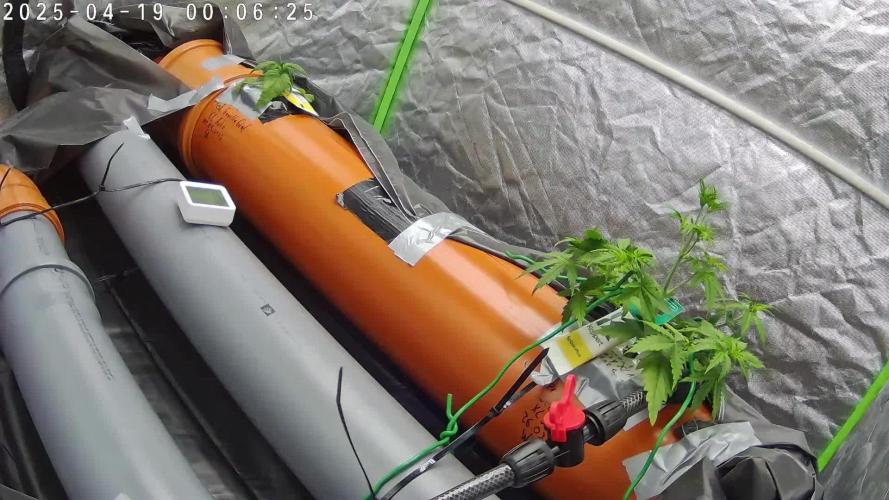
The other plant in the setup had root rot and also infected this one, did a root wash and hope for the best.
Values are average of the day.
DATE - EC(us/cm)
20250419 1638
20250420 1874
20250421 1891
20250422 1868
20250423 1845
20250424 1749
20250425 1774
DATE - PH
20250419 5.81
20250420 6.34
20250421 6.21
20250422 6.11
20250423 6.11
20250424 6.12
20250425 6.09
DATE - ORP (mV)
20250419 93
20250420 -1
20250421 64
20250422 199
20250423 156
20250424 143
20250425 250
DATE - °C - RH% (Tent Temp/RH)
20250419 23.9 48
20250420 25.1 53
20250421 24.0 53
20250422 22.9 58
20250423 22.4 57
20250424 21.6 59
20250425 22.7 55
DATE - °C (Reservoir)
20250419 19.1
20250420 20.1
20250421 20.3
20250422 20.5
20250423 20.1
20250424 19.5
20250425 19.3
DATE - CF
20250419 16.38
20250420 18.74
20250421 18.91
20250422 18.68
20250423 18.45
20250424 17.49
20250425 17.74
Likes
Comments
Share

@mihixd
Follow
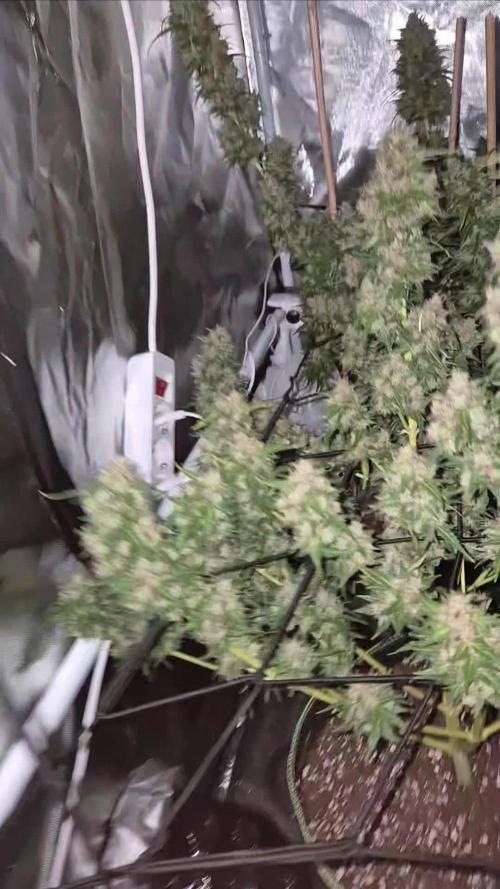
Plants are looking good! I harvested the 2 plants on the left on D82. Drying them in a 4x2 rn, the 2 remaining plants will stay in flower tent until the drying tent clears up. They could use an extra 10 days for a little more size :). Very strong smell! my carbon filter was struggling haha.
D78
10L
D81
8L
D82
2 harvested
Likes
5
Share

@Sundancers
Follow
In Woche 3 hat die Sticky Broccoli ordentlich an Blattwerk und Biomasse zugelegt und zeigt sich insgesamt sehr vital. Die gesunde Blattfarbe bestätigt, dass sie sich rundum wohlfühlt und das Indica-typische Wachstum klar durchkommt. Getoppt wurde sie etwas später als üblich, was dem kräftigen Wuchs aber keinen Abbruch getan hat. Zusätzlich haben wir Cropping angewendet, um die starken Triebe kontrolliert nach unten zu biegen. Ganz ohne Drama ging es dabei nicht, ein kleiner Knacks war leider dabei, aber nichts, was die Pflanze ernsthaft beeindrucken sollte. Die Triebe sind inzwischen weit genug entwickelt, um mit dem Mainlining zu starten. Aktuell bleiben drei Nodien mit insgesamt sechs Trieben stehen. Insgesamt ein sehr solider Stand in Woche 3 mit viel Potenzial für eine saubere Struktur in den kommenden Wochen.

Likes
Comments
Share

@smoking_hills9
Follow
Plants still stretching. I cleaned the bottoms from small branches and leaves, to give more energy to main buds and to make easy trim


Likes
8
Share


@The_Doctor_Green
Follow
Después de 2 semanas de secado logre enfrascarse 26 gramos de Big bang, el aroma y sabor, no se como describirlos.
El efecto es lindo, al menos en mi caso lo sentí cerebral al principio y luego me agarro un sueño😣😣🤣🤣🤣💪💪💪 .
Los cogollos quedan bien compactos , tan compactos que si hay humedad por condiciones q te cuestan controlar, se pueden arruinar, ya en el final del proceso.
Asique presten atención al final.


Processing
Likes
88
Share


@No_Clout
Follow
12/09/18 - everything’s starting to smell great and it’s all getting frosty thanks to the terpinator, just need to wait for them to swell up and get fat. 👌🏻
18/09/18 - everything’s looking good apart from the war wounds on plant #2,gonna slam them with terpinator for abit , upin it to 4ml per litre and also going to be lowering the a&b.


Likes
4
Share


@GREENPHOENIX6262
Follow
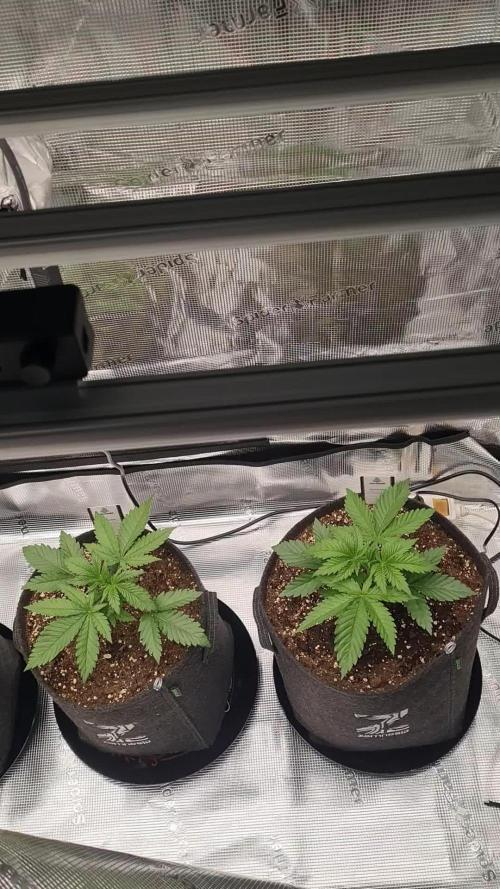
* Week 6 Veg/Early Flower - She has grown a little over an inch and a half since last night (11.5 inches total ) - Veg nutrients will begin to be fazed out early this week to prep for flower*
* End of Week 6 Veg/Flower - 11/4 - She has begun flowering ( 14 Inches ) - Hard defoliation on bottom small budsites as well as bigger fan leaves above.

Likes
36
Share


@ganjameister
Follow
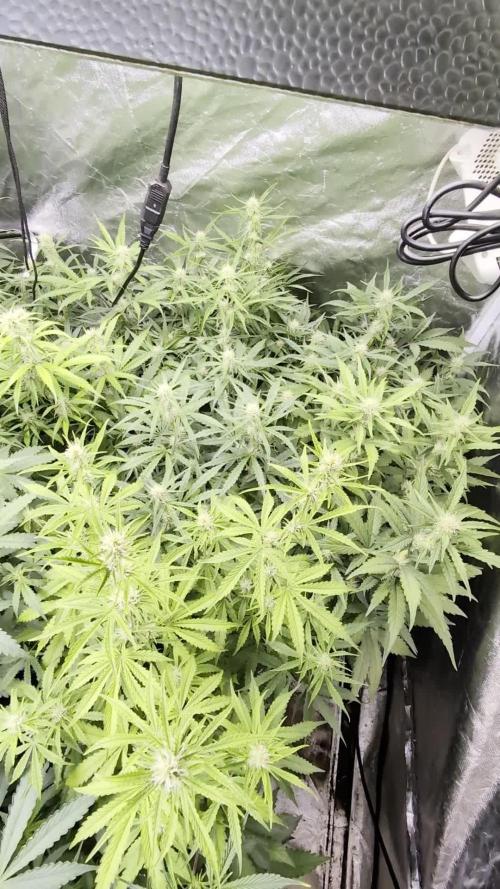
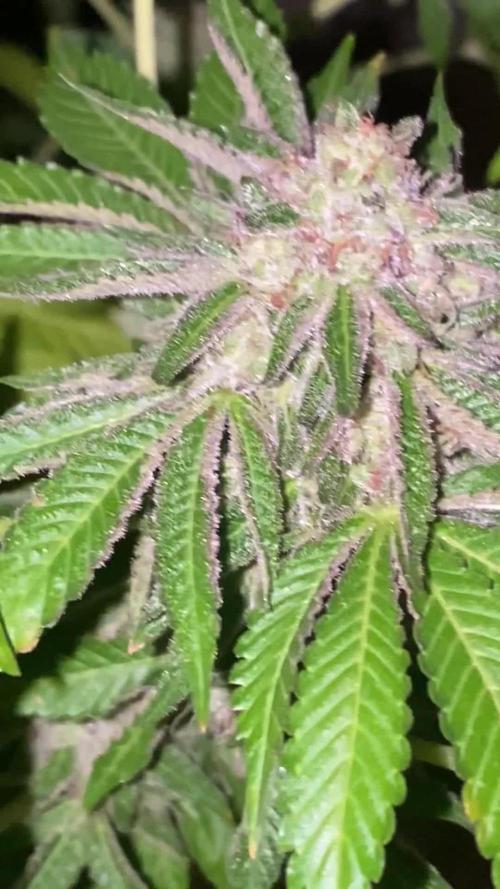
This week I have been steering vegetatively. Less stress on the plants to increase the weight on the buds.
Watering is done very often and the plants are drinking a lot. EC lowered to 3.0 and the VPD has been reduced which means higher humidity than usual.
The buds are getting bigger and I’m seeing a slight shade of dark purple on the bud!

Likes
9
Share


@BelgianBudtender
Follow
How's it growing farmers?
Oh my god, she kjust kept stretching, idk what's going on. She's so massive.
I deffo need to defoliate, ill have mold issues.
she drinks half the bucket every day, Early on in the week I had some Light burn, moved my lights up all the way
My Flower lights:
https://marshydro.eu/products/mars-hydro-ts-1000-led-grow-light/?ref=BelgianBudtender
My Veg lights:
https://marshydro.eu/products/mars-hydro-ts-600-led-grow-light/?ref=BelgianBudtender
Coupon code BelgianBudtender for 3% off
