
Likes
Comments
Share


@Rinna
Follow
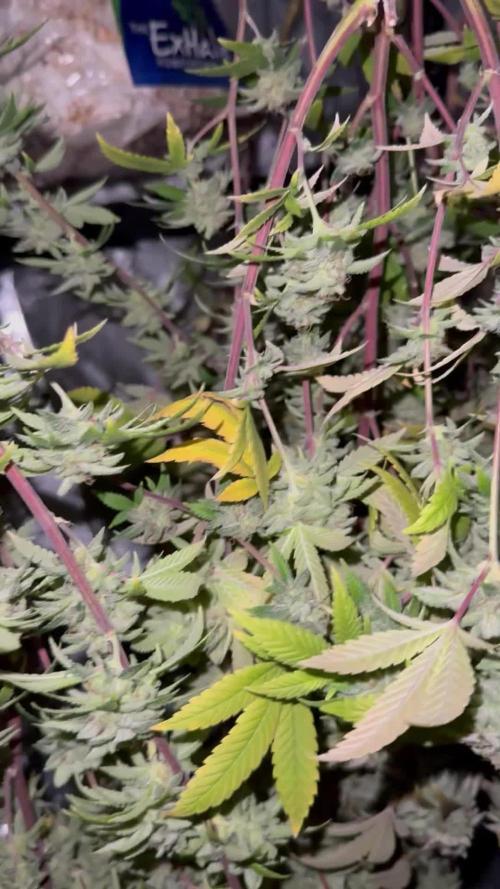
Looking okay, the highest leaves are burning quite a lot, but I’m not worried a lot as the buds are forming nicely. I’ll be feeding a little less from now on as she doesn’t seem to need a full dose every watering.

Likes
38
Share


@Aedaone
Follow
This week wrapped up the generative two phase or midflower and began the generative three phase. The plants were fed the nutrients listed daily. I like to keep the p and k up high during the first week to twelve days of generative three. This week the weather has been more cooperative but far from ideal. The highs have ranged from mid 70's to 90 degrees f. The nights are running low to mid 60's f with humidity in the 90% range at night. Humidity has stayed somewhat high during the day ranging from 70% to mid 50% a few days only. This weather has really been testing these girls resistance. Plants 1 and 2 have been immune to pm. Plant 3 has responded well to treatment with arber. All the plants got a medium defoliation which helped. Everyone stacked this week. They have all reached their maximum height. I used the height of the tallest 87.5" for the official height. The two shorter plants are 61 and 62 inches.


Likes
29
Share


@DesDeGrower
Follow
Pow pow and it’s already Week8
Girls are definitely in stretch now getting some training on ScrOG net to fill this tent in full.
Somewhere this week they will all go through defoliation process and planning to lower the upper net.
EC this week going up to 2.0
Temps around 26C
Humidity around 60%
Stay tuned with photo updates 🤘
Video update Day6 - defoliation done, second net done, all plants on same level done.
Stretching very nice in last few days 😍

Likes
52
Share


@Martian_D
Follow
Plants dried in the pots for 2days then hang for 2weeks at 60-65%rh. Buds were dense in most cases, they ended up being three totally different phenos but over all the smell was strong and taste was sweet.
8g pop corn and 25g sugar leaves in total.Zkittlez 1 37g total not all is in the pic, the smell was sweet. Zkittlez 2 52gs in total has a very pine like smell. Zkittlez 3 very stanky covered in thc snow white the camera does not do her justice.
A huge thanks to @gmslave, @DoDrugs420 and @Mrs_Larimar.
@fast_buds you guys are coming up in my next grow!


Likes
8
Share

@Sadhus
Follow
# **Dognabis Cup – Rapport Semaine 9 (Jour 64-70)**
**Grower** : @Sadhusfrgrow
**Strain** : Permanent Marker
**Zone** : FLO (TCS-1)
**Plantes** : 3
**Date** : 15 novembre 2025
---
## **Observations générales**
- **Croissance** : 3 plantes, **1 seule a percé légèrement la canopée** (+10-15 cm au-dessus des autres). Les 2 autres restent **très en retard** (retard structurel accumulé depuis la vége).
- **Structure** : Canopée **inégale**, mais **fleur légère et aérée** pour l’instant → bon signe pour éviter le botrytis.
- **Action** : **Ajout de K-Boost** (potassium) pour soutenir la floraison et densifier les buds.
- **Phase** : **Semaine 6 de flo** (début de prise de poids).
---
## **Tableau récapitulatif – Semaine 9 (Jour 64-70)**
| Paramètre | **Jour (Mon Dieu)** | **Nuit** | **Cible** | **Écart** | **Commentaire** |
|---------|---------------------|--------|---------|---------|---------------|
| **Température** | 24.4 °C (avg) Max 26.3 °C Min 21.6 °C | 22.2 °C (avg) Max 23.8 °C Min 20.5 °C | 24 °C / 22 °C | ✅ OK | Stable, légère surchauffe jour (26.3 °C) |
| **Humidité** | 63.2 % (avg) Max 69.3 % Min 51.2 % | 61.1 % (avg) Max 66.6 % Min 52.1 % | 60-65 % | ⚠️ Légère hausse | À surveiller, risque condensation |
| **VPD** | 1.14 kPa (jour) 1.05 kPa (nuit) | | 1.0–1.4 kPa | ✅ Optimal | Excellent pour flo précoce |
| **PPFD (Light)** | 991 µmol/m²/s (avg jour) Max 1064 Min 35 | 1.05 (nuit) | 900–1000 | ✅ OK | Bonne intensité, mais inégale (canopée) |
| **CO2** | — (non mesuré) | | 900 ppm | ❌ Manquant | À activer si possible |
| **Solution (pH / EC / Temp)** | pH 6.08 EC 2.67 mS/cm Temp 16.8 °C | | pH 5.8–6.2 EC 2.4–2.8 | ✅ OK | EC un poil haute → surveiller lockout |
| **Moyenne (substrat)** | Moist 21 % | | 15–25 % | ✅ OK | Substrat bien géré |
---
## **Analyse détaillée**
### ✅ **Points positifs**
- **VPD parfait** (1.1–1.2 kPa) → transpiration optimale, bonne absorption.
- **Fleurs aérées** → faible risque de moisissure pour l’instant.
- **K-Boost ajouté** → bon timing pour densifier les buds (semaine 6 flo).
- **PPFD moyen à 991** → dans la zone cible pour flo.
### ⚠️ **Points à corriger**
- **Canopée très inégale** → 1 plante domine, les 2 autres en retard → **perte de rendement**.
- **Humidité jour 65 %** par moments → risque botrytis si fleurs densifient.
- **EC solution à 2.67 mS/cm** → un peu haute → risque de brûlure des pointes.
- **CO2 non mesuré** → potentiel non exploité.
---
## **Objectifs Semaine 10 (Jour 71-77)**
| Objectif | Action | Cible |
|--------|-------|-------|
| **Égaliser canopée** | LST / tuteurage léger sur la plante dominante | Réduire écart à


Likes
58
Share


@Mr_Motalovah
Follow
Hello growers and tokers! 👋 👩🌾 🧑🌾.🔥💨
There has been much change this week!!
First there was a big defoliation done, I cleaned the bottom of the plant.
All the growth that wouldn't amount to anything because the light doesn't penetrate that low.
Also took off the biggest fan leaves to give more room for light.
Then finally switched to 12/12..
After just 36 hours after the defoliation there was a major change.
New growth everywhere, colas started stretching upwards fast.
It's like she already knows it's flowering time.
Great reaction to the defoliation and 12/12 switch.
I'm still watering every other day, After the defoliation I watered with only Enzymes 2ml/L to clean the roots a bit then started with the nutrientes again.
I dropped the amount of grow nutrients from 3ml/L to 1ml/L and started adding bloom nutrientes 2ml/L for now.
I'll slowly be upping the bloom nutrientes and after week 2 I'll no longer add grow nutrients.
That's it for this week. Stay tuned to see how she flowers.
Stay safe!


Likes
574
Share


@TOTEM
Follow
HARVEST DAY!
162 days after the sprout, and 117 days after the switch.
It makes almost 6 months!! What a never-ending journey!
I chopped down the princess and decided to place the colas on the usual hanging net without trimming them directly.
I just couldn't. Every cola requires at least 30-40 mins to be trimmed properly. I got something like 50 or 60 colas in total.
It's a total pain in the ass believe me!!! There are layers consisting in calyx, leaf, calyx, leaf, and so on. You basically need to work between every couple of small calyxes in order to remove the leaf in the middle, while being very careful to not cut down everything. It's insane!!!!!!
So.... just wait a little more for the final harvest and the smoke report.
They will come, but definitely not now!
In the meantime I uploaded some harvest photos and videos.
;-)
See you soon!!!

Likes
6
Share

@Hempcules
Follow
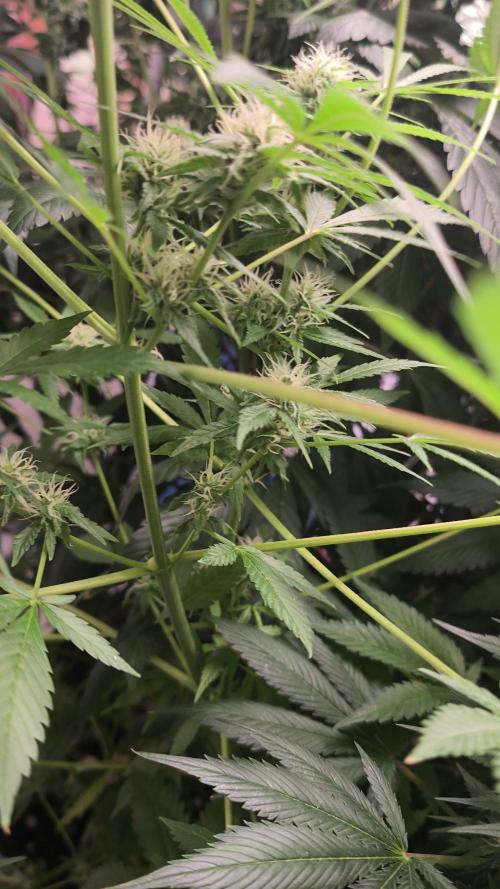
WEEK 6
The first week of flowering went fantastic. The plant really took off and doubled in size. I removed a few shoots and leaves at the bottom, but other than that it’s growing like something out of a picture book.
Starting the nutrients early seems to have been a good choice here. The stem looks solid, and overall there’s nothing to complain about so far. I hope things continue to go just as successfully and stress‑free as they have been — if so, this will be a great run.
PPFD: 750µmol/m²/s
Water: 2x water 1x nutrient solution
Vpd: 1,4Kpa

Processing
Likes
22
Share


@Silverback_Guerilla
Follow
2/4:
Photo session day!
The big one is growing a few inches per day..that shit needs to stop soon or I'll have to supercrop her lovely branches..
Soooperunt is now as tall as the second sister, but not as bushy. All three are slow to flower, like the #11's.
I had a total infestation of Cattus (felis) which I documented in my photos. Eradication seems impossible, so I'm opting to allow a degree of predation, but hoping trichome production will, at least, deter them soon.😁
2/5:
I fed everybody today with about 3/4 gallon each and sprayed them down with Axiom harpin proteins for the last time this run.
I made a DIY CO2 generator today using a 5 gallon cat litter bucket, a small aquarium pump, some air line tubing, and a bubble stone, plus
6 cups of sugar and 30 grams of wine yeast in 2 gallons of warm water. I put the tube where the CO2 is exhausted up against the back of the oscillating fan that aims down over the plants so they are being constantly forcefully bombarded with high levels of CO2(1300+ppm) from above.
I set the ac infinity controller to allow the temps to climb up to 89f before the fan turns on.
2/6:
These girls are a much darker shade of green than anybody else in the garden.
I bought some Gro-Pro pot risers to elevate the pots so that they will dry out faster..seem pretty effective.
2/7:
I'm only seeing a few pistils popping here and there on these girls. I expected them (and the other mostly indica strains) to be moving along faster at this point. Not sure if they are happy with such a short nap every day..
I foliar fed with big bloom and tiger bloom today.
2/8:
I ordered a second 6" AC Infinity fan to connect to my controller, some ducting, and a diffuser which I'll mount to the wall, down near the floor. The fan unit will be in another closet, adjacent to the garden closet, and I'll run ducting up through that closet ceiling into the attic, with a filter on the end to keep bugs and particulates out.
For the next 6 weeks or so, it will provide a supply of colder fresh air. I did the math, and it will now only take about 1 minute and 40 seconds to completely exchange the air in the closet. Depending on the outside air temp at the time, it should take anywhere between 8 and 20 minutes for the closet to heat back up to 80f and the fans to kick back on again. This Spring, on days when it's warmer than 72f outside, I'll disconnect the duct in the closet and stretch it into that bedroom, clipped to the window unit air conditioner output, cranked down as low as it will go. This Summer, I'm gonna just run a pair of the quantum boards and grow 4 or 5 autos in there, but this should help keep the temps cooler in summer as well, without dedicating an air conditioner to the grow op.🙏
2/9:
I foliar fed them with grow big, big bloom, and tiger bloom and checked moisture in their pots. They're due for a good watering tomorrow.

Likes
12
Share


@Kayaboy
Follow
This week lowered the soil ppm to around 700 so i can be in control of nutes and follow up with any deficiencies it might appear , straight away the leaves started fading like 10% so i know im feeding now and not the soil....
Also applied first topping and guess i will go for another two toppings to create 8 main colas with no small stems whatsoever for thick dense buds. ... well see how she responds. So far she didnt have any visible progress like dosidos33 had but leaves lookon upwards like normal...well see and keep posting
Other than that just a batch of red spider mites under the cotyledon leaves treated with low ph spray and seems ok so far until i get proper mite sprays...
Plant looks a bit shorter than dosidos 33 growing next to each other even though has 60% sativa genes.
Mid week Update:
Transplanted and ready to veg further ..No signs of stress from topping or translplating. Xxx
Mid week Update:
Stripped off the side branches leaving only the leaves and thinking of mainlining or just let them with just one topping and no further trimmings...I will decide later this week xxx happy growing all
Likes
11
Share

@TrickzGrowz
Follow
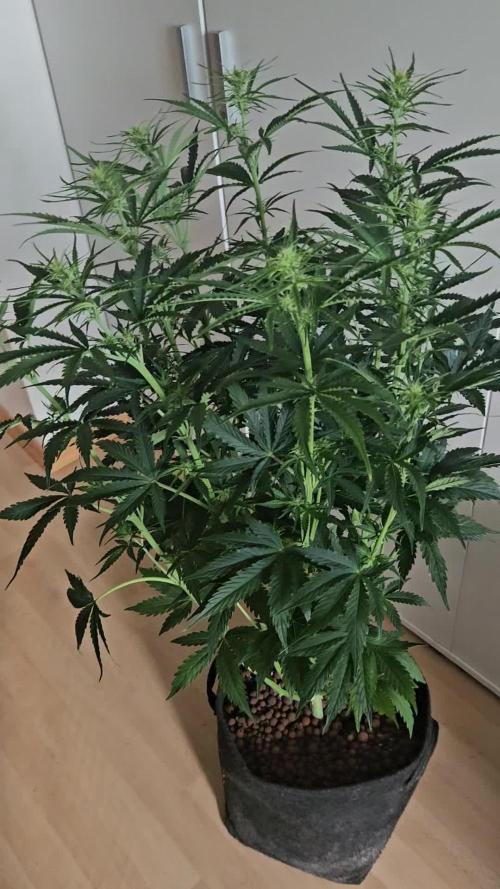
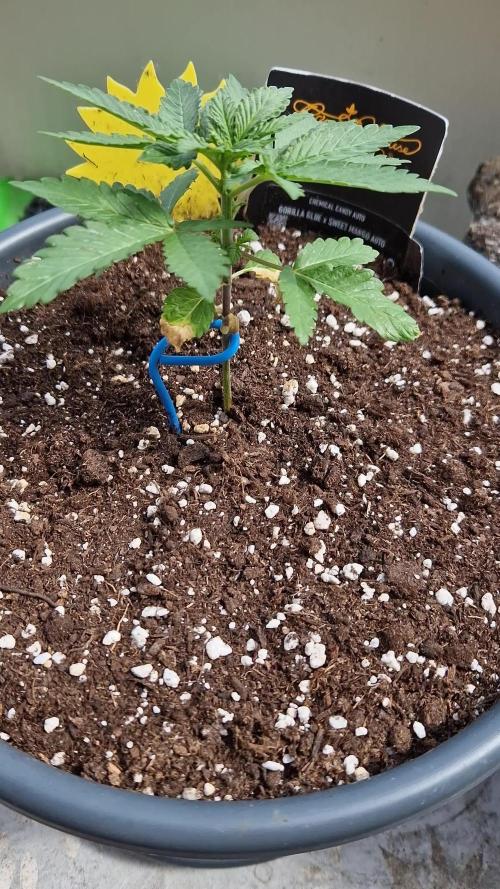
Servus Moin!
Langsam startet die Chemical Candy richtig durch. Der Stamm wird jetzt dicker und die Blätter bilden sich schön aus.


Likes
47
Share


@S2340420
Follow
Nothing much tae say really a hope the triple g makes it to the end of ita cycle and the unexpected church seems tae be a bonus beautiful looking healthy plant with a strong orange zest coming off it will also have the pleasure of an early smoke win win

Likes
23
Share


@nonick123
Follow
Día 6 (29/04) Spray solo agua el top del sustrato. DLI 13
Día 7 (30/04) Spray solo agua el top del sustrato. DLI 13
Día 8 (01/05) Spray solo agua el top del sustrato. Subo a DLI 17
Día 9 (02/05) Elimino la cúpula casera de humedad y empiezo a regar con 300 ml solo agua
Día 10 (03/05) Empiezo a luchar con una ola de calor inesperada para esta época, que me trae temperaturas exteriores de 30 ºC y humedad relativa del 30%...
Mantengo la cúpula casera de humedad
Día 11 (04/05) Hace muchísimo calor.. 30 °C. A ver como lo llevan
Hago un invento casero para aumentar la humedad
Día 12 (05/05) Primera alimentación con Aptus! 300 ml H2O + Regulator 0,15 ml/l + CaMg-Boost 0,25 ml/l + Startbooster 0,25 ml/l - pH 6.2
Creo que las plantas se ven un poco pequeñas para tener 12 días... esperando por explosión de crecimiento en los próximos días....
💦Nutrients by Aptus Holland - www.aptus-holland.com
🌱Substrate PRO-MIX HP BACILLUS + MYCORRHIZAE - www.pthorticulture.com/en/products/pro-mix-hp-biostimulant-plus-mycorrhizae