Likes
15
Share
Ladies and gentlemen, the cycle has been flipped, so flowering is imminent. The plants looked healthy (healthy enough 😅), and if I’m honest, I was also running out of patience. The canopy is set, the net is filled, and now it’s time to let the stretch begin. I’ve got a batch of Amnesia Haze ready for the next classic run, but first, let’s see what this round delivers. Stats so far: 💧 Watering: Every third day 🌡️ Temp: 26–28°C 💦 Humidity: 65% RH 📈 VPD: ~1.18 kPa 💡 Light: ~700 PPFD
Likes
189
Share
Yo yo yo! Day 8 Evening fellow growers, a new week is here and these little ladies seem to be doing just fine. Watered today just hoping for some growth this week. I have attached a link below to RQS if you fancy having a look at there selection. You won’t be disappointed ✌️ Day 10, added a little heater into the mix. These ladies don’t seem to mind it at all. Happy with how they are progressing. ✌️ Day 11, gone to 18/6 DLI is 34. Watered with plain water tonight. ✌️ Day14, happy with how these girls are progressing, some good growth this week. Watered last night. Will wait until towards the end of the week and then I will top them both. ✌️ ⭐️⭐️⭐️https://www.royalqueenseeds.com/uk/autoflowering-cannabis-seeds/537-mimosa-automatic.html⭐️⭐️⭐️
Likes
6
Share
Start of 5 week flowering now she is been feeding with Marshydro irrigation drip. So far she was easy to grow with out any problem and she is a very nice plant
Likes
17
Share
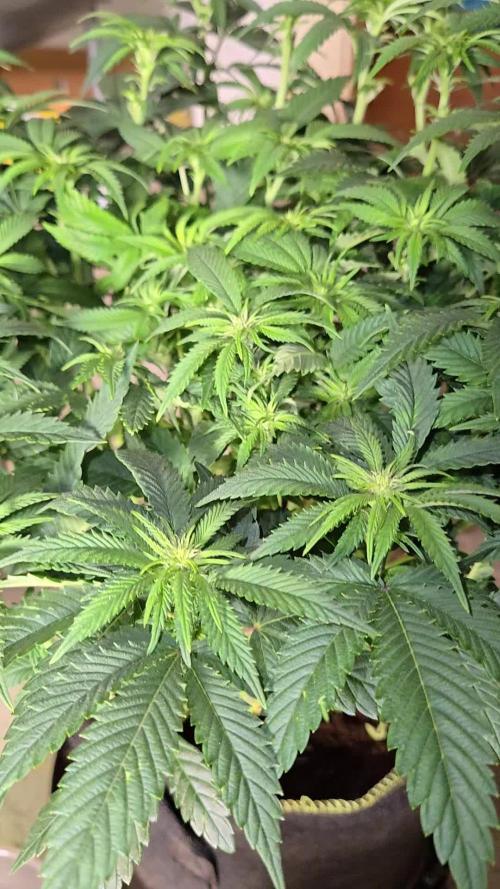
Today marks the second week of flowering, and I’m really excited about how well my cannabis plant is doing! Over the past few days, it’s really stretched out and has grown quite a bit taller. The leaves are looking lush and vibrant, with a deep green color that shows how healthy the plant is. I was a bit worried last week because the leaves were slightly droopy, but after adjusting the water and getting the levels just right, it’s looking much better now. It feels like the plant has responded really well to the care I’ve been giving it. I’m looking forward to seeing how it continues to develop in the next weeks. The buds are starting to form, and I can’t wait to see them fill out. This is such an exciting process, and I’m really hopeful that everything will keep going smoothly from here on. Fingers crossed for a successful grow!💚🌱
Likes
18
Share
I'm loving this strain so far she is very short in stature and takes to training very well the structure I'm liking ...she was bent around some more this week and recovered very well. The girl will be continued with the trading for at least another 4 weeks before the flip over to flower . I'm getting excited to see how she will look in another week just such good genetics ...cheers fam
Likes
33
Share
@nonick123
Follow
Día 71 (24/03) La planta lo ha pasado mal tras 2 días sin riego (casi 3 ciclos completos de 12 horas de luz sin riego...) A lo que se suma altas temperaturas en mi zona, han tenido 28 ºC durante las horas de luz... Las hojas inferiores se encuentran caidas y alguna quebradiza... Le hago un riego con 750 ml H2O EC 0,45 a ver si se recuperan.... Día 72 (25/03) Riego con 250 ml H2O EC 0,45 Elimino las hojas quebradizas que no se van a recuperar después de la "sequia" que han pasado Se encuentra en buen estado general y formando nuevos pistilos! 😍💥 Día 73 (26/03) Riego con 250 ml H2O EC 0,45 Día 74 (27/03) Riego con 500 ml H2O EC 0,45 con BIO PK 5-8 a 10 ml / L (solo Limon Blanco) Riego con 100 ml H2O EC 0,45 (el resto) Reviso los tricomas, y GG4 Sherbet FF y Blueberry Pie F1 solo les faltan unos días! 😍💥 Día 75 (28/03) Riego con 400 ml H2O EC 0,45 Día 76 (29/03) Riego con 500 ml H2O EC 0,45 Día 77 (30/03) Fiesta de la Cosecha! Reviso los tricomas y están un 10% ambar, 85% nublados y 5% transparentes 🚀 FastBuds 15% DISCOUNT code "NONICK" 2fast4buds.com @fastbuds.official 🚀 Khalifa Genetics - https://khalifagenetics.com/product/lemon-blanco-v3/ @khalifa.genetics 💦 BioTabs 15% DISCOUNT code "GDBT420" biotabs.nl/en/shop/ @biotabs_official 🌱Substrate PRO-MIX HP BACILLUS + MYCORRHIZAE @promixmitch @promixgrowers_unfiltered 💡2 x Mars Hydro FC1500 EVO Led Grow Light (2024 NEW FC 1500-EVO Samsung LM301H 150W LED) - https://marshydro.eu/products/fc1500-evo-led-grow-lights/ - https://www.amazon.de/dp/B0CSSGN5D8?ref=myi_title_dp
Likes
3
Share
@Takeaims
Follow
Pineapple express is really going along nicely into week 8 for her got the white widow at the back left week 7 and grape ape back right week 8 you can see the difference In the colours of the leaves and how they have grown the pineapple is just a monster nice wide and fat would be good for a scrog net white widow and grape ape are really lanky but all 3 have many bud sites and I have had no problems at all with these girls so much fun and really easy to grow I surprised myself but I think alot need ti go down to the genetics and who you get seeds off use code ZAMMIGROW2024 for 20% off best thing I ever
Processing
Likes
22
Share
@Luv2Grow
Follow
Day 43 - First day of week 7 today and she looks really good just not sure if she’s really starting to flower yet. I’m hoping this is just typical of the GC strain. Day 44 - No major changes, she’s growing and I’m loving the looks of her. Will continue uploading daily pictures. Day 45 - She’s looking really good and budding more and more each day. Gave her straight pH’d water today and tomorrow and will give her another feeding on Saturday. She’s drinking almost a gallon of water a day. Day 46 - Things are looking good with this girl. Bud sites are growing daily and this thing is a beauty. Gave her another feeding of just pH’d water and will “feed” her tomorrow. Day 47 - ALL is looking good and she’s looking purdy. Gave her a feeding with the foxfarm nutes today. Did a true measurement to the biggest branch and she’s at 25.5”. Will continue to measure each day to see how much she’s growing in a 24 hour period. Day 48 - Looking gorgeous and still stretching. Grew another two inches and is sitting at 27.5” right now. She’s really starting to fill in now and looking forward to the next few weeks. Day 49 - The way thing thing is growing, she’s gonna be a beast. Gave her straight pH’d water tonight and will give her a feeding tomorrow. Looks like she finally stopped stretching, sitting at 27.5” still so hopefully she’ll start putting on the weight.
Likes
134
Share
OMG OMG OMG finding hard to put on words all i am felling with this one, she was a delight to grow and without trying yet her medicine she wen strait to my top 3, i mean super strong Mama, strong to everything pests you name it, amazing structure her terpene profile is taking me back to the 90s with her almost like gasoline smell mixed with limes and pines OMG cant wait to try out this one much but much respect to DutchPassion on this creation of them she is so so so , like glue that you cant touch without getting it everywhere <3 <3 haded the last 3 weeks and harvest time-lapse i fell like this one could have gone more than the 71 days in flower that she did, but there is no time for that in this run but i will run her again thats for sure and a must for me. Guys trust me on this one , she is a must , a real must in any garden <3 <3 <3 Thank you so much Dutch Passion for this blessing of an opportunity and for everything you guys do for the community much respect and appreciation <3<3<3 Everyone best of luck for the contest this was an amazing and fun one <3 <3 <3 As always thank you all for stoping by for the love and for it all, i truly appreciate and enjoy the ride so much more with you guys around <3 <3 <3 you guys make me fell super blessed <3 <3 <3 #aptus #aptusplanttech #aptusgang #aptusfamily #aptustrueplantscience #inbalancewithnature #trueplantscience #growerslove #dogdoctoofficial With true love comes happiness <3 <3 <3 Always believe in your self and always do things expecting nothing in return and with an open heart , be a giver and the universe will give back to you in ways you could not even imagine so <3 <3 <3 More info and updates @ https://growdiaries.com/grower/dogdoctor https://instagram.com/dogdoctorofficial https://youtube.com/channel/UCR7ta4DKLFMg2xxTMr2cpIg <3 <3 <3 Growers love to you all <3 <3 <3 I will post more photos from her dry trimmed bud report smoke etc asap <3 <3 <3 and need to clean space on my iPad so that i can upload the rest of them photos and videos , my apologies <3 <3 Done hehehe waiting on this beauties to dry now <3 <3 <3
Likes
55
Share
@BodyByVio
Follow
Had to put another layer of netting for support.
Likes
24
Share
@Kirsten
Follow
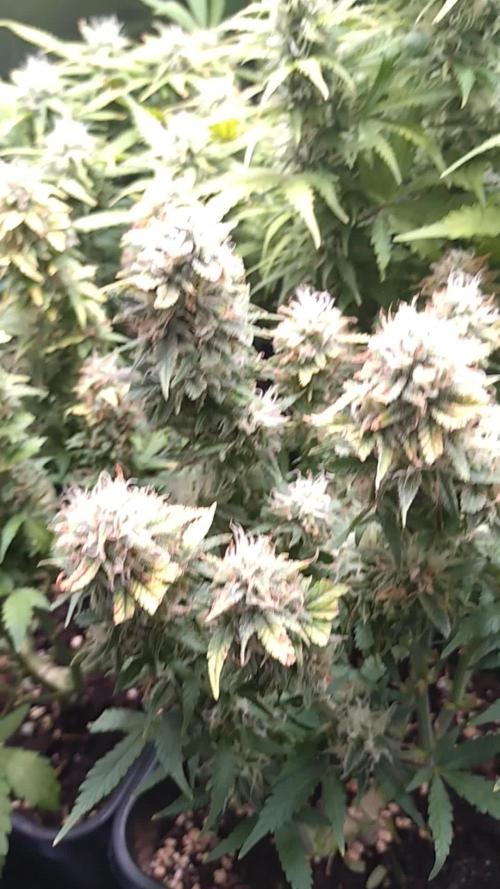
Watermelon 🍉 is maturing very well. Nice and dense, frosty buds! She's finished growing now, so concentrating next on just flower nutes. The plant is very small due to my terrible attempt at LST! 😅 27.2.25: Watermelon 🍉 and Purple Lemonade 💜🍋 are both far below the scrog net, they've definitely stopped stretching now. My LST on these was much worse than even just using the net. 😅 That was certainly a valuable takeaway. I'm sure Purple Lemonade 💜🍋 will be good. Watermelon 🍉 was so stunted. It's not a tall strain, usually either, but nevertheless, the buds there are looking very frosty and are very, very sticky! 😅 Should be a good smoke, eventually, 🤗 just won't be much to bag unfortunately.
Likes
Comments
Share
Приветствую товарищи,бонсай уже принял красивую форму,дальше делаю тренировку лст и переодичсеки делаю дефоляцию,сразу заметно,что растения голодают,чуть проморгал питание,не привычно кормить три растения одновременно в одном горшке,как говорится лучше не покормить,чем перекормить,была произведена очередная дефоляция
Processing
Likes
4
Share
@TehSnow
Follow
Finally the cold front has arrived and temps dropped considerably into comfortable levels 22-26 which are perfect for flowering. You can have high temps if you have enough fans blowing at the plant buzt the increčased perspiration can kill your plants through a nutrient burn as they have to take up more water from the res.
Likes
29
Share
Esa familia como pasaron la semana, yo entre buenos humos, y ahora traigo la quinta semana de floración de estas green poison, vaya colas que laterales y que porte que se marca esta variedad. Sweetseeds hizo un gran trabajo comercializando esta cepa, ya que es uno de sus mejores trabajos que hizo estos años atrás, me encanta 🕸️. . La humedad esta al 45% la temperatura está entre 21/25 grados , y como siempre el ph , ya que es de lo más importante,está en 5,8/6,0. . AgroBeta: 1 ml x L Flowering black line , vía radicular. 0,2 ml x L Beta shark, vía radicular. 0.5 gr x L mega PK , vía radicular. 0,8 ml x L Terminator, vía radicular. 0,5 gr x L Engordacogollos, vía radicular. 0,3 ml x L Tucán , vía radicular. 0,1 ml x L Betazyme, vía radicular. 0,3 ml x L Tricoma, vía radicular. 0,05 ml x L Gold Joker, vía radicular. 0,2 ml x L Silver, vía radicular. . Hasta aquí todo familia 🕸️ , un saludo y buenos humos fumetillas💨💨💨.
Likes
4
Share
@Ensign420
Follow
|»» LOG DISCLAIMER: Not intended as a grow guide. Grow log entries are usually posted 3 weeks later and are for my learning reference. ««| Introduction - Week 26 Summary - Ensign's log, stardate 17608.3, Wow what a week! Drying is always pretty simple and been checking daily. Buds are drying nicely and terps are smelling pretty dank!! Most of the week has been in the veg tent with tissue culture! Mixed another batch of establishment media and took proper explant cuttings. Also super-cropped the mothers to even out the canopy. Ahh yea! Getting hyped for trim day next week! Next week will also be the last week for this grow log, but am already planning out the next cycle. Anyways! Onwards to next week! [START OF WEEK 26] ========================================================== ---------- [ 4x4 MAIN TENT ] ---------- Heady OG BX1 #1 [Round4 ~Wk19] - WEEK 26 - Dry Wk1 ----------- [ 3x3 VEG TENT ] ------------ TKO - WEEK 09 - Full Veg Gorilla Goat #1 - WEEK 05 - Full Veg Heady OG BX1 - WEEK 09 - Full Veg Garlic Budder OG#1 - WEEK 05 - Full Veg 10/13/25 → 10/19/25 This Week's Estimated Goals ---------------------------------------------------------------------------------------------- DLI: ~0 mol/m²/d PPFD: ~0 μmol/m²/s VPD: ~1.5 kPa This Week's Meter Readings & Averages ---------------------------------------------------------------------------------------------- Light On/Off: 00:00 - 00:00 | Wattage: ~000.0W [LV00] Distance From Canopy: ~00” DLI: ~0.00 mol/m²/d PPFD: ~0 μmol/m²/s VPD: ~1.17 kPa Soil %: [47.4, 34.1, 35.0, 55.7, 43.7, 43.6, 44.0, 43.3] ========================================================== Day 01 - Monday - 10/13/25 - Total Days: 183 ----------------------------------- Daily Averages ~[+01:00] - Temps: 78.8°F [26.0°C] - Humidity: 64.4% - VPD: 1.19 kPa - Soil %: [49, 34, 35, 57, 44, 44, 44, 42] ----------------------------------- - [22:05]: Night check on the 4x4 tent. --- Ca-Caw!! Looking great! --- Heady OG BX1 #1 is drying along and no signs of mold. Also airflow and RH is stable and within the 60-70% range. --- Getting stoked! Trim day is 9 days away! - [22:09]: Checked the Ecowitt soil moisture sensor data: ------------------ [ 4x4 MAIN TENT ] --------------- ------ 48% - [CH01 FT » G30 - Heady OG BX1 #1] ------ 35% - [CH02 FB » G30 - Heady OG BX1 #1] ------ 35% - [CH03 BT » G20 - TKO] ------ 56% - [CH04 BB » G20 - TKO] ------------------ [ 3x3 VEG TENT ] ---------------- ------ 46% - [CH05 BL » GR7 - TKO] ------ 40% - [CH06 BR » GR7 - Gorilla Goat #1] ------ 40% - [CH07 FL » GR7 - Heady OG BX1 #1] ------ 40% - [CH08 FR » GR7 - Garlic Budder OG#1] --------- Veg: 38% - 45% | Flower: 45% - 55% --------- General: 30% [Dry] «| 45 - 60% [Moist] |» 70% [Wet] - [22:18]: Checked the 3x3 veg tent. --- Looking healthy in the veg garden! --- All of the vegging mothers are looking great and the canopy is starting to even out. --- Also clones look healthy and no need to water yet. --- The stems, err, I mean, explants, don’t show any signs of contamination. --- Staying positive, glad the growth media is sterile and the overall procedure was successful. --- Anyways! Plan to create more establishment media and cut proper explants soon! - [22:21]: Checked the humidifiers. --- Tanks are still full and no leaks found. Day 02 - Tuesday - 10/14/25 - Total Days: 184 ----------------------------------- Daily Averages ~[+01:00] - Temps: 76.9°F [24.9°C] - Humidity: 64.8% - VPD: 1.11 kPa - Soil %: [46, 34, 35, 56, 43, 43, 44, 43] ----------------------------------- - [21:44]: Night check on the 4x4 tent. --- Looking good in the dry tent! --- Heady OG is drying along and humidity levels look great! --- Nothing to do but maintain and wait to trim in 8 days! - [21:55]: Checked the Ecowitt soil moisture sensor data: ------------------ [ 4x4 MAIN TENT ] --------------- ------ 45% - [CH01 FT » G30 - Heady OG BX1 #1] ------ 34% - [CH02 FB » G30 - Heady OG BX1 #1] ------ 35% - [CH03 BT » G20 - TKO] ------ 56% - [CH04 BB » G20 - TKO] ------------------ [ 3x3 VEG TENT ] ---------------- ------ 41% - [CH05 BL » GR7 - TKO] ------ 40% - [CH06 BR » GR7 - Gorilla Goat #1] ------ 47% - [CH07 FL » GR7 - Heady OG BX1 #1] ------ 46% - [CH08 FR » GR7 - Garlic Budder OG#1] --------- Veg: 38% - 45% | Flower: 45% - 55% --------- General: 30% [Dry] «| 45 - 60% [Moist] |» 70% [Wet] - [21:59]: Checked the 3x3 veg tent. --- Looking healthy and growth is raging! --- All mothers are looking beautiful! --- Clones are getting taller and looking healthy! --- Gorilla Goat #2 needs watering. Let’s go Ensign! - [22:03]: Here is the starting initial watering range: ------ Gorilla Goat #2 » 255.4g → 300.3g and was last watered 4 days ago. --------- General Solo Range: [Dry] «| [Initial Cup Weight] + ~55-100g |» [Wet] --- Took the starting weight before watering, ------ Gorilla Goat #2 » 230.8g --- While on a scale, --- Gently misted her straw mulch with RO water. --- Tried to keep the top growth dry. --- Misted 5-10 sprays. Waited a few seconds, then misted again. --- Made sure to reference the watering weights. --- Repeated this process until the cup weighted at least 300g. --- There was no runoff. - [22:23]: Took the saturated weight after watering, ------ Gorilla Goat #2 » 345.7g --- Marked the watering date on the side of the cup. Also marked the saturated weight on the back. --- Placed her back into the tent. --- Decided to train and super-crop both clones. --- Bent the taller branches to lower the canopy. - [22:38]: Checked the humidifiers. --- Tanks are still full and no leaks found. --- Onwards Ensign! Day 03 - Wednesday - 10/15/25 - Total Days: 185 ----------------------------------- Daily Averages ~[+01:00] - Temps: 75.6°F [24.2°C] - Humidity: 63.8% - VPD: 1.09 kPa - Soil %: [48, 34, 35, 56, 44, 43, 44, 42] ----------------------------------- - [+01:33]: Quick night check on the 4x4 tent. --- Looking great in the dry tent! --- Also starting to smell dank! --- 7 more days until the big trim! - [+01:37]: Checked the 3x3 veg tent. --- Veg garden is healthy and growth is green! --- Both the Heady OG BX1 #1 and TKO mothers will need another topping soon. --- Clones in the propagation tray also look great and no need to water. --- The explant media is still looking sterile with no signs of contamination. --- Easy night in the garden. Nice! - [+01:40]: Checked the humidifiers. --- Tanks are still full and no leaks found. --- Okay! Tomorrow plan to dive back into tissue culture and prep more growth media. --- Onwards Ensign! Day 04 - Thursday - 10/16/25 - Total Days: 186 ----------------------------------- Daily Averages ~[+01:00] - Temps: 74.6°F [23.7°C] - Humidity: 62.2% - VPD: 1.11 kPa - Soil %: [46, 34, 35, 56, 43, 44, 44, 45] ----------------------------------- - [11:41]: Alright! Back to tissue culture and time to start another batch of establishment media! --- Took the plant growth regulators out of cold-storage (my fridge). ------ [ » SMOKES A BOWL « ] --- While the products warmed up, gathered the necessary supplies and setup my workstations. --- Currently, focusing on: ------ PHASE 01 » ESTABLISHMENT --------- » DAY 01 » MEDIA - PART 01 - Mixing the growth media --------- » DAY 01 » MEDIA - PART 02 - Sterilization of media and tools [via autoclaving] --- Going to use the same establishment formula, but doubling the yield. --- Also using RO water instead of distilled water. --- Here's the establishment media formula: --- [» VER.0001 |» INITIAL TROPICAL PLANTS FORMULA |» 0.5L (500mL) RO WATER «] ------ MS [Muashige & Skoog] --------- » 2.22g ------ Sucrose [Cane Sugar] --------- » 15g ------ BAP [6-Benzlaminopurine | Cytokinin] --------- » 0.5mg » 0.5mL » 500μL ------ IBA [Indole-3-Butyric Acid | Auxin] --------- » 0.05mg » 0.05mL » 50μL ------ AGAR [Jelling Agent] --------- » 3.5g ------ PH [Potential Hydrogen] --------- » 5.7 --- [» 1mg/mL CONCENTRATION ratio | 1mg = 1mL | 1mL = 1000μL «] - [12:59]: Time to prep the growth media! --- Made sure to turn OFF the lung-room's oscillating fan. --- Filled a measuring cup with 400mL of RO water. --- Dropped a clean magnetic mixing bar into the measuring cup. - [13:05]: Placed the measuring cup on the magnetic stirrer. --- Turned the unit ON and have the unit on LOW. - [13:11]: Using a precision scale (sensitive to 0.01g) along with a micro-pipette (1000μL capacity along with tips) and disposable (100mL) weigh boats, ------ Added 2.22g of MS [Muashige & Skoog] ------ Added 15g of Sucrose [Cane Sugar] ------ Added 500μL of BAP [6-Benzlaminopurine | Cytokinin] ------ Added 50μL of IBA [Indole-3-Butyric Acid | Auxin] ------ Added 3.5g of AGAR [Jelling Agent] ------ Then filled the measuring cup to the 500mL line before covering the top with plastic wrap. --- Alright! - [13:46]: Let the media mix on the magnetic stirrer for a bit. --- Have the unit set to LOW with a steady vortex. ------ [ » ~20 MINUTES LATER « ] - [14:09]: Okay! Time to pH the establishment media! --- Gently removed the bottom cap of the AC Infinity PH Meter PRO [AC-PHM7]. Placed the cap in the storage case for later. Covered the top with plastic wrap (KCL solution still inside the cap). --- Swirled the probe in a cup of RO water to rinse off the storage solution. --- Shook the excess water out and wiped the unit with a clean paper towel making sure all mineral buildup was removed (kept away from the very tip of the probe). --- Temporarily placed the meter back into the cup of RO water. --- Removed the plastic wrap of the establishment media. - [14:13]: Using the AC Infinity PH Meter PRO [AC-PHM7], --- Took the establishment media's initial pH reading. --- The pH was at 5.14 --- Using the micro pipette, ------ Added pH Up solution. --- Made sure to let the media solution mix for a bit before checking for pH readings. - [14:21]: Adjusted the media's pH until it stabilized to 5.58 --- For this batch, tried to go for a range of 5.4 to 5.8 pH. --- Also glad that I did not need to add PH down. - [14:43]: Poured the pH'd establishment media into separate polypropylene containers. --- Made sure to re-mix the media solution between container fillings. --- Ended up splitting the media solution into 12 containers. ------ 8x » 125mL Polypropylene Bottles [with screw cap lids] ------ 4x » 236mL (0.5pt) Glass Mason Jars [with polypropylene jamming lids] --- Have the lids of all vessels loosely on and set each aside for later autoclaving. --- Also filled 12 empty polypropylene bottles with RO water and placed the lids on loosely (4 bottles are re-used). - [14:58]: Prepped the tools for sterilization. --- Took a new 5.25in x 10in sterilization pouch and added the following tools: ------ 3x stainless steel forceps ------ 3x stainless steel scissors --- Before placing into the pouch, wiped each tool with a paper towel sprayed with 70% isopropyl alcohol. --- Sealed the bag and marked the date. --- Time to autoclave everything in the pressure cooker! --- Filled a Presto 23qt-Pressure Cooker with 12 cups of RO water. - [15:06]: Added a few aluminum foil balls to the bottom of the pressure cooker. --- Placed the first rack on top of the foil. --- Made sure the rack was level and stable resting above the water. --- Gently placed the containers of media into the pressure cooker and onto the first rack. Lids are still loose. --- Made sure to give space for each container and kept them away from the sides of the pressure cooker. --- Placed a second pressure cooker rack on top of the containers of media. --- Placed the containers of RO water onto the second rack. Lids are still loose. --- Placed the third rack on top of the containers of water. - [15:16]: Lastly, placed the sterilization bag of tools on top of the third rack. --- Took the pressure cooker lid and made sure the release vent was clear of debris before placing it on. --- Sealed and secured the lid. --- Pressure vessel has been sealed! --- Alright! Time to sterilize! --- While keeping the vessel level and straight up, moved the sealed pressure cooker to the kitchen for heating. - [15:23]: Placed the pressure cooker onto a butane-gas stove. --- Turned the stove ON and set it to HIGH. ------ [ » ~20 MINUTES LATER « ] --- Once steam was venting out of the release vent, --- Placed the metal rocker onto the vent. --- Shortly afterwards, the pressure top-lock sprung up to indicate the vessel was under pressure. --- Then the pressure gauge started to rise. ------ [ » ~10 MINUTES LATER « ] --- At 15psi, the metal rocker started to rock! - [15:56]: Turned down the stove down to LOW. --- Set a timer for 15 minutes and began monitoring the pressure gauge. --- Maintained the 15psi by making minor adjustments to the stove. ------ [ » ~15 MINUTES LATER « ] - [16:12]: Turned the stove completely OFF and waited until the pressure cooker's top-lock dropped down which indicated that pressure levels were safe to open. ------ [ » ~40 MINUTES LATER « ] --- Once the pressure cooker was at safe levels (0psi) and the top-lock was down, - [16:48]: Moved the pressure cooker into the lung room. --- The pressure cooker was still quite hot so was careful to keep the vessel straight up and level during transport. --- Used towels for insulation. --- Rested the hot pressure cooker onto a stack of 5-gallon buckets covered with layers of towels and folded paper bags. --- Gently opened the pressure cooker and set the lid aside. - [16:57]: While wearing nylon gloves, sprayed my hands with 70% isopropyl alcohol. --- Gently removed the bag of sterile tools placed it onto a Pyrex dish. --- Removed the top rack and set it aside. --- Then one container at a time, --- Gently tightened and secured the lids of each bottle of sterile water before placing onto the Pyrex dish. --- Removed the middle rack and set it aside. --- Then one container at a time, --- Gently tightened and secured the lids of each bottle and jar of sterile media before placing onto the Pyrex dish. --- Throughout the entire process, kept the gloves on and sprayed my hands regularly with 70% isopropyl alcohol. --- Decided to store all the bottles in the Pyrex dish. - [17:16]: Have the dish resting on a shelf in the lung room. The jars of media are set right next to the Pyrex dish on a towel. --- To prevent dust, covered everything with towels. --- Done for now and will check on the growth media tomorrow. --- If all goes well, should be taking new explant cuttings in a couple days! - [17:39]: Night check on the 3x3 veg tent. --- Looking beautiful and healthy in the veg garden! --- All moms are getting bushy and getting pretty close to the grow light. --- Since I plan to take explant cuttings soon, not going to top or train quite yet. --- Clones also looking healthy and seem unaffected by the super-cropping. Nice! - [17:57]: Checked the Ecowitt soil moisture sensor data: ------------------ [ 4x4 MAIN TENT ] --------------- ------ 45% - [CH01 FT » G30 - Heady OG BX1 #1] ------ 34% - [CH02 FB » G30 - Heady OG BX1 #1] ------ 35% - [CH03 BT » G20 - TKO] ------ 55% - [CH04 BB » G20 - TKO] ------------------ [ 3x3 VEG TENT ] ---------------- ------ 43% - [CH05 BL » GR7 - TKO] ------ 45% - [CH06 BR » GR7 - Gorilla Goat #1] ------ 42% - [CH07 FL » GR7 - Heady OG BX1 #1] ------ 44% - [CH08 FR » GR7 - Garlic Budder OG#1] --------- Veg: 38% - 45% | Flower: 45% - 55% --------- General: 30% [Dry] «| 45 - 60% [Moist] |» 70% [Wet] - [17:59]: Checked the 4x4 main tent. --- Ca-Caw!! I got Headies! --- Wow! Heady OG BX1 #1 is drying along beautifully and she is smelling dank! --- Also no signs of mold and RH levels look stable! --- 6 more days until the big trim! - [18:11]: Checked the humidifiers. --- Tanks are still full and no leaks found. --- Wow what a day! --- Still gots more to do! --- Let’s go! Let’s grow! --- Onwards Ensign! Day 05 - Friday - 10/17/25 - Total Days: 187 ----------------------------------- Daily Averages ~[+01:00] - Temps: 76.0°F [24.4°C] - Humidity: 62.0% - VPD: 1.16 kPa - Soil %: [48, 34, 35, 55, 44, 44, 44, 42] ----------------------------------- - [22:57]: Night check on the 4x4 tent. --- Ca-Caw! Headies is smelling dank! --- RH levels are getting a bit dry, but are okay. --- Wow buds are frosty with trichomes! --- With 5 days until trim day, getting stoked! - [23:04]: Checked the Ecowitt soil moisture sensor data: ------------------ [ 4x4 MAIN TENT ] --------------- ------ 47% - [CH01 FT » G30 - Heady OG BX1 #1] ------ 34% - [CH02 FB » G30 - Heady OG BX1 #1] ------ 35% - [CH03 BT » G20 - TKO] ------ 55% - [CH04 BB » G20 - TKO] ------------------ [ 3x3 VEG TENT ] ---------------- ------ 46% - [CH05 BL » GR7 - TKO] ------ 40% - [CH06 BR » GR7 - Gorilla Goat #1] ------ 45% - [CH07 FL » GR7 - Heady OG BX1 #1] ------ 50% - [CH08 FR » GR7 - Garlic Budder OG#1] --------- Veg: 38% - 45% | Flower: 45% - 55% --------- General: 30% [Dry] «| 45 - 60% [Moist] |» 70% [Wet] - [23:11]: Checked the 3x3 veg tent. --- Looking healthy in the veg garden! --- Mothers are getting bushy and tall! --- Super-cropped and trained the taller branches down to lower the canopy. --- Plan to take tissue culture cuttings tomorrow so glad there are plenty of tops to choose. Still deciding on which mother to preserve next. --- Clones in the propagation tray look healthy! --- The original Garlic Budder #2 clone needs watering. - [23:26]: Here is the starting initial watering range: ------ Garlic Budder OG#2 » 256.4g → 300.2g --------- General Solo Range: [Dry] «| [Initial Cup Weight] + ~55-100g |» [Wet] --- Took the starting weight before watering, ------ Garlic Budder OG#2 » 258.9g --- While on a scale, --- Gently misted her straw mulch with RO water. --- Tried to keep the top growth dry. --- Misted 5-10 sprays. Waited a few seconds, then misted again. --- Made sure to reference the watering weights. --- Repeated this process until the cup weighted at least 300g. --- There was no runoff. - [23:40]: Took the saturated weight after watering, ------ Garlic Budder OG#2 » [000.0]g --- Marked the watering date on the side of the cup. Also marked the saturated weight on the back. --- Placed her back into the tent. - [23:45]: Checked the humidifiers. --- Tanks are still full and no leaks found. Day 06 - Saturday - 10/18/25 - Total Days: 188 ----------------------------------- Daily Averages ~[+01:00] - Temps: 76.8°F [24.9°C] - Humidity: 60.3% - VPD: 1.25 kPa - Soil %: [47, 34, 35, 55, 44, 44, 44, 47] ----------------------------------- - [15:19]: Decided to decrease the VPD level a bit. --- Within the AC Infinity App, --- Changed the schedule name from 'Flower [12/12]' to 'Drying [0/24].' Oops. --- For the Main Tent [4x4] controller, --- Adjusted the 'Drying [0/24]' Schedule for the exhaust fan. ------ Decreased the VPD LOW trigger value from 1.5kPa to 1.4kPa --- Adjusted the 'Drying [0/24]' Schedule for the humidifier. ------ Decreased the VPD target value from 1.5kPa to 1.4kPa --- This should increase the relative humidity a bit and will maintain a 60-65% range - [16:59]: Evening check on the 3x3 veg tent. --- Wow the veg garden is raging with healthy growth! --- Even with the lower veg temps, growth has been perky and bushy! --- The TKO mother has been looking a bit on the purple-side, but I plan to increase the temps back after trim day. - [17:23]: Okay! Time to continue the tissue culture journey! --- Checked on the sterilized media, water, and tools. --- Ooo yea! The growth media in the glass jars have solidified nicely! --- The media in the bottles also look great! Found only one that did not gel properly. --- Hmm. The sterile water bottles are not looking sterile. Unlike the first batch (using distilled water), each RO bottle had tiny white particles floating in the water. --- I think this was due to the water source. The RO water used was from the plant reservoir. For the next sterilization, will try using water straight from the tap. Will discard the entire batch and try again later. - [17:34]: Anyways! Time to cut and sterilize another batch of explant cuttings. --- Using the similar protocols as last time, but with a few changes. --- Instead of distilled, using reverse-osmosis (RO) water. --- Also simplifying the workflow and will not be using the sterile water. --- Only taking cuttings from one cultivar. --- Today, attempting to preserve Heady OG BX1 #1 --- Unlike the last attempt, going to be cutting apical nodes and will leave all leaf growth on. --- Last attempt was more for monsteras and not cannabis. - [17:35]: Made sure the lung room's oscillating fan was OFF during the entire process. --- Put on a fresh pair of nitrile gloves. --- Okay! Let's grow Ensign! - [17:47]: Filled a glass beaker with 180mL of RO water. --- Using a micro-pipette, ------ Added 20mL of Clorox bleach --- Mixed the solution. - [17:52]: Poured the bleach solution into a glass mason jar. ------ Added 1 drop of Dawn dish soap. --- Dropped a magnetic mixing rod into the jar before setting it onto the magnetic stirrer. --- Turned the unit ON and set it to a low setting. --- Placed a polypropylene lid loosely on. - [18:02]: Rinsed and filled the glass beaker with 70% isopropyl alcohol. --- Filled another glass beaker with RO water before adding a drop of Dawn dish soap. Mixed the solution. --- Okay! Time to take the cuttings! --- Using a clean pair of trimmers, - [18:09]: Gently cut two clone cuttings from the Heady OG BX1 #1 mother. --- Stripped each cutting down to 2-inch apical nodes making sure to leave about 0.5 inch of stem growth for planting. ------ Prepared a total of 2 nodal cuttings. --- Dropped the nodal cuttings into the cup of soapy water. --- Swirled the cuttings in the soapy water for a bit. --- Opened the jar containing the 10% bleach solution. --- Using clean tweezers, --- Took each cutting out of the RO water and carefully submerged it into the beaker of 70% isopropyl alcohol for about 30 seconds. --- Then transferred the cutting from the isopropyl alcohol straight into the jar of bleach solution. --- Once both cuttings were in the jar, sealed the top with the polypropylene lid. - [18:23]: Flipped and set the entire bleach jar upside down onto the magnetic stirrer. --- Started using the magnetic stirrer. --- But the cuttings were getting hit by the bar so ended up turning the unit OFF. --- Instead, made sure to swirled the bottle every few minutes to agitate the cuttings. --- For a proper sterilization, the cuttings should be agitated in the hypochlorite (bleach) solution for at least 20 minutes. --- While waiting for the explants to sterilize, prepped the still air box. - [18:39]: Unfolded and placed a Safloga still-air box onto my desk. --- Thoroughly misted the inside of the air box with 70% isopropyl alcohol making sure to coat the entire chamber. --- Then isopropyl misted and placed the following items inside of the still air box, ------ x1 » Jar of Establishment Media ------ x1 » Bottle of Establishment Media ------ x1 » Glass-Bead Sterilizer ------ x1 » Roll of Plastic Wrap [pre-cut] ------ x1 » Sterilization Bag Containing: --------- x3 » Stainless Steel Forceps --------- x3 » Stainless Steel Scissors --- Made sure to fully coat the outside of the tool bag and each of the containers with 70% alcohol. --- The bag had a torn corner (Oops), so made sure to spray the inside with a few mists of isopropyl alcohol. --- For the glass-bead sterilizer, ------ Wiped the entire unit with isopropyl alcohol. ------ Before filling the unit with the included beads, misted the heating chamber with a spray of isopropyl alcohol. ------ Misted the glass beads again with a spray of isopropyl alcohol. --- Set the cleaned glass-bead sterilizer into the still air box. - [19:02]: Still air box fully prepped for explants! --- Okay! Explant nodal sterilization complete! --- While still wearing gloves, --- Misted the outside of the explant jar with 70% isopropyl alcohol before placing it into the still-air box. --- Turned the glass-bead sterilizer ON. --- Made sure to re-seal the chamber. - [19:05]: Okay! Finally time to start the tissue culture transplant! --- Let's go Ensign! --- Sprayed my gloved hands with 70% isopropyl alcohol (also put on a pair of cloth arm sleeves), --- Placed my hands through the arm holes and into the still air box to begin the process. --- Started by laying out my initial workspace: ------ » Far Left Quadrant » Jar of Sterile Establishment Media ------ » Far Center » Bottle of Sterile Establishment Media ------ » Far Right Quadrant » Glass-Bead Sterilizer ------ » Mid Center » Bleach Jar with Explant Cuttings [Main Workspace] ------ » Near Left Quadrant » Empty [Trash Area] ------ » Near Right Quadrant » Bag of Sterile Tools & Roll of Plastic Wrap --- Opened the bag of tools and placed the forceps and scissors into the pre-heated glass-bead sterilizer. --- Set the bag in the trash area (near left quadrant). --- Loosened the lids of both containers of sterile media but did not remove the lids. The lids were resting on top and could easily be lifted. --- Also took lid off of the bleach jar and gently set it on the table. --- Took the jar of sterile media and set it in the center of my workspace (to the right of the bleach jar). --- Using my left hand, took a set of scissors from the glass-bead sterilizer and gently cut the bottom of the first cutting. --- Once the bottom cut was made, placed the scissors back into the glass-bead sterilizer. --- Using my left hand, lifted the lid off of the jar of sterile media and inserted the trimmed end of the cutting straight into the growth media (using my right hand). --- Covered the jar with the lid and placed the forceps back into the glass-bead sterilizer. --- Tighten the lid of the jar and set it aside. ------ [ » REPEATED THE ABOVE PROCESS FOR THE BOTTLE OF GROWTH MEDIA « ] --- Once the last cutting was transferred from the bleach jar into the sterile media, --- Turned the glass-bead sterilizer OFF. --- Cleaned up my workplace and placed the scrap stem tips and bleach jar out of the way (near left quadrant). - [19:28]: Wrapped the lid of each explant container with plastic wrap before setting it in the center of the workspace. --- Explant transplant completed! - [19:59]: Using a label printer (Brother DT410), made a set of labels for each container: ------ Heady OG BX1 #1 | 04.24.25 | Photo | Reg ------ Formula: v0001 | ExBatch: 0002 | Lot: 01 | Pod: 01 ------ Establishment Media | Sealed On: 10/18/25 --- Opened the still air box. --- Then one container at a time, took an explant out and wrapped the lid with a label. --- Set the labeled containers onto the propagation tray (in the 3x3 veg tent). - [20:07]: Done! ------ The explants are around 37 μmol/m²/s which gives a DLI of 2.40 mol/m²/d under an 18/6 light cycle. --- Will check daily for contamination. --- Ca-Caw!! Ahh yea! --- Heady OG BX1 is now officially my first true attempt at cannabis tissue culture! --- Using this new workflow, I may try reusing the TKO media. Do plan to take new cuttings soon. May even try using the liquid media. --- Shout out to microclone and Bill Graham! His 'Tissueponics' video contains tips and tricks of the trade that have straight up changed the way I think of DIY cannabis tissue culture. --- Plan to further refine my process and will continue to refine the workflow with each attempt. - [20:15]: Checked the Ecowitt soil moisture sensor data: ------------------ [ 4x4 MAIN TENT ] --------------- ------ 54% - [CH01 FT » G30 - Heady OG BX1 #1] ------ 34% - [CH02 FB » G30 - Heady OG BX1 #1] ------ 35% - [CH03 BT » G20 - TKO] ------ 55% - [CH04 BB » G20 - TKO] ------------------ [ 3x3 VEG TENT ] ---------------- ------ 43% - [CH05 BL » GR7 - TKO] ------ 48% - [CH06 BR » GR7 - Gorilla Goat #1] ------ 42% - [CH07 FL » GR7 - Heady OG BX1 #1] ------ 45% - [CH08 FR » GR7 - Garlic Budder OG#1] --------- Veg: 38% - 45% | Flower: 45% - 55% --------- General: 30% [Dry] «| 45 - 60% [Moist] |» 70% [Wet] - [20:56]: Checked the 4x4 tent. --- Ca-Caw! Looking great my ladies! --- Humidity levels are still a bit on the dry side, but still okay. - [21:08]: Checked the humidifiers. --- Tanks are still full and no leaks found. --- Wow what a day! --- Oh yea, 4-more days until trim day!! Ca-Caw! Let’s go! Day 07 - Sunday - 10/19/25 - Total Days: 189 ----------------------------------- Daily Averages ~[+01:00] - Temps: 76.7°F [24.8°C] - Humidity: 59.4% - VPD: 1.27 kPa - Soil %: [48, 35, 35, 55, 44, 43, 44, 42] ----------------------------------- - [07:08]: Quick morning checked on the 3x3 veg tent. --- The veg garden is healthy and perky! --- All moms and clones are healthy and raging with growth! --- Both Heady OG BX1 #1 explants also look alive and green! - [19:26]: Night check on the 4x4 tent. --- Ca-Caw! We got MENDO DOPE in the trunk! --- Wow terps are getting loud and buds are drying along nicely! --- Looking frosty and coated in trichomes! --- Three more days until trim day!! - [19:33]: Checked the Ecowitt soil moisture sensor data: ------------------ [ 4x4 MAIN TENT ] --------------- ------ 46% - [CH01 FT » G30 - Heady OG BX1 #1] ------ 35% - [CH02 FB » G30 - Heady OG BX1 #1] ------ 35% - [CH03 BT » G20 - TKO] ------ 54% - [CH04 BB » G20 - TKO] ------------------ [ 3x3 VEG TENT ] ---------------- ------ 40% - [CH05 BL » GR7 - TKO] ------ 43% - [CH06 BR » GR7 - Gorilla Goat #1] ------ 47% - [CH07 FL » GR7 - Heady OG BX1 #1] ------ 41% - [CH08 FR » GR7 - Garlic Budder OG#1] --------- Veg: 38% - 45% | Flower: 45% - 55% --------- General: 30% [Dry] «| 45 - 60% [Moist] |» 70% [Wet] - [19:35]: Checked the 3x3 veg tent. --- Vegging along beautifully in the garden! --- Mothers are getting taller and probably could train, but will wait until tomorrow. --- Clones and explants also look healthy and green! --- Gorilla Goat #2 needs watering! - [19:44]: Here is the starting initial watering range: ------ Gorilla Goat #2 » 255.4g → 300.3g and was last watered 5 days ago. --------- General Solo Range: [Dry] «| [Initial Cup Weight] + ~55-100g |» [Wet] --- Took the starting weight before watering, ------ Gorilla Goat #2 » 244.9g --- While on a scale, --- Gently misted her straw mulch with RO water. --- Tried to keep the top growth dry. --- Misted 5-10 sprays. Waited a few seconds, then misted again. --- Made sure to reference the watering weights. --- Repeated this process until the cup weighted at least 300g. --- There was no runoff. - [20:04]: Took the saturated weight after watering, ------ Gorilla Goat #2 » 345.6g --- Marked the watering date on the side of the cup. Also marked the saturated weight on the back. --- Placed her back into the tent. - [21:41]: With a few days before the big trim, decided to sample a few buds! --- Cut and trimmed branch for sampling and wow she’s got terps! --- Buds are dense and have a gassy diesel funk! Ca-Caw!! Wow! --- Without even curing, pretty sure she’s the one! --- Plan to grow out another cycle (in clone of the same pheno), but I think I found my female for my first breeding project! - [22:01]: Checked the humidifiers. --- Tanks are still full and no leaks found. --- Ahh yea! Three more days until the big trim! --- Also next week will be the last for this log. --- But already stoked for the next! --- Planning on popping more seeds and continuing the pheno hunt for another female! --- Since I lost TKO this harvest cycle, plan to grow a clone cutting of the same pheno (#2). --- As for seeds, popping more regulars and going to attempt to grow some of Mr. Grow-It’s Chillout OG! --- Got a pack of F3s and am stoked to give them a try! --- Also going to sprout some beans of Dead Ops OG from Zaza Genetics! --- Chillout OG, Dead Ops OG, and another round of TKO! Let’s go! Let’s grow! --- Hunters of the dank! Ca-Caw! --- Anyways! --- Onwards to next week! [END OF WEEK 26]
Likes
4
Share
@BGT420
Follow
Flushed with PH'd water (4.5L) to bring EC run off from 2.2 down to 1.9. Time for another retuck! This should be the last veg mix before transfering Cindy to the flower tent 😎 UPDATE: Timelapse added for this week.
Likes
6
Share
📆 Semana 12 Cierre completo del ciclo para Isla Mirage, con cogollos en su punto máximo de maduración, muy compactos, pesados y completamente cubiertos de resina. La estructura no cambia, todo enfocado en el acabado final. Los tricomas se presentan mayoritariamente lechosos con presencia clara de ámbar, situándose en una ventana de corte óptima. Textura muy pegajosa y brillo intenso en toda la flor. A nivel de perfil, destacan los tonos cítricos dulces combinados con ese fondo skunk/queso característico, creando un aroma denso, penetrante y muy definido en esta fase final. La planta ha consumido prácticamente todas sus reservas, mostrando un fade avanzado en hojas grandes y deteniendo su actividad. Cultivo finalizado, estable y listo para cosecha. Seguimos creciendo fuerte 💪!