
Likes
Comments
Share


@PTrain
Follow
Far as I can tell I have done what was needed to just be at the point were we/I wait for those buds to stack. Plants keeping with twice a week @ .80 gallon at 6.0/6.5 range, one of the watering is with a Dr.Earth Flower Girl w/blackstrap tea. I have defoliated quite a bit in the last couple days, so Im watching how much they drink and how fast the drink it this week. Lots of frosty leaves all about, this is the second forum stomper I have grown, this one is growing much nicer. I can say the same for the Double Grape, that first one I grew just wanted to be stunted for no reason right at germ. Every time I see the Strawberry Mango Crumble I find hard not to to squeal like a giddy school girl. I have high hopes for this beauty.

Likes
11
Share


@CanabisLoverHobbyGrower
Follow
Today is day 57 I flipped them to flower on day 55, responded so well to all the things they've had done, topping, tie downs, defoliations, they look really good especially the bigger of the 2,.. roll on next week

Likes
3
Share


@Xabii
Follow
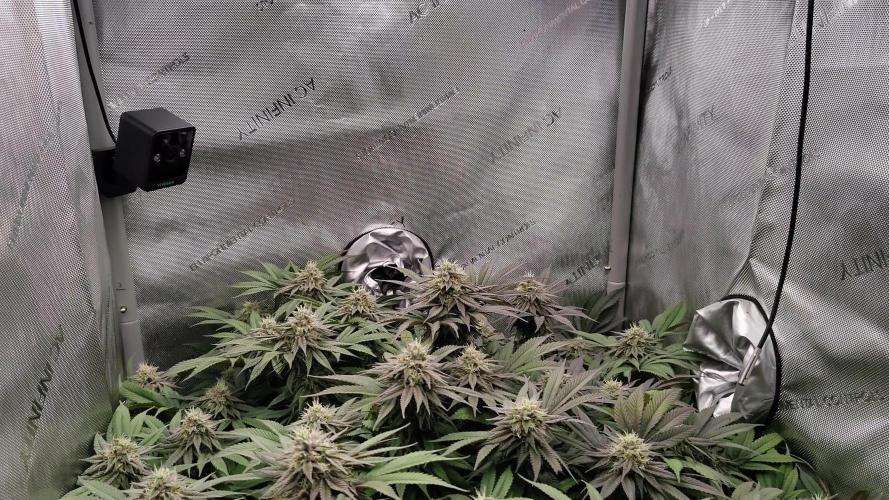
Nothing really to say, just waiting.
Values are average of the day.
DATE - EC(µS/cm)
20250412 1986
20250413 1935
20250414 1799
20250415 1819
20250416 1826
20250417 1865
20250418 1875
DATE - PH
20250412 5.99
20250413 6.02
20250414 6.19
20250415 6.19
20250416 6.18
20250417 6.18
20250418 6.17
DATE - ORP (mV)
20250412 92
20250413 89
20250414 84
20250415 82
20250416 81
20250417 81
20250418 79
DATE - °C - RH% (Tent Temp/RH)
20250412 24.9 54
20250413 24.3 54
20250414 23.5 51
20250415 24.1 51
20250416 23.8 52
20250417 23.6 51
20250418 23.4 51
DATE - °C (Reservoir)
20250412 22.1
20250413 21.6
20250414 20.7
20250415 21.1
20250416 21.2
20250417 21.0
20250418 20.8
DATE - CF
20250412 19.87
20250413 19.36
20250414 17.99
20250415 18.19
20250416 18.26
20250417 18.65
20250418 18.75

Likes
9
Share


@Jozef_Balcerek
Follow
Warunki raczej stabilne temperatura w dzień ca. 24-26C w nocy 17-19C wilgotność ok.50% Lampa 75% ,60cm od szczytów. Podlewane w cyklu woda-woda-odzywki... Zastanawiam się czy nie dołożyć lampy UV (mantis od grow the jungle) na 1 godzinę dziennie. Pozdrawiam oglądających.

Likes
1
Share


@Ogchemst
Follow
First day in Flower! It's been... very interesting 2 weeks.. now that I survived tha, im having some lockout due to being unable to take care of my plants for the past 5 days and someone having no idea had to do the job, I'm not afraid of showing these mistakes I'm always looking forward to the outcome so I'm still having some hopes for this og kush, not everything here went as planned and that's why I want to focus on finishing up the grow and starting new ones, better ones as soon as possible, I will definitely never grow autos again as I'm just not a fan of them having to be on 18/6 schedule and I like having co trolley over my plants as sometimes things can go wrong.
Og kush had a lockout after flush it grew beautiful but still ate up some of the upper leaves.
Runtz.. yeah I like him he is a beautiful little bonsai he didn't get lockout too much but also did I'm looking forward to seeting the stretch on him if it so happens.
Cherry gusher, a tiny pheno I got this time I'm looking forward to growing 4 next time and hunt down a pheno.
They say outdoors you have to play with God and indoor you try to play God.. we are not perfect and that's why I'm looking forward to the finish line.
Will i scrog? I have the net setup but I'm not sure if I will get enough stretch.
Day 3 I noticed some light white spots on bottom leaves of the plant after a flush I did recently, I diagnose this as magnese or magnesium deficiency, I'm going to up the cal mag to 8 ml and a+b to 10ml per 5 L of water along with additives extra 0.5 ml just as a touch up. Also I noticed we are at 47cm at the tallest branch after topping and lst and this thing is an absolute bush.. I could probably hide behind it if I was a kid playing hide and seek!.

Likes
2
Share


@DurbanPoison420
Follow
My patience has paid off, it is finally time for harvest! The aroma is absolutely blowing me away, stay tuned for harvest and trimming pictures!

Likes
31
Share


@420DeepGrow
Follow
La aventura ha acabado antes de lo esperado, entre las condiciones climáticas y el ataque de un jabalí 🐗 han acabado con este proyecto, la próxima vez será 😃

Processing
Likes
3
Share


@Grownewgenetics
Follow
We have with the Bonsai creamcaramelauto (a small sisters but the oldest of all sweetseeds creamcaramelauto we are running now. ) A litle accident,we lost the top of it , but still looking greatly Bud's ate becoming frosty and the other tow sister are also incredible big and smelly.

Likes
10
Share


@GaiaG
Follow
This week seemed to go by very slow. The plants are growing at a slow rate. It’s my first grow abs I was unsure of when to turn the lights on. I had some plants still as seeds and some has germinated. I turned the lights on a day or 2 late I believe so some of my plants began stretching.

Likes
Comments
Share

@Walachiangrowindiary
Follow
Week 6. Watering volume Is now 3 liters per day. Nice and slowly at soil surface for evenly wetting peat Moss whats in mix that have after time tendencies to became water resistant and water just fall down. Then water to the base of pot to let Plant and soil suck that watter in as much as need. Whole pot must be properly wet to have healthy living soil and microbial life.


Processing
Likes
18
Share


@Barcelona_Farmers710
Follow
Esta la pasaremos junto las 2 Runtz x Strawnana y la tiger bomb al armário grande, cuando acabemos el seguimientos de Royal Queen Seeds! Entrenaremos el Scrog por primera vez.🤙🏻

Likes
11
Share

@birdmountain
Follow
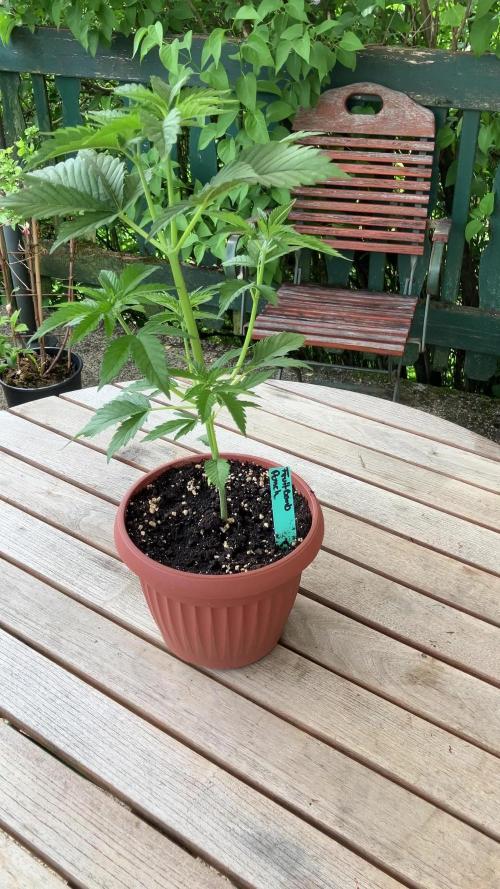
Sie entwickelt sich sehr gut. Vom Topping hat sie sich erholt und ist insgesamt kräftiger geworden. Kommende Woche nach den Eisheiligen wird sie noch einmal verpflanzt in ihren endgültigen Topf. Sie zeigt sehr breite, indicalastige Blätter, meist verändert sich das in der Blütezeit. Ansonsten ist sie gesund und zeigt keine Mangelerscheinungen, wird allerdings kommende Woche vor dem Umpflanzen mit einer Portiopn Vinasse und Seetang auf das Umpopfen vorbereitet werden.


Likes
2
Share


@fabialien
Follow
13 Agosto 2024. selección de semillas y colocación en vaso con agua ph 6.0 con agua Oxigenada.
14 de Agosto se ponen en agua las semillas por 24 horas para hidratación.
15 de Agosto, con las semillas con muestra de radicula procedemos a pasarlas a papel absorbente.
16 de Agosto se muestra la radicula avanzada.
17 de Agosto en la mañana se puede apreciar el crecimiento de la radicula.
17 de agosto en la noche trasplantamos a "Peat Pallet" y una a maceta de cartón ya que la radicula creció bastante.
18 de agosto ya en los "Peat pallet" se pueden mostrar qué las semilla se cayo por completo e iran abriendo en el transcurso de las horas, las tenemos en un domo germinador dentro del Indoor.
🌡️ 27.1 ⁰C
💨 75% Humedad
🌫️ 0.9 VPD kPa.


Likes
20
Share


@VnknowN
Follow
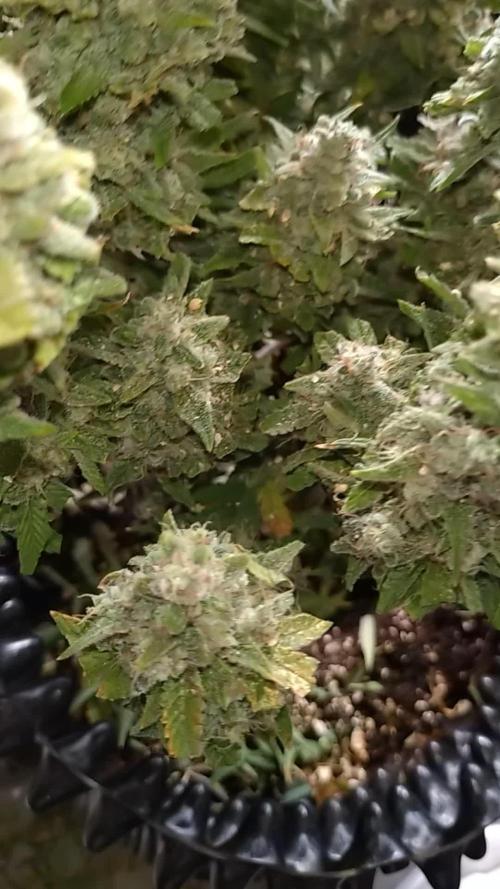
The BIP started fading. The buds are pretty hard and dense. The smell is already Stunning 😮💨😵💫. Beatiful genetic From Perfect Tree

Likes
12
Share

@PhinolaGreen
Follow
Ich habe mich dazu entschieden sie heute schon zu legen. Sie sieht einfach Klasse aus, frostig, kompakt und Fett!
Update vom 23.01.2026:
Ich habe mit meinem gecurten Guava an einem privaten Community Winter-Cup teilgenommen und habe mich gegen 4 andere Sorten durchgesetzt, darunter Zkittlez Runtz, Permanent Marker, Tangerine Dream und CBD Crack 1:1 wuhuuu 🏆
Als Gewinn gab es einen 20€ Gutschein für einen Ortsansässigen Headshop 🤤 😄🤭🥇
Freue mich total 😌👌🏻
Likes
4
Share


@weed_gastro
Follow
on the video, the 2 on the right side are the Ayahuasca Purps, the other ones are Peyote critical.
getting real bushy, need to defoliate soon
day 32: they got their first feeding, I only use a minimal amount of blooming nutrients.
day 33: plucked some leaves , cuz there was no airflow at all, also installed a new ventilator.
day36: again, I had to defoliate a little
Likes
7
Share


@HegauHillsFarmers_M11
Follow
Tag 56 - Beginn der 9 Woche.
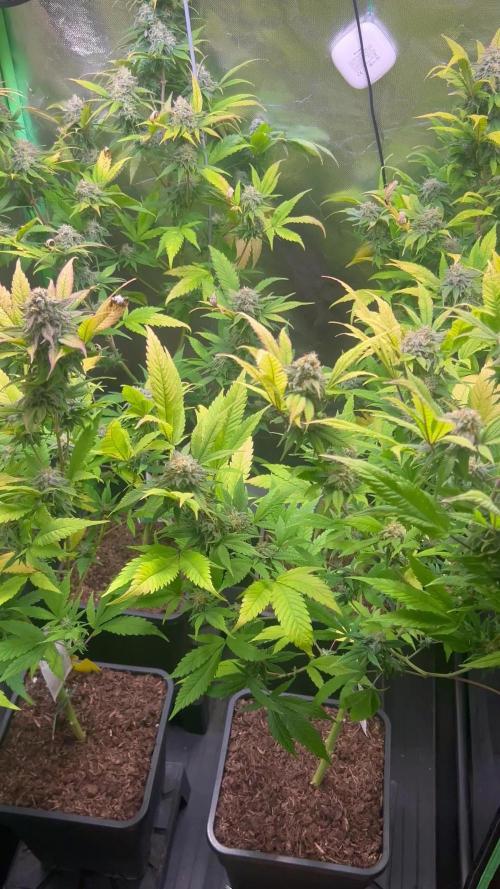
Die Blüten entwickeln sich weiterhin gut, sie sind schön frostig und duften stark und süßlich. Leider wurden die Blätter immer gelber und fallen teilweise ab. Für mich ist das anhand der Symptome diese Woche eindeutig geworden, dass die Pflanze hier mit zu viel Licht und Hitze zu kämpfen hat. Leider kann ich die Lampe nicht weiter hoch stellen ohne das es die andere Pflanze beeinflussen würde. Deshalb habe ich das Düngeschema nicht geändert und weiterhin Cal-Mag dazu gegeben damit sich die Pflanze vor der Lichtintensität und der Hitze besser schützen kann.
Gedüngt wurde an Tag 51 der letzten Woche.
Nährstofflösung:
1 ml/l - Sensi Cal-Mag Xtra Advanced Nutrients.
1 ml/l - Big Bud Advanced Nutrients
1 ml/l - Bud Candy Advanced Nutrients.
1 ml/l - B-52 Advanced Nutrients.
2 ml/l - pH Perfect Sensi Bloom Part A.
2 ml/l - pH Perfect Sensi Bloom Part B.