
Likes
Comments
Share


@Green_Friends_Inc
Follow
Commencing Week 8: day 50 on January 19th
Update is late my sincerest apologies. I will make it up by giving a very thorough smoke report when all is done.
Otherwise all is going very well 😁😁👏👏
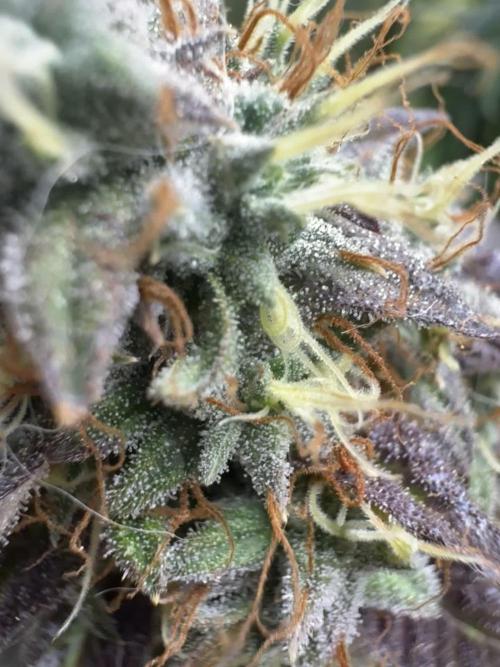
On day 50 I took the head off of bloody skunk.
I checked trichome colors under USB microscope. At least 90% fully milky-white with maybe 5 or 6% Amber and the remainder clear. 😁
On day 55 I gave all of the plants a fan leaf trim including the remaining bottom half of bloody skunk. as I sit here and think about it I believe this will help with ensuring the entire plant ripens and matures at the same time - versus the tops being ready before the bottoms.
I still plan on letting the bottoms of all these plants go way beyond the recommended time to see if I can initiate the process of rodelization. Either way I am glad to report that Bloody skunks pollenization looks like it is resulting in some seeds. (See photo). In hindsight my only concern is that because the plant finished a bit earlier than I expected the seeds may not make it to full maturity but I believe it should be okay we'll just have to wait and find out.
That being said besides the bloody skunk being done just a few days early everything else seems to be right on time as described in plant profiles on company websites.👍
That's all for now thank you for your patience and attention and support and as usual feel free to leave any suggestions comments or questions and I'll do my best to get back sooner rather than later 😁


Likes
35
Share


@eldruida_lamota
Follow
Venga familia, va la septima semana de vida y primera semana de floración de estas Frosted Guava de Zamnesia.
Añadimos la malla de Scrog hace una semana, lleva una apical y ahora ya pude colocarla.
Que color que sanas se ven como se nota que Agrobeta es de lo mejor, las niñas están de 10.
La humedad está en su punto, y por fin puedo controlar la temperatura en 25 grados.
Os comento que tengo un descuento y para que compréis en la web de Zamnesia de un 20%, el código es ZAMMIGD2023
The discount 20% and the code is ZAMMIGD2023
https://www.zamnesia.com/
Mars hydro:
Code discount: EL420
https://www.mars-hydro.com/
Agrobeta:
https://www.agrobeta.com/agrobetatiendaonline/36-abonos-canamo
Hasta aquí es todo, buenos humos 💨💨💨.

Likes
3
Share


Likes
3
Share

@Nillenium
Follow
Weiter geht's! SIe pusht weiterhin all ihre Energie in die Blüten. Von mir aus gerne! Man sieht ordentlich Zucker!

Likes
3
Share


@Kinglui77
Follow
Because of the extrem Defolitation/Schwazzing, which was more or less necessary regarding Humidtiy levels of of over 95% around evening night and morning. Even though I also did it for trying out how the Plants react. They mainly stopped growing Bud for 3-4 Days and the leaves of the Bud Sides got a bit Bigger. Also I had problems with NutBurn and Heat Burn, Nutburn because of my not constantly watered Pots which, I guess, ended up beeing a really salty and nutrient soaked(from the soil) substrate because they are reused Filters for Water out of clay. As well in midday it gets really hot and we are more than 3500ft over the sea level.
And why I grow in Clay Filters ? Just to try, in my opinion already not recommendable even though it keeps the Soil a bit cooler..


Processing
Likes
4
Share


@BUDPRIEST
Follow
My plant's got a name - Melanie. She fights against the pests. We suppose that the yellowish colour of the leaves are caused by them. As I decided to help her, I used the insecticide called Dursban. As a result, the pests' number has lessened but not totally removed. Do you have any advice for me? Thank you in advance.

Likes
5
Share


Likes
7
Share


@Cultivatorcarlos
Follow
week 3 is a tough rn not gonna lie shes yellowing extremely fast and shes begging me for potassium. i was just giving her 2 tsps to 3 gallons of water. as of today (jan 8 2022) i gave her a feed of 1 and 1/4 bloom and 1/4 veg nutes to try to fight the yellowing. i honestly dont know if that was the right thing to do most threads i read just said to add some nitrogen but idk if dyna gros bloom and grow are meant to be mixed. especially this late in flower. either way its too late i already gave it to her i guess now all i can do is wait and see what happens. you can see how fast the yellowing is happening too.

Likes
14
Share


Likes
65
Share


@bypado_farm
Follow
Day 84:
Watered the plants 0.5L with nuts
975 ppm, 2070 us/cm, PH 6.4
Flushed plants with 10L clear water
Day 86:
Watered the plants 0.5L with nuts
955 ppm, 2029 us/cm, PH 6.4
Flushed plants with 10L clear water
Day 88:
Watered the plants 0.5L with nuts
980 ppm, 2089 us/cm, PH 6.4
Added 1ml of bloom/top mix (5 ml/l total)
Flushed plants with 10L clear water
Likes
15
Share


@HighOhioAn
Follow
Absolutely Love these genetics one of my favorite grows so far cannot wait till harvest. The smells are immaculate.🌿💨💯
Likes
2
Share


@Kern420
Follow
Woche über haben sich die Blüten weiter entwickelt. Die Trichome wurden mehr und man fängt an erste Terpene zu riechen.
Wir haben Donnerstag (BT 21) stark entlaubt und schauen jetzt wie die Pflanzen wachsen.
Tropi fängt an erste Farbakzente zu entwickeln in den Buds.
Likes
8
Share


@Chubbs
Follow
420Fastbuds
FBT2301 WEEK 9
What up Grow fam. Hope everyone's having a good one. Week 9 update for these two beautiful girls. Flower sites are developing bigger and bigger daily so that's awesome to see. Starting to see more fade in the leafs on the bigger of the two but over all both are growing great. The shorter one has more fat colas as the bigger one has more branches but smaller colas nut more flower sites. I'll probably stop feeding notes this week as I generally will give a week or two of just water while they finish the last couple weeks before harvest. All in all Happy Growing
Processing
Likes
16
Share


@Andres
Follow
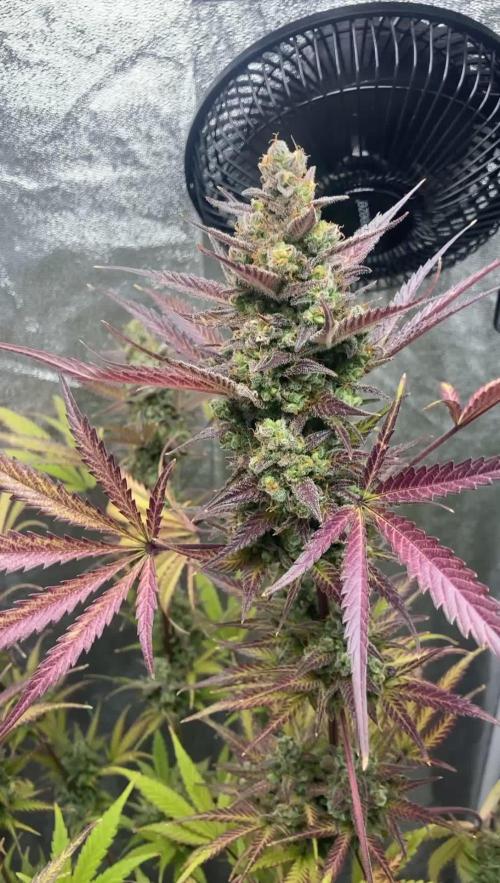
Purple afghan kush 1...she has taken her purpyra color ... there is very little left for her to be able to taste this variety ... she has a smell of tender wood ... sweet smell ... she did not grow enough but if she dedicated herself to fattening her head ...
purple afghan kush 2
she had about 15 worms ... look for them one by one ... she did not grow well from the beginning ... I do not know what happened to her growth and flowering ... her buds are small ... let's hope she tastes good ...
Likes
12
Share


@CaliforniaOGkush
Follow
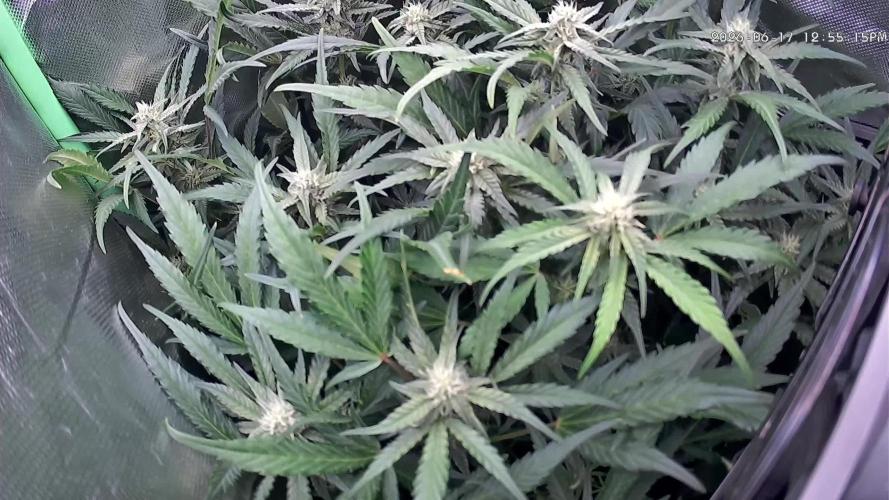
6 plants looking healthy starting to smell like dank already i was feeding them evry other day for 2 weeks and now I'm just going to give it RO water every other day for 2 weeks
Likes
8
Share


@Gonjuk
Follow
Fin'ora tutto bene a un mese di fioritura ho cambiato l'acqua, c'è un problema l'acqua è a 25/26° ogni tanto ci metto delle bottiglie congelate e aumento il perossido d'idrogeno

Likes
Comments
Share

@FATTSx650
Follow
8/22
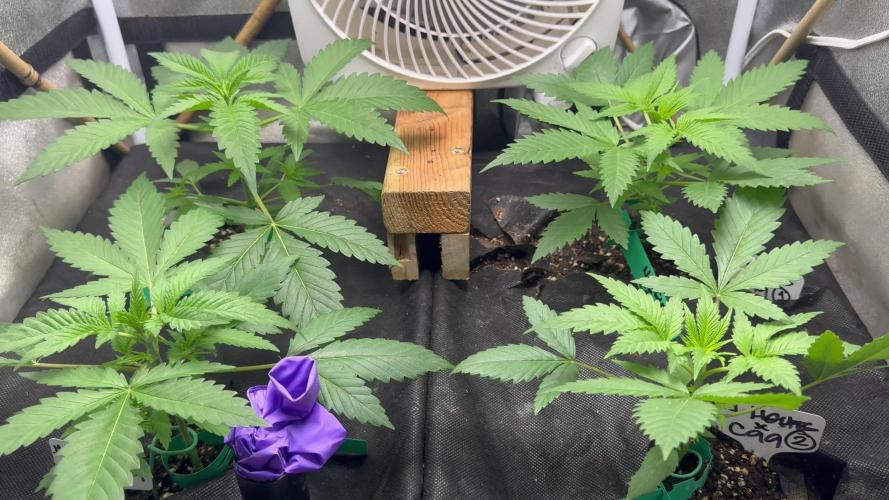
Nine days into veg and looking great. I want to veg these for a total of 6 weeks instead of the more common 4 weeks. But in case they get a little too tall for my liking, i'll transition sooner into bloom. I'm scared I might run out of room, but we'll see. I gave these guys about 500 mil between each earth box which contains 2 plants in each box. I haven't added any fluids to the reservoirs as of yet. I want to make sure the roots get a chance to stretch out so I'm just giving them a little water from the top for these first couple of weeks then they should be ready to the self watering system. Nothing but tap water aerated for 36hrs and ph'd at 6.0 and cal-mag. I topped dressed each earthbox, should be good for another 2-3 weeks. I'll update if ther are any changes that need to be made for the nutrients, but so far all the ladies look great. My goal is to to get a full canopy converage using two rows of scrog nets to help me get what I want. This 2x2 isn't as tall as others, it only reawches 5' tall and I still have to account for the light and exhaust located inside the tent at the topmost region. I'll get some pics of how tall this tent really is on my next post.
The shortest plant measures at 5.25" while the tallest plant stood at 7". I plan on using a scrog net to get a nice even canopy later on and maximize all the space in this 2'x2' grow tent
Likes
10
Share


@Weedbadk
Follow
Día :1 iniciamos este seguimiento de estas variedades toda germinaron en 3 días
Día 5 desde puesta en sustrato
Solo pulverizó 1 no sobrevivió pero las 2 salieron sin problemas