


Likes
6
Share


@valiotoro
Follow
Super easy trim✂️
The buds are super dense & sticky🤩
For the smell it’s cherry & blackcurrant with a gassy touch the Cherry Cola Diesel ⛽️🍒


Likes
11
Share


@BudBeezy
Follow
Welcome to week 22 of my grow diary. It rained at the beginning of the week. On Monday and Tuesday I only left the plant outside for half a day and when it rained I put it in the garage so that the buds wouldn't get wet. Unfortunately, in this weather there is a high risk that the flowers will start to mould. Most of the trichomes are now milky.
See you next week ✌️


Likes
13
Share


@KirbyFarm
Follow
Started giving them plain water to flush before harvest. Buds look like they are still chunking up though. They have like a lemon smell too i was not expecting. Great strain for sure
Likes
2
Share


@KannaGrowing
Follow
Toca cambiar las lamparas que hemos estado utilizando durante el periodo vegetativo, con un espectro lumínico más azul (entre 5000ºK y 6500ºK), por unas mixtas de 2500ºK.
Más adelante las cambiaremos por las definitivas 2000ºK.
Es importante decir que realizar fotos o videos bajos lamparas de floración, no ofrece un buen resultado... Así que a partir de este momento voy a utilizar un filtro corrector en las imágenes que muestro.
Sigo regando cada tres días, alternando entre agua+Bio Rhizotonic+Bio Vega y riegos solo con agua.
Llevo un diario de cultivo en una libreta y los principales cambios en una pizarra.

Likes
3
Share


@Joaka
Follow
ya se comienza a sentir un olor intenso, como se tenia previsto las black jack estan evolucionando sumamente rapido, ya comienzan a explotar en resina.

Likes
3
Share


@LandFarm420
Follow
Esplosioni di cime e terpeni manca sempre meno alla fine.
Concimi e nutrienti usati
25 g di guaino di pipistrello
16 ml di adv nutriens
25 g di pellet a rilascio lento rqs

Likes
34
Share


@rhodes68
Follow
11/29 Start week 4 still solidly in veg
Tighten training daily . Still on same feed of 800ppm
Water filter be in Monday-ish and so I can drop the tap water TDS so to raise the nuet level.
12/1 Continuing to get hang of coco, the runoff in particular will be worked on. Happy with it
12/2 Seeing the first signs of flower so beginning the intro of bloom nuets. dropped the CT A&B Grow to 9ml/gal adding 1 ml/gal Bloom A&B. Will increase the bloom over the next week to full.
12/5 Into the flowering tent still on half grow half bloom nuets 800ppm for a while.
Changed feeding to once per day 1 qt(liter) with @ one cup runoff each (25%)
New camera learning how to use it
Likes
18
Share


@Wakesk8
Follow
9 week flowering..Runtz Auto is almost ready and it’s beautiful!
Balance plants are going well


Likes
2
Share


@vilahaze
Follow
primera semana despues de la germinacion , las fotos son justo del dia despues del transplante , le puse mykos microrizas y velokelp de remo
Likes
13
Share


@Robeeriegenetics
Follow
Added nutrients to top off reservoirs everything looks good …I am content so far with testing will be dropping light schedule to 11 on 13 off to accelerate bud development hopefully shortening flowering time
Likes
41
Share


@TheBulldozerSicily
Follow
11 agosto 2024
Cambio acqua
Aggiungo 75 acqua osmosi inversa ec 599 ph 7.9
tutti i nutrienti ottenendo ec 1788 ph 6.5
13 agosto 2024
Inizio controllo ec 2660 ph 5.9
per livello acqua bassa
Aggiungo 50 lt acqua osmosi inversa ec 1445 ph 6 aggiungo tutti i nutrienti ottenendo ec 2070 ph 6

Likes
3
Share


@Andres
Follow
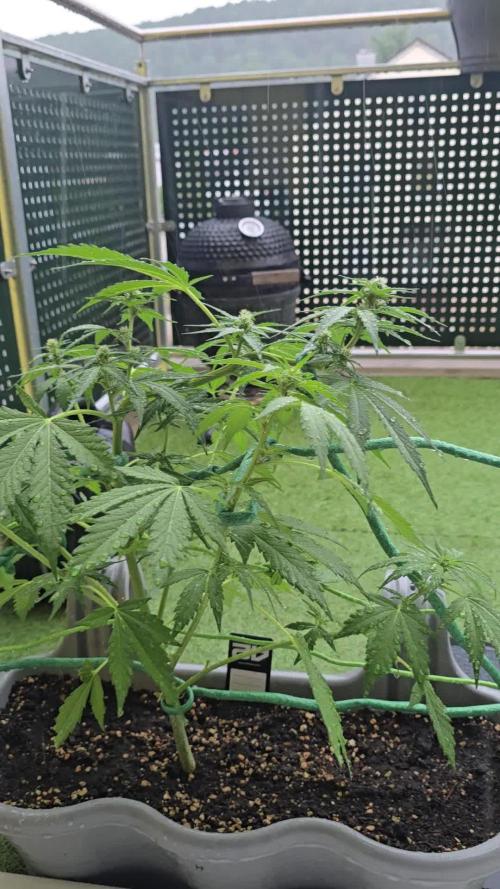
She is a large plant. There is still a couple of weeks left in his flowering. Summer ends in this part of the world and temperatures are low. Although the.orange is not cold, the minl is 17 C. I am happy with this strain of ripper seeds
Likes
4
Share


@Lato33
Follow
Day 54 from seed started running into some issues,leafs are turning pale with brown spots some greyish spots tips curling upwards shes growing but nugs not as dense as expected shes very short

Likes
23
Share


@adam_pawloski87
Follow
Today is day 71 for these ladies and they are doing just amazing! Stacking up densely with a Very sweet smell , I still get hints of vanilla ! Not to much longer to go these girls few more weeks an they should be done! Stay tuned for next week ! ✌️
Likes
24
Share


@DeepRootsGrowTrees
Follow
COLOMBIAN JACK by KANNABIA
Week #14 Overall
Week #3 Flower
This week she's looking 👍 good no issues this week she's budding and they are getting more dense by the day and you can see the trichomes starting to form on her buds! Stay Growing!!
Kannabia.com
COLOMBIAN JACK
Likes
10
Share

@Naujas
Follow
49 dienos!!! Šią savaitę, Megina, orai buvo labai įvairūs: ir saulė, ir lietus, buvo daug vėjo ir šaltų naktų, bet viskas atrodo gerai ir ji laiminga:) ji jau pradėjo savo žydėjimo fazę, šią savaitę palaistiau ją 6,3 pH su @Plagron maistinėmis medžiagomis ;) sėkmės visiems;)
Likes
1
Share


@EvilGrower
Follow
There is a timelapse of this week, Blueberry is in the background. This entry covers days 30 - 38.
This week has seen violent acts. I've topped the blueberry. She's doing well!
I've started to give this plant less light so I can give more energy to the flowering GSC auto. I'm not sure how much this will stunt my plant.
Lately my feeding schedules for both this plant and my GSC auto are obtained by following the GH Flora Series recirculating feed chart on the General Hydroponics website. I put the amounts they suggest for 1 gallon, but I use 3 gallons of water. So, I give the plants 1/3 of what the feed chart recommends. It's worked well so far. My plants are thriving, and I haven't seen signs of nutrient burn. The only deficiencies I encounter are Cal Mag. I remedy this by mixing in some tap water with my RO water.
Processing
Likes
4
Share


@Englandshigh
Follow
This one my favourite plants to ever grow , she is producing loads of pistols everyday and producing colours change in the them, very stinky smell recommended this strain to every one
