


Likes
Comments
Share


@BudMastero
Follow
I have not dealt with such an unpretentious girl for a long time!
very easy to grow.
I got only udovstye from her!) I really wanted her to become black at the end. but unfortunately it did not work out ((but no matter how it was, I am generally 100% satisfied with the variety

Likes
4
Share


@Hommero75
Follow
This week was good. The bud density increase. The ladies are looking great and they have an amazing aroma. They just received their last feeding. Now is PH water and cal-mag into they are ready to harvest. It might take a couple of weeks to for them to be ready. Due to the fact the I had some issues in the beginning with the developing of the plants. The growth was slow and it took longer than expected. Tropicana Cookie is the tallest with 17" , Forbidden Runtz with 16" and Banana Purple Punch with 15". I expected them to be taller.

Likes
3
Share


@RainerWinklerGrow
Follow
Harvested Around 220 Grams from 3 Plants, terps were there slightly, smoked fine, its alright, went with a differnent breeder after.

Likes
8
Share


@CannbellFarms
Follow
Monday 10/07
- front 2 plants finally beginning to bud
- extended last weeks nutrients for another week just to help the front 2 plants catch up
Thursday 13/07
- massive defoliation on all 4 plants
- great increase in light pen all the way to the floor
Friday 14/07
- removed bug bud coco from Nutes
- added overdrive to the Nutes
Likes
18
Share


@Masterchief
Follow
Update 30/10
Purple : going well 2nd week of flowering perfectcly.
Only issue : cal/Mag or ph deficiency
New pH meter and adding the new biobizz cal/mag
Master : the topped one is now really at the same rythme..
I defoliate a lot to try how she will react to be honest I am disappointed and I would ear space by loosing her... I don't know!
So far expecting a nice yield from 2/3
Guys do you have any idea about when to harvest the purple?

Likes
17
Share


@DudeGrowsWeed
Follow
Alien vs Triangle still going strong! Several weeks until harvest, but she STINKS! This is another girl I can't wait to chop down and do a smoke report on. But I'll be patient. 😎

Likes
26
Share


@FUH20
Follow
2021 - 08 - 29
Wedding Glue Auto 1
- most fan leaf are starting to turn yellow , Hoping she finished up in a week to 2.
- Day 55 since sprout
- trichomes are mostly milky, not much amber on buds yet.
Wedding Glue Auto 2
- Some of the buds and fan leaf with abit of sugar leaf are turning purple...
- Day 50 since sprout
- She's fattening up nicely
image format : Wedding Glue Auto 1-4.1 day 27
Wedding Glue Auto 1( plant strain and tag number) , 4 (week), 1 (image number) , day 27 ( Date since sprout )
Likes
3
Share


@bk_garbage
Follow
Well boys and girls its time. Krishna got the chop at 58 days, and I just took down the Orange Blossom Fizz at 62 days. Krishna trimming has started and I'll ad some pics of those awesome buds, the Blossom is a lot and pretty wet still so that might need more days of hanging.
Great looking plants, probably not too much weight off the Krishna but its soo frosty. It smells like homeless armpits and is almost too ripe to inhale deeply...
The blossom doesn't coat the fan leaves in trichs like the kush but it makes great nugs with almost all calyxes instead of leafy material. Smells like mangos and some hint of spice, like an orange peel with cinnamon.
They got powdered koolbloom for 4 days and flushed for 3 more before setting them outside the tent, in the dark, for a day before cutting and hanging. its like 59f outside my tents so it really helps the purps come out at the last second for strains that do it.
once its jarred up an weighed i'll post back. probably 2.5 off the KK and could be a good amount off that big orange blossom plant.
Likes
Comments
Share

@PharmaZ
Follow
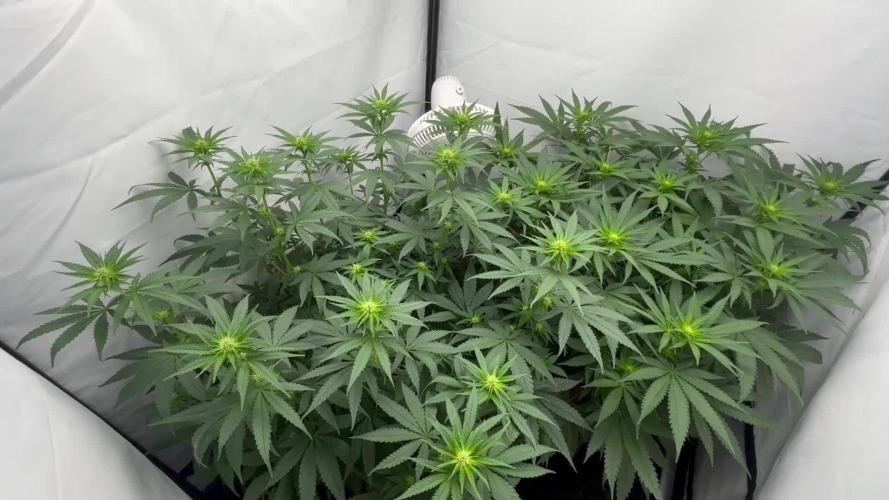
Sun 12th July (day 15) Lights on🌺
Planning of a big defoliation later closer to the end of the lights on period so she can recover lights off.
Also reduced light intensity to 75% to reduce heat for a few days.
0.5ml/L - MagneCal+
2ml/L - Canna A&B
2ml/L - Organic bloom liquid
1ml/L - Nirvana
2ml/L - Growzyme
EC1.2 PH?
Monday 13th July (day 16)
Defoliated massively, scissors dipped in 3% H2o2 between cuts, I removed pretty much all undergrowth that looked pointless.
Also measured the light distance
It’s 60cm @ 75% will be playing with that soon raising and increasing intensity back up to 85%
Tues 14th July (day 17) 5am
Unfortunately I have sporadic waterings as I’m working nights I’ve been finishing late recently so schedule is all off.
However I have reduced the amount of Base Canna A&B by 50% and also made sure to give a really good heavy watering to try and displace as much excess out as much out of the pot as possible with a higher dose of Kelp to help remineralise excess
Raised light 60cm down to 75%
Check PPFD/DLI
Increase intensity and by day 21 have it around 700-800 in the centre of the tent
0.5ml/L - MagneCal+
1ml/L - Canna A&B
2ml/L - Organic bloom liquid
1ml/L - Nirvana
2ml/L - Growzyme
EC1.0 PH?
Weds 15th July (day 18)
Light 40-50cm 80%
500-680ppfd
Thurs 16th July (day 19)
She’s already frosting the leaves up hopefully that’s a good sign
0.5ml/L - MagneCal+
1ml/L - Canna A&B
2ml/L - Organic bloom liquid
0.5ml/L - Big Bud Coco
2ml/L - Growzyme
2ml/L - Big Fruits
EC1.1 PH?

Likes
9
Share


@Kanabas
Follow
I love her <3 cant wait to harvest, i think i have to wait for 7 - 8 weeks more.
Likes
Comments
Share


@eldruida_lamota
Follow
Vamos familia, actualizamos la novena y última semana de floración de esta Amaretto Tarmac de Seedstockers.
Temperatura y humedad dentro de los rangos correctos, 12 horas luz, 12 oscuridad.
Una lástima que de todas solo aguanto una, y en concreto tiene un color espectacular aún así seguiremos con el diario hasta el final.
Agrobeta:
https://www.agrobeta.com/agrobetatiendaonline/36-abonos-canamo
Hasta aquí todo, Buenos humos 💨💨💨

Likes
101
Share


@SlowpokeFuegobud
Follow
💜 🌧️ 👊💜 🌧️ 👊💜 🌧️ 👊💜 🌧️ 👊💜 🌧️ 👊💜 🌧️ 👊💜 🌧️ 👊
Welcome to week 6, dear friends!! 😘
My girls are growing beautifully, the Punch girl is the smallest, but the smell is incredibly good. Smells like cherries and pepper. 😋 I knew it, this one's going to be great!! 🎉 😍
DAY 36
Watered with 1ml A+B EC 1.0 + enzym+ 💧
DAY 39
Watered with 1,5ml A+B + 0.5 ml C4 EC 1.2 💧
DAY 42
Watered with BioEnhancer 💧
Thanks, everybody for visiting!! 💚 💚 💚 Grower love!!! 😘🙏 🌱
_________________________________________________________________________________
Strain Description:
This is a giant autoflower that reaches 150cm and produces massive yields of up to 600gr/m2, a modern Cali strain that offers what a top-quality Indica-dominant hybrid should; nugs capped in resin with the density you would expect from Indica-dominant strains and that bag appeal that will surprise even the most experienced growers. Expect beautiful purple and magenta hues that come along with a sweet almost pastry-like taste and, thanks to the 24% THC, a very pleasant and potent effect that surprisingly starts as a motivating high and in no time relaxes you completely, taking a bit of the energetic edge off.
Bud description
Purple Punch Auto develops rounded compact buds with fat calyxes and bright orange or sometimes bright yellow hairs, with copious amounts of trichomes that give the buds that beautiful frosty look that all growers seek for. The light-green buds can exhibit subtle purple or lime-green tones that give them a charming and attractive look and complement them magnificently, while the mouth-watering mix of earthy cherries and blueberry muffins with a spicy touch will win you over even before you can see the buds.
Smoke report
Due to the high THC levels, you’ll experience a powerful effect that will completely relax your whole body and gradually start feeling like all your muscles are melting before you can count to three. Despite the strong Indica effect, you won’t be couch-locked thanks to the slight Sativa genes that incorporate a pleasant creative head-buzz and leaves you mellow and clear-headed in a peaceful state of mind. The perfect effect to go through a busy day stress-free, alleviating sore muscles after a long workout routine or just chill and have fun on a night out with friends.
Plant appearance
Due to the Indica dominancy, this strain remains relatively compact despite its height and grows wide and thick fan leaves typical of Indica-dominant varieties. You can expect a thick tall main cola and a few shorter side branches with spaced-out internodes where the incredibly frostbitten flowers develop and end up looking like buds on steroids by the end of the flowering stage.
Grow tips
This strain offers unique flavors and charming colors so we recommend flushing thoroughly to allow it to show its full potential and end up with the beautiful reddish-purple and/or lime-green hues on the buds and surrounding foliage. Due to the Indica genes, the buds grow denser than usual so it’s essential you tie the branches slightly so there is enough airflow in between the buds to prevent mold and bugs. This variety doesn’t require a lot of maintenance or anything extra but remember to feed her properly and with good-quality nutrients, this way you guarantee the buds fatten up properly and that your plant doesn’t suffer any kind of nutrient deficiencies.
Flavor
Thanks to the high-quality genetics, this strain offers a distinguishable taste of fresh blueberries and earthy cherries with spicy undertones and a pinch of sugary tart. The sweet smoke overpowers your throat with a sweet blueberry muffin-like taste as you inhale and, as you exhale, leaves a delicious coat of sweetness in your mouth that leaves you feeling like you’ve just eaten a dessert.
______________________________________________________________________
SETUP:
° Zelsius 60x60 cm (2x2ft)
° Light
Greenception GC4 128W
4 Cluster OSRAM + CREE LEDs (380, 455, 630, 660, 720, 760nm)
6400k (cold-white to cover the basic load during the growth)
2100k (warm-white to cover the basic load during the blossom)
The module groups can be switched individual as follows:
⬤ Module I: growth 1x 32 watt
⬤ Module II: full spectrum: 2x32 watt
⬤ Module III: Bloom: 1x 32 watt
⬤ Module I is optimized for the growth phase. A relatively high amount of blue and white support a dense growth.
⬤ Module II suits for the growth as well as blooming phase. Optimal plant light full spectrum.
⬤ Module III is optimized for the bloom. A high portion of red and an additional infrared push.
° 2x 5W Fans
° custom 320/270 cm³/h exhaust fan & Carbon Active Granulate 240cm³/h
° Mills Nutrients, Green Buzz Nutrients
Shouts go out to my sponsors @GreenBuzzNutrients, thanks so much for your support! ❤️
If anyone would like to try their amazing organic products, use code GD42025 for generous 25% discount (for orders of minimum 75€) ✨
https://greenbuzznutrients.com/
° tap water EC 0,26uS upgraded to EC 0,5 with PlantMagic MagneCal - pH 8, nutrient solution downgraded to pH 6,5 with Advanced Hydroponics Minus Bloom
° from week 4 in the same container Aptus Enzym+ once a week
° Biobizz Lightmix
💜 🌧️ 👊💜 🌧️ 👊💜 🌧️ 👊💜 🌧️ 👊💜 🌧️ 👊💜 🌧️ 👊💜 🌧️ 👊
Likes
1
Share

@SirNutalot
Follow
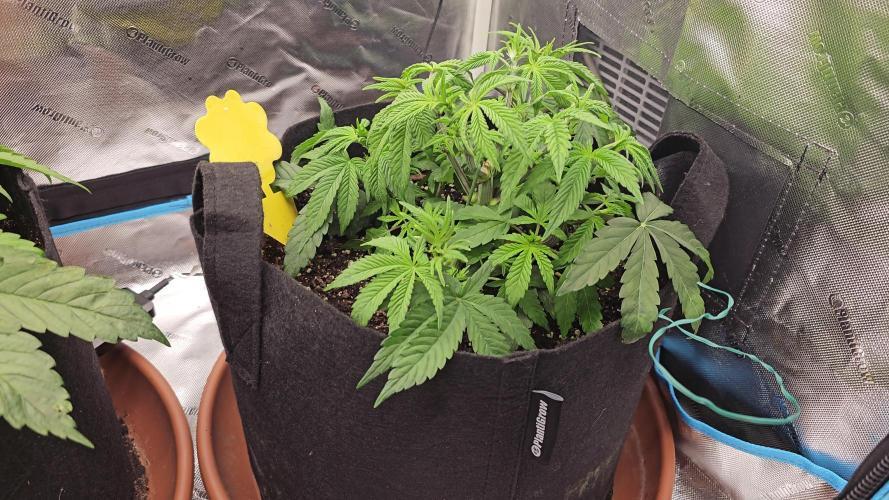
Because theyre a little bit slow in growth i consider another 2 weeks before i switch

Likes
4
Share

@GERGrowDesigns
Follow
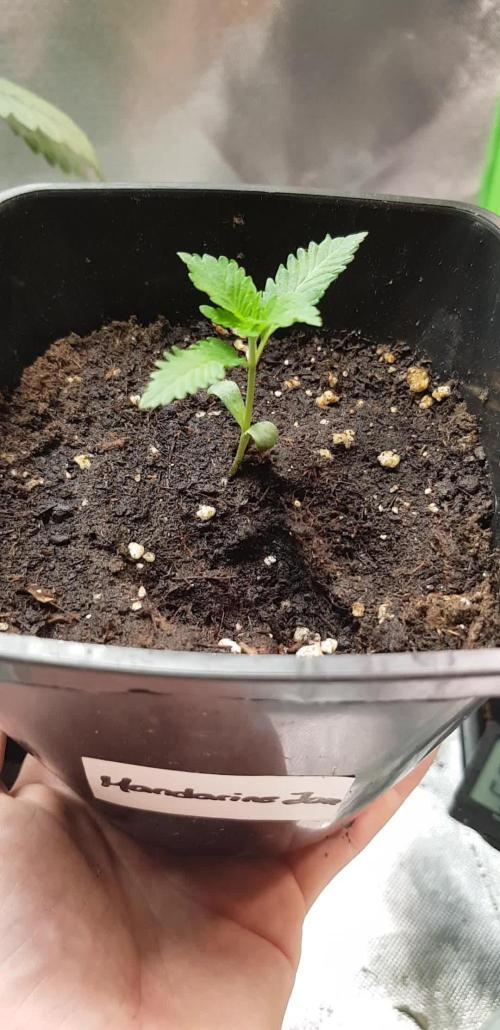
Welcome to Veg Week 1 of Sensi Seeds Mandarine Jam
I'm excited to share my grow journey with you from my
Sensi Seeds Project . It's going to be an incredible ride, full of learning, growing, and connecting with fellow growers from all around the world!
For this Project , I’ve chosen the Feminized Photo Strain Mandarine Jam:
Here’s what I’m working with:
• 🌱 Tent: 120x60x80
• 🧑🌾 Breeder Company: Sensi Seeds
• 💧Strain Info : 20-23%
• ⏳ Flowering Time: 7-8weeks

Likes
23
Share


@Ferenc
Follow
Day 72: 600W LED, 18 hours on 6 hours off the same with ventilation. No more ferilization. Water intake also remains the same 200ml per day. Humidity approx 35 percent.
Day 74: She is done I just checked the trichomes getting amber Friday is harvest. No more water so 3 days no watering.
Likes
18
Share


@NMGDOC
Follow
I was flushing all the plants since August 9.
You can see in the videos with de microscope ( I really try my best, but it was pretty difficult) the trichomes looks cloudy and some of them looks amber. Maybe in the videos you can't see it because my hand was really shaky.
August 17: all the plants were in dark.
August 18: i cleaned all the plants, buds, leafs, everything..., spraying water to remove the rests of potasic soap.
Today august 18, during the nigth, i'm going to harvest all the ladies.
In the past 3 days i didn't watering the plants and the smell was stronger.
August 19:
Before dry
-Critical Kush: 150g
-Red dwarf: 60g
-Syrup (2 plants): 270g
-Lemon (4 plants): 570g


Likes
3
Share

@Growfather1
Follow
Hello everyone!
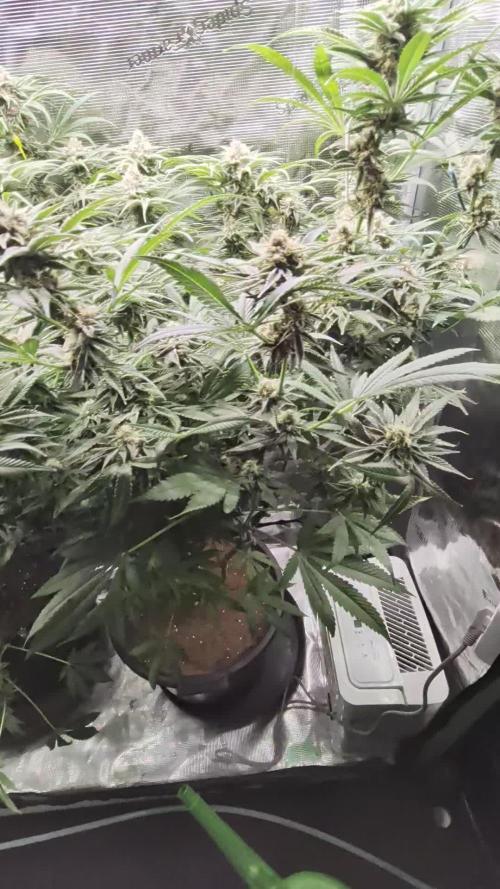
Welcome back to another update on the Gorilla Glue #4 x White Widow grow!
We are officially in week six of flower, and things are looking fantastic.
The buds are really swelling up nicely, and I'm starting to see a lot more orange hairs popping up across the canopy.
Environmental conditions have been solid over the last couple of days.
Temperatures have ranged between 20°C at night and 28°C during the daytime.
Humidity spiked a bit high today, reaching 63% for a few hours, but it usually sits comfortably between 50% at night and 57% during the day.
Since the strain label estimates a finish time of eight to nine weeks, I'm getting ready to begin flushing in the next four days to ensure a clean, smooth end result.
Overall, the plant is looking super healthy and everything is on track.
I did a light defoliation today and plan to step that up over the coming days to open up airflow and light penetration.
Let's see how she stands next week!
Thanks for stopping by and wish you all a nice day!
Best regards,
Growfather

Likes
8
Share


@Mr_nugs_lover_David
Follow
Very good journey to me, she has responded very well to the lst training, providing me beautiful colas, enough for me to have nice clean organic nuggets to smoke. I would definitely would run this Ak420 by seedstockers again, the sweetest phenotype was the number #2 which you can take a look at here in my page!
Likes
42
Share


@iLoveGoodWeed
Follow
WEEK 5 - both ladies are stretching, no issue so far pleasure to grow
9L Pot I started notice pre flowering stage
12L Pot the is getting bigger but still in veg stage


Likes
31
Share


@The_Bearded_Grower
Follow
Day 39 11/06/20 ok so she is doing very good and the color is amazing. i cant wait till she gets bigger and boy she is thirsty i have to 5 from 1 gal to 5 L. i have lots of info in the vids for your viewing. happy growing and keep your stick on the ice
