
Likes
Comments
Share


@MassEric
Follow
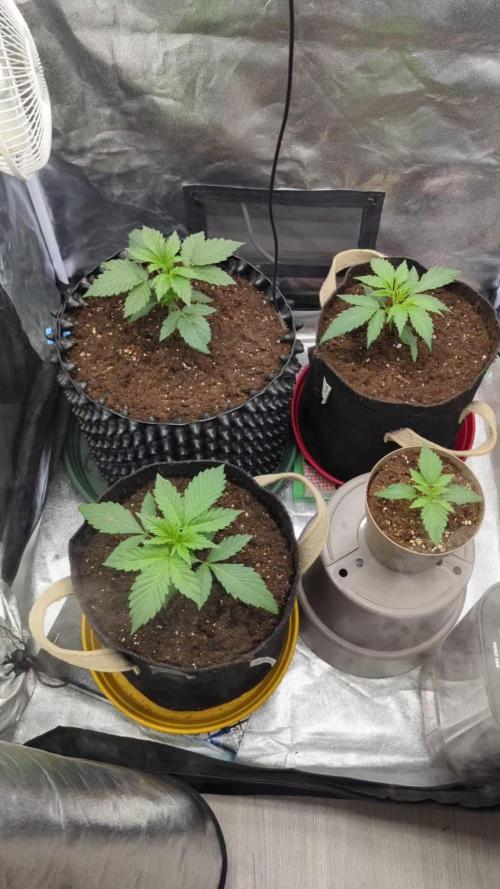
Moving along nicely now. The timelapse is showing some nice growth over the last 6 days. The next month should really be fun to watch. I plan to let them stay in the buckets for another week before I move them into the larger containers.
Not much else to see early on. They should be ready for their first clipping here soon. Fun fun!

Processing
Likes
3
Share


@DBanned
Follow
July 24, 2020
The phenotypes have been stretching as normal.
Some of them already passed the 30 in mark.
Some bottom leaves are turning yellow but we think it is normal for lower leaves to die.
We not only gave the plants Gaia green bloom amendments but also, we fertilized the plants with some Alaska morbloom 0-10-10. (Once every three weeks)
Water intake has been increasing. Now the plants are being water every other day. 10-14 liters for 10 plants.
Happy grow🤤🌱🌱🌱🌱!!!!
Likes
20
Share


@adam_pawloski87
Follow
We are in Flush !! Was giving them GH Flora series + rapid start + cal mag


Likes
1
Share


@Yooper94
Follow
Starting to think if I didn't stunt pheno 3 initially, how much more beautiful this plant would be. It was the runt due to nute burn as a seedling. It has now become my favorite plant of the 3. It has beautiful structure, and the fan leaves are almost triple the size of the other 2.
Pheno 1 is showing signs of preflower.. stretchy girl showing her indica traits.
Pheno 2 has seemed to back off on the vertical growth, reminds me of pheno 3 but with not quite as good genetics. Beautiful plant though 👌
Pheno 3 would be the plant you clone of the 3 if this were a photo run. I'm curious to see how she turns out.

Likes
48
Share


@Aleks555
Follow
Hello everyone. Another week has flown by, and everything is going well with our girl. She's eating well, covered in trichomes, and the buds are dense and sticky. It looks like it's going to be an atomic yield. I think another two weeks, and she'll be fully ripe. As for the website, I don't know what happened, but after the update, it's been a real challenge. I can't upload videos, and uploading photos is a bit hit-and-miss. It's a bit nerve-wracking. If you're experiencing similar issues, please share in the comments. I'm curious if it's just me or a site-wide problem. Thanks!

Likes
9
Share


@Chupadeos
Follow
La temperatura en la zona que vivo está muy alta y es casi imposible tenerla más baja,y no puedo instalar aire acondicionado,así que están con mucha ventilación y agua.ellas se ven muy sanas y con muchas ganas de absorber abonos,han reaccionado muy bien al cambio de foto periodo,después de tener estás temperaturas tan altas ellas no muestran signos de problemas se ven muy sanas y fuertes ,en el futuro veremos qué tal van bajo temperaturas incluso más altas ,aunque personalmente las veo perfectas para soportar lo que venga, estas pequeñas nos van a sorprender.

Likes
41
Share


@TheBulldozerSicily
Follow
Giovedì 11 luglio
Cambiamo soluzione e rinnoviamo i nutrienti le piante iniziano a fiorire, spero che esplodano!!!! Fin ora nessun tipo di problema,
Ph 6 ec 1984
Questi prodotti mi stanno piacendo molto, ho finalmente risolto gli sbalzi di ph!


Likes
9
Share


@Kushizlez
Follow
Blackberry Breath #1
Yield: 57.5
Smell: 9/10 - sweet, grape, berry, gassy, earthy, hashy
Bag appeal: 8.5/10 - dense, sparkly buds
Crystal coverage: 9/10 - super impressed
Ash: 5/10 - flaky, mostly grey/blackish
Fire holding: 4/10 - stays lit for 10-30 seconds
Smoke: 5/10 - tastes like chalky shit
High: 6/10 - indica dom
Comment: looks amazing, smells amazing, tastes like shit, burns like shit.
46.5/70 = 66% 👎🗑️
Blackberry Breath #2
Yield: 76.1g
Smell: 6/10 - musky, tea, berry, herbal
Bag appeal: 8/10 - slightly leafy/stemy
Crystal coverage: 7.5/10 - very impressed
Ash: 5/10 - flaky, mostly grey/black
Fire holding: 4/10 - stays lit for 10-30 seconds
Smoke: 5/10 - taste is shit
High: 6/10 - indica dom
Comment: looks nice, smells shitty, tastes shitty, burns like shit.
41.5/70 = 59% 👎🗑️

Likes
38
Share


@LittleBigTrees
Follow
I've been pulling the top small fan leaves to allow the side's to catch up.
One plant is really tall and stretchy ,
One plant is very short and compact .
The other 4 plants all look very similar to each other at this stage .
Likes
2
Share


@NewbieLearner
Follow
Very heavy indica. Gets you so freaking stoned its awesome haha. Myself and a few mates already all said this pheno is a definite keeper! huge heads, amazing taste, incredible smell and best of all knocks like a donkey just kicked you😆😂😃
Already got clones growing for the next run! will be growing this strain probably for the next year straight.


Likes
13
Share

@20SYL
Follow
Rempotage des plantes dans du Bat Mix de Plagron dans des pots de 15L et 20L. J'ai utilisé des mycorhize de la marque Great White pour les aider un peu !
La tente se porte bien, j'espère ne pas trop manquer de place mais je sens qu'elle vont bien grandir 🌱🌳
Likes
6
Share


@BabyBillyFreeman
Follow
Decided to harvest at 10-12% amber. Running out of time and needed to chop her down. Pretty sure I slowed her down from a heavy defol. She was supposed to be done on day 65 based on breeders notes. She took considerably longer for me so the heavy defol is the only thing I can think of.
She has sweet gas and grape terp. Very nice heavy dense buds but not as large as I was hoping. Despite the bud size I think it will be some good smoke. I’ll update with dried and cured bud pics.
Buds are very dense after dry and cure!

Likes
2
Share

@Pabloauyanet
Follow
En resumen, todo ha salido bien y los productos han echo su función en el siguiente cultivo cámbiate el sustrato por un ligth mix para poder fertilizar mucho antes y estoy muy asombrado por el sistema de riego

Likes
27
Share


@Lordshiva83
Follow
Olá amigos, estamos na segunda semana de floração com 48 dias de vida estão todas de boa saúde a crescer como uns monstros 🤩, esta semana adicionei bactobloom (bactérias para estimular a floração), e elas já começaram a mostrar as pré-flores, estou muito feliz com estas princesas 💪🍀🌱
Processing
Likes
45
Share


@Magich
Follow
Day 64: when pictures was taken, all the girls was doing some excellent night-stretching! I just love watching them grow bigger and bigger❤️Day 65: did a little bit of defoliation on the ones with the scrog net. Also widened the outer fence around them. I think i will do some branch for branch, thorough pruning, on all the plants later in the process. DAY 66: pruning done. That wasn’t a lot longer into the process but now its done. Took some time!
Likes
15
Share


Likes
48
Share


@AsNoriu
Follow
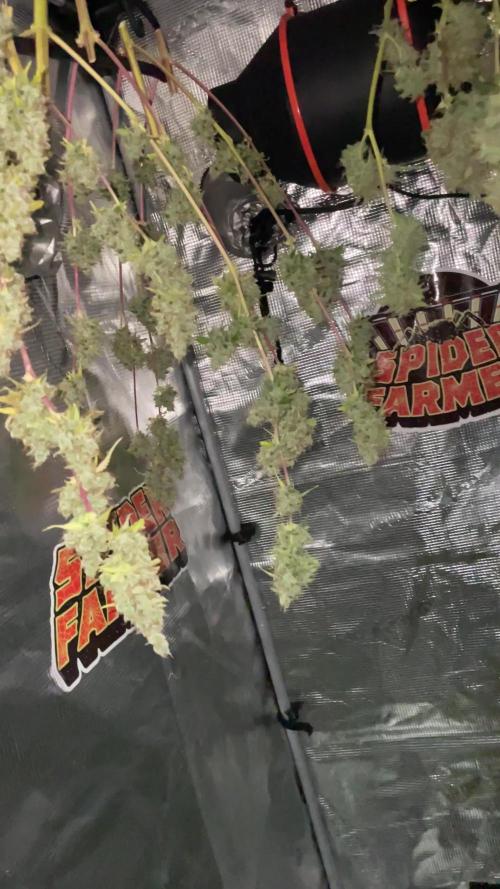
Day 88. Amazing girl. Trim jail was easy, but she needed few more weeks to properly finish even so high lolipoped colas. Sugar leave trim left for butter and freezed , the rest of foliage and trim goes for bubble hash.
Day 98. 92 g went for curing
Happy Growing !
