


Likes
Comments
Share


@LiamF
Follow
She's growing amazingly
I really hope she will start flowering very late since i want her to grow bigger.
Giving her more nutes and shes taking it well

Likes
6
Share

@Weed_Wizard
Follow
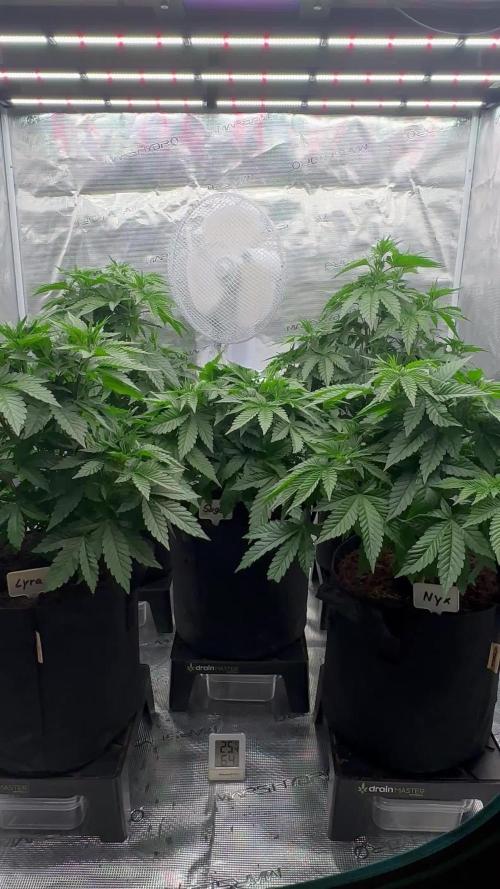
After a few days the LST has an effect. They grow nice and bushy. Still trying to get some drain in these massive 12l pots. At the moment I’m watering every 3 days with 3,5l of nutrient solution. Still no drain. I also removed some leaves at the bottom and the big ones, so light can break through better. We’re working on it 🧙♂️✨
Edit: I flushed them today with 5 liters of pH neutral water and we finally had drain 💦
I also lollipoped and defoliated them so the Girl Scouts get a better light intake ☀️🌱✨ let’s see how they’ll do. I’ll change the light to 12/12 next Tuesday, when we start week 7. Happy flowering

Likes
4
Share

@OlyGrower
Follow
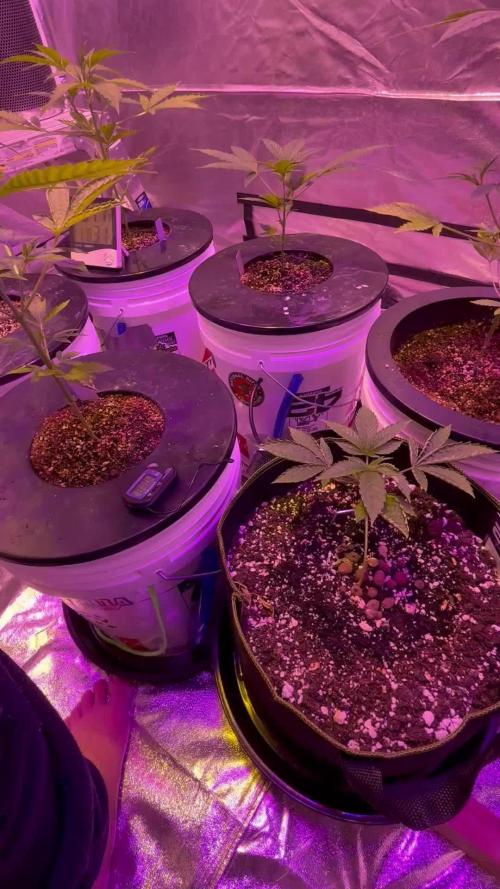
Growing fine except one Original Glue that is lagging behind. Perhaps not worth doing but we will see after the stretch.
- New addition to the tent , Purple lemonade FF
( for next run, clones )
Some LST
12/23 - pre flowering indications on all plants
Switching out the metal halide for the HPS. Time to start budding.

Likes
2
Share


Likes
10
Share


@Kayaboy
Follow
This week lowered the soil ppm to around 700 so i can be in control of nutes and follow up with any deficiencies it might appear , straight away the leaves started fading like 10% so i know im feeding now and not the soil....
Also applied first topping and guess i will go for another two toppings to create 8 main colas with no small stems whatsoever for thick dense buds. ... well see how she responds. So far she didnt even feel the topping no stress apparently and lower branches getting higher after 10 hours so i guess more toppings to follow soon xxx
Mid week Update:
Transplanted today and ready to veg further ..No signs of stress from topping or translplating. Xxx
Mid week Update:
Stripped off the side branches leaving only the leaves and thinking of mainlining or just let them with just one topping and no further trimmings...I will decide later this week xxx happy growing all

Likes
12
Share


@TupSkyWalker
Follow
Aquí seguimos, separamos ya los machos y nos quedamos con 5 hembras de las 9 que seleccionamos. Más del 50% muy contento.
Durante estas 2 semanas hemos estado luchando contra una pedazo de plaga de mosquitos que hemos sufrido. La cosa parece que mejora pero habrá que estar muy atentos.
La floracion va en camino podría ser mucho mejor pero la plaga ha hecho sufrir a las plantas.
Iremos actualizando.
Buenos humos.
Likes
48
Share


@xbrico
Follow
Evening all...back on it AGAIN!!!! Worst is, in the middle of a heat wave (Hottest day every recorded in this part of the world a couple of days in a row!!!)...still need to finish trimming my last crop!!! 😰 Will get that done over the next couple of days as these girls need rehoused!!!
So, got a cloner at the start of the year...was planning on clone a spare wedding cake I had but that sort of went to pot and life got in the way and that didn't happen. As I also got a hold of an Ultrasonic Mist Generator, I thought I'd give this "Fogponics" Germination thing a go!!! Seeing as @Sweet_Seeds donated a few Magical Beans to my cause, I thought I'd give their genetics a whirl. The Red Hot cookies looked too cool to pass up on!!!
So, got the beans popped on the 12th of July and by the Thursday, they were showing their wee heads. These are strong wee plants!!! Vigorous as you like!!!
Got them into the 'fogponics' machine and let them rip (Under 2x11W T5 Sunblaster 6400K's and a Amazon Special LED light for extra Spectrum) and they seem to be coming on grand. Noticed some yellow spots on the leaves and in 2 minds if it was:
A. calcium (As starter plugs are Coir and I didn't put calmag in the plug hydration mix - Jiffy Original plugs are supposed to be buffered for this!!!);
B. if I should have broken and washed them out of the Coir and put them into straight Hydroton (The fog could have been saturating the Coir and choking the internal roots a bit) or
C. if its just the abusive heat we've been having here (In a country where A/C is basically unheard off as heat doesn't exist outside!!! 😋).
Roots are ripping out of the net pots now so they're about as ready for transplant as can be...just wanna give a day or 2 more to see if the heat here settles as I can't adequately cool the area they're going too - but then again, under LED so heat may be good as it doesn't heat the leaf surface up as much! Plus I have a couple of plants to trim...still hanging in their humidor tent when is needed again for growing!
Think this will also be the retirement party for the Wilma. Going to build an Undercurrent Fallponics system when this run is done (Wont have time to get it setup before these girls need forever homes!!!). Have the crates bought and a bit of research done on how to DIY a build so hopefully this turns out to be a decent run. Also have a few people with building experience on hand to give advice.
Since last grow:
Lights have been upgraded to a Geekbeast 630W Pro LED (3500K Spectrum - UV 385nm and Far Red 730nm built in [won't use the 730's as they can't be run independent of the Main Lights...be wary of this if you buy one off Alibaba for the 730's built in!!!] - Will run the 385UV's though throughout the grow for more blue...will run then 3 hours after lights on to until 3hours before lights off).
Also procured an InvisibleSun LED 730nm Flower Initiator (Will use this for EOD Far Red treatment to try a 13/11 flower cycle) and a Migro UVB310 fixture - For the Trikes!!! 😝.
Have a Haliea 300A winging its way to me as we speak.
Have some Non-Stick Micro-tips flying in from the Grand old US of A
a will to get a better, more consistent yield.
Think that's about all I have for now...Happy Growing all!!! 💪


Processing
Likes
15
Share


@FishTankGrow
Follow
New Grow reusing old equipment from a fish tank LED and an IKEA fabric wardrobe. 😃
I hung two 75W LED Acan/Eco lamps inside the IKEA TENT I had laying around.
I bought a bag of Miracle Grow Organic soil and two pots at Home Depot for $20.
Pulled a fan out of an old computer.
Bought a $13 humidity and temperature gauge with Bluetooth. 😃
Ordered my Fox Farm nutes and Cal Mag on Amazon. $30 & $10.
RO comes from the fish tank setup.
Bought my seeds at Growers Choice.
Let’s see how this goes!😷
12/9 - 18 hours in water glass.
12/10 - 24 hours in paper towels. 1/2” tap root.
12/11 - Straight into soil. 😁


Likes
8
Share


@wayupnorth420
Follow
Bambi and Susan have been hung to dry.
Veronica still has a bit of time to go!


Likes
9
Share


@AnnGeneLabs
Follow
Hey growdiaries! The plant's doing fabulously. Looks like it's finally done with its stretching spree, and all that good energy is channeling into beefing up the buds. 🌿🌸
Here's the latest update:
Stable Growth: My green amigo seems to have hit a sweet spot - less stretch, more bud boost. It's like it's found its zen in the bloom phase.
Moisture Sensor Calibration: Nailed the moisture sensor issue! I tweaked it with a temp correction, 'cause the temps were messing with the readings.
Now, the graphs are looking way more legit. 📈🌡️
Nutrition on Point: Still rolling with the bloom stage feeding schedule.
It's all about that balanced diet for peak flower power. 🥦💪
Ready for the next level? 'Cause here's what we're aiming for in the upcoming week. 🎯
Data Collection Fine-Tuning:
Gonna revamp the data gathering process for soil moisture. It's all about accuracy, right? So, I'm updating the 'dry' and 'watered' soil baseline values to get the real deal on the moisture front.
By refreshing those raw values, we'll have a solid ground (pun intended) for our moisture readings. No more guesswork, just pure, precise data. 🌱💧
Gearing up for a week of tweaks and triumphs. Let's get our hands dirty (in the cleanest way possible) and make sure our plant's living its best life! 🛠️🌻
That's the word from the green world, GD. Let's keep this bloom boom going! 🚀🌼
Likes
5
Share


@LeedsCityFarmz
Follow
Not much to report this week so far. Slightly defoliated above the Scrog to allow more light penetration for the lower branches. Plants starting to stretch abit now but nothing to bad.
Likes
1
Share

@Naujas
Follow
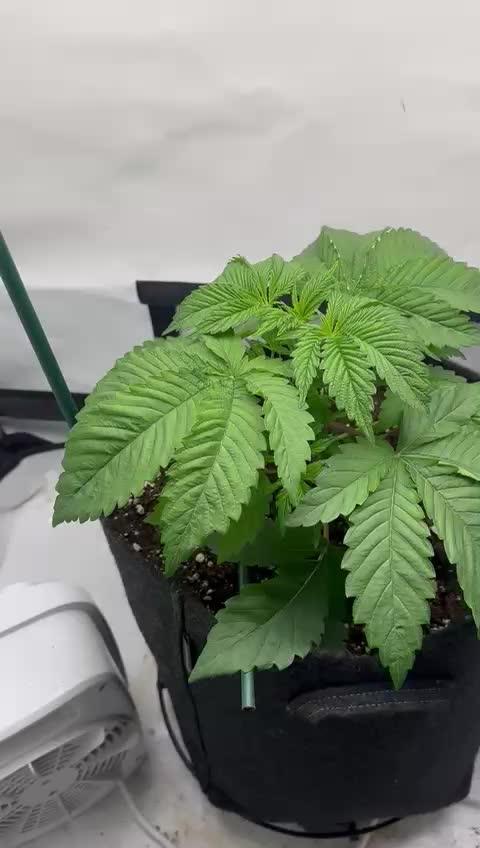
Praėjo 28 dienos, nors dabar nesu su ja, tiek nuotraukų pavyko padaryti :) 27 diena - ji miegojo ;) ir trūksta 28 dienų :) bet daugiau nieko, kitą savaitę vėl pas ją būsiu, ir treniruosiuosi LST ;).

Likes
31
Share


@Reaper
Follow
27 august: day 21 Flowering
the plant in the 20liter pot has the same problems now as my other critical grow.. the leaves fall of at the bottom and waterleaves in the middle turn yellow inbetween the vains.. im not sure what this is. the other plant in the 12Liter pot is yellowing a bit at the bottom but very dark at the top (no burn) you can see everything in the video all info is welcome even if this update is getting old. i only have this problem with this strain

Likes
7
Share


@Waisgrower
Follow
Primer dia desde cambio de fotoperiodo, recien se pueden ver los primeros pistilos indicando el sexo de nuestras plantas🌱. En unos dias se veran las primeras preflores que nos indicaran que partio la floracion🌺. Muy contento con los resultados obtenidos hasta ahora con tan solo 4 semanas de vegetacion, hemos llenado el espacio super rapido🔥. Se pretende sacar este cultivo en menos de 3 meses, asi como vamos se cree lograrlo!.
Las proximas lavores a realizar sera desfoliacion a los 21 dias de floracion ✂️.
Iluminacion Sodio 400w al 75% se aumentara en una semana a 100% 💡.
Fertilizacion con linea @topcropchile 💥
Potenciadorgenetico @knactive_ ⚡
Royal gorilla🦍 by: @royalqueenseedsrqs 🦁.
Likes
7
Share


@Alejangrow
Follow
Some defoliation & nutrient solution change
Really liking the bushiness of these plants. Probably have to flower an extra week to account for some of the stress right around the switch to flower 🤷♂️🏽
Seems a little behind for end week 4 imo🤔
What do you think?🌿
