The Grow Awards 2026 🏆 


Likes
Comments
Share
@DabbertGlobberfield
Follow
For the Herbies contest - https://growdiaries.com/diaries/157348-grow-journal-by-dabbertglobberfield#gallery=6777378 - Grandmommy Purple is guilty multiple noise violations for being too loud and for stanky funk.
Harvest - 169 days / 66 days in flower
Well, we did it. I made it to the end. All I can think is...WOW that was A LOT of work. But I think I had very good results for a first time grower. I
For harvest, we took Plant B and D and prepared them for immediate freezing. Altogether, I ended up with 1212g wet on plant B and 1089g wet on plant D. I ended up freezing 1816g of this. There was some from each of these plants that was set aside from freezing because, for whatever reason, I thought they were not worthy of washing because of how progressed the leaf damage was from the root rot battle. So that was cut up and dried as nuggets instead of hanging like the rest. Sawtooth and Plant C were both harvested and hung in the tent to dry for 12-13 days. I think I overdried by 1-2 days because when I jarred them they struggled to raise up to 55%. So I am using rh% packs.
After drying Sawtooth and plant C, I ended up at 459.8g for dried flower and 170.8g in dried trim. So just over 1lbs between the 2 plants and 4.15lbs wet between the other 2 plants that was washed for hash.
So... are you for real with the effort involved with washing bud for bubble hash? I don't think I would do this in the warmth. I only pursued doing bubble hash cause it's cold right now and I figured that would really help. Even in the 30s(fahrenheit) stuff would stick. It's hilarious how sticky of a process this is. I hope you have a bunch of gloves, water, and ice to burn through. I went through over 60 gallons of distilled water and 80lbs of ice to wash the 4 lbs. I am envious of people in videos using a hose to collect, clean, and refill. Also, doing this as a 1 person show is the definition of insanity.
I broke the washings up into 3 parts. The first part was was the tester wash. I broke off 420g of plant D's 848gs available. I used 7 bags to see where I would end up. I used 220, 160, 120, 90, 73, 45, 25. What I determined was that if I was hunting a specific micron with a lot of material this would help find what you can get. But for the next washing I reduced the amount of bags to 4; 220, 160, 45, 25. The time, with the 4 bags, I washed with 809g. I had a much more favorable experience and return this second time but I had green fast and probably used too much ice. The 3rd wash was the remaining 631g and I found an extra 137g I added of sugar leaves and trim, brining the 3rd wash to 768g. I used 5 bags this time; 220, 160, 73, 45, 25.
By the 3rd wash I have become an expert in collection but also never want to do it again. lol.
2 of the 3 washes have dried and I have 43.4g of bubble and 2.8g of dry sift. 37.4g of that bubble is able to be pressed into rosin. I will probably press that dry sift as well. The other stuff is 25u or 160u that I will experiment with or cook with. The other stuff is drying so I can't add it all in.
I pressed a bunch of trim and some flower. The trim presses nice and the dab is decent. I am working out a good temp for the flower. But the problem with all these tests to find the sweet spot is that I have all these testers to go through but want to keep pressing and trying that! I think I will need to work on a better storage solution.
I can't wait for the fresh frozen bubble hash rosin pressing... I have over 20gs of bubble to put in one bag. I am really looking forward to this. But I will need to work up to that pressing since I have never pressed hash/kief/bubble before in my rosin press. So this should be really fun.
I will 100% post an update of the hash pressing once I do that and also after the 3rd wash session is done drying.
In closing, saying I learned a lot from this grow would be an understatement. I fully expect to start it back up in a few weeks after some R&R then some R&D. There's some things I will need to work on before I start again, such as: having a single external reservoir that feeds multiple plants, hard to clog and easy to use ebb and flow system, miscellaneous final run stuff like space for drying. So thanks everyone for hanging out and perusing the photos and or reading all my huge rambling updates and thanks to those for the help along the way.

Likes
16
Share
@HowtoBubatz
Follow
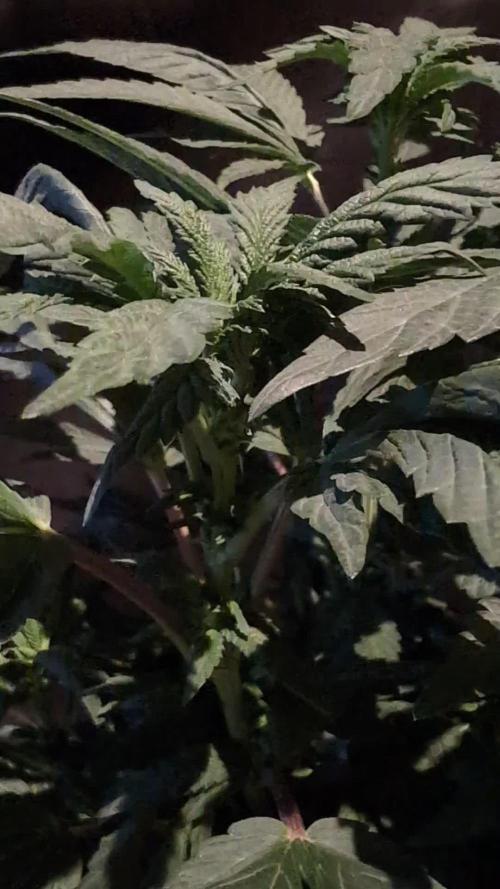
As the plant enters the fifth week of flowering, the first trichomes have begun to form.
The buds have started to thicken considerably during this week. They are becoming denser and more robust, which indicates that the plant is channeling its energy into producing larger, more resinous flowers.
Throughout the growth process, the cannabis plant has shown no signs of health issues.
It has remained vigorous and resilient, with no observable deficiencies or diseases.
To ensure optimal light penetration and airflow, the plant was lightly defoliated this week.
The cannabis plant is progressing well in its fifth week of flowering.
The formation of trichomes, the thickening of buds, and the plant's overall health are all promising indicators of a successful flowering phase.

Likes
19
Share
@Unpluggy
Follow
Hi there Friends🕊️
Purple Lemonade is doing really good!
Im excited for her buds to grow💜
Upgraded to a bigger tent 120x60x180cm and a larger light is coming next week. This should get all 3 Plants nicely covered and they have more space👌

Likes
11
Share
@Minniesturps
Follow
All done and hanging to dry , ill update when its dry woth a total and smoke report

Likes
11
Share
@Organic473
Follow
Full bloom has begun…some of the larger fan leaves were removed for more light. I will be crossing this girl with some Khalifa Kush pollen in the 2nd week of flower for some custom bred seeds.

Likes
7
Share
@x_grower
Follow
Last week plants were looking super healthy and responded very well to the second topping so I decided to flip the light schedule few days later. They already started stretching and the smell is noticeably enhanced.

Likes
126
Share
@nonick123
Follow
Día 69 (25/03) Su hermana Gorilla Cookies FF muestra una ligera necrosis... me preocupa...
Día 70 (26/03) Necrosis en Gorilla Cookies muy avanzada en solo 2 días. Hablo con el gran @dogdoctorofficial y me hace ver que estoy regando mal...
He dejado que se seque demasiado el sustrato! (como en la fase vegetativa) Y la Gorilla Cookies FF al ser la planta más grande y que más agua pide, está demasiado sedienta...
Voy a modificar los patrones de riego para que el problema no persista en Gorilla Cookies FF ni aparezca en las otras plantas!
Riego 0,5 Litro H20 sin nutrientes. TDS 225 PPMs - pH 6,6
Día 71 (27/03) Riego 1,25 Litro H20 + Wholly Base 3 ml/l + Solid Green 1,75 ml/l + Early Flower 0,75 ml/l + Big Bloom 1,5 ml/l de Gen1:11
TDS 1150 PPMs - pH 6,2
Día 72 (28/03) La necrosis en Gorilla Cookies FF se ha detenido 😁 y las flores siguen creciendo
Observa alguna mancha de necrosis también en Wedding Cheesecake FF y decido a subir un poco la lámpara
Ahora el PPFD en apical es de unos 830 PPFD
Día 73 (29/03) Riego 0,5 Litro H20 sin nutrientes. TDS 225 PPMs - pH 6,6
Día 74 (30/03) Riego 1,25 Litro H20 + Wholly Base 3 ml/l + Solid Green 1,75 ml/l + Early Flower 0,75 ml/l + Big Bloom 1,5 ml/l de Gen1:11
TDS 1150 PPMs - pH 6,2
Día 75 (31/03) Detecto una ligera necrosis en Purple Lemonade FF y en Wedding Cheesecake FF.
Voy a aumentar un poco la distancia de la lámpara para tener un DLI de 37, por si fuese estrés por luz.
💦Nutrients by Gen1:11 - www.genoneeleven.com
🌱Substrate PRO-MIX HP BACILLUS + MYCORRHIZAE - www.pthorticulture.com/en/products/pro-mix-hp-biostimulant-plus-mycorrhizae
Likes
14
Share
@GoodTimesOrganics
Follow
Welcome Back!💚
Nach der ersten Blütewoche sieht man bisher kaum etwas an Blüten/Stigmenansätzen. Sie ist bisher echt der krasseste LowGainer, den ich seit ich Growe gesehen hab.
Bisher muss ich leider sagen dass mich die Genetik hier etwas irritiert.
Mal schauen ob die Pflanze in der Blüte noch was reißt 😁
🙈
Die Umgebungsgegebenheiten sind top:
—————
🌞 Temp: 23°C
🌚 Temp: 18°C bis 19°C
💨 RH: 51%
VPD: 1,05 kPa
😎 PPfD: 630 mqm
—————
Viele Grüße 👋
Likes
12
Share
@GREENPHOENIX6262
Follow
*Early Flower 09/10*
(2) Fastbuds - Mimosa Cake Auto
Aggressive LST was applied for even light coverage.
Smaller-Lagging budsites and bigger fan leaves under net have been removed.
Slight increase in nutrient feeds, thus far 0 signals of deficiencies.
*Mid week update - 09/13*
Both plants have grown approximately 6 inches in height
Early flowering continuing to progress accordingly
Half a gallon increase in water feed (Nutes included)
*End of week recap 09/16*
Mimosa Cake (Auto) - Both in week flowering accordingly
Small increase on nute feeds - Moderate increase in filtered plain water feed (1.5 gallons )
*SEE END OF WEEK RECAP VIDEO*
Likes
8
Share
@DevelGrow
Follow
Growers Love to Zamnesia✌️🍀💚🍀
Hallo Freunde 👋 Grand Daddy ist 14 Tage alt und macht sich sehr gut in Händen von Shiva 🌱💚 es sind die ersten Triebe da und ab nächster Woche wird leicht LST angewendet und entsprechend entlaubt! Sonst finde ich sieht's ganz schön aus! Bis nächste Woche keep Green and grow High,✌️🍀💚🍀

Processing
Likes
Comments
Share
@Mugatu
Follow
The screen is slowly filling up! I will admit the ScrOG method is a little more work than other LST/HST, but I love messing with my plants anyway. Its like solving a puzzle trying to find the next spot to pop up a cola. The Lucas method is going great. Still no water changes, and I haven't had issues with algae or root rot. Some people report their reservoir smelling bad without water changes, but all I smell is ganja 😀


Likes
37
Share
@Kirsten
Follow
30.8.24:
The plants are still developing very slowly.
I may top dress with Ecothrive Life Cycle again, as it's taking longer than expected. So they can probably benefit from that.
I overwatered all plants, there was run off. I watered 2 days in a row. There weren't any visual signs that this affected the plants. I'm not going to water, until the soil is dry enough to mix in the ammendments.
I'm sill using the Xpert Nutrients Bloom Booster, I have noticed that FBP1 and FBP3 have gotten more sizeable since using this product. It's hard to tell on my FBP2 as the buds are already huge.
I have continued to defoliate today.
I also moved the plants around to maximise light exposure.
The branches on FBP3 and FBP1, were looking flimsy. So I tied a few more branches with string, to keep them from breaking and taking up so much room.
1.9.24:
So today I added Ecothrive Life Cycle, Diatomaceous earth, also went ahead and added the Bat guano.
I watered it in with 2 Tbs of Black strap molasses in 1 ltr of water, to each plant. Each plant also got 1ltr of water with 3ml of Ecothrive Flourish. Additionally I used 2ml of Xpert Nutrients Bloom Booster in 1ltr of water.
I've noticed that there are new pistils are growing out of the top buds. I think it may be light and or heat stress. It's up to 30°C, at some points. The humidity is pretty stable at 40-50%.
I've lowered the light intensity slightly, and am now using 2 fans on low settings. To try to get the heat to lower.
2.9.24:
I've decided that stakes are necessary to FBP1 and FBP3. So have made some 70" tall.
I also finally got round to cleaning out the bottom of the tent. It was a mess, so I disinfected it with F10. I didn't get any anywhere near the plants.
The plants top soil had dried up overnight, I'm assuming the dehumidifier has something to do with it! It is is a great piece of kit.
I watered each plant with 1ltr of dechlorinated water, PH'd to 6.0. Each 1ltr had 1 ml of Ecothrive Flourish.
I don't want the microbial ammendments, to dry out and ruin it. So I'm thinking about watering just once a day, only 1 ltr per 5 gallon pot.
Additionally my companion plant, Rosemary has some either; webbing or Mould on it, so I took it out of the tent, and will treat soil
In that pot with a neem oil drench, and see what happens. I need to repot it, my mint plant in the tent also has exploded and needs repotting.
3.9.24:
I've watered again, as the water is getting drank by my dehumidifier. Couldn't live without it though!
I added 3ltrs of water to each plant included was;-
3ml per litre of Ecothrive Flourish,
2ml Xpert Nutrients Bloom Booster.
Dechlorinated to 6.2.
Still haven't managed to add the extra plant stakes yet.
4.9.24
Today all the top soil was dry, and with my dehumidifier so close, I've added another 2ltrs of water each with;-
2ml of Xpert Nutrients Bloom Booster
2ml of Ecothrive Flourish
2ml of cal-mag.
PH'd to 6.0.
Had to add additional stakes in to FBP2 (my best pheno)! As the flowers are soo heavy, it's crazy actually. I've been using 6% silica, since the beginning.
I am checking the trichomes daily through the jewellers loupe. They do actually still look clear / glassy. I'm glad I did top dress this week, as it looks like we're going to be going for a long while yet. 2-4 weeks.
Ps. If I've made mistakes in this update, I'm 9/10 faded on my Royal Critical. 😅
5.9.24
I watered with 2 ltrs of water per plant PH'd to 6.0. For each litre, I added 1ml of Ecothrive Flourish and 2ml of Xpert Nutrients Bloom Booster.
I accidentally bent a branch on FBP3. I have taped it together tightly with duct tape.
I also added more stakes to FBP2 as the flowers are getting super heavy, which is an awesome thing, as I was prepared for staking, and tying. Can't wait to taste these when they're ready to harvest! 🤤
Ps.
I'm thinking of making up a new 5 or 10 gallon pot with a super-soil mix, I did that for this run, but now I know more about ammendments, hopefully it will be better this time. I'm going to leave the soil mix as per the instructions to cook / dry, before planting this time.
Will update again 🙂

Likes
207
Share
@PEAKYPLANTERS
Follow
Hi guys, how's it going?
We are out of strength but we want to continue our efforts on the platform
My God! If we continue at this rate....I think next year I will eliminate all types of soil from the list 😄😄😄
We're having so much fun with this tree😎👩🏼🌾
Processing
Likes
2
Share
@MidwestBudz
Follow
From the looks of my top of the coco it seems like I was over watering. I seem a bit of algae growth, my coco stay moist for 4-5 days it seem like. So should my nute feeding be huge or give them small daily feeding in between the large watering?


Likes
10
Share
@ZweetZkittlez
Follow
Ya cambiamos al ambiente final! Se realizó una poda de bajos, una buena Defoliación y LST


Likes
60
Share
@m0use
Follow
This week has gone well, had a bunch of stuff typed out and closed my browser by mistake and now this is #2 attempt to post this week.
Easy week for the plants, they have being growing well and I am impressed by the size of them. I added in some potassium silicate to introduce some Si into this grow. I decided to top them as they where starting to grow their 4th node, snipped that tip off and we're golden. They are kinda smelly if you rub them and that's fun too, Some of the hot peppers have also popped up and started growing. I still don't have anything on the Naga Morich pepper that I am hoping for. I have a feeling that as the seeds I got from these peppers where from a dehydrated pepper, they might be duds nuked from the dry heat of the dehydrator. I do have 4 vials of hot pepper seeds where the label has fallen off, I found the labels but no idea what one goes on what bottle. One out of the four bottles is Naga Morich, Having some none dehydrated seeds in my possession is one step closer to getting more of this hottie.
I also found a fly out of no where, Its little wing is damaged and it more or less hops and glides unsuccessfully vs fly's but I took some videos of it. I also seen a few fungus gnats, little fuckers where not in my apartment before I am convinced their eggs survive in the stuff I buy then come out of it. Kinda annoying.
PLUS I borrowed a light meter from my hydro shop, I was expecting it to be a LUX meter and that I would have to do a bunch of conversions but it was not, it was a legit Quantum Par Sensor, detecting in PPF "Photosynthetic Photon Flux" or umols/s, with these readings I can calculate my PPFD "PPF+Density" I have mapped out my tents floor into a colour coded grid of dots and mapped out the PPF at varying heights and dims. However I did not do it right and need to redo this. But once this is done I will have a functioning PPFD map with relation to my tent. This will help me tone in DLI and get it aorund a solid 35-40.
Will be gearing up for a transplant next week. I try and post on Fridays but don't always get around to it. I take the pics on that date though and then try and remember what I was going to write about that week. PS Gorilla Tent Accessory's suck shit. The SCROG nets pic has the gorilla 2x4 SCROG net "black" and the Secret Jardin 2x4 SCROG net "white" beside it. massive difference in quality and size. I should have known when they state on the label its for 2x2 or 2x4, that's not even possible. Also tried out the nutrient line that's part of the gorilla tent company, Lotus, I ran it one year and it was just trash, did not work, had issues since first week and they would not correct. Buddy reached out to me and said same thing happened to him and he disliked the brand.
Big shoutout to Medic Grow for sponsoring the lighting in my tent, They have provided me with 2x Mini Sun 2's in the 240w configuration, They use the v1 growing spectrum that is a all purpose seed to harvest spectrum so their is no hassle of switching it mid grow. If you interested in learning more about Medic Grow products please visit the web link below.
https://medicgrow.com/
https://growdiaries.com/grower/MedicGrowLED

Likes
5
Share
@Saihtan
Follow
Purple haze auto begin flowering a week later after the group went to 12/12. She just started drinking a half gallon a day. She has also stretched above the rest of the plants!


Likes
15
Share
@Messypies
Follow
brilliant week of growth from the peanut butter cookies. Been a little bit of a struggle for space but will HST once all autoflowers are out.
Both the auto cinderella jack and auto critical cheese are developing buds nicely

