
Likes
Comments
Share


@NocturnalGardner44
Follow
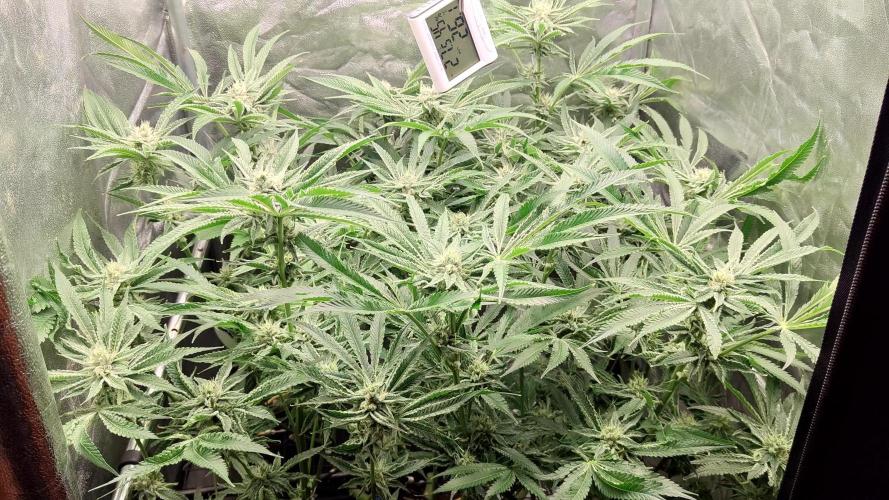
This week I pruned and defoliated heavy. Removed every fan leaf and removed everything before the scrog. I didn't get as horizontal as I would have liked but I'm hopeful I won't burn tops bcuz I'm close, lucky I have the light rail moving the light atotal of 3 feet back and forth allowing me to use more intense like but in spurts. Also the co2 bag and co2 bucket really seem to be helping. Topdressed with endgame and loaded up with basilus, activated em1, orca, great white, king crab, mammoth p, ohn, yucca, alow flakes, count powder, root wise poder and enzymes. Also weekly to every other week I make compost tea from boogie brew. All my water is treated with drops of balance and I also collect and use rainwater. I have an irrometer and run from 10 to 15 kps


Likes
3
Share

@Hren_Morjovii
Follow
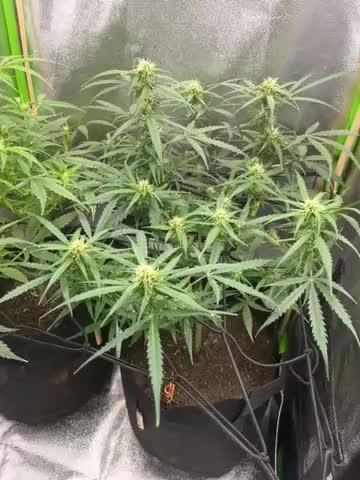
29й день 12/12. Добавляю в питание Simplex Aroma Punch. Теперь питание поочередное. 10 литров с раствором 2А 2Б 1T.A. Мл на литр, после чего 10 литров с раствором 2А 2Б 1Aroma 0.5 mg. Мл на литр. Все вместе не даю, что бы не перегружать ЕС в корневой. Так же на этой стадии можно не заморачиваться и лить 2А 3Б, вообще так до конца можно лить и результат будет хорошим. Просто жопа ищет приключений.
Убрал дальний красный. Увеличил световой день до 13 часов, добавил по полчаса в начале и в конце.
Провел еще одну дефолиацию, убрал большинство крупных листьев и проредил листья снизу.

Likes
18
Share


@Grower_Of_Persia
Follow
my dry and cure style is this:
4 days of hanging upside down to get water activity lower to around 0.6 in 50% humidity and 26 C temp (i know its a little high but we are in a hot summer right now and i cant get it lower even with air conditioner) and then after 4 days of drying i remove leaves and stalks, trim buds and move them to jar for the rest of their life :D . and in the first 4 days of curing i open the jar door and let hem get some fresh air in the jar for about 5 minutes and close the jar door again, after 4 days of curing like that buds are smokable but they will get better as they getting cured about 1 month.
buds are one of the hardest as fucking rocks type of buds! very dense , compact , sticky , smelly , amazing at every aspect
growing stage was 56 days and flowering stage was 75 days total (harvested tops at day 64th)
the total weight of dry buds was : (plant #1 & #3 top buds 56 G + lower buds 22 G ) 78 G + (plant #2 top buds 47 G + lower buds 18 G ) 55 G + (plant #4 top buds 120 G + lower buds 67 G ) 187 G = 367 G

Likes
38
Share


@MadeInGermany
Follow
Info:
Unfortunately, I had to find out that my account is used for fake pages in social media.
I am only active here on growdiaries.
I am not on facebook instagram twitter etc All accounts except this one are fake.
Have fun with the update.
Hey everyone 😊.
This week has continued to develop great :-).
It was poured once with about 200 ml because it is still under the hood with very high humidity that is enough :-).
Next week the hood will be opened bit by bit so that it can get used to the surroundings :-).
Otherwise the tent was cleaned and the humidifier refilled every day this week.
I think I'll repot next week and then start training :-).
Until then, I wish you lots of fun with the update.
Stay healthy 🙏🏻 and let it grow 👍
You can buy this Strain at :
https://www.zamnesia.com/de/4532-zamnesia-seeds-gorilla-glue-feminisiert.html
Type:
Gorilla Glue
☝️🏼
Genetics:
Chem's Sister x Chocolate Diesel
50% Sativa/50% Indica
👍
Vega lamp:
2 x Todogrow Led
Quantum Board 100 W
💡
Bloom Lamp :
2 x Todogrow Led
Cxb 3590 COB 3500 K 205W
💡💡☝️🏼
Soil :
Canna Coco Professional +
☝️🏼
Fertilizer:
Green House Powder Feeding
☝️🏼🌱
Water:
Osmosis water mixed with normal water (24 hours stale that the chlorine evaporates) to 0.2 EC. Add Cal / Mag to 0.4 Ec Ph with Organic Ph - to 5.5 - 5.8 .

Likes
11
Share


@DixTheReal
Follow
Giorno 57 - procede bene, ho tolto qualche foglia morta sotto, l’odore é davvero troppo forte anche fuori dalla grow box, comprerò Ona Gel
Giorno 58 - ho continuato a defogliare sempre su “CARAMEL” le foglie morte, domani irrigherò
Giorno 59 - fornisco 0,5 L di acqua a testa, procede bene, i fiori di “CARAMEL” sono rimasti nettamente più piccoli a causa delle carenze
Giorno 60 - prima rilevazione dei Tricomi al microscopio, ancora trasparenti, credo che ci vorranno ancora 10 giorni prima del taglio…
Giorno 61 - procede bene, domani darò ancora acqua
Giorno 62 - alla fine non ho dato ancora acqua, la daró domani, hanno iniziato a ingiallirsi le foglie di “CREAM” e manifestare carenze, spero di raccogliere tra una settimana
Giorno 63 - fornisco 1 litro di acqua a testa. Le foglie di “CREAM” hanno macchie marrone rotonde, carenza di calcio, mi hanno consigliato di dare CalMag ma ormai sono a fine ciclo e attendo di raccogliere

Likes
10
Share


@iLoveGoodWeed
Follow
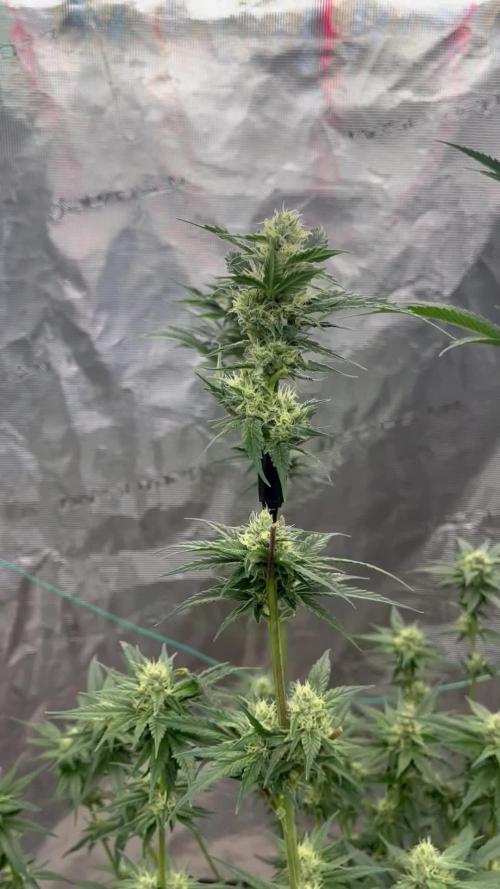
This plant is just monster similar to Haze plant.
I have not done a lot of LST so there is one massive bud in middle. It's growing and growing but slowly I can see some frost on buds but this plant still have few weeks to go


Likes
6
Share

@Peteysmokes215
Follow
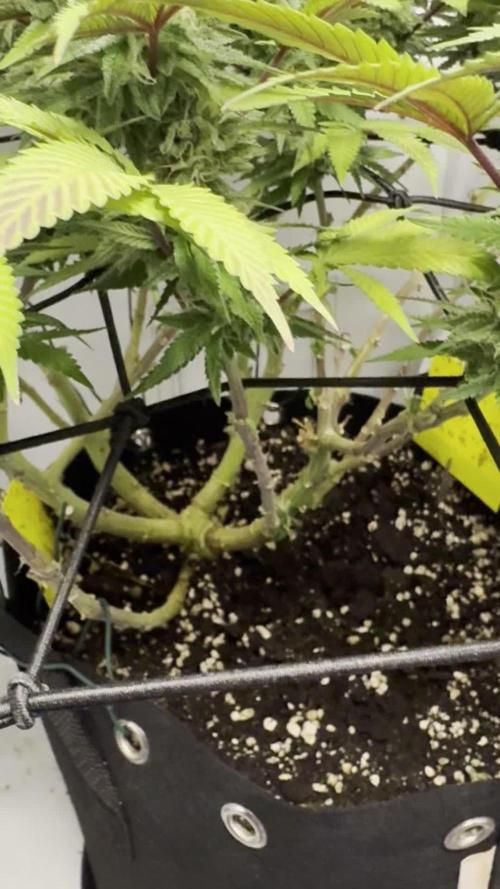
Moved light closer and added a resin boost tea I’ll do it two more times looks like they like it


Likes
23
Share


@Gordy
Follow
Week 3(Bloom):
She has packed on a lot of pistils this week. Overall she’s looking really good. I think I’m under watering her. Last night and tonight when the light came on she looked pretty droopy. I’ve given her some more water today. Tomorrow when the light comes on I’ll give her a look and see. I did lift the plant to see if it was heavy or light, she was very light. Hopefully she snaps out of it.
I’m very happy with this girl. This week the growth wasn’t as rapid, this could be because of not enough water, not sure though. Starting to see a bit more vertical growth
Thanks for checking out the diary! 👊

Likes
20
Share

@Rangaku
Follow
RS11 is showing off now , she’s got mad sticky this week and starting to fill out very nicely, keeping up with the defol weekly and tying her down she’s stopped stretching for sure and wants to bulk up . Same same next week . Solid strain this , she loves feeding and does all the good stuff automatically. Gonna be a great month at chez Rangaku

Likes
44
Share


@Jays_Not_Here_Man
Follow
A great week of growth and development. Did a small defoliation, and clean of the tent. The girls are very leafy, and some of that needed to go to increase air flow and prevent issues from developing. Love this time of growing as there is not much to do, but watch the buds stack! Happy Gardening 👊❤️🇨🇦

Likes
31
Share


@Mrs_Larimar
Follow
This Spring I was asking @James from RQS, wich recommendations he can give for Good Outdoor Performer in my Country. ( Northern Europe)
Because most of the Year i have to Harvest earlier due bad Weatherconditions.
Because in 3rd .of September, weather changes, and big Rain begins
He recommended me Honey Cream and Speedy Chile
So I started Grows with this Strains
And its a Superstrain!! for my Conditions,
That means they get ready in Time, before everything gets worse
Great growing Strain, very big and stable Branches, .........When they started Flowering they go in Overdrive
The Result is a wonderful strong Plant, filled on and on with Buds
Today we harvested The Lady in the 75l Growpot
On Sunday the Lady into the ground, gets Harvested
We made some Photoshooting and Videos to show her Beauty, but its nearly impossible To catch her in Pictures
but we tried
Luckyly ii nvented in a wet trimming machine, and the Lady was cut down in short Time,
and gave us a good Number ( i have no cluehow much,,,Iam guessing for 300 g)
Sunday October 4th
Second Honey Cream was Harvested, She had agood shot Of Purple due Cold nights.
She was so fresh , when I took of the Bif Leaves, they made asmacking Sound
Plant Number 2 was sitting in The Ground, I started fertilising her late( 2 weeks before Harvest), but not tooo Late
She nearly catched up , in Budbuiding her Sister.
So Thank you for those Gentics... its for me a "must to grow again Plant"
Iam going to write more on Sunday, about buds smell and resinousness

Likes
13
Share


@Nyabinghi420
Follow
After not growing for almost a decade, it’s absolutely nostalgic and somewhat of an emotional moment to finally finish a grow again.
I never thought I’d ever be able to do it again, But it feels really good after all this time and I appreciate all you joined me on this journey.
I’ll be back soon; very soon! Stay tuned :)

Likes
10
Share


@Dthebudguy
Follow
This is the best one I’ve done to date and excited to see what she finishes like .

Likes
21
Share


@VicFor
Follow
Start of flushing week, we’re close to the harvest, buds are becoming so heavy and sticky !!

Likes
14
Share


@BLAZED
Follow
Week 9 (27-3 to 2-4)
27-3
Temperature: 25 degrees (lights on) 18.9 degrees (lights off)
Humidity: 63% (highest) 55% (lowest)
Added 15L to the reservoir.
28-3
Temperature: 25.1 degrees (lights on) 18.5 degrees (lights off)
Humidity: 64% (highest) 56% (lowest)
29-3
Temperature: 27.2 degrees (lights on) 19.4 degrees (lights off)
Humidity: 67% (highest) 48% (lowest)
30-3
Temperature: 25.3 degrees (lights on) 20.5 degrees (lights off)
Humidity: 65% (highest) 54% (lowest)
31-3
Temperature: 25.8 degrees (lights on) 20.8 degrees (lights off)
Humidity: 62% (highest) 56% (lowest)
Today i decided to turn of the reservoir/autopots.
I think the plants are overwatered, and because of that probably have light stress and other problems.
Also, it can be that i underfeeded them, and that the PH was too high.
I turned the light down to 40% strength aswell.
1-4
Temperature: 23.6 degrees (lights on) 20.6 degrees (lights off)
Humidity: 62% (highest) 57% (lowest)
2-4
Temperature: 22.6 degrees (lights on) 19.8 degrees (lights off)
Humidity: 62% (highest) 56% (lowest)
No pictures.

Likes
5
Share


@Gram_Solo
Follow
FastBuds - Gelato Auto x 1
Dry Weight - 2 ounce and 20.73 gram
I can definitely see an increase in weight and yield from doing the mainlining technique I would normally get around 1.7 oz of an auto If I hadn't done any training and not lollypopped and defoilated the plant.
Highly recommend this method to avoid clutter , little popcorn nugs and messy plants.
I thought I lost a plant to herm but I could have been wrong as I seen a diary on here that looked very similar to the one I Isolated and it turned out OK.
Smoked that one already and didn't hear any popping or cracking of seeds so she could have gone longer but I didn't wanna risk other plants turning.
Nugs are rock solid!
Gassy lemony smell!
Tried one last night as a tester and it was niiiiiice! Will try and let the cure begin before I raid the jars lol
Buzzing with results!
This was also a sample from FastBuds so good! 🙌🍦🍦🍦🔥🔥🔥
👊
Likes
22
Share

@Sundancers
Follow
Die Buds entwickeln sich sehr gut und nehmen kräftig an Masse zu.
Huhu.... wir purpeln auch ein bisschen.
Größer wird sie wohl nicht mehr, nachdem wir in den letzten beiden Wochen in die Breite und nicht in die Höhe gewachsen sind.

Likes
53
Share


@Mastr
Follow
Day 50 come along and now I give her full dose off nutrients and she loves it
4ml heaven
4m acti vera
4ml bloom
4ml top max
Water her 1 time a day with 2.5L ph 6.4
This time she grow so fast without any trouble she start flowering day 21 and I think she is ready in just 3 weeks
Day 54 and she is super happy and easy to grow while my other strain keep mess me around with deficiency lol this strain smell is incredible like light lemon with herb and when you smoke it you feel you smoke hash not week honestly test so close too hash when you smoke it she will be ready in day 70 or 75 and I bet she produce over 150g bud not long left 2 weeks or bit more
Day 56 u start use atami bloombastic to increase sugar for final flowering phase
Processing
Likes
4
Share


@Andres
Follow
she grows outdoor ... without any relevant information ... only her vegetation is slow ... it's autumn ... and the sun is not very strong ...
