


Likes
Comments
Share


@Rob691
Follow
D-104 : Last week, I noticed a problem related to the calcium OR to the Ph. I didn't know if it was a deficiency or an excess. So I tried to just wetered girls with the right Ph and A bit more of CalMag 0.8 > 1.2/L. We'll see this week if It was the good choice. fingers corssed !
D-110 : As Chocolate Haze 1/4 start to show nanners and her trichomes are mostly mature, I desicided today to remove her from the main room to settle her in the small room for 48h of black out. For her, the harvest and the drying process will start in 48h from now.

Likes
13
Share

@Chubbs
Follow
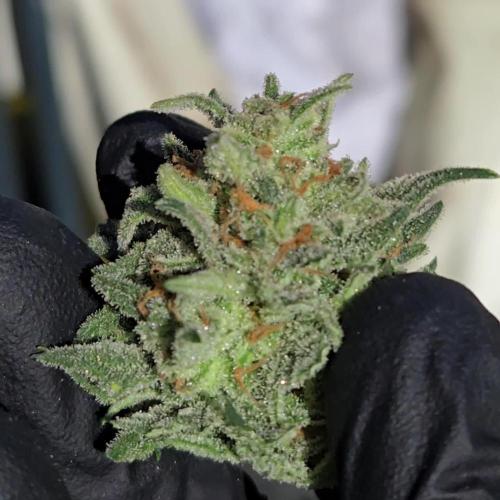
I feel like a kid on Christmas morning with this one being harvested. The terps scream loud, and they're covered in frost. I decided I'll be doing some bubble wash with these so they're where harvested and put directly into the freezer until I wash them. Stay tuned to see what the Hash and Rosin look like as I'm excited. It's more on the Sativa side so not a small plant as I chopped 3 getting a wet weight of 705g of beauty flowers. All in all Happy Growing.

Likes
39
Share


@Hazecat_420
Follow
Todo resultó bien, pero hubo una semilla que a pesar de que germinó de manera exitosa no logró enraizar correctamente. Quedando con 14 semillas de 15 en total seguimos ...


Processing
Likes
68
Share


@Tazard
Follow
Beginning of the 10th week of flower. Shouldn’t be too much longer now. I will add some bud and trich pictures this week.


Likes
27
Share


@Frosty_farm
Follow
Week 15....day 106. She's just going to get plain pH 6.0 water for the next few days. I know she wouldn't yield a lot but this plant taught me a lot so I'm satisfied with that. I'm sure from here out you guys will see better yields and quality from me. Day 108.... nothing much has changed but some of her old leaves are getting yellow and brown. Her buds are looking better every day. Day 109... Nothing changed. Day 111.....this plant still looks healthy because my ppm was at 1000. Gave her a couple of flushes and bought it down to about 200. I'll chop her down at the end of this week. Day 112.....last day for this girl, trichomes are looking good, she's not big but I'm loving it. I trimmed most of the big leaves down, I'll chop her down tomorrow and put her in my diy dryer. Very sticky buds, my fingers were sticking together even the clippers were sticking too. See you guys at the harvest

Likes
20
Share


@eldruida_lamota
Follow
Que pasa familia, vamos a añadir la segunda semana de floración de estas Apple Fritter de RoyalQueenSeeds, empezamos con la temperatura que la tenemos entre los 21/25 grados, la humedad está entorno al 50%, el ph está en 6.2 , el foco actualmente lo tengo encendido 12 horas y la potencia es al 75% de lo que da el foco.
También añado la gama de nutrientes de Agrobeta, que no falla, sin duda de la mejor alimentación que hay para tus plantas, también se ven bien verdes ya recuperaron la carencia de nitrógeno.
Veremos estas próximas semanas como avanzan y se comportan en la floración.
Mars hydro:
Code discount: EL420
https://www.mars-hydro.com/
Agrobeta:
https://www.agrobeta.com/agrobetatiendaonline/36-abonos-canamo
Hasta aquí todo, Buenos humos 💨💨💨
Likes
11
Share

@ZhulenejJohny
Follow
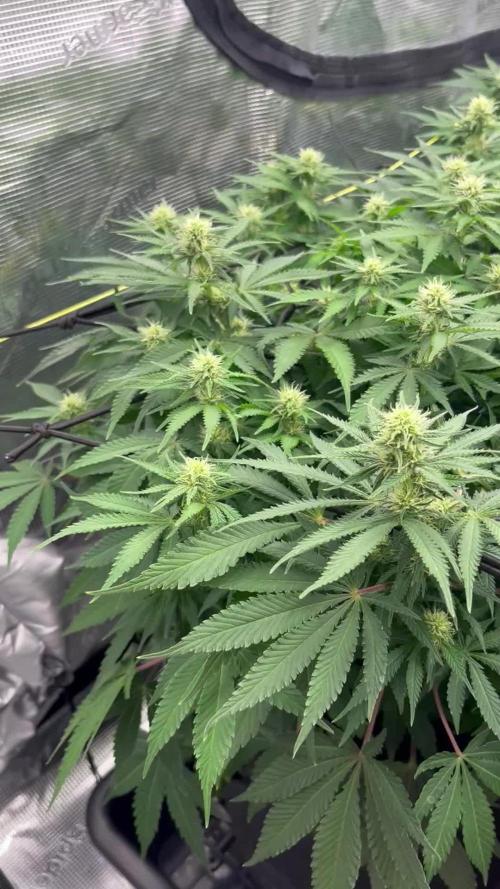
Dnes máme 19.den květu. Pijou jak o život, palice se krásně formujou. Zítra jdu na defo. Peace👽
Processing
Likes
12
Share


@NutsInGuts
Follow
Welcome to week 3 of the flower.
28.09.2020 - watered with recharge at ph 6.34
DAMM!!! these pistils seems to be on some sort of steroids i swear..ahahah..pretty evil looking bud if ya ask me.
Another smooth week without any issues .buds are really starting to stack now.
Likes
8
Share


@Rabidreject
Follow
I always find it hard to say how much water they are taking because the whole auto pot thing. It would be more useful to maybe have an option to be able to change the unit because it would be way easier for me to say how much water has been put in the res during the week - sometimes even that’s hard to remember for me!
Aaaaanyway, things are going fine in the grow - I turned down the light just a tiny bit as the pistols were showing signs of having too much light and they were just looking a little bleached out, so I turned down the light to around 80-90% as well as I think I raised it a little bit also.
It’s much harder keeping everything stable in such a small space when I am used to having a room to use but oh well, it is what it is - I am really lucky / stupid to be doing this one, however, I also went into the grow knowing I may have to kill her at any moment - dependant upon visits etc. I know photo growers always say there is no difference in speed between autos and photos but there is a couple of weeks in it most of the time - at the very least. I tried it, my last proper grow I selected all fairly fast flowering photos (not those photos that have been bred with autos to make them quick but just generally fast flowering plants) and it still took longer than my longest auto has taken and it annoyingly Hermes so had to turn into hash coz it was super annoying.) but that’s all in the past now…
So I haven’t had to resort to using my AC yet but I did get a 1/4 of the price knocked off because it doesn’t work with the app properly and that’s basically what it was sold on! Don’t go to klarstein, people!
She’s def been stretching for sure but I remember this being a really squat plant anyway and I have also trained it in a bit of an odd manner so that it grew outwards with a flatter canopy - I wouldn’t top in future. I don’t really know why I did - maybe because I always have (for the most part) but I think she’d have grown taller and had bigger side branching if I hadn’t but having said that it is pretty much impossible to tell! Unless you do an A/B test - which I obviously don’t have room for!
In the next week I am hoping to see her get really hairy and hoping to have to attach a carbon filter - as that would mean she’s happy and I’m going to get some dank.
With regards to expected harvest - I genuinely have no idea. She averages at around 2.5z/plant going on the info put into grow diaries and that it about what I got last time - I don’t think I ever weighed it tbh coz I grew it just to turn into rosin. Having said that, it is a totally different set up and the first time I am using this light, so I’m not sure of the capabilities of what is probably a 120-140w light - now I have dimmed it down. I mean, I guess if she was starved for light I wouldn’t have had to turn it down so I’m confident it can produce sticky buds. I will also turn it up to full power in the last couple weeks.
She’s meant to be a 10 week or 70 day strain - and I hope that is true because I am going on holiday in early July so I can’t have her going on and on and on. She will have to be cut when she will have to be cut - and maybe hung whilst I am away with the ability to control the environment over Wi-Fi (and probably a camera). Iv just looked at dates and actually she can go on for 13 weeks and so it is all good - she should still be drying by the time I go there and should be ready for me when I get back - I’ll be doing a dry trim as I always do just because it slows down the drying process even more - although actually to be fair the main reason I used to do that was I didn’t have seperate climate control for drying and couldn’t use the tent as was on a perpetual grow. This time I’ll be able to set it tov 60%/60f and hopefully keep it there for a full couple of weeks.
Obviously I get rid of big the fan leaves and also chop it into smaller branches but other than that I prefer to do it all dry - saves your choppers for one thing!
Processing
Likes
3
Share


@Budz420
Follow
Great start for week 10 did some defoliation,they look so happy and healthy, I had issues with the plants they responded well to LST and defoliation. I make sure to remove some leaves here and there. The most important thing to me me in this stage is to make sure they have perfect airflow.
Likes
13
Share


@CalGonJim
Follow
11/13 all the clones are doing great. These will be ready in a couple of weeks. I have three more that I flipped to flower and I’m running them at 76 was the three plants it was an accident but they seem to be responding just fine at that so I’m gonna try and maybe not have the lights up so high bleached out the leaves on my other plants these lights are incredibly bright, and I I run them to high of wattage but I love these they’re the best I’ve ever had
11/15 Wednesday I took some samples from blackjack I think earlier in the week and I had them in the jar and I took some pictures of them. The resin is incredible. I’ve never had results like this. This is really nice. I gave her water today with light nutrients, and about 3 1/2 mL of the Boombastic only half a gallon each
I’m smoking a sample that I took off and put in a jar and dried and wow it’s so pretty see all the resin I took pictures and the video of that pretty good
11/18 Saturday the tops are beginning to be so heavy. They’re falling over and I can’t keep them standing up. It’s the most frustrating but the best problem to have really good stuff.
11/19 I had a lot of trouble standing them up yesterday I stand one up another one would fall down. I felt like they were playing a practical joke on me. I look like the three fucking stooges doing it. I was so pissed off. It must’ve been hilarious. They’re doing really good today. Nobody’s falling down, I don’t know how much longer I can keep them growing but wow they’re really something I have three other clones that just switched over to flower and I have three of them that are still in veg so I’m gonna have these for quite a long time
I’m probably gonna take clones off of clones off of clones it’s hard to let go when you’ve grown the same plant this long they grow a little taller than I’d like but I have a really nice smoke.
It doesn’t make me too hungry. It’s good for nausea but I can still function around the house and get everything done. I have to fast a lot so I don’t get sick and this helps that even though I’m hungry it helps with the discomfort of not being able to eat.
I gave early flower nutrients to the three blackjacks in early flower. I just flipped them this week I added a half a milliliter of the Bloombastic just to get her used to it. I went pretty light on the nutrients I introduced the nectar from General hydroponics a sweetener I put that in there I used 5 mL of that, it said to use 10 no way
Likes
18
Share


@Roberts
Follow
Zealix is growing well. I did a solution change today. I switched her light time 2 weeks ago. I defoliated her to open her up for stretching, and lollipopped her. Everything is looking good. Thank you Spider Farmer, and Terpyz mutant Genetics. 🤜🏻🤛🏻🌱🌱🌱
Thank you grow diaries community for the 👇likes👇, follows, comments, and subscriptions on my YouTube channel👇.
❄️🌱🍻 Happy Growing 🌱🌱🌱
https://youtube.com/channel/UCAhN7yRzWLpcaRHhMIQ7X4g.


Likes
28
Share


@cyberkyd
Follow
Week 5 Updates : -
Plants are in their stretching and 3 out of 4 grows are not in flower yet. I took this opportunity to do Some LST with minor defoliation by bending branches and about 1 day before writing this I used proper LST equipments rather than DIY. Almost all have got 9 Branches. And my attempt is to at least have them stretch wider and healthier if not bushiest. But has definitely gone benefiting and I can already see the difference since I left one of the OG plant completely Untrained and you can see the difference which one is which. Mars Hydro Dimmer after working for a while Broke again( third time it fixed and broke again) throwing 100% light again so I ended up restoring the Light height to almost Max 110cm from plants top to distribute about 350-400 PPFD here and there.
Hoping my 2*2 to arrive soon so I can fit these new batch of 3 plants into that tent.
PEACE.

Likes
15
Share


@Callatic
Follow
Great, started of slow, but caught up and fixed itself. Was a hefty bushy XXL Indica for sure
This is only about 55% of the plant harvested, rest will come in a week
Rest of plant has been harvested and cropped

Likes
74
Share

@yan420
Follow
FERMAKOR BARREL MIX – BASE IN USE
(Testing on the Fantasy Feast girl we pulled out of another diary
https://growdiaries.com/diaries/274722-grow-journal-by-yan402 )
(FERMAKOR BASE SYSTEM KOH VERSION diary
https://growdiaries.com/diaries/278391-grow-journal-by-yan402)
(Urea & Micros on the way — first week running without them)
🍶💧🍶💧🍶💧🍶💧🍶
💧 30 L Barrel – Current Working Mix
🍶💧🍶💧🍶💧🍶💧🍶
Step 1 – Calcium Nitrate (Part A)
7 L warm water (~35–40 °C) → added 45 g Calcinit, stirred until fully clear.
That’s the calcium + nitrogen backbone for the feed.
Step 2 – FERMAKOR PK Base (Part B)
15 L water in the main barrel → added 30 ml FERMAKOR PK Concentrate, mixed well.
This forms the main P + K part of the formula.
Step 3 – Combine Solutions
Slowly poured the Calcinit mix into the barrel while stirring — no reaction, still crystal clear.
That confirms the mix is stable and precipitation-free.
🌿 Step 4 – FPJ / FFJ Batch
Added 30 ml homemade FPJ (fish + veg batch) ≈ 1 ml/L.
Color shifted to a light-amber tone — looks alive and active.
🍋 Step 5 – Citric Acid Balance
Added 1 tsp citric acid after everything was blended to fine-tune pH and help chelate micros later on.
📦 Step 6 – Top Up & Check
Filled to the 30 L mark with plain water → pH tested with drops, showing yellow-green — roughly 5.8 – 6.0 range.
Nice clean look, stable smell, no residue.
💧 Current Base Ingredients (Active Mix)
Warm Water ≈ 22 L total
Calcinit 45 g → N + Ca foundation
FERMAKOR PK Base 30 ml → P + K support
Citric Acid 1 tsp → Chelation + pH balance
FPJ / Fish Emulsion 30 ml → Organic enzyme booster
Result: clean amber mix, mild and balanced.
I’ll let this version run for a week before adding anything.
👀👀👀👀👀👀
Observations and changes
👀👀👀👀👀👀
27.10.25 VW27 noticed some min burnt tips so I decreased Calcium Nitrate 45 to → 40g, decided to add two more elements micros and Epsom salts just to make sure they got everything, Fetrilon Combi 1 (Micros): 0.5 g, Epsom salts: 8 g
28.10.25 VW27 she seems devoid of any deficiencies, seems ready for the flip to 12/12
02.11.25 VW27 girl is looking good so I decided to stop making daily videos and do a standard once a week update.
09.11.25 aVW28 7 days since flip,stretch in full swing, first pistils showing, leaf color deep and healthy. Slight tip burn early week → gone after pH stabilized.
Feed stayed clear, no residue, roots clean and sweet-smelling, did what I hope is a last cleanup and pruning🎥
10.11.25 VW29 added Phosphoric acid pH down to the schedule for flowering stage.
14.11.25 FW1 FERMAKOR PK Micros 40 → 50 ml
23.11.25 FW2 got some burnt tips, observe and act accordingly in case it worsens, diluted by 25% for this week.
05.12.25 FW3 about 2 weeks ago Calcium Nitrate 35 g → 25 g, FERMAKOR PK Micros 50 ml → 60 ml
12.12.25 FW4 Calcium Nitrate 25 g → 20 g, FERMAKOR PK Micros 60 ml → 80ml
16.12.25 FW4 Calcium Nitrate 20 g → 17 g, FERMAKOR PK Micros 80 ml → 110 ml
20.12.25 Calcium Nitrate 17 g → 15 g
26.12.25 Ffj fpj 30 →0ml
🌱💦🌱💦🌱💦🌱💦🌱💦🌱
🌿 Day to day tasks & actions 🌿
🌱💦🌱💦🌱💦🌱💦🌱💦🌱
Fed about 5l a day of #1 and on the weekends I do a pure FERMAKOR PK flush 2l runoff
(*RUNOFF reused for tomato plants)
💧💧💧💧💧💧💧💧💧
🌱 Nutrients in 30 L #1 – FERMAKOR (progression kept)
💧💧💧💧💧💧💧💧💧
Calcium Nitrate (Calcinit / Nitcal):
45 → 40 g → 35 g → 25 g → 20 g → 17 g → 15 g
= 1.50 g/L → 1.33 g/L → 1.17 g/L → 0.83 g/L → 0.67 g/L → 0.57 g/L → 0.50 g/L
= 207 ppm N / 253 ppm Ca
→ 184 / 225
→ 161 / 197
→ 115 / 141
→ 92 / 112
→ 78 / 96
→ 69 / 84
PK Concentrate (FERMAKOR Base):
30 → 40 ml → 50 ml → 60 ml → 80 ml → 110 ml
= 1.00 → 1.33 ml/L → 1.67 ml/L → 2.00 ml/L → 2.67 ml/L → 3.67 ml/L
→ balanced 1:1 P:K + light micros (from extract)
Home-made FFJ/FPJ (Fish + Veg):
30 ml → 0 ml
= 1.00 ml/L → 0.00 ml/L
Epsom Salt (MgSO₄·7H₂O): 8 g
= 0.27 g/L → ~26 ppm Mg + ~35 ppm S
Fetrilon Combi 1 (Micros): 0.5 g
= 0.017 g/L
→ Fe 0.7 ppm · Mn 0.7 ppm · Zn 0.3 ppm · Cu 0.3 ppm · B 0.1 ppm · Mo 0.02 ppm
Phosphoric Acid (pH down) + Citric Acid (chelation): as needed
→ First set pH with phosphoric acid, then add a little citric only if you want extra chelation
Target pH: 5.8 – 6.0 (drop test yellow-green)
📦 TOTAL (corrected):
Liquids (PK + FFJ/FPJ):
60 → 70 → 80 → 90 → 110 → 140 → 110 ml per 30 L
= 2.00 → 2.33 → 2.67 → 3.00 → 3.67 → 4.67 → 3.67 ml/L
Solids (CaNO₃ + Epsom + Fetrilon):
53.5 → 48.5 → 43.5 → 33.5 → 28.5 → 25.5 → 23.5 g per 30 L
= 1.78 → 1.62 → 1.45 → 1.12 → 0.95 → 0.85 → 0.78 g/L
YouTube Link: https://youtube.com/-m8h?si=A7x4Zlr2kj-_ga31
Likes
40
Share


@GYOweed
Follow
Just a nice sativa hybrid.
Nice colors, stems are strong for a sativa.
Smell is great, sweet for now.
I did up getting pollen and since it was bushy the nylon filter worked on both plants but STS dripped a bit on branches around it...i cleared thise branches. I am happy to announce its preggers so i loosened the wires on the branches and will be doing just ro n some low supplements for now after i dumped good amount dr earth flower girl and topped it with coco about qeek ago


Likes
3
Share

@Northern_Ent
Follow
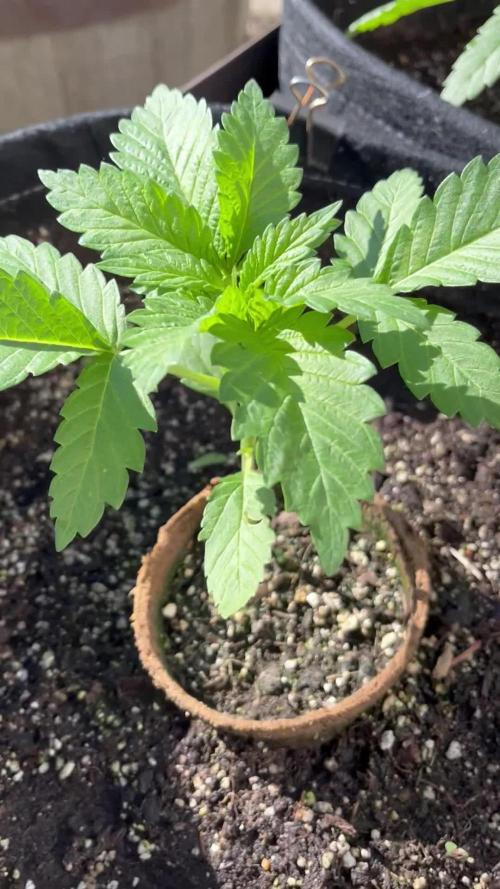
June 13: cool and rainy spring but she will start growing quickly with warmer temperatures near the solstice.
This backup seed is actually about 5 weeks old and not seven.
June 14: nice weather today but supposed to get rainy again this week.
June 17: did first topping for the manifold. Rain again today.
June 18: more rain again today.
