Likes
11
Share
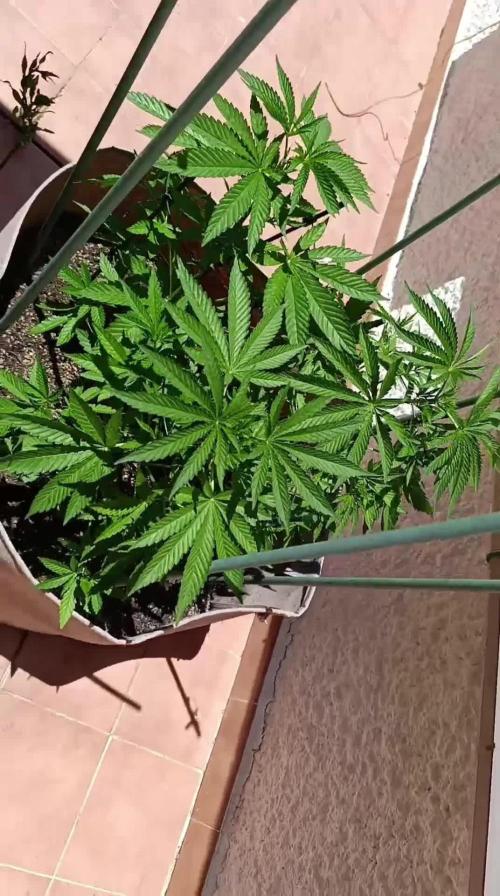
I am living in South Africa, Cape Town, we are heading into summer now so it is the right time to plant.... I potted this lady today so when the sun is out she'll be going outside.
Likes
81
Share
Hey! Welcome to week 8! Karen is mid way through her flowering stretch. Please check back to last week as I update daily so the week is now complete. I count about 20 colas now. Day 51: Have reconfigured the tent, see video. Karen is now 36cm and still stretching. Karen has more light now. Smell is still there hits you when you open the tent. Fertigated 2l. Day 52: Height: 39cm. Karen's scent is heavenly. I have reconfigured again and installed some upgrades. Better reflector. Much bigger carbon filter. Increased airflow. Better config. More efficient pot layout. Karen is lovely. I am grateful to her and for her, so I wrote her a little poem, I hope she liked it. "Karen! Oh Karen! The phoenix of flowers, Three lowly weeks she struggled in vain, Shadowed and starved for five hundred hours, He slowly wept to witness her pain. Karen! Oh Karen! I P-H'd your showers, and in the fourth week you started to gain, Hallowed and hard you survived as you cowered, I thought you meek, I was wrong once again. Karen! Oh Karen! Forgave me my howlers. She set a pace, a pace she maintained, Now shes a girl at the peak of her powers, And so I'm a geek, with buds on the brain." Day 53: Approx 48h into a simulated dry spell. Alright I think it is time for Karen to get her first MAJOR defoliation. I will update shortly with photos and info. I will also be doing some gentle LST to separate the colas a bit. Day 53.5: Defoliation and LST. Finally got chance to photograph that bunda. Enjoy! Day 53.75: Bit of a fail. Messed up the timer and the lights ended up being off for about 3 or 4 hours. Because I was cooling the room (open window) to keep temperature in the tent down, without any light the temperatures absolutely plummeted as it is sub-zero outside. By the time I realised and turned the lights on, the temp in the main tent had dropped to 14 degrees celsius. Whoops! How is that for mistreating your girl? Defoliated about 80% of her leaves, 4 nodes, significant LST, then stuck her in the cold and dark for 1/6 of a day. Not to mention she is now almost 3 days into a "dry spell". There do not seem to be ill effects, and Karen has already begun to respond to the LST; all the colas that had been changed in angle are now upright again. The dry spell I keep mentioning, there is a method behind my madness, I have spotted one or two small flies and I think they may be fungus gnats. I am starting to suspect that the 2nd seedling in the Purple OG Punch Auto grow was actually beheaded by fungus gnat larvae. So I am drying out the mediums as much as I dare. I am closely monitoring the plants, so far the only one I have had to break the drought for is Enigma; all the girls in big pots haven't even noticed it's dry yet. How far am I going to push it? Well I will judge it on a plant by plant basis, but quite honestly I am hoping to see physical signs of thirst before I breakdrought. Of all the plants the two I think will respond most strongly to this will be Karen and Bertha, because of where they are. Karen here is actually probably 4 weeks into flowering rather than two, so about now is a good time to give her a little hydration stress. I do not think I will push it past 5 days, as RH is 34%. By now all the plants will be compensating for the lack of moisture and the high temperatures and low humidity. They will be taking more and more moisture out of the coco, and as the coco dries further and further down, those plants that have space will start desperately growing roots to find moisture. Mark my words, 24 hours after I end this drought, every plant in the tent will throw out crazy growth. Day 54: Ended drought and fertigated 6l, no run off, I will re-fertigate tomorrow. Karen is still stretching her height post LST is now 37cm. The two tallest colas seem to have stopped but the other colas are still stretching. Day 55: Alright so it has been 5 hours since lights on, and Karen is looking in good shape, all her drooping leaves have perked back up and she has added quite a bit of foliar growth. The colas are all still rising, except perhaps the two tallest. This girl is absolutely loaded with pistils, I'm starting to see trichomes on the sugar leaves, but trich production hasn't started in earnest yet. She has a least 20 colas, and 6 of them are thicker/taller than the primary cola at her tip. Every one of her nodes has reinforced itself with a bulbous growth and these cola branches are swelling rapidly. I am increasingly of the opinion that, all being well, this girl is going to surprise us all with her yield. My first grow, which was just mucking about really, I got 60-70g of the two main plants, and they were just bare sticks with 2 colas. Although her height is less than theirs was, 2/3 of their height was bare stick... whereas every mm of her is befoliaged and living. So in terms of the height of the actual cola I think they were about comparable in usable space on a per cola basis. The main difference being that Karen has 20+ colas whereas they had 2 primary and 2 lower. I know that it is probably unrealistic to expect more than 70g from a single auto grown indoors. Nevertheless my gut tells me this baby could achieve at least 100g, perhaps as much as 150g. The next few weeks will determine that, but given where we were in week 3 I will be grateful for any yield of quality bud. I have dropped the lights down to 18/6 from 'tonight' onwards. I really have no idea how long we have left for Karen. According the the "brochure" she flowers for 7-8 weeks, with a total crop time of 9 weeks. The problem is I don't know what a total crop time is? Does that mean from seed to finish? If so Karen is clearly not going to be anywhere near that timescale.I am going to go ahead an assume that, for my plant anyway, the first 4 weeks were veg weeks. I think it is fair to count week 5 and 6 as flowering because pistils were popping out very early in week 5 if not before. So that makes this week four of flowering. I am going to assume 8 weeks rather than 7, so I think we have another 4 full weeks give or take a week. On that basis I am expect harvest week to be around week 12 or so. I am not fixed on this though, I am determined not to harvest this girl early. Day 55: Photos taken 00:00 9/3/23 Strong 24h of veg growth as predicted. Day 56: Existing leaves continue to swell. Stretch appears to be slowing. I've taken so many media this week that I cannot scroll down far enough to select a recent thumbnail. Probably Karen's biggest week in terms of changes. She is looking like she is going to impress. Height 39cm.
Processing
Likes
120
Share
Hi all the happy people here in GrowDiaries. This is my second cultivation ever and it will be fun to try a bigger space than my closet grows First, I'm just going to say I'm done with the construction of my new growroom. I put some pictures on the construction here in week one. The room is 2.14 meters by 1.7 meters and has a ceiling height of 2 meters. It provides a floor area of ​​3.6 square meters. I use a 54 Watt Lightwawe T5 for germination and 2 Pcs 400 Watt HPS lamps. I have a channel fan that replaces the room air about 40 times an hour to get a comfortable theme in the room, the air enters a fresh air intake from the outside. The air is purified through a carbon filter to then leave the room to the rest of the basement. Then I use that heat to heat the rest of the basement. I will use 8 pcs 15 liter Autopots to grow with and a 100 liter water tank that supplies the pots of water and nutrition. I will grow completely organically in soil and will watercure my buds to get the best possible medicine for me. But there are no cultivation rooms to be displayed here, so I continue with what is most important. Today I have put my seeds in my moisture dome and hope the seeds have germinated within a few days. I am very excited to see how the new growroom will work and how this CBD Fast Eddy plant from Royal queen seeds will turn out. CBD Fast Eddy Automatic is combining Cheese x Juanita la Lagrimosa x Ruderalis, Fast Eddy is a rapid growing, flavourful, and CBD-rich auto strain that goes from seed to harvest in 8-9 weeks, produce generous yields, and induce a clear, mellow, and most importantly, functional high. THC: 9% CBD: High Yield Indoor : 400 - 450 gr/m2 Yield Outdoor: 80 - 130 gr/plant Height Indoor: 60 - 100 cm Height Outdoor: 80 - 120 cm Flowering: 6 - 7 weeks Harvest month: 8-9 weeks after sprouting Genetic Background: Cheese x Juanita la Lagrimosa x Ruderalis Type: Sa 50% In 40% Ru 10% Effect: Clear, Painrelief Climate: Mild .............................................................................................................................................................................................................................................................................................................................................. Update 2017-08-15. Both seeds have germinated and planted in small pots inside the humidity dome. I'm so glad it worked so well and now it's just hoping they'll start growing and become 2 big healthy girls :) ............................................................................................................................................................................................................................................................................................................................................... Update 2017-08-16. I have mixed my own soil today. Its 40% sieved peat harrow H2-H4 0-30 mm, 45% sieved peat harrow H4-H6 0-30 mm. 5% sand and 10% of compost soil. And i use 15% of perlite and mix it all together. ............................................................................................................................................................................................................................................................................................................................................... Update 2017-08-20. These girls are much slower to germinate and to start growing than the other 6 girls I started at the same time. One of the germinated seeds split in half, so I had to take a new seed and germinate it. It took 2 days. It was just a smal taproots after germination with this strain as opposed to my Fastbuds cbd. But I hope everything goes well from now and that they live up to their name, Fast Eddy. ................................................................................................................................................................................................................................................................................................................................................ Update 2017-08-21. New pics. ................................................................................................................................................................................................................................................................................................................................................ 2017-08-22. Nr1 dident make it and died. Started germinate a new seed to get another Nr1. .............................................................................................................................................................................................................................................................................................. 2017-08-27. Nr 1 is in a small pot in humidity dome and i hope shes going to break the surface soon. Nr 2 is slow but doing fine. --------------------------------------------------------------------------------------------------------------------------------------------------------------------------------------- 2017-08-28. Nr2 is transplanted in 15 liter autopot. --------------------------------------------------------------------------------------------------------------------------------------------------------------------- 2017-08-29. New movie of the girls Nr2. Its no water for 3 days now so the roots develop more and match the plant above the soil. The temp controlled fan is awesome, its easy to set what temp you like to have in the room. Right now its 28 celcius. And humidity is 56%. ----------------------------------------------------------------------------------------------------------------------------------------------------------------------------------------------- 2017-08-29. Hello to you who read my diary, I just want to say that I am pleased that you have chosen to check in with me and in my diary. I just want to say that I do this for myself and for a steady flow of my medicine. Everything you read and see in my diary is 100% honest and I will never distort or beautify anything here. I document my crops so that I can learn from my mistakes and also to look back at those different crops. I try to update with pictures every day and with text if something special has happened in the garden. This is my strainhunt for the best medicine and the beginning of my journey with cannabis and the cultivation of it. ----------------------------------------------------------------------------------------------------------------------------------------------------------------------- 2017-08-30. Cleaned the room this morning, just vacuuming and cleaning with chlorine solution. Im testing the fan to control temp and humidity, it works great. Added a movie. Everything is looking great right now. ------------------------------------------------------------------------------------------------------------------------------------------------------------------------ 2017-08-31. 3 New pics. ------------------------------------------------------------------------------------------------------------------------ 2017-09-01. New pics and a video of the grow room from today. ---------------------------------------------------------------------------------------------------------------------- 2017-09-04. Week 2 starts now, new pics. -------------------------------------------------------------------------- 2017-09-05. KL 08.00. Cleaned the room this morning, just vacuuming and cleaning with chlorine solution. KL 12.00. The girl got 2 liters of water with nutes in it, added a video. ------------------------------------------------------------------------------------- 2017-09-06. KL 08.00. The girls woke up after their beauty sleep, the leaves are always a bit down after 6 h of darkness, but they will stretch now when the HPS lamp starts. Everything looks good and I keep trying to tuck the leaves so they get the maximum amount of light where needed. Added pics and video. -------------------------------------------------------------------------------------------------------------------------------------------------------------------------------------------- 2017-09-07. Day 17 from sprouting. I have never tested PH in my grows, when growing organic in soil iv learned that it adapt PH by it self. But im curious by nature so i had to test. Kl 10.00 Tested PH in the soil, it was 6.9 and tested my tap water and it was 6.8. Added video of the girl. Kl 22.30. New pics. ----------------------------------------------------------------------------------------------------------- 2017-09-08 KL 08.00. Good morning, added new video. 2017-09-08. Kl 23.50. Gave every girl 3 liters of water and nutes, added new video. ----------------------------------------------------------------------------------------- 2017-09-09. Kl 21.00. Defoliated a lot and added pics. ------------------------------------------------------------------------------------ 2017-09-10. Kl 08.00. Last day of week 2. New video. 2017-09-10. Kl 23.00. 3 new videos. --------------------------------------------------------------------------------------------------
Likes
13
Share
@balansa
Follow
We have last days. I want to switxh lighta off for 72 hours and than chop. She looks readdy
Likes
144
Share
August 8th - we’ve hit the 14hr. of daylight mark and with all of the rain recently, amended soil etc., its Officially into Flower this week - next meal posted above - Feed - Feed - Water begins - carried out an actual Schwazze to the Med/Lar Fan Leaves on the bottom 70% of the plant. Trying it inside, might as well have one tested outside; day 1 flower = Schwazze Day - Day 20 is next Trim - Vital-B from npk into the next beverage 9th - after rain on 4 consecutive days, this Specimen was Thirsty aka DRY at Noon today - fed 1 gal, posted above - B-Vital used to de-stress plant, post Schwazze 11th, - fed 2 L bloom nutes 13th - fed 2L pH’d water - she is moving up 14th - last day of the Week 1st one in Flower - hit 75cm tall this morning, she started the week at 57cm. Almost 10” vertical growth in this week. She’s a Beauty Doctors Choice
Likes
14
Share
It's shocking how long the pound cake takes to grow. In the end, it has the whole tent to itself... We're still two weeks away from harvest; let's see what the beast turns out to be.
Likes
2
Share
Wochenbericht: Papaya Frosty – Ende Blütewoche 6 / Start Woche 7 Vom Fundament bis unters Dach: Wenn Selektion auf pure Naturkraft trifft Heute ist der letzte Tag der sechsten Blütewoche und ab morgen starten wir offiziell in die Blütewoche 7. Meine Papaya Frosty zeigt jetzt unter den Polycarbonat-Platten meines Gewächshauses ihre wahre, monumentale Pracht. Dieses Gewächshaus ist kein gewöhnliches Setup, sondern ein echtes Ökosystem: 4 Meter breit, 8 Meter lang und stolze 3 Meter hoch. Es ruht auf einem soliden Fundament, das einen halben Meter tief in die Erde eingegraben ist, während das Dach mit strategischen Umluftspalten konstruiert wurde. Um der Natur maximale Freiheit zu geben, bleiben Türen und Fenster rund um die Uhr, 24/7, sperrangelweit geöffnet. Das Ergebnis? Draußen herrscht seit gestern Nacht Dauerregen, doch im Inneren zieht ein permanenter, natürlicher Luftstrom durch das dichte Grün. Keine einzige feuchte Stelle, kein stehendes Wasser auf den Blättern – nur das perfekte Gewächshausklima für die anstehende finale Phase. Das Fundament: Eine Pipeline in der Muttererde Alles an dieser Pflanze beginnt im Verborgenen. Dadurch, dass sie direkt in der tiefen Muttererde steht, konnte sie ein Wurzelnetzwerk aufbauen, das keine Topfgrenzen kennt. Wer den Blick an den Boden richtet und den Zollstock anlegt, sieht sofort das Ergebnis: Der Hauptstamm hat an der Basis einen unfassbaren Durchmesser von 6,5 Zentimetern erreicht. Er ist massiv verholzt, tief gefurcht und arbeitet wie eine gigantische hydraulische Pipeline, die ununterbrochen Kraft nach oben pumpt. Dieses Fundament ermöglichte mir eine radikale Schnitttechnik. Ich habe die Pflanze konsequent auf den Haupttrieb und fünf starke Beine selektiert. Bis auf eine Höhe von 1 Meter wurde alles rigoros gelollipoppt – keine Energie verschwindet hier in schwachem Popcorn-Bugholz. Erst ab dieser Ein-Meter-Marke durften sich die Triebe entfalten, die nun von zwei Scrog-Netzen im Zaum gehalten werden. Das erste Netz sichert die Struktur bei 1,40 Meter, das zweite fängt die Wucht bei 2,20 Meter ab. Die mittlere Etage: Steinharte Knospenmasse Die Bilder aus der mittleren Etage (zwischen 1,40 m und 2,20 m) zeigen, was diese selektierte Energie bedeutet. Die Buds sind hier bereits über 5 Zentimeter dick – und zwar reine Blütenstruktur, ohne die abstehenden Blätter. Was mich zum Ende dieser 6. Woche am meisten fasziniert: Jede einzelne Knospe, bis hinunter zur kleinsten im Halbschatten, ist schon jetzt vollkommen fest und steinhart. Die Blütenkelche stapeln sich dicht an dicht, während ein dichter, frostiger Teppich aus glasklaren Trichomen die Zuckerblätter überzieht. Die langen Stigmen stehen noch makellos schneeweiß im Saft. Das ist das Zeichen: Hier wird noch aktiv Masse gebaut. Gestern gab es das letzte Mal Nahrung – organisch mit Biobizz und Top Max. Pünktlich zum Start von Woche 7 bricht nun die reine Herbstphase an, in der die Pflanze beginnt, sich langsam aus eigenen Reserven zu zehren. Der Blick nach oben: Der 60-Zentimeter-Hauptmast Doch das eigentliche Spektakel spielt sich ganz oben ab, wo die Pflanze die Decke berührt. Die Hauptspitzen thronen auf einer schwindelerregenden Höhe von 2,50 bis 2,60 Metern. Wenn man den Zollstock von der allerobersten Budspitze nach unten führt, offenbart sich die absolute Ausnahmeerscheinung dieses Grows: Der Hauptmast bildet eine durchgehende, majestätische Blütenstruktur von weit über 60 Zentimetern Länge! Interessanterweise verläuft die Reifung hier oben umgekehrt. Während die mittlere Etage schon kompakt ausreift, steht der riesige Hauptmast direkt unter dem Dach im absoluten Fokus des Sonnenlichts. Diese massive Lichtenergie treibt die Spitze unaufhörlich an – sie schiebt immer weiter vitale, hellgrüne Blätter und frische Blütenetagen nach oben. Sie will einfach noch nicht aufhören zu wachsen. Es ist ein faszinierender Spagat zwischen der bereits reifenden Mitte und dem unbändigen Vorwärtsdrang der Krone. Wir gehen nun ab morgen mit Woche 7 auf die Zielgerade zu. Das Fundament steht, die Blütenmasse ist extrem dicht und die Luftzirkulation könnte nicht besser sein. Ich bin gespannt, wie weit diese 60-cm-Riesencola in den nächsten Wochen noch anschwellen wird, wenn die Erde langsam aushungert. Bleibt dran – der Endspurt hat gerade erst begonnen!
Likes
1
Share
Plants has great structure and nice low height, perfect for a stealth grow. Pot is running low on nitrogen so i have to add some nettles juice
Likes
22
Share
@Prilyfe13
Follow
July 21, 2024 Day 92 This week may be a little weird with pictures. My phone's screen died, so pictures may be a little messy if any at all. I'll do my best to get as good as I can. Anyway, I managed to get these 4 before the screen went black again. I'll update as I can. So the focus this week will be flushing and flushing only. I don't have enough flawless finish so I have to flush with plain water. Sour Diesel A is looking pretty good. Her branches are getting heavier and heavier. Some are starting to lean a bit too much and will pull down other branches as anchors. A good and a bad thing. Not too bad though. Sour Diesel B is just doing her thing now. Her buds are huge and solid. Her leaves are starting to show more color and some are yellowing out. She's getting there. Sour Diesel C is looking great and is definitely thirsty. She's already getting light. It's a good thing I'm flushing tomorrow. After that, it will be just bottom feed of plain water for the rest of the week or 2. Sour Diesel D is still bulking up. Her leaves still aren't showing color, but they are starting to show signs of hunger. Just barely around the edges. The environment is actually not that bad today. The humidity is below 60% and the temp is just at 75 degrees. Grow System Environment: Temp: 76 RH: 58% VPD: 1.25 kPa July 22, 2024 Not much going on today. I managed to get a daily pic, but that's it. I will be flushing tomorrow I think. They are still a bit heavy. Sour Diesel A is looking really good. She has super frosty buds and they are nice and heavy. The fade is starting to pick up the pace. It is to be expected now. Soon enough we will have some beautiful colors. Sour Diesel B looks great! Her buds are nice and fat as well as getting even more frosty. I cant get trichome pics for now because my phone is broken. However, I can Still look through a loupe. Currently they are half clean and half cloudy. Definitely looking at another week. Which makes total sense for the time frame. Perfect. Sour Diesel C is looking amazing with her bright green leaves and tight buds. She's starting to fade a bit more now. It's looking like we will see some yellows and maybe some pink. no purple though. I don't expect this strain to give purple anyway. Sour Diesel D has this stupid looking fat cola that's more like the end of a club than a plant top. Its about as hard as one too. Too bad I don't have a baseball bat. I'd love to see if its actually fatter than the end. The environment is about the same as it was yesterday. The humidity is just below 60% and the temp is around 76 degrees. ( cant find the degree symbol lol.) I cant really say much for the averages. i cant see the app on my phone. I will update everything when I get a new phone. For now it will be just an average from what I've seen throughout the day on the display at the tent. Grow System Environment: Temp: 76 RH: 59% VPD: 1.20 July 23, 2024 Flushing day and picture day! I flushed each plant with 3 gallons of water PHed to 6.5. Sour Diesel A has this kind of wind swept look about her now. I just noticed it today when I was flushing her out. The branches all seem to be bending toward one side. Like they are bending toward the center of the plant. Sour Diesel B is looking marvelous. Her buds are fat and the foxtails seem to be stopping now. However I did notice the lower buds have much more pronounced foxtailing. I believe it's due to the smaller size of the lowers. Sour Diesel C is fantastic. Her buds are solid and frosty. Definitely packing on more weight too. Sour Diesel D is just ridiculous. Her main cola is like a football. Super solid cola. Can't wait for the harvest. Soon enough. The environment is still like yesterday. Just under 60% and 76°. Grow System Environment: Temp: 75.7° RH: 59.9% VPD: 1.20 kPa July 24, 2024 Nothing going on today. Just the daily pic and a quick check of the plants. Sour Diesel A looks great as always. Her leaves are still pretty green, but I can see more purple coming through. No other colors yet. The smell is great too. Sour Diesel B is also looking great. Her buds are big and fat. Her frost is frosty sweet. I can't wait to see how she turns out. Sour Diesel C is smelling sweet and gassy. Her buds are really frosty now. The buds are still putting on weight and are getting tighter. Sour Diesel D is getting frosty now. She was frosty before but now it's getting more noticeable. I can't express enough how solid this massive cola is. Its SOLID. The environment is the same as it has been for the last few days. Humidity below 60% and the tempmis around 76°. It will, of course, drop down to the low 50's% when the AC kicks on. Grow System Environment: Temp: 74.7° RH: 59.4% VPD: 1.16 kPa July 25, 2024 A first thing update: So it's before my actual diary writing time and I need to address this. A friend of mine saw heat stress in my plants and I was really confused as to how it could be. Well, it was getting hot in the tent before I woke up in the morning. So 2 to 3 hours of 80° everyday for the last week if not longer. I fixed the issue today with mu AC. I'll just keep it on 24/7. It's picture day! No watering needed. I'll be doing one last flush I think. Theblast one didn't show clear water. So one more time should do it. Sour Diesel A is showing signs of heat stress now. Although, as I said earlier today, I have fixed it. But the humidity is really high. The back branches are leaning hard with one falling over flat. It's a good and a bad thing. Lots of weight, but not as good of light. Sour Diesel B is under a lot of stress. I didn't realize it was heat stress as I thought the temp in the tent was 76°. Her buds are still really nice, but I think the heat stress is causing lower foxtailing. Sour Diesel C needs nothing. She is also showing signs of heat stress. Not as bad as Sour Diesel B, but still there. It should be fine now. I'm not sure what the humidity is going to do, but it's high. Buds are tight, frost is on point. Sour Diesel D is showing the least amount of heat stress, but is also the only one not showing signs of fading yet. She is still beautiful and huge buds. The environment is back to really high humidity and good temp. So I'm trading heat stress for humidity stress. Great. Grow System Environment: Temp: 73.7° RH: 62.8% VPD: 1.04 kPa July 26, 2024 Nothing going on today. Just the daily pic and observation. Sour Diesel A is looking super good. I don't know if she is suffering from much heat stress, but she should be fine now. I took care of it. Her branchesbare leaning more and more. I can tell she will be a decent harvest. Sour Diesel B is by far the worst with the heat stress. It must be the location of the plant and the airflow. Maybe there is an empty air pocket. Interesting. I'll have to look for it. Sour Diesel C looks great! Just a little bit of heat stress and that's about it. Her buds are nice and tight. No leaning, butni have a feeling we will run into thar with her. Sour Diesel D is showing a slight sign of heat stress, but nothing serious. It should be fine with the temp fix. One of her side branches is starting to lean a bit. Not a lot, but enough. Otherwise, she looks great! I really wonder what the main cola will weigh. 2 Oz? We will see. The environment was giving me trouble for the last week and last night I left my AC on. It was chilly when I woke up, but the tent was at a comfortable 74°. The humidity is also a bit lower, down to 57%. Not too bad. I would like it to be at 50%, but this is what I got. Grow System Environment: Temp: 72.8° RH: 58.7% VPD: 1.11 kPa July 27, 2024 It's picture day! And video day! I was going to do another flush today, but tomorrow is the start of a new week, so I'll wait for then. I'll also start taking trichoke pics starting next week. I think I was supposed to start this week, but there's no point in looking at clear trichomes. Sour Diesel A needed some support for the rear branches. They were leaning super hard. So I propped one up that's now holding the rest ofbthe branches up. Let's hope it holds. Everything else looks good. Sour Diesel B is still showing signs of heat stress. I'm guessing it'll take a few days to recover. Not good for the last week of life though. We shall see how she turns out. Sour Diesel C is looking great! Her branches are starting to pull out a bit from the weight. We shall see how she looks at the end of the week. Sour Diesel D needed 1 branch propped up. It was one of the lowers, but it has a nice big bud on it. Other than that, she's looking pretty good. The environment is better. I kept my AC on all night and shut it off this morning. I'll have to turn it back on in a little bit, but yah, it worked. The humidity was also below 60%. Grow System Environment: Temp: 72.1° RH: 57.4% VPD: 1.12 kPa
Likes
4
Share
Most of the autos are being moved into my dad's garden or the backyard.
Likes
Comments
Share
@Tponyou
Follow
Love a good haze
Likes
2
Share
Quarta settimana di fioritura.iniziano AD ingrossare e profumare .queste 2 prosecco della korngarden.seeds stanno venendo super Diventano giorno per giorno sempre più belle e grosse..... forza prosecco kor garden seeds
Likes
25
Share
@Smokwiri
Follow
Wet paper towel method, in ziplock bag. Waited for 1.5cm root before transplant to its final container (its an autoflower). I will update with pictures of the seedling rising from the soil in a couple of days.... ----+update 2days later something is popping slowly out of the soil ;)
Likes
8
Share
finish the 3 week of flowering i like the Remo Nutrients simple and the leafs still very nice green smell the gorilla alot this one
Likes
55
Share
@w33dhawk
Follow
05.04.21 Anfang der 3ten blüte Woche.Hab mich jetzt dazu entschieden das biegen und binden ein zu stellen natürlich halte ich weiter die Blätter unter dem netzt aber ich erlaube den Ladys jetzt durch das Netz auf zu steigen hab ja noch genügend Platz nach oben(hoffe ich). Das Wachstum is immer noch ziemlich stark ich denke mal das wird sich diese Woche auch nicht wirklich viel dran ändern und sie zieht vom trinken her stark an hab anfang der ersten woche 1x 4l mit Zusätzen gegossen und das hat 7 Tage gehalten bin jetzt an Tag 15 und muss alle 4 Tage 4l giessen gutes Zeichen denke ich mal..... 06.04.21 hab heute nur Blätter unters netzt gesteckt und schon von meinem nächsten Grow geträumt..... 07.04.21 wieder ein Tag vergangen und mehr als Blätter unterm Netz halten und hier und da mal ein Blatt entfernen war heut auch wieder nicht los... 08.04.21 heute war mal wieder bewässern dran und das tägliche Spiel Blätter weg stecken sonnst war nix weiter..... 09.04.21 hab das gefühl das das Wachstum anfängt sich ein zu stellen und Blätter hab ich heut wieder unters netzt gebogen was das hoch drücken der Blätter betrifft sind die Ladys ziemlich stark und eigenwillig gehe 2x täglich runter drücken unters netz werde nächstes mal eine kürzere Maschen weite fürs netz nehmen dachte 10 cm ist genug platz aber 5 cm pro Kästchen sollten sicher auch reichen das macht das spiel mit dem biegen und binden sicherlich einfacher und lässt die Blätter besser an Ort und Stelle Ach ja und ein paar Blätter hab ich heute noch entfernt ist aber auch bald mal Ende mit Blätter entfernen ich will sie nicht zu stark stressen... 10.04.21 Blätter unterm netz halten knapp 2 Std einige Blätter entfernt die von unten gegen die buds drücken sonnst war nix.... 11.04.21 hab heute wieder mal nur Blätter unters netzt gedrückt und den Pflanzen beim wachsen zu geschaut die Woche lief super bin echt stolz auf mich das ich die Finger so gut von der schere lassen könnte die letzten 21 Tage hab das netzt mal fast voll bekommen obwohl ich zu geben muss das die Masse die da wächst mir angst macht vor schimmel im späteren Verlauf des grows....
Likes
13
Share
Chugging along week six licking my wounds and biding my time all is well though I ain’t mad leasons learned no reason to cry over spilt milk
Likes
18
Share
Oh lovely looking plant. Straight up looks a Cali girl. Have a lot less Complicated grow this time with just tipping - kinda miss the trellis…but all good have too much work to do
Likes
56
Share
Bonjour à tous les padawans et maîtres jedis Jour84 arrosage avec 2 litres d'eau ph6.3 Jour86 arrosage avec 2. 5litres d'eau ph6.3 Jour89 arrosage avec 2 litres d'eau ph6.3 LE MEILLEUR MOMENT POUR RINCER SON CANNABIS Le rinçage commence en général deux semaines avant la récolte. Si le plant a une période de floraison de huit semaines, le rinçage doit commencer six semaines après le début de la période de floraison. Il est préférable de regarder de près les trichomes sur le plant pour déterminer quand votre cannabis est prêt à être récolter. Si les petits trichomes commencent juste à passer d’une couleur transparente à une teinte laiteuse et blanche, c’est une bonne indication que les plants peuvent commencer à être rincés. Il faut s’arranger pour que la majorité des trichomes aient changé vers la couleur désirée pour la récolte après deux semaines – ça devient plus facile à faire avec l’expérience, alors accrochez-vous ! Le rinçage peut également être un bon moyen de remettre à zéro la terre quand un plant est toujours en phase de croissance végétative. Parfois, un cultivateur suralimente par accident son cannabis, ce qui provoque un changement de couleur et un flétrissement du bout des feuilles. Ceci est appelé une « brûlure par nutriments ». Rincer la terre peut éliminer les nutriments excédentaires, ce qui aide à résoudre le problème. Cependant, c’est une mesure drastique à ce stade de la culture, alors assurez-vous que le problème soit bien une brûlure par nutriments et non quelque chose d’autre. Le rinçage ne concerne pas que le moment de la récolte. Cette technique peut aussi être mise en place durant la phase de croissance afin de débarrasser le sol des nutriments. Bien évidemment, les nutriments permettent à votre plante de rester en bonne santé et vous assurent des rendements maximaux, mais une trop grande quantité peut causer une accumulation et un état statique durant lequel la plante ne peut plus y accéder. Le blocage des nutriments peut être causé par une accumulation saline ou des niveaux de pH incorrects. Ces deux causes peuvent être résolues par un rinçage de votre plante à l’eau claire. Les fluides viendront pousser les nutriments en dehors du substrat et le débarrasseront de l’accumulation, permettant ainsi aux racines de pouvoir accéder à nouveau aux nutriments. EMPÊCHER LE BLOCAGE D'ABSORPTION DES NUTRIMENTS AVANT QU’IL NE POSE PROBLÈME Au mieux, le blocage des nutriments peut être un problème, au pire, il peut être un vrai désastre. Comme le dit l’adage, il vaut mieux prévenir que guérir. Il vaut mieux prendre de l’avant pour empêcher le blocage des nutriments plutôt que de s’y atteler lorsque c’est trop tard. Empêcher le blocage des nutriments peut se faire par le biais d’un rinçage de routine. En rinçant vos plantes une fois avant la floraison et une fois au milieu de cette dernière, vous minimiserez l’accumulation de nutriments. LES ENZYMES À LA RESCOUSSE Après le rinçage pour contrer l’accumulation ou le blocage des nutriments, vous remarquerez peut-être que vos plantes ont une apparence vert foncé, c’est le signe d’un excès de nutriments. Dans ce cas, certains cultivateurs choisissent d’ajouter une formule riche en enzymes à leur substrat. Au cas où vous auriez oublié vos cours de biologie, les enzymes sont des protéines qui catalysent les réactions. Elles aident à rincer le substrat en décomposant l’amidon, les glucides et les nutriments. Il existe sur le marché toute une variété de produits qui contiennent des formules d’enzymes très efficaces. Si l’eau ne suffit pas à vos plantes, ces petites protéines ne feront qu’une bouchée de l’accumulation de nutriments ! COMMENT BIEN RINCER SON CANNABIS Rincer votre plant de cannabis est un processus simple. À chaque fois que vous apporteriez normalement des nutriments, vous rincez à la place. De l’eau du robinet non traitée est tout ce dont vous avez besoin pour rincer, assurez-vous juste que son pH est sans danger pour le cannabis. La plupart de l’eau de puits a un pH sain et ne nécessite pas de traitement, mais s’il est nécessaire de traiter l’eau de rinçage pour avoir un pH adapté, faites-le. Les ajustements du pH seront donc la seule chose à considérer. Inonder la terre avec autant d’eau fraîche qu’elle puisse contenir. Laissez l’eau durant quelques minutes pour qu’elle puisse absorber les nutriments, puis inondez la terre encore pour rincer les nutriments loin du plant. Si vous cultivez en intérieur dans des pots, notez la couleur de l’eau qui s’échappe du fond des pots. Elle sera tâchée et aura une couleur sale. C’est à cette étape qu’un appareil de mesure des TDS (Total des Solides Dissous) est utile. Si vous récupérez et mesurez le TDS de l’eau « évacuée », elle devrait avoir un taux de 1300ppm, ce qui est assez élevé. Il est important de rincer le plant jusqu’à ce que total baisse à un niveau de 50ppm, ou du moins qu’il s’approche du TDS de l’eau fraîche que vous utilisez pour rincer le plant. La couleur de l’eau d’évacuation va s’éclaircir et apparaîtra plus propre. Vous devez tirer autant que possible de minéraux dissous du plant. Comment et Quand Rincer les Plants de Cannabis Rincer les plants de cannabis avant la récolte peut faire la différence entre les meilleurs têtes ou la plus rude pour la gorge. Cette petite tâche est simple et facile à faire. Ajoutez juste de l’eau ! Attention car le moment du rinçage joue un rôle critique. Le b.a.-ba du rinçage de ses plants de cannabis. Sommaire: 1. Qu’est-ce que le rinçage ? 2. Le meilleur moment pour rincer son cannabis 3. Empêcher le blocage d'absorption des nutriments avant qu’il ne pose problème 4. Les enzymes à la rescousse 5. Comment bien rincer son cannabis 6. Comment rincer ses plantes en hydroponie 7. Les résultats du rinçage de son cannabis 8. Quand éviter de rincer son cannabis Vous avez enfin fini vos cultures et vous vous retrouvez avec un magnifique plant couvert de super têtes, maintenant sèches, vous avez fait le curing et vous êtes prêt à fumer – et pourtant quelque chose ne va pas. La weed semble ne pas vouloir se consumer et quand vous tirez une bouffée, c’est comme si on vous avait donné un coup de poing dans les poumons et vous toussez en craignant pour votre vie ! Le goût est rude et décevant. Si c’est une situation que vous avez vécue, il y a des chances pour que vos plants n’aient pas été rincés correctement avant la récolte. Cette fumée bien loin d’être agréable est provoquée par la présence dans le plant des nutriments et minéraux utilisés lors de la culture, ce qui altère la façon dont le plant se consume. Rincer le plant élimine ces nutriments restants, ce qui améliore la qualité des sensations. Heureusement, le rinçage des plants de cannabis se fait facilement et sans effort, et cela vous permet de produire des têtes douces et délicieuses en un rien de temps. ARTICLE LIÉ Comment Utiliser les Nutriments pour Cannabis QU’EST-CE QUE LE RINÇAGE ? L’acte de rincer un plant implique d’utiliser de l’eau pour éliminer tout nutriment présent dans la terre. Une grande quantité d’eau est passée à travers la terre et drainée sur une base régulière. Tous les minéraux et nutriments présents dans la terre sont rincés avec le temps avec l’eau, ce qui laisse une terre propre. Mais pourquoi vouloir éliminer tous les minéraux de la terre ? N’est-ce pas mauvais pour la récolte ? En fait, cela aide à la récolte de manière significative. Quand les nutriments sont éliminés de la terre, ceci force le plant de cannabis à utiliser tous les nutriments toujours présents dans le plant. C’est comme pour le corps humain. Quand on consomme beaucoup d’aliments, ce que nous n’utilisons pas est transformé en graisses. Dans les situations extrêmes où la nourriture est rare, le corps s’appuie sur cette graisse stockée pour tirer de l’énergie. Comme rincer force le cannabis à utiliser tous les nutriments restants dans le plant, aucun ne devrait rester et altérer les têtes récoltées. Cependant, si vous le faites trop tôt, cela peut nuire à la santé du plant, le moment est donc clé. LE MEILLEUR MOMENT POUR RINCER SON CANNABIS Le rinçage commence en général deux semaines avant la récolte. Si le plant a une période de floraison de huit semaines, le rinçage doit commencer six semaines après le début de la période de floraison. Il est préférable de regarder de près les trichomes sur le plant pour déterminer quand votre cannabis est prêt à être récolter. Si les petits trichomes commencent juste à passer d’une couleur transparente à une teinte laiteuse et blanche, c’est une bonne indication que les plants peuvent commencer à être rincés. Il faut s’arranger pour que la majorité des trichomes aient changé vers la couleur désirée pour la récolte après deux semaines – ça devient plus facile à faire avec l’expérience, alors accrochez-vous ! Le rinçage peut également être un bon moyen de remettre à zéro la terre quand un plant est toujours en phase de croissance végétative. Parfois, un cultivateur suralimente par accident son cannabis, ce qui provoque un changement de couleur et un flétrissement du bout des feuilles. Ceci est appelé une « brûlure par nutriments ». Rincer la terre peut éliminer les nutriments excédentaires, ce qui aide à résoudre le problème. Cependant, c’est une mesure drastique à ce stade de la culture, alors assurez-vous que le problème soit bien une brûlure par nutriments et non quelque chose d’autre. Flushing Le rinçage ne concerne pas que le moment de la récolte. Cette technique peut aussi être mise en place durant la phase de croissance afin de débarrasser le sol des nutriments. Bien évidemment, les nutriments permettent à votre plante de rester en bonne santé et vous assurent des rendements maximaux, mais une trop grande quantité peut causer une accumulation et un état statique durant lequel la plante ne peut plus y accéder. Le blocage des nutriments peut être causé par une accumulation saline ou des niveaux de pH incorrects. Ces deux causes peuvent être résolues par un rinçage de votre plante à l’eau claire. Les fluides viendront pousser les nutriments en dehors du substrat et le débarrasseront de l’accumulation, permettant ainsi aux racines de pouvoir accéder à nouveau aux nutriments. EMPÊCHER LE BLOCAGE D'ABSORPTION DES NUTRIMENTS AVANT QU’IL NE POSE PROBLÈME Au mieux, le blocage des nutriments peut être un problème, au pire, il peut être un vrai désastre. Comme le dit l’adage, il vaut mieux prévenir que guérir. Il vaut mieux prendre de l’avant pour empêcher le blocage des nutriments plutôt que de s’y atteler lorsque c’est trop tard. Empêcher le blocage des nutriments peut se faire par le biais d’un rinçage de routine. En rinçant vos plantes une fois avant la floraison et une fois au milieu de cette dernière, vous minimiserez l’accumulation de nutriments. LES ENZYMES À LA RESCOUSSE Après le rinçage pour contrer l’accumulation ou le blocage des nutriments, vous remarquerez peut-être que vos plantes ont une apparence vert foncé, c’est le signe d’un excès de nutriments. Dans ce cas, certains cultivateurs choisissent d’ajouter une formule riche en enzymes à leur substrat. Au cas où vous auriez oublié vos cours de biologie, les enzymes sont des protéines qui catalysent les réactions. Elles aident à rincer le substrat en décomposant l’amidon, les glucides et les nutriments. Il existe sur le marché toute une variété de produits qui contiennent des formules d’enzymes très efficaces. Si l’eau ne suffit pas à vos plantes, ces petites protéines ne feront qu’une bouchée de l’accumulation de nutriments ! Comment et Quand Rincer les Plants de Cannabis COMMENT BIEN RINCER SON CANNABIS Rincer votre plant de cannabis est un processus simple. À chaque fois que vous apporteriez normalement des nutriments, vous rincez à la place. De l’eau du robinet non traitée est tout ce dont vous avez besoin pour rincer, assurez-vous juste que son pH est sans danger pour le cannabis. La plupart de l’eau de puits a un pH sain et ne nécessite pas de traitement, mais s’il est nécessaire de traiter l’eau de rinçage pour avoir un pH adapté, faites-le. Les ajustements du pH seront donc la seule chose à considérer. Inonder la terre avec autant d’eau fraîche qu’elle puisse contenir. Laissez l’eau durant quelques minutes pour qu’elle puisse absorber les nutriments, puis inondez la terre encore pour rincer les nutriments loin du plant. Si vous cultivez en intérieur dans des pots, notez la couleur de l’eau qui s’échappe du fond des pots. Elle sera tâchée et aura une couleur sale. C’est à cette étape qu’un appareil de mesure des TDS (Total des Solides Dissous) est utile. Si vous récupérez et mesurez le TDS de l’eau « évacuée », elle devrait avoir un taux de 1300ppm, ce qui est assez élevé. Il est important de rincer le plant jusqu’à ce que total baisse à un niveau de 50ppm, ou du moins qu’il s’approche du TDS de l’eau fraîche que vous utilisez pour rincer le plant. La couleur de l’eau d’évacuation va s’éclaircir et apparaîtra plus propre. Vous devez tirer autant que possible de minéraux dissous du plant. COMMENT RINCER SES PLANTES EN HYDROPONIE Le rinçage des plantes en hydroponie est bien plus simple que de se débarrasser des nutriments en terre. Les cultivateurs en hydroponie pourront simplement drainer leur système et le remplacer par une eau au pH neutre. Le rinçage des plantes en hydroponie est aussi un processus bien plus court. Une fois que la réserve d’eau aura été modifiée, les plantes en hydro n’auront pas accès aux nutriments externes. Pour cette raison, un rinçage de deux jours suffira. LES RÉSULTATS DU RINÇAGE DE SON CANNABIS Après la récolte des têtes, prenez du temps pour bien faire le curing pour atteindre le potentiel le plus élevé. Un affinage correct par curing permet de réduire encore plus le côté rude des têtes, en éliminant des choses comme un excès de chlorophylle. Vous serez étonné de voir la différence que ce petite effort peut avoir sur votre produit. Tout votre travail se sentira dans la première bouffée de cette weed douce comme de la soie, qui caresse la gorge comme du miel. Le plus doux de la nature. Vous pouvez donc améliorer la qualité de votre cannabis en ajoutant juste de l’eau ! QUAND ÉVITER DE RINCER SES PLANTES Le seul moment où nous recommandons d’éviter le rinçage de son cannabis est lorsque l’on travaille avec une terre biologique amendée ou un super soil. Ces substrats ont été développés avec précaution afin d’héberger des micro-organismes bienfaisants tels que des bactéries ou des champignons. Cette délicate biodiversité pourrait être éliminée et endommagée par le rinçage. Une fois de plus, l’absence de rinçage ne devrait pas poser de soucis, car aucun nutriment externe ou synthétique n’aura été ajouté au substrat. À la place, les plantes comptent sur les micro-organismes pour décomposer la matière organique et la livrer aux racines. May the force be with you 💪