


Likes
Comments
Share


@RhodiesGrow
Follow
Day 1: Popped. Temp: 75º RH: 82% + PPFD: 250
Day 2: Temp: 75º RH: 82% + PPFD: 250
Day 3: Roots showing through the bottom of the rapid rooter. Dusted roots with Tryfecta Myco Supreme (FoxFarms) and transplanted to 3 gallon pot w/ProMix HP. Temp: 75º RH: 78% + PPFD: 300
Day 4: 5-10ml ph 6.2 water feed. Temp: 75º RH: 75% + PPFD: 300
Day 5: Showing second set of leaves. Temp: 75º RH: 75% PPFD: 300
Day 6: Temp 75º RH: 75% PPFD: 300
Day 7: Temp 75º RH: 72% PPFD: 300
Both + Speed Autos are falling a little behind this first week which I find a little surprising given the name.We'll see how they do in week 2. Will continue to mist spray a few times a day for the next week with maybe one more 5-10ml ph 6.2 water feed.

Likes
2
Share

@eldruida_lamota
Follow
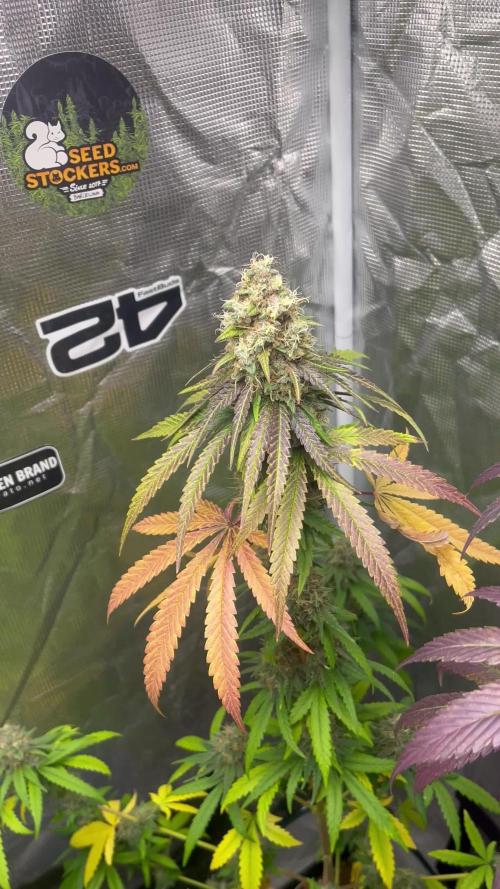
Vamos familia, actualizamos la octava semana de floración de estas Runtz de MSNL.
La temperatura que estuvo entre los 24-26 grados y humedad dentro de los rangos correctos.
Este armario se contaminó esta semana , tengo que para un poco para desinfectar todo bien.
Las flores están madurando bien y se llenaron de tricomas, por el momento todo correcto, os dejé también alguna novedad y un cambio en la sala,
agradecer al equipo de Mars hydro por el nuevo TSW2000. (los últimos 5 años cultive solo con los leds de esta marca).
- os dejo por aquí un CÓDIGO: Eldruida
Descuento para la tienda de MARS HYDRO.
https://www.mars-hydro.com
Hasta aquí todo, Buenos humos 💨💨💨

Processing
Likes
11
Share


@Newbie5648
Follow
Last week of flower. Flushing plants this week with 150 to 200ml water ph 7.0 to 8.0each day
Day 76 plants are pretty much ready for harvest. Buds have fattened up a abit.
Day 77. Alot more orange hairs. Buds fattening up still by a little. Plenty of milky trichomes. Harder to spot orange trichomes but can see them.
Likes
37
Share


@Chunkmasta1
Follow
Well she’s is strong and today is day one of flower. I have turned the lights off for the next 24 hours. Cleaned the Reservoir. Increased the nutrients for the flip. I am running 1 mL of each flora grow flora bloom flora micro silica and Cal mag. My 12 hour light schedule be from 8 AM to 8 PM lights on 8 PM to 8 AM lights off. I will need to dehumidify a little bit to get it down to about 50 and then 45 I believe would be good once the pistols start coming in and colas start to grow. Ive been thru a lot with this plant due to user error but the genetics are strong and this plant can take serious abuse. I would absolutely recommend the strain for a beginner as you can see my many mess ups and still this plant survived and is ready to be budded now. She scroged well with topping multiple times. She’s not a fan of heavy nutrients she also does not like a high pH. You can clearly see the bomb genetics in it as these plants tend to explode in growth very easily. I am extremely happy with this growth so far even with the hiccups. I cannot wait to see these callers grow hopefully fat and happy and heavy.

Likes
27
Share


@DogDoctorOfficial
Follow
Day 58 FLOWER and this girls keep surprising me every day, they keep on getting bigger 🤷♂️🙌💚💚💚 the trichomes and smell department is doing the same 😂 they are definitely showing me the reason why i have to always make clones 🤦♂️🤦♂️🤦♂️ my bad 😆💚💚💚
As always thanks guys for checking and reading my diaries, I truly appreciate the love and it all 💚💚💚🙏🙏🙏 growers love and keep on groweing 💨💨💨💚💚💚
PPFD - 1000 Umol/m2
DLI - 40.0 mol/m2d
VPD - 1.72 kPa
Girls:
Gelato OG @Seedsman
Light Lumatek Zeus 465W compact pro at 100%
More info and updates @
https://growdiaries.com/grower/dogdoctor
https://instagram.com/dogdoctorofficial
https://youtube.com/channel/UCR7ta4DKLFMg2xxTMr2cpIg
All i grow is medecine for myself, nothing to sell, dont even ask !!!!
Stay safe and do it with love for the love ❤️ 🙏
💚Growers Love to you all 💚


Processing
Likes
3
Share


Likes
Comments
Share

@Kushncheeseplz
Follow
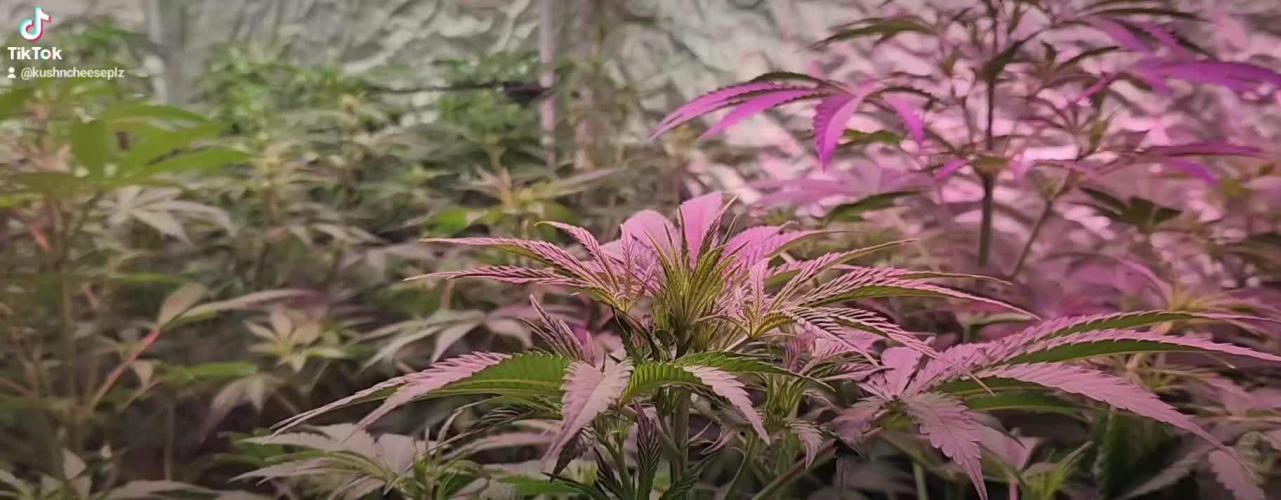
Right now , the challenge is the humidity
To combat against it., open the other tent

Processing
Likes
7
Share


@AlpineGoat
Follow
Just a normal week of watering, curing, slow bending and stem arrangement..
Two times water since monday, maybe today (sunday 14) imma water a lil bit :)


Likes
23
Share


@HideAndFly420
Follow
Day 50 (22 of flowering ) flowering is really bloom ing now, i’m playing a little with lamp distance cause is a 100 watt non dimmerable so i hope to increase light to bud, they need now.
Now she really needs a lot of feed. I give 1 lt every2 days.
Day 51 (23 o flowering ), another 1 lt full.
Now she’s eating 1 lt every 48 hours, and when she need it anyway. But she need à lot more thème before.
Day 53 I had to supercrop this branch that was too close to the heat ventilation. I hope it will save the branch and increase maybe that bud.
Today another 1 lt of feeding, and I think that from the end of this week is going to need more.
Let’s go!

Likes
4
Share

@SWITCH420
Follow
Hi folks,
I'm coming here to start the process of ending this grow journal. I harvested about three months ago and the weed is definitely cured. Photos are about to come — I'm doing a real studio photo shoot for those buds, they deserve it!
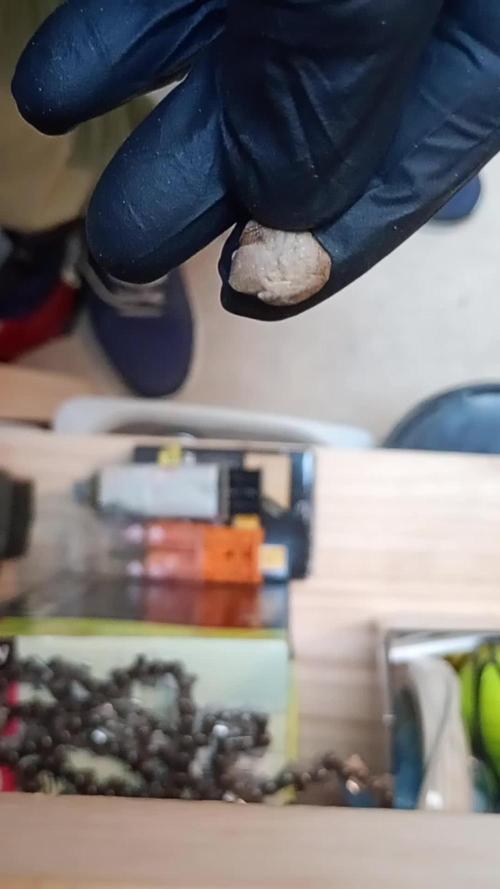
While waiting for the shots, I made some pretty damn dank hash temple balls using the iced water extraction method (solvent-free) with my little washing machine. It's a mix of the 8 strains I grew here — never ideal to mix different kinds of resin... but man, this is some serious dedicated work, so I'm making myself happy with that 14g shiny temple ball in the end 😉
Here are a few details about my process for you guys (and don't forget — you can do it with fresh material! Fresh frozen is always tastier. Also, the drying process is much more efficient and faster with a freeze dryer, but... you need the budget for that. I don't, so I go with the air drying method — check it out below):
1. Get your dry trim, then cure it properly for at least a month (I did 3 months). Smell it — mmh, sweet, dried to perfection. ✅
2. Freeze it, delicately wrapped in a freezer bag.
3. Let a large amount of tap water sit for at least 24h to remove chemicals like chlorine, then use it to make plenty of ice cubes — don't be shy, especially if you're not working in a cool environment.
4. Prep your washing machine: add trim between two layers of ice, fill up with clean water (as much as you can, large vortex is better than a smaller one), then make it seat for 30 min (45 min for thicker buds) the time that the dried green material gets wet again.
5. Prep your filtering tools: catch bag, different mesh bags, spoon, etc.
6. Wash as many times as you can before green contaminants appear, as these lower the quality of your hash — don't hesitate to go up to 8 to 12 washes if the resin still looks clean! Important: each wash has its own specific duration, and they get progressively longer as you advance through the process. Frenchy Cannoli (a true hash legend) provides a detailed timetable for this — from as little as 30 seconds to 1 minute for the first wash, all the way up to around 25 minutes by wash 8. Make sure to follow that schedule rather than using the same duration for every run or running it too long the first wash !! It could breaks to quickly your precious material before you collect all the trich's and the quality would be lower in the end.
7. Collect the wet resin in the mesh bags with a frozen metal spoon, make patties with the resin, and let them sit over some towels in order to drain as much water as possible (place a tissue made for hash collecting over the towel).
8. When the patties are a little dry to the touch, wrap them as they are in the tissue and place them in the freezer for 48h or more.
9. With an iron strainer, microplane your patties over the biggest flat surface you can get! It's important that your micro pieces of hash dry widely and don't get too compacted. Any failure in the air drying process will nucleate rot, ruining your hash in the end and making it a poor product — eventually something to throw away. Sad when you think about all the phases of the process to get to this point!
10. So, in order to air dry properly, you must — it's not optional — lower the RH of your dry room to 35% or slightly below, never above and let it dry as long as needed until the material feels like dry sand. For myself, I found 10 to 15 days is ideal. The room must be very lightly ventilated (not directly on your resin!) and in complete darkness — the goal is to preserve all those delicious terpenes! Ideally, temps around 60°F or 16°C
11. Now that it's dry, collect your resin with a large thin spatula! Make a little mound between two layers of PaperHash, boil some water, and fill up a wine bottle with it!
⚠️ From this point on, to avoid exposing your carefully dried resin to a more humid environment — which could ruin all your hard work — everything must happen in the same drying room. Keep working at 35% RH until your temple ball is tightly and airtight wrapped in PaperHash. (And don't forget to drink water — it's dry in there! 💧)
12. Start to slowly press your resin. Magical moment. Finally....
13. Press 3 times for 10 to 15 minutes in order to really decarb your hash — because that's what it's all about! Between each press, try as best you can to shape a patty... until the final press, when you'll be able to form that magical shiny temple ball (it only shines with gloves on, guys 😄)
14. You are now allowed to try it — for quality control purposes only, of course!
15. Because you want to age your hash for the sweetest 5-star smoking experience: wrap your temple ball in a large piece of PaperHash — if you can get that brand it's ideal, or another kind (check https://thepressclub.co) as long as it's organic!
16. Place the wrapped temple ball in a glass jar and store it in a dark, cool place.
17. Wait a minimum of 3 months before opening it.
18. Open, smell, touch — you'll be amazed. Roll it up with some weed or tobacco or both (I do both) / Or get a Hooka... you are smoking some true primo aged hash made by yourself! Taste the difference and realize all the path from choosing the seeds online until this first amazing puff ... 🙏
I want to credit my inspiration for making this kind of hash to the great Frenchy Cannoli, who has shared all his knowledge through amazingly rich tutorial content that you can find online with a bit of searching. 😉 Peace Frenchy 🕊️☮️




Likes
Comments
Share

@frigo_camelo
Follow
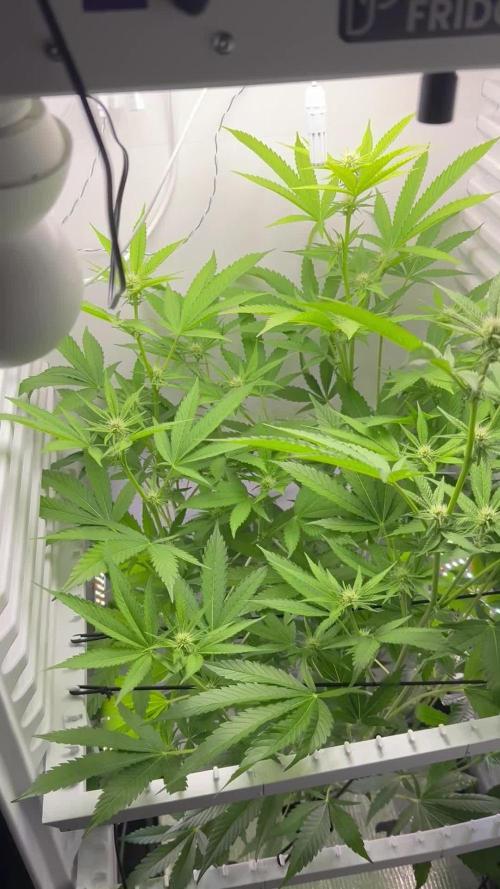
mid week 3 flower | stretch suprised me another time 😂 | started the under canopy | nice smell | healthy plant

Likes
2
Share


@Naujas
Follow
Well, this is another new journey with @FastBuds, I know they are great, so this time I will grow 2 girls in a tent, each one will have a separate diary, and here her first week has already passed, everything looks pretty good, in a week she will be transplanted into a 15 liter pot :).
Likes
16
Share


@Foggedaboudit
Follow
One pheno already reeks of overripe banana and the other two bushes are slowly coming along with the same type of sweetness/muskiness!
Likes
346
Share


@Canna96
Follow
This week went pretty well. I was worried about the flower stretch, and running out of room. I have a tall tent, 80" but with my huge 8" carbon filter, lighting, and automatic drain buckets I have the pots sitting on, I really only have about 48 inches of actual plant height to work with, which I originally thought would be MORE than enough room for Autoflowers, now I am not sure.
This lady definitely almost doubled in size this past week. I am still on 18/6 light cycle, and feeding 6X per day in coco coir via a timer (drain to waste) with the runoff being discarded out of the tent via a gravity fed auto draining system I built. I started adding Liquid Kool Bloom this week to help the flowers start to thicken up, and I am also still using about .5 tsp per gallon of Cal Mag (for the Coco, not the plants) and dry kool bloom at about 1.5 tsp per gallon. I am keeping my EC around 1.5 and keeping my ph in a range from 5.7 to 6.2 Please let me know if you see something I am missing or should be doing better! Thanks for checking me out! Blaze on!

Likes
26
Share


@HowtoBubatz
Follow
The cannabis plant is in excellent health, showing vibrant green leaves and a robust structure.
The overall appearance suggests that the plant is thriving in its current environment.
No signs of nutrient deficiencies, or diseases have been observed. A light defoliation was performed during this week.
This practice will help the plant focus its energy on the upper buds, leading to better yield and quality in the upcoming weeks.
The plant has been fed according to the BioBizz nutrient schedule, specifically following the guidelines for week 2 of the flowering stage. The nutrients provided include BioBizz Bio-Bloom, Bio-Grow, and Top-Max, which have been carefully measured and administered to support the plant’s transition into full flowering.
I'm curious to see what will become of the plant. Stay tuned! 🌱🌱


Likes
9
Share

@Chubbs
Follow
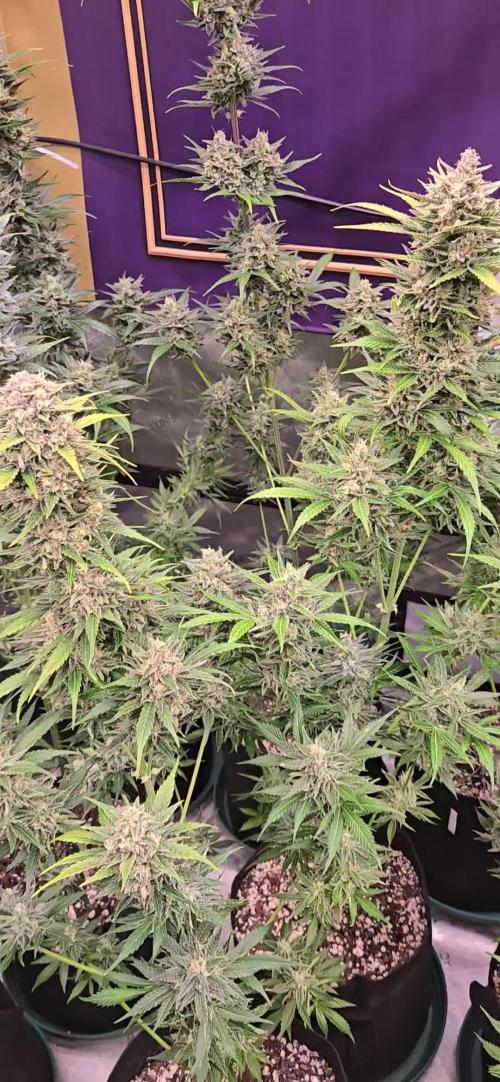
Weekly update on these lovely ladies, I did another major defoliation this week taking most the the bigger leafs off opening up the lower flower sites. They're getting close to being done and wow do they smell so sweet. The top colas are the size of coke cans so I really couldn't be happier with how they've grown. All in all Happy Growing.


