
Likes
Comments
Share


@Tropicannibis_Todd
Follow
💩Alrighty then Growmies We Are Back At it 💩
Well folks we just finished up the last run and so we are bad to do it all over again 😁
So what do you say we have some fun 👈 We got some Z & Z 🚗 🚘 🚗 🚘 👉 From Exotic Seeds
Well we are just 63 days and folks shes doing pretty good 👌
She's going to be chopped here in the next day or too 👈
So I am super happy thus far👍 smells awsome 😊 very sweet 😊
FC4800 from MarsHydro Lights being readjusted and chart updated .........👍I've added a UR45 to the mix👈
www.marshydro.ca
👉I am using Agrogardens for nutrients for my grows and welcome anyone to give them a try .👈
👉 www.agrogardens.com 👈
Agrogardens Cal MAG
Agrogardens Grow A+B
Agrogardens Bloom A+B
Agrogardens Bud Booster
Agrogardens PK13/14
I GOT MULTIPLE DIARIES ON THE GO 😱 please check them out 😎
👉THANKS FOR TAKING THE TIME TO GO OVER MY DIARIES 👈
Would you like to hang with the growdiary community 👉 https://discord.gg/gr4cHGDpdb 👈


Processing
Likes
13
Share


@Andres
Follow
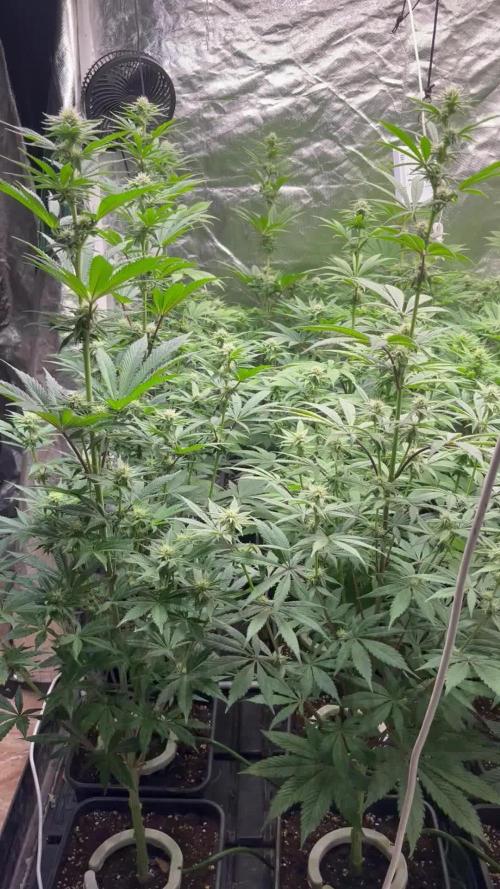
She is a monster measuring 1.94 cm 6'4 ft the same as me. She grew slow due to cloudy days. she is 2 different processes the bottom is the list and with big buds ready to be cut. The upper part has just begun flowering. her buds were cut at the bottom with 5% 15% amber in different buds. There are some big buds. I hope almost all ready as soon as possible this spring

Likes
14
Share


@Chedderbob112
Follow
Av had a good week been busy dunno exactly wot a want tae dae hear feel like a constantly want mere paitience is the key Rome essential built in a day

Likes
14
Share


Likes
30
Share


@DrewbieDoobieNoobie
Follow
I had a little leaf curl on a few fans so I backed off on the watering and I put a elevator drain screen under the 5 gallon fabric pots so my roots would not get the root rot. Gonna Start Flushing this week, giving the Ripening feeding per EH feed chart and getting a better wet dry cycle with the plants. will water in another day with plain rain water I collected ( SEE WEEK 8 VIDEO) and keep a close eye on the trichomes clear cloudy ratio. The buds are getting thicker. thanks for all the feedback on this grow.
I got some good advice from SpinnerCaribbean on flushing with coco. cheers

Likes
6
Share


@xmackobox
Follow
Hola amigos arrancamos nuevo cultivito, por ahora os traigo los videos que subo a YT como ya sabéis le estoy dando caña al canal, buscarme allí, me llamo como aquí, xmackobox.
Poco mas, se empezaron a germinar el día 14/02/24. Algunas se pasaron a maceta el día 16, otras en 17 y se terminaron de plantar en maceta definitiva de 11 L el día 18/02/24.
Para la primera semana de crecimiento ya meto fotos detalle de todas.
**ACTUALIZADO**
26/02/24 llevamos 12 días desde que se empezó a germinar, todas brotadas perfectas excepto 1 que como veis parece atrofiada o con algún problema, no desarrolla el ojo principal es decir su punta apical.
Esperaremos a ver que hace esta plantita :D
Likes
85
Share

@Tropicannibis_Todd
Follow
Start of day 21 ..... Oct 30
Check out the full grow video on latest weekly update
Exceptional Growth
Started LST ON day 19 , re-adjusting daily ... and leaf tucking daily ....
Water Only when needed and adjusting lights when needed.......
Rain Water Only !!!!!!
Sidenote : Being that it's my first autoflower and being a spong and learning, I am impressed so far at the stage growths however a little surprised at NL 2 showing Pre-flowers already on day 21 ,and NL 1 decided to show her pre-flowers on day 26 , super happy with the grow so far,
Truly Love it !!!!!!!

Likes
11
Share


@Beastmode1502
Follow
The flower stretch was crazy, love the progress. I don't know why people don't like advanced nutrients. Doing well for me

Likes
57
Share


@PEAKYPLANTERS
Follow
good evening to all, my friends
God only know what I spent to keep these gems up, but in cure a thing I swallowed another!
The too much warmth in tent has arisen a reaction of strong stress in the plant by transforming their peaks from the shape of fox's tail.
This happens in some cases when the temperature is very high in a tent and makes it believe the plant that is still full summer making it bloom and vegetate at the same time

Likes
12
Share


@cookingwithninja
Follow
day 30 video day 30 note crossed bridal party x pink paradise
day 31 crossed blackberry oreo bigstuff x pink paradise
day34 videos of each, a lot of photos. Rh% high I keep my terps non-volatile. Bridal rubbing sugar leafs smells like some sort of candy watermelon, blackberry neat skunky AF sugar leaf rub, pink is nice mellow I will have to check tomorrow. Dr. Thunder very oily with sugar leaf rub I swear you could deepfry with it. It also smells mellow skunky but will check again tomorrow it may have been terps overload on my fingers regarding thunder and pink paradise aromas. Pink caylaxes have shriveled and accepted pollen locations. I just don't think the seeds will be ready when harvesting in a few weeks. Start week 5 tomorrow and I don't think crosses will be ready so I will figure it out. Pink crosses would be fun next round but I have so many more selections to choose from to grow my next 4.Thunder smells like a citrus cleaner, almost pineapple front notes then a full citrus.
day35 defoliated like madd. no lie so sticky: 2 fingers lifted a ceramic cup like I was spiderman. 1 finger was a struggle.. science

Likes
4
Share


@HavelGrower
Follow
First Week of Flower.
I gave them 36h of darkness before flipping to 12/12 light schedule. Canopy is filled somewhat good and more important is a even canopy.
Installed a second net in the middle of the week. The support will be necessary later.
Did a bit of defoliation but the lollipop will be done in 2 weeks.
Conditions of the Grow:
💡 PPFD: 900 umol/m2/s
☀️ DLI: 38.8 mol/day
🌓 Lightcycle: 12/12 h
💨 Humidity: 50-55 %
🌡️ 🌞Daytime Temp.: 21-23 *C
🌡️ 🌙Nighttime Temp.: 18-19 *C
🌡️🌱Leaf Temperature: 21 *C
🌡️💧Water Temperature: 18-19 *C
Water TDS: 1000ppm | EC: 2000us/cm
🚰Watersource: Rainwater (TDS: 15ppm | EC: 0.03 us/cm
Vegetation Equipment:
🔦 Lamp: Mars Hydro FC-E6500
📤Container: 3x DIY 63L Euro-Box with lid
Pot: Netpot 2 inch
💦Pump: M.R.S. Ultimate Whisper Powerpump 22 bar
🚿Nozzles: 12x 0.3mm
🫧Waterfilter: 150 microns
🌬️Fan: 3x Clipfan
🌪️Duct-Fan: AC Infinity 200 mm with Controller and Carbon Filter
🍶Nutrient Brand: Terra Aquatica
🔬Sensors: Waterstation (EC, TDS, Temp, PH, Salt), CO2, Air Temp. & Humidity (VPD), Temperature-Sensor Root Container

Likes
2
Share

@Ribemarti
Follow
Dia 24 de floracion aqui dejo las fotos y videos,
Las plantas miden ya las mas altas 98 cm parece que van a cargar bastante estas plantas, Temperatura 25 grados humedad 45, estan siendo regadas con 1500ml a una ec de 1300, Proximo riego ya aumentare a 1750 ml por planta, debido al tamaño ellas piden mas agua hasta llegar a 2L por planta, Regamos cada 3 dias y siempre con abono organico de bio bizz, da unos muy bueos resultados si sigues la tabla


Likes
19
Share


@JeyGanesha
Follow
Undicesima settimana.siamo arrivati quasi al traguardo.la vendemmia si prepara... .il profumo invade tutta la mia stanza.. delizioso,😂😉🤣🤤🤤🕉️
Likes
36
Share


@MadeInGermany
Follow
Flowering day 42
since time change
to 12/12 h.
Hey everyone 😀.
Both phenotypes continue to develop very nicely :-).
The buds are getting bigger and bigger and the sweet smell starts to waft through the tent 😍.
It's very much in the Skunk direction 👍.
It was watered twice this week with 1.2 l per watering per plant.
The tent was cleaned and everything checked for health 👍.
We'll see you again next week :-)
Until then, I wish you and your families a Merry Christmas 👍😀🙏🏻.
Stay healthy and let it grow 🍀
You can buy this Strain at :
https://sweetseeds.es/de/sweet-skunk-f1-fast-version/
Type:
Sweet Skunk F1 Fast Version
☝️🏼
Genetics:
Sweet Skunk Auto (SWS34)
X
Early Skunk
👍
Vega lamp:
2 x Todogrow Led
Quantum Board 100 W
💡
Bloom Lamp :
2 x Todogrow Led
Cxb 3590 COB 3500 K 205W
💡💡☝️🏼
Soil :
Canna Coco Professional +
☝️🏼
Fertilizer:
Green House Powder Feeding
☝️🏼🌱
Water:
Osmosis water mixed with normal water (24 hours stale that the chlorine evaporates) to 0.2 EC. Add Cal / Mag to 0.4 Ec Ph with Organic Ph - to 5.5 - 5.8 .
Likes
36
Share


@Suemchen
Follow
Sanlight evo at 100%
Day 64: watered today with supplements. Getting high humidity levels, so I sprayed purolyt. Will propably flush in a couple of days.
Day 68: flushed yesterday. One week now and then 72 hours of darkness. Looks and smells really good🤙
Get 15% Off Fast Buds with Code: FBSUMO
https://2fast4buds.com/
Likes
5
Share


@MeneBud
Follow
Week Nutrients
The plant did not need any nutrition and water in those days.
Last watering done on the 16th and next on the 23rd.
The broken branch recovers well and with a light resin forming on the buds.
PPFD avg 680
Avg temp 24ºC
Avg RH - 55%
Likes
14
Share


@CampaCavallo
Follow
6ª Settimana di Fioritura 💐💐💐💐💐💐
Amici della Cannabis 💚, guardate che belli che stanno diventando i fiori della RUNTZ 💓🗿💙!
Belle cime gonfie ed innevate😍🏔️
Un abbraccio a tutti 😘💪🏻💚
Likes
27
Share


@GhettoGrowShow
Follow
Week 5 of flower.
Strain is Nanda Devi(The Real Seed Company) X Skunk 1 (Spliff Seeds) F1 Hybrid cross.
Started seeds outdoors and sprouted on May 10, seeds went indoors under 11 and 13 on June 16th.
Check me out on youtube to see more of this grow https://www.youtube.com/channel/UCvBA-kG70hHVrnBxoHBHBuw/videos
Like
1

