
Likes
Comments
Share


@I_Identify_As_A_Dan
Follow
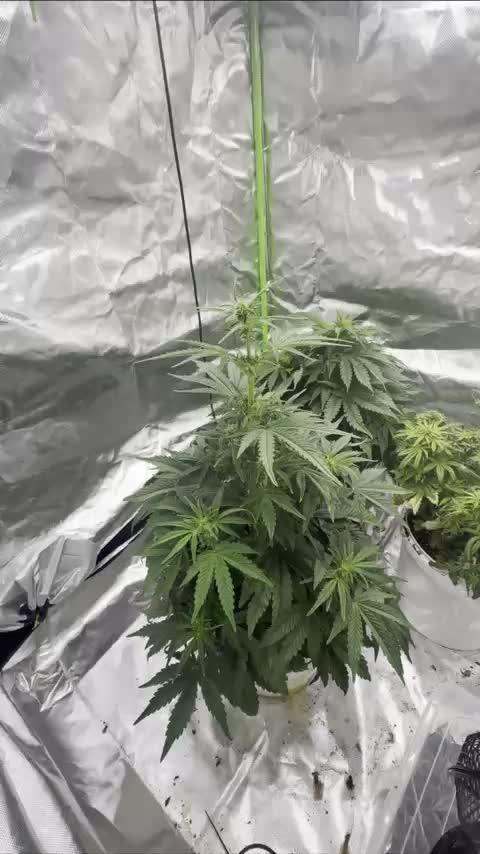
Week 12 of Gelato 41 by seedstockers,
Just look at that growth😂 Shes been loving the rain it looks like 😍 Showing no pest issues... showing no nutrition issues either. Her colour is beautiful 😍 Letting her soak up all that rain water from the pot. Probably wont water for 7days to see how she does.
Have Still been morning spraying them when its not pouring with rain. Also topped her on a branches they i felt like needed it.


Likes
10
Share


@wheedtobeus420
Follow
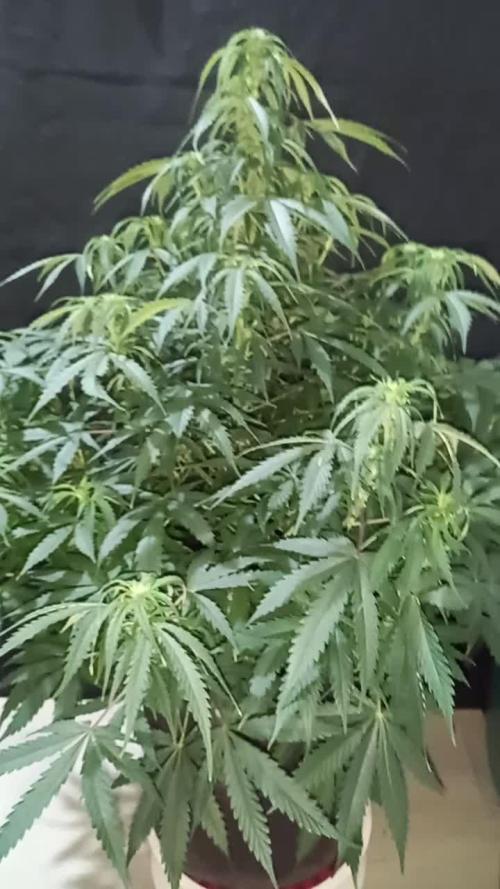
day 27. She took very well to the low stress training. She’s looking beautiful. Her little pistols are in pre flower. I’m very happy with how she is coming along. Looks bushy green happy and healthy 🔥


Likes
10
Share


@StoneJackson
Follow
I’ve lost two of the four arms I was trying to save 😢 one snapped clean and the other is standing dead. No worries cause there is plenty left to take care of!
I’ve built a 4.8m x 4.8m x 3.0m enclosure and now that I’ve splayed everything out there’s barely any room to move again haha absolutely loving it 🌴
I’ve stripped a good 1.5m of bottom plant material clean of side branches and foliage partially for energy distribution and airflow but also partially to bring the obvious foliage above the neighbouring properties tree line now if anyone peeks over they should see a bunch of sticks instead of a forest of sticky :p
They are definitely in flower I think I’m at the end of pre-flower stretch. They’ve reached the top of the enclosure so I’ve pulled most of the tall arms over and I think they’ve stopped reaching meaning the next few weeks should produce some fun material to post up
Thanks everyone for following along
Likes
52
Share


@DogDoctorOfficial
Follow
Let's realign our cosmic compass and embark on a harvest report for our magnificent Cosmos F1, a pure CBD strain that has taken us on an extraordinary journey. Brace yourself for cosmic revelations and interstellar delights!
After an impressive 11 weeks from seed and 7 weeks of flowering, the time has come to witness the cosmic culmination of our efforts. I carefully hung the entire Cosmos F1 plant to dry, allowing the cosmic energy to infuse every inch of this botanical marvel. It's a sight to behold, with majestic branches reaching for the cosmos, reminiscent of a cosmic dancer frozen in time.
As our cosmic queen gracefully dries, her vibrant hues continue to amaze. The shades of green, intertwined with delicate hints of purple and gold, are a testament to her genetic splendor. It's as if she has absorbed the cosmic essence of the universe, transforming it into a visually stunning spectacle.
Now, let's talk about the cosmic power of CBD. Our pure CBD strain holds the key to a transformative experience. With minimal psychoactive effects, this cosmic treasure offers a realm of therapeutic benefits. It's like a cosmic massage for the mind and body, soothing and relaxing, allowing us to explore the depths of cosmic tranquility.
The decision to hang the entire plant for drying is a testament to our dedication to preserving the cosmic integrity of our harvest. By allowing the branches to hang freely, we encourage a slow and controlled drying process, ensuring that the cosmic essence remains intact. It's a ritual that honors the plant's journey, preserving its cosmic magic for us to enjoy.
As we eagerly await the cosmic transformation, let us express our gratitude to the celestial forces that have guided us on this cosmic odyssey. The cosmos has aligned to bring us the extraordinary Cosmos F1, a gift from the cosmic garden gods themselves. We extend our heartfelt appreciation to the cosmic harmony orchestrated by @James and Royal Queen Seeds.
In the coming days, our dried cosmic buds will be ready for the next stage of our journey. From cosmic concoctions to cosmic culinary delights, the possibilities are infinite. Imagine infusing the cosmic power of CBD into soothing teas, cosmic creams, or cosmic confections. The universe is our canvas, and with our cosmic harvest, we can create cosmic masterpieces.
As we bid farewell to our Cosmos F1, let us cherish the cosmic memories we've shared. The vibrant colors, the pure CBD power, and the cosmic connection we've established with the universe. May our future endeavors be as cosmic and awe-inspiring as this one.
Until we meet again, my cosmic friends, lets keep exploring the cosmic wonders, nurturing our cosmic gardens, and let the cosmic energy guide our cosmic creations. May our harvest be abundant, our cosmic experiences be enlightening, and our cosmic journey be filled with celestial blessings.
As always thank you all for stopping by and for supporting me on this journey, i am super passion about growing and fell blessed to have you all with me on


Likes
21
Share


@gr3g4l
Follow
con 64 dias y viendo el estado de los tricomas diría que voy a empezar a regar con agua sola , unas 3 veces más en el que añadiré en el riego Dos de acido cítrico por uno acido ascórbico
y en 7 -10 dias cosecharé.

Likes
46
Share


@Dreadnug
Follow
Plant has been getting straight pH balanced water this last week and minimal nutes.
It is showing some slight nute burn so I let off a bit and raised the light canopy about 6”. I discovered that what I thought was a calcium or potassium deficiency was actually a rookie grower error by me. I have an RO system that I use to water all my strains in the grow room including this one, but when adding nutes to the water, it takes too long so I had been filling them up with well water. When I had originally tested the well water, I must had used a faulty testing agent as after testing it this last week, I was showing a pH of 7.5 vs. my RO of 6.2. Thus, every time I was adding nutes (multiple times a week) I was significantly fluctuating the pH between regular feedings and nutrient additions. To make matters worse, when I originally thought it was nute burn, I flushed each plant with well water and likely caused additional stress.
Anyway, I have since learned that the well water needs to be treated, I only utilize RO water the last few days and plan to do so over this next week.
Also, I have turned off the CO2 system as I was starting to see signs of heat stress on a couple of the strains (Plant #1). The literature I have reviewed suggested that these strains might be able to handle heat closer to 90F but it was also causing issues with high humidity so when I added a dehumidifier, it pushed the day temp to between 90-92F and the overnight temps were not getting low enough (maybe 85F or so). Maybe I could leave out the dehumidifier, but I was getting rH of 70% and didn’t want to risk any bud rot or mildew growth. So for now, I have turned off the CO2 and am getting high temps of 81F with 60% humidity and overnight temps of 74F and 50% humidity.
Plant #1 had some heat related curling of leaves as well as some of the lower leaves showing impact of the pH fluctuations. My hope is we will be steady until harvest.
Plant #2 has shown the least signs of stress and is fattening up its buds very nicely. Late in the week, some of the leaves started turning brown from the pH issue but my hope is that with RO water only, we will be on the right track.
Over the next few weeks I will start monitoring the trichomes for a nice milky color for harvesting.

Likes
10
Share


@Lushgaia
Follow
Week 3 of flower I found a hermie, not sure wether it’s pollinated all of them but it definitely got one in the back, treated it only time will tell no obvious pollination signs
Likes
6
Share


@1Prinz
Follow
18.07 watering with 400ml - 400ml - 400 ml
Blueberry got only water
Trainwreck got Bloom, Top-max and Fish-Mix
All the others got only Top-Max and Bloom.
Search everyday for some spidermites or something else. On some days I find a few on blueberry and Biscotti. I remove the manually.
21.07 watering with 400 - 400 - 400 water.
Again: blueberry only water
All the others Top-Max and Bloom
Trainerwechsel started to flower.
The leaves of Blueberry and Biscotti started to get yellow. Also removed some leaves with were down in the shadow of the top strains of frosted guava.

Processing
Likes
21
Share


@Neo09
Follow
Im falling in love, cos thoose our babe's makes US 🤩😋🤩
..., that Last 3 weeks. Jeep on rollin baby

Likes
12
Share


@LockDownGrow
Follow
Omfg what can I say,
Just look at the size of this auto plant,
She looks over watered but I can sure you she is not,
But just too be sure she had a flush feed this week and sucked that pot dry in just 3 days the same as the feed bucket before that rich of nutrients,
Absolutely no signs of defentcies on any of the plants leaves at any stage this grow,
Just the mutations in the first weeks that have only seemed too make them all very special plants indeed,
Now comes the exiting part,
The bud development,
I really pumped the nutrients this week as you can see,
At the end of this week a stopped giving the plant these addavitves
More roots,
Humic acid,
Growzyime,
Fast bud folar spray,
And big buds,
And have now started too raise the house & Garden A&B soil feed and also there budXL
I also started off early but as a trace amount of there top shooter,
By the end of week I intend on giving them the full recommended of each and only be giving them the house and garden range at full streingh,
I will then wait for the first Amber tricomb then instant flush feeds,
Hopefully I get two weeks from that stage but it is often genetic so as long as I get at least one week and at least 3 feeds of water only then I'm happy
Update I've been told from my photos I need too flush and they over fertililsed so my plans too increase is an
Abort Misson lol
Will not turn back the dial on feeds
Likes
18
Share


@Kirsten
Follow
17.3.25:
So I watered with 2ltrs of dechlorinated water PH'd to 6.4 with 4ml Xpert Nutrients Cal-Mag amino acids.
I have really overdone the nutrients, I got carried away 😅
To try and rectify the situation, I've cut everything out except Cal-Mag amino acids.
I will try to just stick to this with some Biosys, but I'm running out of that now, too.
Anyway, with Or Without, I'm sure it'll balance out. Fingers crossed 🤞
Likes
3
Share

@Mortelinos
Follow
holky si protrpěli své ale snad to zvládneme dokonce :)
(ano byli 3 skončili jsme na 2)
Processing
Likes
3
Share


@StonyHemp
Follow
Week 4 and buds are beginning to fatten up nicely, I’ve changed the position of the gelato and one of the Zkittles to improve light penetration into the canopy as the leaves have began to defoliate themselves from the plants. This being said all plants are looking green and healthy and show minimum environment stress. Hopefully this change in the canopy will allow each of the strains to grow to their full potential with the limited space that I have.


Likes
40
Share


@xbrico
Follow
***New Addition***
Day 82 - Big tank change out. Had a massive drop in pH while EC rose some again (Only been adding RO water the last few days to keep tank in check around EC1.2-1.3, had jumped to 1.6. PH Drop was from 5.9-6 to 4.9-5.0 from it being stable for 4-5 days). After epsom salting the leaves last week, still noticing some lower leaves "Praying" and some dead and drying ones hanging from the plant. Its getting to about the mid-way point of the plant now (again, all that's under the scrog but...) but getting too close for comfort!!! Have edited my formula slightly for this change out to:
*2ml/L Bloom A & B (So 100ml of each in a 50L tank)
*1ml/L Silicon
*0.6g/L Epsom Salts
*1ml/L 9/18 PK Warrior (This was a f**k up, should have been 0.5ml/L - hopefully doesn't impact or isn't the cause for Mg issues - causing a lockout)
2ml/L Sumo Active Boost
2ml/L Fulvic Acid
2ml/L Sensizym
2ml pH Down to bring the lot to pH 5.7-5.8
This brought me to about 1.6EC, pH6.4 (Expected value was 1.521 from Hydrobuddy Calc for the * ingredients - My water bases at 0.2EC so a close enough calc!!!) - Higher than I have been putting in but i think most of the EC rise is from the Sulfate in the Epsom Salts (The Sulfur alone is about 0.32EC).
Also, with it coming late autumn and the tent in an outdoor cabin, got a temp controller to bring on a heater to stop the temp dropping below 16.5C...its now averaging out around 18.7 during the night so that's decent enough (Was potentially getting sub 15C - recent day temps have been 9-11C so could have been pretty chilly in there!!!). Also put my aquarium heater in the tank to bring the solution to around 19C as 1 of the plants has grew an absolute root mass into the tank itself - It is defying the Smart Pots and getting itself into there even after a pruning a few weeks back!!!
So, tank change happened a few days early but what the hey...passed the time with a hot whiskey or 5!!! :P
********************************************
Day 78 - Really haven't done anything with the girls the last week. Just been topping up with pH adjusted water, bringing down the nute strength a bit as they're taking on water but not really taking on any nutes. General monitoring.
Think I am going to have to get a heater out in the cabin as the night (IRL Day temps) are getting 15C and below so worried that could be impacting some nute uptake - Gave them an epsom foliar last night and then the bi-weekly Geisha foliar spray just before lights out this morning.
Apart from that, nothing new.
Happy growing all.
Likes
6
Share


@Shellshocked
Follow
Last week of veg. Renting a house that the owner is selling so I gotta move so everything must flower now. Just plain water ph to 5.9-6.2 and cal mag for 1 watering


Likes
3
Share


@Maven26
Follow
Thick root system. Currently she is competeing for grow space against the larger Bermuda Gold
