
Likes
Comments
Share


@Dunk_Junk
Follow
Day 70 - She's really getting frosty now! The smell is very sweet, like Icing Sugar. Amazing 😍
Only 1cm vertical growth this week, I think flowering stretch is over. Bud and trichome production is in full swing.

Likes
4
Share


@DarbGrowDiaries
Follow
Getting bigger and looking healthy, only around 150 PPFD
They seem to be sensitive to strong light, still too little
Day 21 - topped the bigger girl, hopefully she catches up since she was already moving faster

Likes
16
Share


@BongRip
Follow
In my experience, mango is a bit hard to to achieve the best looking and tasty smoking buds. I had to do many extra stuff at the end, gave a lot of stress to plants. Fortunately, everything worked out so well, the stress doesn't interfere with the taste much. It smoked very good, hit heavy indica with tropical kush taste.
Lastly, Within a control environment with proper knowledge, I did all of these in my whole plant cycle : LST, HST, chiropractic, stem splitting, extreme cold stress, and total darkness.


Likes
57
Share


@Wastent91
Follow
Eccoci qua all ultima settimana di vegetativa di questa bestia! Penso che le piante crescano davvero meglio con questi casi antispiralizzazione, prima pensavo fossero dicerie, ma sto sperimentando che le ragazze crescono molto di più rispetto rispetto alle sorelle nei vasi normali, questa ad esempio è germinata 10 giorno Circa dopo le sorelle, e sta rapidamente raggiungendo le stesse dimensioni! Anche la sour Apple di anesia ho dovuto spostarla e portarla in fioritura una settimana prima di queste, xke stava diventando troppo grande, ora è a 80 cm di altezza rendetevi conto! Al prossimo giro tutte le mie ragazze avranno un nuovo vestito, ovvero il vaso antispiralizzazione che permette alle radici di avere un accesso maggiore all ossigeno, e ci sono maggiori cicli asciutto/bagnato significa che la pianta respira e cresce meglio, raddoppia la velocità di fotosintesi secondo me! Merito anche dei nutrienti di Terra Aquatica naturalmente sono orgoglioso di fare parte della loro famiglia e utilizzare i loro nutrienti famosi ed orgoglio in tutto il mondo! Un buon 420 a tutti alla prossima settimana 💪😸

Likes
33
Share


@Roberts
Follow
Cali Crasher is growing great under the Hortibloom Solux 350. She got some heavy training today. The light schedule was also changed to 12/12. Everything is looking really good. Thank you Hortibloom, and Doctor's Choice. 🌱👍🏻🌱
Thank you grow diaries community for the 👇likes👇, follows, comments, and subscriptions on my YouTube channel👇. ❄️🌱🍻
Happy Growing 🌱🌱🌱
https://youtube.com/channel/UCAhN7yRzWLpcaRHhMIQ7X4g


Likes
4
Share

@PhinolaGreen
Follow
6. Woche
Der Switch in die Bloom ist im vollen Gange, ich werde demnächst die Lampe umstellen auf Veg/Bloom und. Gerade gab es bisschen Dünger mit extra Calmag und joa, sonst sieht soweit alles gut aus finde ich 😊

Likes
4
Share

@SkunkyDog420
Follow
Hallo zusammen 🤙.
Sie wächst sehr schön und macht keine Probleme.
Rabattcode für den BIOTABS-Webshop https://biotabs.nl/en/shop/ GDBT420, damit erhalten Sie 15 Prozent

Likes
24
Share


@olli0420
Follow
Going really nice! I'm flushing right now and hope to be able to harvest in a week or so🌱💚😁 very happy with this grow!!

Likes
10
Share


@BR1CK_SANCHEZ
Follow
Just chuggin along this week, didn't do much... struggled to keep temperature at stable 68°
Likes
22
Share


@Naujas
Follow
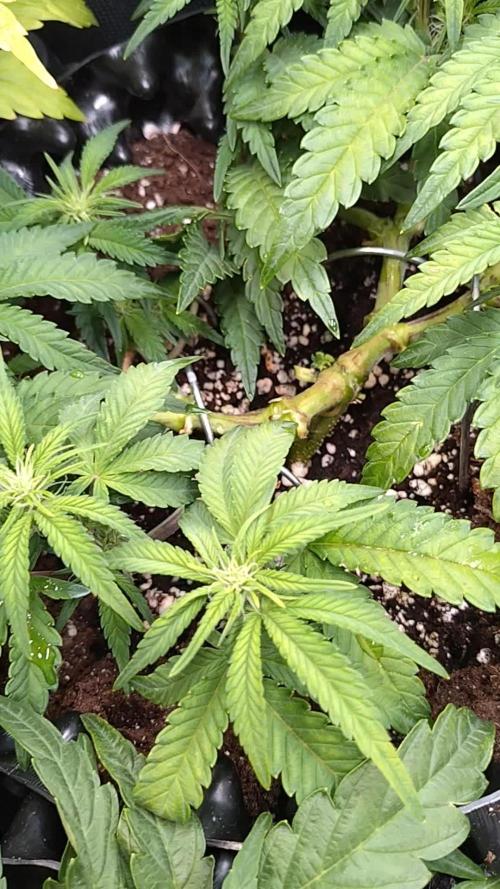
The girl is suffering, it's too tight for her, too little co2, well, but the green color is increasing :D what I hope will promote her growth :).


Likes
3
Share


@Ganja_Victoria_Aus
Follow
Planing to move in dwc under fluence light food by Front Row Ag. Let's see how she does.

Likes
98
Share


@420DeepGrow
Follow
Gracias al equipo de Royal Queen Seeds y MarshHydro, sin ellos no sería posible esta hazaña
💐 🍁 Wedding Cake! Este potente híbrido de dominancia índica ofrece un perfil de terpenos difícil de encontrar. Disfruta de intensas notas azucaradas acompañadas de impresionantes niveles de THC. Procura tener la agenda libre el resto del día para disfrutar al máximo de las propiedades eufóricas y del colocón de esta encantadora dama.
Tierra. Hierbas. Dulzura. Cada calada de estos cogollos te hará querer más y más. La Wedding Cake sabe muy rica en porros y bongs, pero en vaporizador te harás una idea real de lo que pueden llegar a ofrecer. A medida que el sabor acaricia la lengua, su 23% de THC se asienta rápidamente, ejerciendo un potente subidón que relaja el cuerpo y anima la mente.
🌻 🚀 Consigue aquí tus semillas:
CODIGO 20% DESCUENTO: GROWERS20
https://www.royalqueenseeds.es/semillas-feminizadas-de-marihuana/628-wedding-cake.html
💡 Mars Hydro TS 3000, como la lámpara de cultivo LED más grande de la serie TS, ofrece suficiente cobertura para un área de 4 × 4 pies con un precio asequible y rendimientos de calidad; a cambio, se puede aplicar tanto al cultivo doméstico como al cultivo comercial.
Potencia - 450w
Cobertura Vegetal – 5×5 pies
Cobertura de flores - 4 × 4 pies
La opción abrumadora para la mayoría de los productores que la aplican en tiendas de campaña.
Consigue aqui tu lámpara:
https://marshydro.eu/products/mars-hydro-ts-3000-led-grow-light/
📆 Semana 8:
Finalizando en la etapa de engorde, esto va que vuela 😍, la resina esta cada vez mas presente ❄️ comienzan a madurar
Esta semana seguirá el TS-3000 de MarshHydro al 100% y 30cm de distancia.
Se estan desarrollando mejor que nunca, con una floracion mucho mas rapida y fromdosa, noto una gran mejoria gracias al Marshydro TS-3000.
Continuo con defoliaciones
Aplico una solución con nutrientes EC 1500 y otra con agua del grifo reposada y PH 6.6
Likes
14
Share


@DevelGrow
Follow
Hallo Freunde 👋 Frost Banger von fast buds ist 28 Tage alt! Und geht fast sie ist in vor Blüte gegangen und wird wie es aussieht sich noch mächtig strecken! Keep Green and grow High ✌️🍀💚🍀
Likes
5
Share


@Happydays58
Follow
Overall I enjoyed this grow and learned a lot about living soil. Going for a slow dry, trim, then at least a one month cure. Hopefully another six days and I’ll update with a dry yield.
My next batch is already cooking but with 5 gallon pots.
03/25 - Day 7 Drying
B & C are done drying and have been in jars for a day now with RH ~60%.
Total 3oz from B & C.
Total 1.5oz from A & D

Likes
9
Share


@masterofsmeagol
Follow
6/15 Everything was dry this morning but the bags STILL had some heft. Much lighter though so I decided to water. I didn't realize how cold the hose is so I'll have to usecthe water inside or premix it. I watered everything at least a half gallon. Things are going great. I'll update as I go.
UPDATE: IM GLAD I WATERED. ITS 73° OUT AND NICE AND SUNNY.
6/16 Foggy morning has turned into a sunny day! Plants are doing amazing. So glad I watered. I took a shit ton of pictures but they don't seem to be uploading. VERY FRUSTRATING TO TAKE THE TIME TO TAKE PICS AND VIDEO ONLY TO HAVE IT NOT UPLOAD. It's working now. I canceled out after I uploaded everything. Trying to upload again now.
EDIT: EVERYTHING IS FIXED. I UPLOADED A BUNCH OF STUFF. PLANTS IN THE BACK AND THE FRONT SEEMED DRY AND LIGHT. I GAVE THE TWO 10'S AT LEAST A HALF GALLON. I GAVE THE THIRTY A GALLON AND SPLIT THE REMAINDER WITH THE 20'S. I MIXED UP 5 GALLONS. EVEN THOUGH THE PLANTS IN THE MIDDLE WERE DRY THEY STILL WERE FAIRLY HEAVY. IT IS SUNNY AND 80° WITH STRONG WIND. I'LL WATER THE OTHERS IF NEEDED BEFORE WE GET SOME RAIN. WE HAVE RAIN IN THE FORECAST SO ILL KEEP AN EYE OUT. IM VERY IMPRESSED WITH THE GROWTH IM SEEING. I NEED TO DO SOME MORE LST SOON AND PUT UP A TRELLIS.
6/17 I'm glad I watered those plants. Everything is looking GREAT! I didn't get pictures as I was in a hurry. The 3 plants in tje middle are dry on top bit about as heavy as the others. The wind doesn't go through them like the others. I would've watered but they looked happy and we are supposed to be getting rain. I'll be back over later and re-evaluate.
EDIT: I GAVE THE THREE IN THE MIDDLE ABOUT A HALF GALLON EACH. EVERUTHING IS LOOKING FANTASTIC. I LSTED SOME. ITS SUPPOSED TO RAIN TONIGHT AND A LITTLE BIT WITHIN THE DEW DAYS BUT NOT WHAT THEY NEED. IM JUST TRYING TO NOT OVER WATER. IM REALLY HAPPY WITH WHAT IM SEEING.
6/18 It's overcast with showers. Rained hard last night and it's been raining off and on this morning. I probably could've made it without watering the three in the middle but I didn't want to chance it. Plus the rain doesn't add up to much anyway. Plants were soaked this morning. Soaked me just shaking them off. I'll update later. This year has been really good so far.
6/19 Overcast and Maineing out (tiny sprinkles tuat appear intermittently). Plants love it. Apparently I've reached my photo limit. At least that's what the app says. AT least I got SOME of these pictures and the video up. I can't belueve the increase in size both vertically, laterally and width. Branches are long and thick. This rain, sun, rain, sun type weather is creating some monsters. Can't wait to see the result. Still on the fence about light depoing. One thing I DO need to do is put up trellises. It sucks if I can't upload anymore pictures or videos. If I see something great I'll just delete a dfferent picture.
6/20 Not raining but still overcast. 71° at 9:15. Plants are still doing amazing. I've dedoliated some damaged old leaves. I can see some plants have shot a few pistols but I don't think reveg will be a big problem. Some have no signs of reveg. A couple spit out a few three finger leaves but that could be from the environmental stressor. I kept my second mk ultra without topping or fimmed. It's stalk is enormous and just the LEAFLETS are bigger than my wrist. ENORMOUS fan leaves. I think this is going to be a great year.


Likes
8
Share


@FirstTime97
Follow
Been a good week explosive growth first signs off early stages of flower few plants come out with spotting and few yellow leafs tent is starting to get cramped tried to spread um out as even as possible with the space we have , first dose of nutrients solo soil nutes we’ve gone with as recommended by the local grow shop

Likes
103
Share


@Hou_Stone
Follow
️ Tarte Tatin = Caramel Apple Gelato x King’s Tart ️ 🌲💚
Tin tin tin tin tintin 🎵
------------------------------------------------------------
💧Watering each pot:
Day 25 : 0.5 L
Day 28 : 0.5 L
I use tap water, adjust the ph to around 6 and water
------------------------------------------------------------
🔥❄️Temperature of the week :
Day : 19-23°C (Humidity : 60-75%)
Night : 14-17°C
------------------------------------------------------------
🚀Equipment of the week ⭐️ :
Light FC3000 Mars hydro. power 95% at 50cm
Extractor 6 inch Mars Hydro. power 1/10. ON 24/24h
2 fans to circulate the air inside the tent. Each on for 30 minutes then off for 1 hour. this rhythm repeats itself in a loop
Heating mat 95x95cm. ON 45 minutes. OFF 30minutes. In a loop. The day only
------------------------------------------------------------
Processing
Likes
2
Share

