
Likes
Comments
Share


@KeemBboomin
Follow
So where I live we had a really bad storm it had knocked out my power for a full 24 hrs so I had to give them some extra attention to insure there was no mold or any pest with no fan rotation. Then I also had to put them back on there proper timer to get things back on a roll so far so good they still look and smell amazing wish me luck
Likes
8
Share

@RBG
Follow
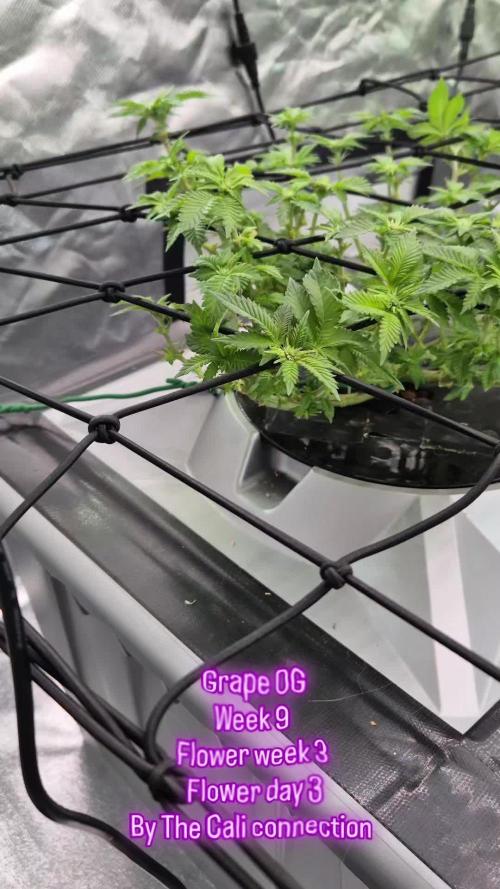
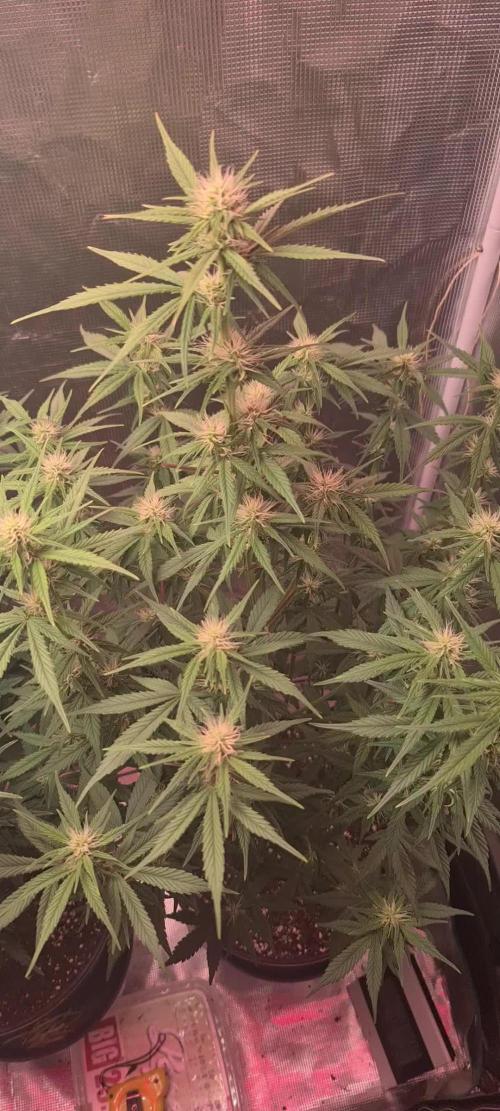
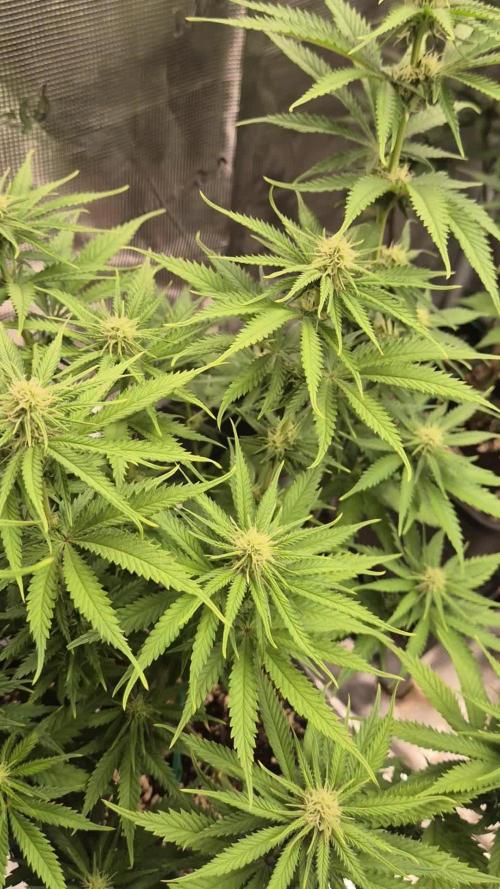
28/10/25Grape doing well overall, absolutely loving how shoes keeping her shape but i do want to start trying to spread her out a bit more, I'm hoping for some lovely growth overnight so she can start being bent out so that middle is a little more spread out
Nutrients change today ( a day early ) because i didnt like how she smelt, so flushes, filled hit with 400ml sleeps then flushed, refilled and nutrients
Floramax veg 1
Floramax Rezin plus
Floramax flowering enhancer
Floramax Organabud
Green Planet vitathrive
Isn cal mag
Green planet massive bloom
Green planet bud booster ( 30ml scoops x 4 )
Cyco platinum series silica
Sleeps with the fishez ( HOCI )
Hit 4.8 e.c, changed 100L got 2.3-2.4e.c, 6.1ph. Used a lot but wanted to get rid of the Green planet line plus the ISN cal mag as im switching out to sensi cal mag
Week 3 here we go!
29/10/25
Light defoil and spread to get that light in, last week to do anything then let her just thrive and vibe

Likes
11
Share


@DimJesus
Follow
Iniciando mi primer indoor, updates toda semana.
Ya he cometido algunos errores pero siempre aprendiendo, próxima semana comenzaré a fertilizar con advanced nutrients.


Processing
Likes
65
Share


@Dedon
Follow
Hi Everyone !
Everything is ok.
Plant are still healthy. specially the tank on the left, they drink 15L during this week and maybe less than 10L for the tank on the right
Guess which one has a nice root system ? 🙏😉

Processing
Likes
5
Share


@Mr_nugs_lover_David
Follow
She looks as healthy as her sister,she's happy,no issues at all,and starting to show the first pistils on August 24th.let's see how this wonderful strain performs. 😊💚🌱


Likes
11
Share


@MRTHC
Follow
Well we finally reached the end. The last week was more cruise control. Just trying to remove the big fan leaves that's blocking any flowers. The trichomes looking kinda ready but still acceptable. During the last few days I maintained a daytime Humidity of around 60 and nighttime of 55. Temperatures are between 73 degrees and 67 degrees.
Two days before chop they got 48 hrs of dark and 3 days of no water to add to the stress. After the 48hrs darkness all the ladies Came out extra frosty. Loving the change of hues on the blue gelato. The vanilla Kush is very oily and very very strong smell. Not a strong smell coming off the OrangeGelato though. The green gelato has a creamy smell.

Likes
6
Share


@Kannamar
Follow
Well that was a special day, it always make me sad in a way, but this time, I enjoyed the moment a lot.
As I wrote in a reply to a comment, things can always be better, and they are with good decisions at the right time.
These are the smallest and the biggesr plant, one seed didn't germenated and that's why I had to put a Red Gorilla.
Not sure I will try a main mlinning on auto flowering strains any more.... but I think I did it wrong, first I took the one that seemed less strong for the experiment, and having 2 other plants to compete for lights.
FIM is definetly a technique I will reuse if needed.
It's so nice to have these genetic contrasts, colors, aromas, shapes.
Many thanks for all the help you gave, precious.
19/04/2024 lower popcorn buds seems dried already! But still branches don't crack on bends. Will check again on Monday.
I finally have received, lately a portable microscope, will be more ususeful next year! But this confirms that lower buds might have need more maturity but did the choice to not over complicate by harvesting in 2 times, my indoor tent is also my drying tent, and I wouldn't have any other place to dry the upper buds separetly while allowing the remaining to harvvest with more maturity.
In general I think I might have began the Final part too early.
BTW, we smoked the popcorn bud, and it's very promissing, we liked it.
Likes
Comments
Share

@Dottgreenthumb
Follow
Sono passato dal 75% al 100 % di dimmer,
Marshydro depp red 18 ore ccese
Marshydro uv 10 minuti ogni ora per 18 ore


Likes
64
Share


@Natrona
Follow
W11F7 8/17-23 HARVEST 8/19
This past week has been rainy and overcast from a tropical storm with temperatures mostly in the upper 80s. We had Hurricane Erin with wind gusts of 30-40 MPH. While we won’t be directly hit by the storm, we will get the outer bands of heavy winds and rain. To protect my plants, I brought all the girls inside on Tuesday in preps for the storm. I inspected each one for bugs, rot or anything unusual. I did not find any bugs or bud rot on AK47. The leaves have some wind burn but that doesn’t affect the plant in any way.
Auto AK-47XL is 59 days from germination. Divine Seeds indicates it is ready for harvest from the end of August to early September. 8/19 AK-47XL Auto grew outside until harvest today. I put her in the 3x3 in the dark for 3 days and cut her and hung her on August 23rd. Trichomes were mostly milky with only a few amber so it was time to harvest since AK47 is sativa and I don’t want a sedative effect. The smell is woody and piney with only a hint of citrus. From what I see and smell AK47XL should be a nice wake and bake vape. I can’t wait.

Processing
Likes
1
Share


@Drecstnd420
Follow
My first grow she looks sexy.this week I clipped of the top. I think I missed up a lil, I went to far down but she still looks great. She is starting to smell and is getting stronger And thicker. Any suggestions I would love to hear about them.

Likes
Comments
Share

@geegeal
Follow
Soo i ended up with 112grams of dry flowers might be 3oz because had to trim more leafs then bud flower
Likes
6
Share


@wraith
Follow
2 1/2 litres of feed per plant every 48 hours
Avge temp 80F avge Humidity 51%
Added a 900w LED
Did some light cropping.
Likes
14
Share


@Jays_Not_Here_Man
Follow
The Runtz auto girls are doing 😊. They have settled in and are fattening and stacking nicely. They are only about 16-18 inches total, but have some nice fat buds, should be some good weight.
They are starting to develop some frost, but are very greasy to the touch 🤤 Trying to keep them in a sweet spot so they keep developing. RH around 55-58 % and Temps between 77-80 degrees. They are in week 8 now, and suggested harvest is about 70-75 days… Happy Gardening 🇨🇦👊❤️🌱


Likes
5
Share

@Daris_Growmance
Follow
Deutsch:
🌿 Grow Diary – Blüte Tag 28 🌿
Heute genau ein Monat seit dem Umstellen auf 12/12 – wir sind offiziell am Ende von Woche 4 angekommen.
Diese Woche haben wir ein leichtes Lollipopping gemacht ✂️
Alles im unteren Bereich, was kaum Licht abbekommt, wurde entfernt, damit die Pflanzen ihre Energie gezielt in die oberen Buds stecken können.
Die Struktur ist jetzt deutlich cleaner und luftiger, was für bessere Lichtverteilung und Luftzirkulation sorgt.
Die Buds entwickeln sich jetzt immer deutlicher und starten langsam in die richtige Massephase 🔥
Die Pflanzen wirken stabil, gesund und reagieren bisher genau so, wie man es sich wünscht.
Ab jetzt wird’s spannend – die nächsten Wochen entscheiden über Ertrag und Qualität.
📅 Status: Blüte Tag 28
English:
🌿 Grow Diary – Flower Day 28 🌿
Exactly one month since switching to 12/12 – we’ve officially reached the end of week 4.
This week we did some light lollipopping ✂️
Everything in the lower area that wasn’t getting much light was removed, so the plants can focus their energy on the top buds.
The structure is now much cleaner and more open, improving both light penetration and airflow.
The buds are developing more and more and are just starting to enter the real bulking phase 🔥
So far, the plants look stable, healthy, and are responding exactly how you’d want them to.
Now it gets interesting – the next few weeks will define yield and quality.
📅 Status: Flower Day 28


