


Likes
Comments
Share


@Albanymedicinalgarden
Follow
Skywalker rounding the corner. Harvested 8/7 @ Day 76 from sprout
Blueberry bulking up.
Glueberry og done stretching and bulking up now


Likes
10
Share


@barlobruz
Follow
6/21/2021:
- Transplanted to final pot. Next cycle, will germinate seed straight into the soil/final pot.
- Bought a pump sprayer for even irrigation.
- Fed soil a kelp, karanja, neem & coconut water tea. No adverse reactions as of yet.
- Soil went hydrophobic before transplant, will water as necessary.
- Branch on first node bent from stalk upon transplant, currently being supported by a stake.
- Noticing red/purple stalks and branches, very stoked!
- Need to re-feed lacto/wild yeast starter.
- Need to brew up more kelp tea.
6/23/2021
- Took off support early, split seemed to heal, but has separated once again. Going to manifold, so not too concerned.
- Had to water about .7g of water to keep soil moist for duration of day.
- 6th node growing vigorously, birth of leaves for 7th node showing.
6/27/2021
- Topped plant for quadlining at the 5th node, cleared all growth under 3rd.
- Watered with a mix of coconut water, DIY neem, karanja & kelp extract.
- Foliar fed with DIY kelp extract.
- Trimmed leaves already giving off great grapefruit aromas.
- Pressing trim for framing.

Likes
8
Share

@Drehpaper
Follow
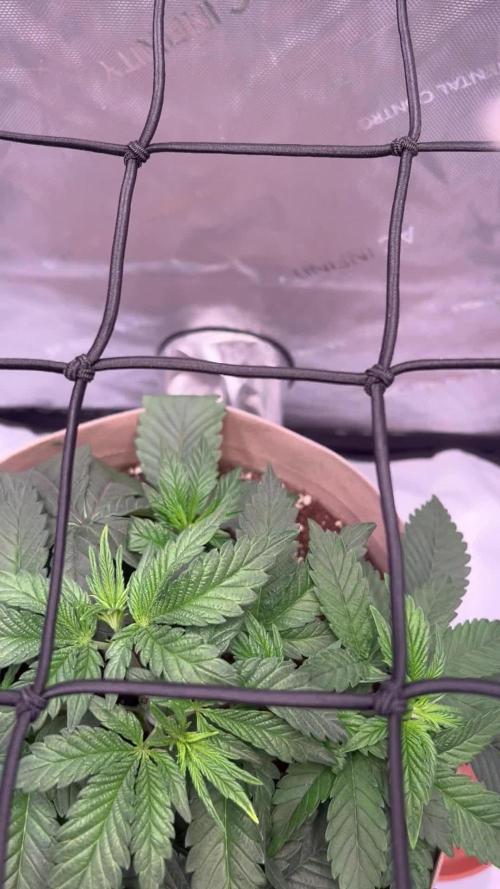
Woche 04 :
PPFD: ca 400
VPD: ca 0,92 am Tag
Geplant war so wenig wie möglich zu machen, aber kam doch anders 😎
Hab Sie doch wieder getoppt und ein Netz installiert.
Evtl schaff ich es die Fläche perfekt auszufüllen.
Der weiter Plan sind noch zwei Wochen Veggie und dann soll der Switch auf 12/12 kommen.
Von Wachstum und von der Struktur bin ich auch sehr zufrieden. Mal gespannt wie sie sich später im Stretch verhält.
Likes
3
Share


@Farmerbry71
Follow
This outside AK Auto is doing extremely well in the eastern Canada climate gotten a little rain but lots of hight heat and humidity. Very healthy girl no stress

Processing
Likes
10
Share


@Trying4Trees
Follow
Week 1 - Day 1
20L Super Air Pots with a bottom layer of clay pebbles, (an inch deep at the centre point) and topped off with Growdog’s 70/30 coco perlite mix.
The tops of the pots are covered by green plastic water distributers to evenly spread the water from the 12” watering rings.
2 lights; each 300W actual draw, currently inside the tent. 2 more coming next week to make a total of 4, across the 6 plants achieving a true watt draw of 1200W.
Aiming for 1g/watt
Germinated seeds from FAST BUDS, were planted and hand watered using tap water pH’d to high 5.8 to low 5.9 with H&G Roots Excl. giving a nice PPM of 362 to start.
The BudBox tent is a 2x2x2m, using a Medusa Boosted XL run off trays to a waste brain were the run off can be tested. This will then be recirculated into the feeding tank again. The feed tank will a standard 100L water butt, retro fitting pumps inside for Feeding and Pump to waste - for cleaning the tank out each week. Another 100L water butt will contain a store of filtered RO water which will fill the feeding tank.
A 10L PureMate humidifier is set at 65%, along with 2x RAM 16” oscillating wall fans which are mounted to the top of the tent for maximum coverage - set to lvl1 on swing giving the 25°C. No extraction yet. This is ready and waiting. 8” HyperFresh fan with a RHINO 8”x600 pro filter. We are using 8” acoustic ducting.✌️🏻
Week 1 - Day 2
No change. Keeping the new environment stable is difficult. The humidifier is not large enough for the space.
Week 1 - Day 3
Fed PH RO water this morning. Trying to keep the humidity up inside the tent.
They have popped up! It begins :D
Did a feed of 5.8PH RO with CocaA&B 0.4ml/l, Roots excl 0.3ml/l, Calmag 0.2ml/l for a 150PPM. 300ml was used to moisten the coco per pot.
Extraction fully connected. Environment stable at 23-24°C, trying to stay at 23.3°C. Humidity fluctuating 47-60%, humidifier struggling, but hopefully be okay.
Week 1 - Day 4
All 6 are up and reaching. Husks hopefully will pop off soon. Will be doing another small feed this evening to keep the coco moist.
Little leaves have appeared!! Fed another 300ml, 5.8PH @ 151PPM/ plant.
Week 1 - Day 5
All shooting up now, tallest at 5cm down to 3.5cm 🌱
I gently helped the last 2 husks off the smallest ones to hopefully even them up. Gave the coco 1L of RO water around the edges.
Week 1 - Day 6
Nothing to report this morning. Another PPM feed to be done shortly.
Soaked the coco until run off with around 3-4L per pot using 5.8PH nuit water; 0.4 Canna A&B, 0.2 Calmag, 0.3 Roots Excl. 152PPM.
First time we tested the Medusa brain - works well and pumps away to the feed tank, need to change one of the low trays to be a boosted tray for better drainage. Giving 5 boosted trays and one normal. Hand feeding up until this point, but will connect up the automation in the next week.
Week 1 - Day 7
Strongest are growing around 1cm a day now. Tallest 6cm, smallest at 4cm. Looking forward to next weeks progress :)
Bought a wet&dry vac - best thing ever!! Haha. Cleans everything in sight plus all the water from the dirty run off.
Lifted all the pots, still a good weight to them so no feed or RO water today I think. Bring on week 2! 💪🏻

Likes
46
Share


@Merrymoosefamilyfarms
Follow
Hey hey everybody! We are back here this week at the beginning of week 13 and it is almost that time… time to flip?
….I wish…. No, no…. I am trying to be good but I think I came up with a plan that will give me a rough idea of when I will see that light at the end of the tunnel- or we’ll at least flip that light to 12/12 haha-
No no it is almost Christmas and things have been crazy over here. With the holiday madness upon us, I can’t tell all of you how much I have appreciated the relative silence (you know how it is, there are multiple fans running) time seems to slow down and it just us and the plants. Quite enjoyable.
So as you already know, we are going to be on coast until we fill out the rest of that 3x3 scrog net- however just today on my way into work, I came up with what might be my new definitive plan…
I have had a bit of trouble waiting, no doubt it will be worth the wait, but the wait has been difficult none the less… so here it is..
Here’s what I’m thinking- I have this going and I also have some fastbuds growing in the same area. What I am most likely going to do- is wait until it’s time for the fastbuds to come down to open up some space in the 5x5 and the rock candy cake can have all that space to herself- I will shift the scrog into the center of the tent and then flip the light schedule to 12/12 and let it run wild- it’s at this point I will most likely employ a more hands off approach so it can focus all of its energy on producing buds worthy of such a wait.
The canopy is getting pretty lush and I really need to get in there and defoliate- I really lucked out, today was the last day I had to work until after Christmas so you KNOW I will be in there tomorrow plucking away at leaves (strategically of course) half kidding I’m probably still a whirlwind compared to some, but I’ve noticed- especially when it comes to autos, that my leaf selection has become much more refined when defoliating. PROBABLY gonna see a BIT less of that tomorrow as I have to open up the canopy but I still plan on being careful.
Something else that was super cool who may not be following along with the other journal, happened oddly enough just the other day when I was doing dishes- I was scrubbing away with my phone all propped up so I could watch/listen to dude grows. And I heard the dude mention a contest on their website that I had entered… of course my ears perked up, I leaned in a little closer to take a look and was thinking to myself how cool it would be, even to see my picture in the background and sure enough there it was and they brought it up and commented on the submission and seemed to be genuinely enthused by it and let me tell you I am STILL riding high off that one!
One thing that was cool too was a rep at a nutrient company had seen that and congratulated me as well and it was again just so cool and I’m honored to have been on there! I listen to them practically everyday at work- yeah words are not doing it justice right now but I was stoked!!!
Other than that, the holidays are practically upon us so I’d imagine it’ll be a whole lot of family activity with a side of unintentional neglect that I plan on keeping to an absolute minimum because we are right around the corner from some excitement in that tent- that thing is going to be HUGE! So we have that to look forward to! And on that note, I just want to say that from our home to yours, I truly hope you all have a wonderful holiday season and I can’t wait to come back and get into the garden talk with all my growmies! Growers love everybody and happy holiday!! 💚🤙🌱🎅🏼🎁🎄
Likes
Comments
Share

@Danger_Mouse
Follow
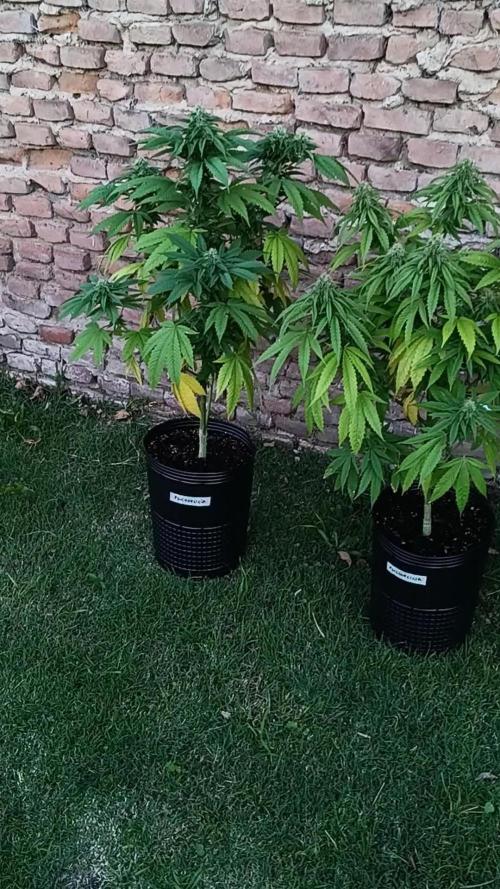
Continuan 6h en exterior (con sol directo), y el resto del dia en indoor, con 6 horas de LED 480W.


Likes
Comments
Share


@Growfather1
Follow
Hello everyone!
Welcome back to the Amnesia Grow Diary, Part One.
We are officially rolling into week four of the vegetative stage, and the three girls are still hanging in there. They aren't exactly in peak pageant condition right now, but hey, we all have our awkward phases, right? I have high hopes that they will pull through and start looking much better in the coming weeks.
Right now, I am giving them a solid feeding every one to two days to keep their energy up. However, I am starting to suspect that my pH meter is playing mind games with me again. It seems to have a personality of its own lately, so I am going to give it a reality check and start a fresh calibration today.
There isn't too much else to report from the grow room this week. I topped them last week, so they are really relying on a perfectly balanced pH right now to bounce back and find their groove again.
Let's see how they look next week once the equipment is dialed back in!
Thank you for stopping by and have a nice day.
Best regards,
Growfather


Likes
17
Share


@TheCannaProphet
Follow
-----------------------------------------------------
~SWEET SEEDS JACK 47 STRAIN DESCRIPTION~
-----------------------------------------------------
A 3rd generation Autoflowering strain, this hybrid is the result of a cross between an Autoflowering Jack Herer from the Sweet Seeds®️ R&D Department and our elite clone of AK 47.
Probably the most potent Autoflowering strain available in the market. This is a very productive Autoflowering plant with abundant, compact and very resinous buds. The aromas and tastes of this strain are sweet, fresh, lemony and with hints of incense.
Variety: Sweet Seeds Jack 47 Auto #SWS31
Indica: 20%
Sativa: 76.9%
Ruderalis: 3.1%
THC: 18-21%
CBD: 1.1%
Indoor Yield: 450-600 g/m²
Outdoor Yield: 50-200 g/plant
Harvest Indoor / Outdoor: 9 weeks from germination
Height: 50-120 cm
Effects: Creativity, Psychoactive, Stimulating
Taste: Citrus, Lemon, Incense, Cool, Sweet
________________________________________________________________________________________________________________________________________________________________________________________________________________________________________________________________________________________________________________________________________________________________________________________________________________________________________________________
THE SETUP:
~Planted into Jiffy Peat Pellets that were hydrated with de-chlorinated water with SuperThrive added then ph'd to 6.0 @ 80℉
~Grown 100% organic in 10g fabric pots with Mother Earth 70/30 Coco/Perlite medium amended with 2tbs/g of Down To Earth 4-4-4 / 2 cups/g of Earthworm Castings / 1tbs/g of Dr. Earth Flower Girl 3-9-4, 1tbs/g of Dr. Earth Bat Guano, 3/4 cup of Down To Earth Azomite and 1 tsp/g Down To Earth Fish Bone Meal.
~24hr light cycle during Germination / 19/5 light cycle for Vegetation and 12/12 for Flower
~Straight water ph'd @ 6.2-6.8 when needed and weekly Compost Tea's.
________________________________________________________________________________________________________________________________________________________________________________________________________________________________________________________________________________________________________________________________________________________________________________________________________________________________________________________
WEEKLY UPDATES:
9/6- Day 33 of flower and harvest time is fast approaching with her trichomes, which are now checked daily, maturing rapidly being 80% milky now with the remaining being clear.
Daily watering's continue with 1g of straight de-chlorinated water ph'd to 6.7 @74℉ and also I'm turning her pot 1/4 turn daily as well.
9/8- Well, her trichomes are right about where I like them to be and she's ready for 48hrs. in the dark before I chop and hang her to dry for 10-12 days.
I'm watering her with 1g of straight de-chlorinated water ph'd to 6.7 @74℉ and will continue to water her while she's in the dark (cannabis continues to carry on with it's growth processes even while in the dark) so that her medium doesn't completely dry out. Keeping her watered will also help to extend her drying time to that ideal 10-12 day target.
This should be some epic smoke as her buds are absolutely crystalized with trichomes and her smell is AMAZING! 😛💚
9/10- Well she's been in the dark for 24hrs. now with 24 more to go. I'm keeping temperatures in the low to mid 60's℉ and the RH @ 45%. Tomorrow is 'Chop Day'! I'll be taking some pic's of her when she comes out of the dark and during harvest...Stay tuned, this is some 🔥!
I am continuing to water while she's in the dark with 0.5g of straight de-chlorinated water ph'd to 6.8 @67℉ to keep her hydrated.
9/12- Well she's out of the dark where she spent roughly 60 hours. I kept the temp's @ 64℉ and the RH at 45%.
After I brought her out I shot a few pictures of her, then plucked off all of the shade leaves. I then cut her off at her base and hung her whole. I'll keep the RH in the room @ 50% for the first 24hrs., then raise it to 55-60% for the remainder of the drying. I have the temperatures in the Dry Room at a constant 65℉ to help preserve the terpenes.
Hopefully she'll take 10-12 days to dry to the point that she's ready to be trimmed and jarred! Stay tuned for the harvest of this phenomenal cultivar! 💚🔥
~Thanks for stopping in! Things are wrapping up and harvest is right around the corner....Stay lifted and be Blessed! 😎🙏~
Likes
9
Share

@J4kpvp
Follow
Hello:)
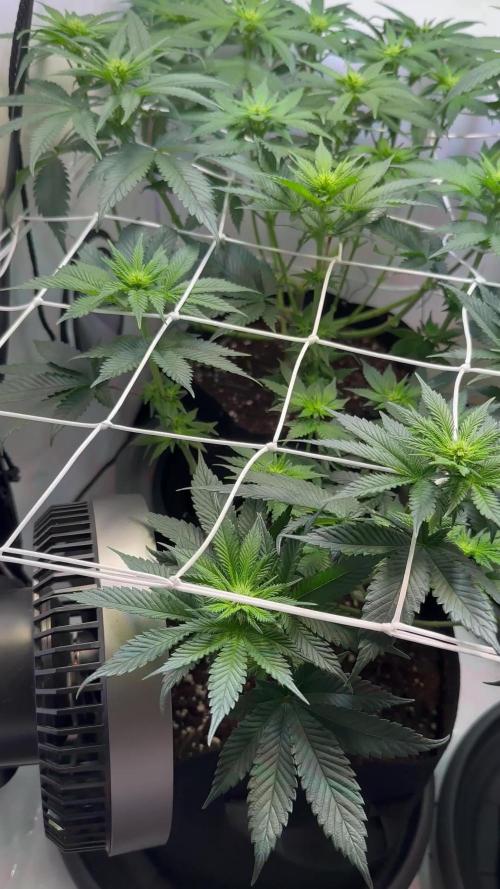
This week I installed the net and defoliated them a final time, now I just need to sit back and relax:) maybe some fertiliser next week since the plants still look just fine without anything more than what I put in the soil at the start… let‘s see:)

Likes
14
Share


@whitehouse1115
Follow
Did some cleaning up of undergrowth and discovered some weird symptom on the lower growth that was removed. I have done some research but have not found anything. Any help is appreciated. Other than that everything is looking good. Taking longer than I expected but otherwise happy with the way things are going. I believe I am having some circulation issues due to poor design of my rdwc set up. The plant furthest from the reservoir is showing some stress. I am in the process of designing a new setup that will definitely circulate better.


Likes
26
Share


@PatriciaGant
Follow
Dane, We all should help one another. Human beings are like that.
We should live by each other’s happiness - not by each other’s misery.
We don’t want to hate and despise one another.
In this world there is room for everyone. And the good earth is rich and can provide for everyone.
The way of life can be free and beautiful, but we have lost the way.
Grow High and Give the world A smile. Have A Great Day.
What n°2 is lacking is n°1 compensating,
(day 11, dont know what to do ph is right ppm is right themperature is ok light is ok should be recovering within 3-4 days i hope.)
roots are already grown into water bucket.(should i picture them as well?)
ph lv is such a pain in the ass but grow speed is worth all the trouble in hydro.
(16 n°2 still not good i placed another one next to her with luck she recovers if not another one already in place to grow)
(19 all hope is lost she probably doesent make it i set replacement already so waiting for her sisters to pop out and take over)
(20 it is the same water in the buckets so im a little lost why one explode and the other one not,)
(21 n°2 complete reset, new water, new nutrients new clay. probably died cause to shock now)

Likes
6
Share


@lOlympusl
Follow
I was so excited to see some weed leaves pop out. Everyday the plants got noticeably bigger. I’m making sure their environment stays as consistant as possible. I did encounter my first issue. I went to refill my humidifier turns out the water had turned green. I emptied the tank into a glass you can see in the pics. Washed it and ill make sure to do so more frequently. I’m guessing it was stagnant for too long and algae grew? Has this happened to anyone? What cause it?

Likes
10
Share

@WeedleyScott
Follow
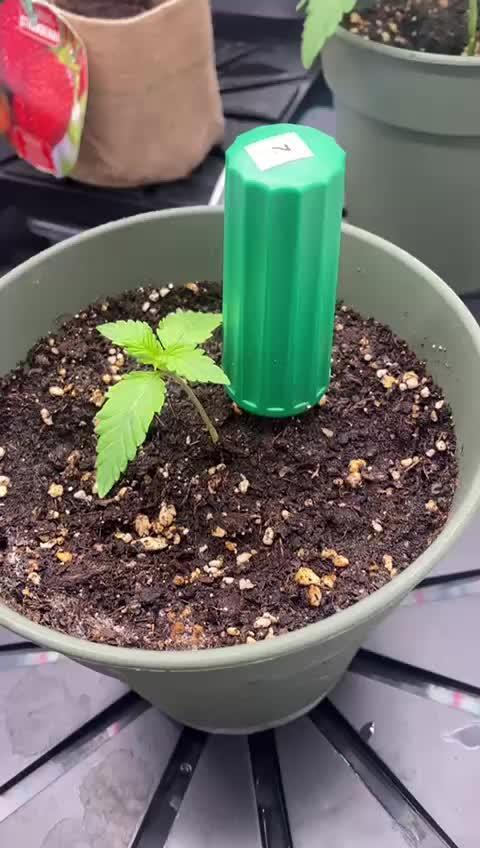
Woche zwei der Nachzügler hat sich gut entwickelt und die Hauptpflanze ist fast schon ready für den nächsten Top, ich werde mal Erde ansetzten und alles vorbereiten.

Likes
4
Share

@Chubbs
Follow
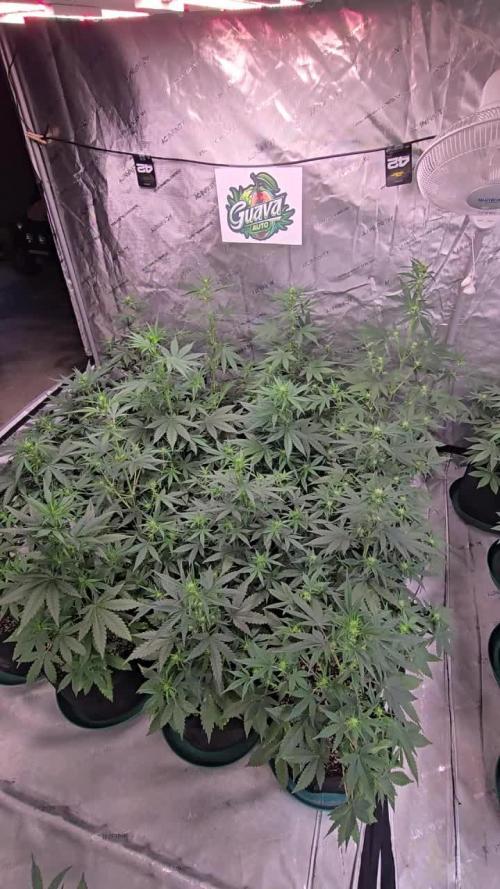
What up Fam. These girls are growing amazing. Now that I can controll the temps a little better they've taken off with growth. Starting the flower period which we all no know what that means. The countdown is on. Over all Happy Growing.
Likes
27
Share

@TheCannaProphet
Follow
-----------------------------------------
~BARNEYS FARM DOS SI DOS 33™️~
-----------------------------------------
This strain from 'Barneys Farm’s Cali Collection gets another jolt of super power with this explosive collection of terpenes fused together from some of the world’s most astounding US cannabis phenotypes.
Dos Si Dos was developed from OG Kush Breath, a knockout Girl Scout Cookies pheno crossed with Face Off OG, then crossed again with their legendary Cookies Kush (OG Kush pheno x GSC) AND THAT’S ONLY HALF OF THE STORY.
Add in a subtle blend of Gelato #33 to the pot with its star struck Sunset Sherbet x Thin Mint GSC heritage and boom! A new champion was born: a sativa burst of euphoric energy is followed by tranquility with sedative properties capable of happily tranquilizing an elephant, if you’re overzealous or uninitiated!
DOS SI DOS 33™️ Cannabis Seeds Strain Specifications
~Type: Feminized
~Photoperiod: Normal
~Genetics: Dos Si Dos x Gelato #33
~Effect: Relaxed, Sedative, Happy
~Outdoor Yield (g): up to 2000
~Indoor Yield (g):up to 700 gr/m²
~Flowering Time (days): 60 - 65
~Feminized Outdoor Harvest Month: October
~Feminized Outdoor Harvest Month Week: 1st-2nd week
~Height Indoor (cm): 90cm
~Height: Short
~Indica %: 60%
~Sativa %: 40%
~Indica/Sativa: Mostly Indica
~Taste: Mint, Lime, Spice
~Aroma: Cookies, Sherbet, Lime
*Above information credit to Barneys Farm
__________________________________________________________________________________________________________________________________________________________________________________________________________________________________________________________________________________________________________________________________________________________________________________________________________________________________________________
THE SETUP:
~Planted into Jiffy Peat Pellets that were hydrated with de-chlorinated water with SuperThrive added then ph'd to 6.0 @ 80℉
~Grown 100% organic in 10g fabric pots with Mother Earth 70/30 Coco/Perlite medium amended with 2tbs/g of Down To Earth 4-4-4 / 2 cups/g of Earthworm Castings / 1tbs/g of Dr. Earth Flower Girl 3-9-4, 1tbs/g of Dr. Earth Bat Guano, 3/4 cup of Down To Earth Azomite and 1 tsp/g Down To Earth Fish Bone Meal.
~24hr light cycle during Germination / 19/5 light cycle for Vegetation and 12/12 for Flower
~Straight water ph'd @ 6.2-6.8 when needed and weekly Compost Tea's.
__________________________________________________________________________________________________________________________________________________________________________________________________________________________________________________________________________________________________________________________________________________________________________________________________________________________________________________
Weekly Updates:
9/27- Week Seven of flower here we go! She's looking good to go with her flowers stacking and her trichome production continuing to coat her flowers!
Today she was given 1.5g of de-chlorinated water which was ph'd to 6.2 @ 72℉ which I gave her half through her drip pan (bottom chuggin), the remainder trough the medium. I also gave her pot a 1/4 turn.
9/29- Yesterday I didn't water her, only turned her pot and checked her over... Wow! She's really ramping up the trichomes making her flowers look like their sugar coated! 🤩
I watered her today with 1.5g of de-chlorinated water with 1 tsp/g of unsulfured molasses added which was then ph'd to 6.4 @ 72℉.
The molasses will give the microbial colony some additional food as well as supplying micro-nutrients to the plant. I finished out the daily maintenance giving her a check over and turning her pot 1/4 turn to ensure she gets light to every inch of her.
10/1- Yesterday was a 'no water' day as her pot was still fairly heavy to lift. Today she was watered with her usual of 1.5g of de-chlorinated water which was ph'd to 6.2 @ 72℉.
Her flowering continues to impress me with her trichome production covering her flowers, that have these incredibly beautiful blood red hairs in them, with 'frost' making her a sight for sore eye's! 😍
The end of next week will be the beginning of her wrapping up with the 'Finish Line' approaching by Week 8 or 9!
10/3- With Week Seven coming to a close we're going into the last 2 weeks for this lady and she's right on track, looking like a Rock Star! 🤩
I watered heavy yesterday and added 1 tsp/g of Unsulfured Molasses to the 1.5g of de-chlorinated water which was then ph'd to 6.6 @ 72℉.
Her pot had some weight to it when I checked today so I'll skip watering her until tomorrow. I finished up today by checking her over and giving her pot a turn.
~Thanks for stopping in! This epic run will be wrapping up in the coming weeks...Stay lifted and be Blessed! 😎🙏~

Likes
8
Share


@skaterblasted
Follow
Days 92 - 98 (from sprout)
8/23/24 - 8/29/24
Loompa's Headband x TK fading hard this week - checking trichome color through a 15x loupe, needs more time
The Good Shit drinking a gallon of water a day but slowly backed off near end of week - my guess would be a 14-week flowering period for this genotype before harvest quality
I'm pretty much watering daily a 1/4 gallon to Blue Nose Pit or less to keep mulch layer from drying out
Sweet 16 S1 takes the win for most trichome coverage out of the garden, has the most up-front aroma out of the geno hunt
PAR is all over the place on this one and totally messed up, after this week I'll raise the light and focus on the appropriate PAR for canopy of The Good Shit
Pest Management slipping too, fungus gnats are repopulating and it seems the ecosystem has encountered a serious imbalance of beneficials and predators that normally kept soil/mulch in-check
Plan on short-term remedying this with a top-dress of remaining compost + em bokashi and a moderate drench of EM5 following with repeated treatments of enzymes (tweetmint)
Long term solution may need a predator/beneficials kit and/or higher quality vermicompost after knocking them back with enzymes
