


Likes
Comments
Share


@DeepRootsGrowTrees
Follow
SWISS DREAM ROSE 🌹 CBD AUTO
KANNABIA SEEDS
Week #10 Overall
Week #7 Flower
This week she continues to shine ✨️ 😎 her buds are a beautiful purple color then you see the sparkle of the trichomes against her purple buds that have white and orange hairs throughout. Once again another example of the great genetics from KANNABIA SEEDS!!
Honestly just blessed to be growing CBD organic medical marijuana. Thank you to KANNABIA for all the support 🙏!! Additional thank you to FOOP!!

Likes
49
Share


@masterofsmeagol
Follow
6/9 I can't believe it but I had faith. The transplant yesterday LOOKED like it was fucked. I cleaned it up though and left it outside. This morning it was standing straight up. Both transplants were! I put tarps up to block the wind tunnel between buildings. It's still overcast and rainy. Sun isn't supposed to come out for a couple poke days. Chance of thubder storms tomorrow but I'm going to try to get everyone in their forever homes today. Or at least most of them. I plan to light dep a few right in the 3 gallon. I'm sure I'll be updating this after I get some work done.
UPDATE: I WENT OVER AND GOT THREE MORE TRANSPLANTED. THAT MEANS FIVE ARE OUTSIDE IN THE CAGE. TWO 10TH PLANET, 2 BLUEBERRY CHEESE AND A LITTLE PURPLE PUNCH. THE 3 GALLON POTS WERE RELATIVELY HEAVY SO I PICKED THE LIGHTER ONES TO TRANSPLANT. I LEFT THE ORHER TWO 10TH'S IN THE GARAGE WITH THE DOOR OPEN WITH THE REMAINING PLANTS. I ALSO ADDED WIND BREAKS AND SUPPORTS TO EVERYTHING. I WANTED TO GET EVERUTHING DONE TODAY BUT THERE MAY BE A THUNDER STORM SO IF I DONT GET IT DONE ITS NOT A BIG DEAL AND ILL FINISH TOMORROW. TRANSPLANTS WENT SMOOTH. I THINK THEY'LL GO EVEN SMOOTHER IF THEY DRY OUT A BIT. STILL HAVE THE 50 AND 40'S TO FILL. Took a bunch of videos but the don't want to load. I'll have to try tomorrow or later tonight.
UPDATE: I TOOK TONS OF PICTURES AND VIDEOS BUT THEY DONT WANT TO SEEM TO UPLOAD. IVE GOT SIX IN THERE FINAL HOMES OUTDOORS 20s and 30 gallon smart pots. Still have massive plants but I'm going to out those in the 50 and the 40. I'll finish this shit up tomorrow and get all the girls in their forever homes and if I don't have room for some I was planning on doing a light dep anyway so that will work out good. I learned a lot and transplanting went a lot smoother todsy than before. I feel really proud of myself. The last Transplant I did break a few leaves off that I didn't notice but whatever. I used tomato cages for suppirt on two and bamboo poles and string on the others. I'll add the vertical trellis as they grow. I'm proud of myself.
6/10 I got a lot done yesterday. Six are outside already. Two are in 20s in the garage. I'm planning on transplanting the rest today or tomorrow. I'll update later. Accidently uploaded lots of stuff on the wrong week. UPDATE: I TRANSPLANTED THAT SUPER TALL PURPLE PUNCH THAT I DIDNT TOP OR HST AT ALL INTO A 40 GALLON TUB. ROOTS WERE DRY AND THIS TIME IT ACTUALLY LOOKED LIKE THEY FELL AWAY. THE PLANT HOWEVER STAYED STANDINGVUP FINE. I THINK THIS PHENO IS GOING TO BE A TOUGH ONE. LOOKS GOOD LIKE AN HOUR LATER. I HAD THE 50 READY TO TRANSPLANT THIS MONSTER BLUEBERRY CHEESE I FIMed BUT THE POTS WERE SUPER HEAVY AND I FIGURED I NEEDED TO SLOW DOWN AND THINK. WE HAVE THUNDER STORMS COMING TONIGHT. TOMORROW IS GOOD. I MAY TRY TO FINISH UP TONIGHT BUT WE SHALL SEE. THE GOOD THING WITH DOING IT A FEW AT A TIME IS THAT IF SOMETHING HAPPENS OUTSIDE IVE STILL GOT A CROP INSIDE LOL. WHAT IM PLANNING TO DO IS EITHER LIGHT DEP THAT BIG BLUEBERRY CHEESE OR PUT IT IN THE FIFTY BUT IM PLANNING TO LIGHT 3 RIGHT IN THEIR 3 GALLON CONTAINERS. HAVENT DECUDED FOR SURE BUT IM THINKING THATS WHATS GOING TO HAPPEN.......of course videos won't upload and the ones that do are old videos. Damn. I need to sharpen my computer skills....and my growing skills. Especially transplanting. I suck at transplanting. I decided not to out all my eggs in one basket and left the 10th planet amd Blue berry cheese in the 20s in the garage. I pulled them out for light further but I'm ousting them back a little tonight. That way I'll have a back up if something catastrophic happens. I doubt it but better safe than sorry. I'm proud of what I've accomplished thus far. I've successfully uploaded my 1 minute plus video several times but it won't appear. Oh well. I'll try to load the videos tomorrow I guess. Just started raining. Just a light rain. Probably what fresh transplants like.
6/11 BEAUTIFUL outside. Today is the day. Most is done and I'll add the supports as trellis as they grow. This new grow space gets about twice as much sun as my old spot. The tar stops the burrowing insects. I'm getting everything out today. I just need to decide if I'm going to light dep that MASSIVE blueberry cheese or bite the bullet and put it in the fifty. Maybe I'll try to get some help from my cousin. Plants withstood the thunderstorm like Champs. I'll update as the day goes on. I planned better this year so I SHOULDN'T have an unmanageable jungle. UPDATE: WATERED THE 3 PLANTS LEFT IN THE 3 GALLONS (1 10th PLANET WITH GREAT BRANCH STRUCTURE AND TWO PURPLE PUNCH THAT WERE THE SMALLER ONES. IM GOING TO LIGHT DEP THEM. EVERYTHING IS OUTSIDE NOW IN A MIX OF 1/3 FOX FARM OCEAN FOREST, HAPPY FROG AND ROOTS ORGANIC 707 IN EQUAL PARTS. TRANSPLANTED WITH MYKOS. EVERYTHING IS OUTSIDE NOW. FINALLY DECIDED TO GET The MONSTER BLUE CHEESE I FIMed INTO ITS FOREVER HOME A 50 FALLON POT. IT WAS TGE EASIEST BEST TRANSPLANT OF THEM ALL. JUST LIKE AETTING A POT IN THE WHOLE. I DONT EVEN THINK THE PLANT NOTICED. ONE OF THE PURPLE PUNCHES HAD ROOTS OB ONE OF ITS LEAVES WHEN I LOOKED BUTVIT WAS STILL STANDING UO STEAIGHT. I KNOW SOME OF THE PLANTS LOOK DROOPY BUT WEVE HAD SEVERAL DAYS OF RAIN AND A MASDIVE THUNDER STORM. I BROUGHT OUT THE EARLIER TRANSPLANTS AS WELL. THEY ARE OUT OF THE SHOCK. WIND IS PRETTY HIGH BUT I DONT WANT TO ADD MORE TARPS. I THINK THINGS ARE SECURED GOOD ENOUGH FOR NOW. IM SUPER STOKED THAT TRANSPLANT WENT SO GOOD! Went back at 7:30pm. Some plants have a little bit of transplant shock and a little bit of burn but it's negligible considering they've been through a thunderstorm with pouring rain and extremely high winds. That blueberry cheese in the 50 transplanted so easy and still looks like it didn't even know the difference. I'll start light dep once I get a plan. Plants are recovering nicely but should something happen to one I could replace it. I'm interested in the light dep though and I've got a pretty good idea how to start.
6/12 The plants that had a little transplant shock are coming out of it. We had a thunderstorm and pouring rain the day of some of the transplants. Wasn't forecasted. High winds moved the plants around a bunch bit they are tough as hell. Everything is out now. Suppisedcto have showers the next few days. I'm putting together a feeding schedule abd setting up a spit to start light dep on the three plants I decided to flower early. The cage now gets twice as much sun as before. This is going to be a good year.
Went back over and plants are perking up and doing even better everytime I see them. I took a video but it might not upload until tomorrow. I may start a new diary for the light dep. I have a few places I'm thinking to use for light dep. I need to make a solid plan before I start so maybe a day or two. Trying to upload again but I doubt it.
6/13 Had a rushed morning but I watered the plants in the 3 gallons as they were dry. I had added more soil to a couple of the bags. The top soil is startingvtj dry out but the plants look good and we are supposed to get rain so I don't really want to water if it's going to be raining. I think I've found my light dep spot and schedule. I'll update after I do something.
WENT BACK OVER AND SPRAYED A LITTLE BIT OF WATER ON THE EXTREMELY DRY TOPSOIL THAT I HAD TOPPED SOME OF THE PLANTS OFF WITH. SHITTY THING IS THAT WAS ADDED AFTER THE THUNDER STORM SO IT MAKES IT HARDER TO JUSTE THE PLANTS WATERING NEEDS. I CAN TELL THAT ONE OFCTHE FIRST TEANSPLANTS IS STILL HOLDING WATER. I MEAN WE GOT A DOWNPOUR AND I DONT WABT TO WATER IF WE'RE GOING TO BE GETTING RAIN ANYWAY. IM GOING TO LOOK BACK OVER THE DIARY. THATS ONE GREAT THING ABOUT THESE. YOU CAN GO BACK AND CHECK YOUR WORK.
6/14 Glad I held off watering. It's raining today. Just showers. We haven't gotten any of that extreme wind we usually do. I have the plants supported but I still worry. Definitely more than I should. Plants are still doing good and acclimating to there homes. I have not started the light dep with the 3 gallons but I think I've found my spot. Once I start it will just be staying consistent putt8ng them in and out. I need to train them anyway. I have some research to do and a joint to smoke so I'll update later.


Likes
9
Share


@LetsGrowSome
Follow
Starting week 4 flower now. Theses ladies are doing great. No signs of any deficiency thus far. Decided to hold off on potash at this point. Noticed ladies fighting for light hard and middle lady trying to take it all. I removed the exhaust fan and opened the tent on the sides. Then I added another king led 4000w light. Both 24 in with bloom only turned on at a par of 850. That was done on Saturday, and by Sunday could already see a big difference in bud production. Added recharge with last watering. Hoping the ladies continue on happy and building!

Likes
11
Share

@MrMaabra
Follow
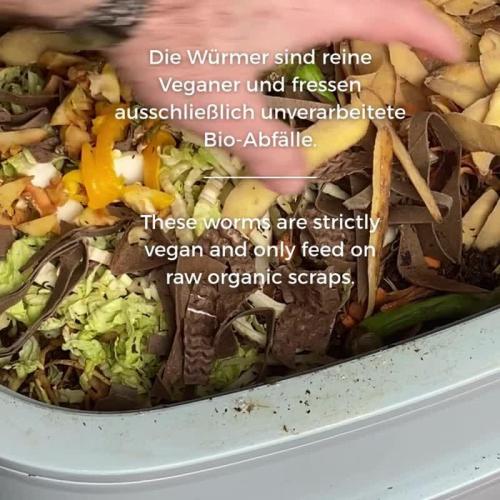
Heute habe ich etwas Besonderes für Euch - in dem Video zeige ich Euch, wie ich Wurmtee aus meiner eigenen Wurmbox vom Balkon ernte und ihn im Verhältnis 1:10 mit Wasser verdünne und meine Pflanze damit gieße. Ab dieser Woche gibt es bis zum Ende des Grows ein Mal Wurmtee in der Woche.
Ansonsten entwickelt sich die Pflanze schön weiter. Mittlerweile ist sie durch den Stretch bei 35cm Höhe angelangt - noch habe ich etwas Höhenpuffer, daher binde ich sie nicht weiter runter.
Die Blüte ist im vollen Gange und es beginnt langsam zu duften. Durstig ist die Dame mittlerweile auch und sie erhält nun alle 2 Tage 2 Liter Wasser. Nach wie vor ohne PH-Anpassung. Dabei achte ich darauf, dass die Wassertemperatur bei 20 Grad liegt.
Ich bin schon sehr gespannt, wie sich die Buds entwickeln im Vergleich zu meinem vorherigen Run im 30-Liter-Stofftopf mit meiner Papaya Cookies Auto.
Ich plane für meinen nächsten Run ein weiteres Video, in dem ich Euch zeige, wie ich u. a. mit dem Wurmhumus mein gebrauchtes Living Soil aufbereite.
__________
Today I have something special for you! In this video, I’ll show you how I harvest worm tea from my own balcony worm bin, dilute it 1:10 with water, and feed my plant with it. From this week until the end of the grow, I’ll be giving her worm tea once a week.
Other than that, the plant is developing beautifully. Thanks to the stretch, she has reached a height of 35 cm. I still have some vertical space left, so I’m not doing any more LST (low stress training) for now.
Flowering is in full swing, and the smell is starting to kick in. The lady is getting quite thirsty, too—she’s now receiving 2 liters of water every two days. I’m still not adjusting the pH, but I make sure the water temperature is around 20°C.
I’m really excited to see how the buds develop compared to my previous run in the 30-liter fabric pot with my Papaya Cookies Auto.
For my next run, I’m planning another video where I’ll show you how I reuse and amend my living soil using things like my own worm castings.

Likes
21
Share


She starting to stretch

Likes
43
Share


@2x2growing
Follow
As I am writing this I have just trimmed and jarred my second grow🤠
I managed to pull 203.9 grams. Nearly half a pound off 1 plant, which I am extremely proud of😁
I haven’t smoked her yet as I don’t want to spoil the experience. I’ll wait a good 3 weeks to a month before enjoy this lovely lady.
I did unfortunately find a couple undeveloped seeds. She must have thrown nanners early on which I thought was odd because I didn’t even flower for 9 weeks. I guess she just really wanted to come down quick. So I can’t be too mad at her about that.
Overall, for my second grow I couldn’t have been happier with the results. Everything went better in every way and I know I can do better next run:)
Thanks for stopping by✌️💚

Likes
11
Share


@Growing420Dreams
Follow
En esta semana he empezado a abonar con Ultimate PK según la tabla.


Likes
19
Share


@HeavyHead
Follow
Great strain to run. I’ll be adding more pictures of dried products and possibly extraction videos in a couple weeks once it’s all ready ;)
Likes
7
Share

@Bunterbiber
Follow
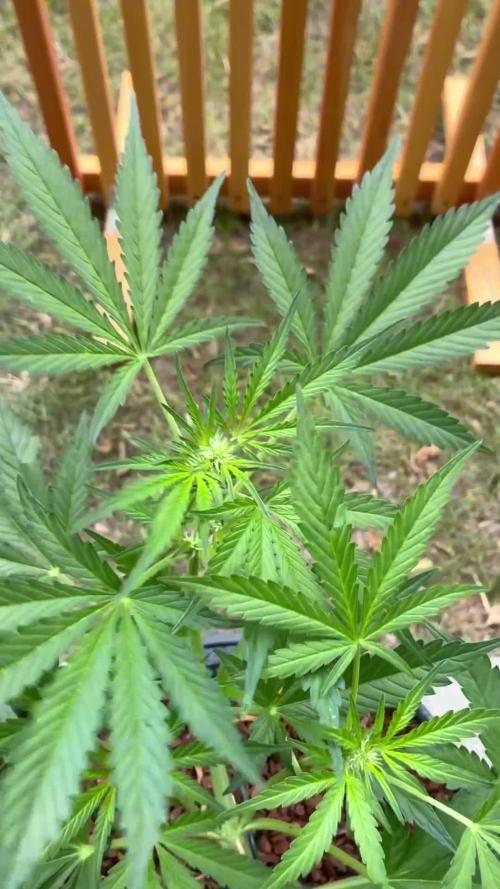
Welcome to Week 5! The weather took a bit of a turn this week. The sun decided to hide behind the clouds a lot more, we had our fair share of rain, and the nights got noticeably chillier, dropping down to a minimum of around 10°C. Despite the less-than-ideal outdoor conditions, the ladies pushed through and continued to develop remarkably well.
I’ve kept up with the LST (Low Stress Training), specifically focusing on keeping all the main tops at an even height so we get a nice, uniform canopy. Watering has stayed consistent and easy—just giving her a drink of tap water + CalMag about twice a week.
Appearance & Flowering:
She has really stretched out horizontally and become quite wide! She is more bushy right now, and those signature dark leaves are just a treat to look at. But the most exciting news of the week: she is officially starting to transition into the flowering stage! The first pre-flowers are showing, and she seems totally unfazed by the colder nights.
Don't forget to check out how the Purple Haze Auto is handling the chill and her own transition to bloom over on my profile!
Likes
2
Share


@Mytrichomedgarden
Follow
Estoy en la ultima semana todo salio genial vamos por ese secado y curado
Likes
30
Share


@Grower_Of_Persia
Follow
at last we are in harvest week. im happy at all it was a good experience.
my dry and cure style is this:
4 days of hanging upside down to get water activity lower to around 0.6 in 50% humidity and 26 C temp (i know its a little high but we are in a hot summer right now and i cant get it lower even with air conditioner) and then after 4 days of drying i remove leaves and stalks, trim buds and move them to jar for the rest of their life :D . and in the first 4 days of curing i open the jar door and let hem get some fresh air in the jar for about 5 minutes and close the jar door again, after 4 days of curing like that buds are smokable but they will get better as they getting cured about 1 month.
buds are dense and frosty but very little in size!
i had some mistakes and problems with this grow so i admit i wasted them .
lesson from this grow :
grow autos far from fems and always give them 20 hours or more light per day to get good weight in little time.
Likes
170
Share


@Tropicannibis_Todd
Follow
👉Alrighty Then👈
This plant finished out just around 90 days from seed
👉Puffed a bunch of it , and its Sweet and Earthy , this plant has the nicest colas 🌼 👈 the buds are tight and smoothered in resin 👌
This is a one is just a little light , i wish she had more bang for your buck effects 👈 still she kicks ass .......
Would definitely recommend 😳 .....
Persian Pie from Greenhouseseeds
Full Gas from Greenhouseseeds
Babba Kush from Greenhouseseeds
Rainbow Melon from Fastbuds
Papaya Sherbet from Fastbuds
Weddingcheesecake FF From Fastbuds
Purple Oreoz F1 From Seedsman
Slurricane From Premium Cultivars
Soil by Promix
Nutrients by Cronks
This was a crap ton fun 🙃
Thanks to all my growmies out there for stopping by its much appreciated 👈
👉Happy Growing👈


Likes
8
Share


@Alien98
Follow
Fat buds and 4 phenotypes. The first two are very similar: indica and very productive. One is a highly sativa phenotype who grows high but have large-indica leaves. At last I found a not so big yielding phenotype but it produced top buds with much resin.

Likes
27
Share


@adam_pawloski87
Follow
Today is day 72 from seed!! This week went real well , 2 of the Forbiddin Runtz have been getting flushed an the rest will also start flush through this next week, I can’t believe the smell of this combo strain,, super fruity smelling an all are super sticky!! Stay tuned for next week yall !


Likes
5
Share

@Rangaku
Follow
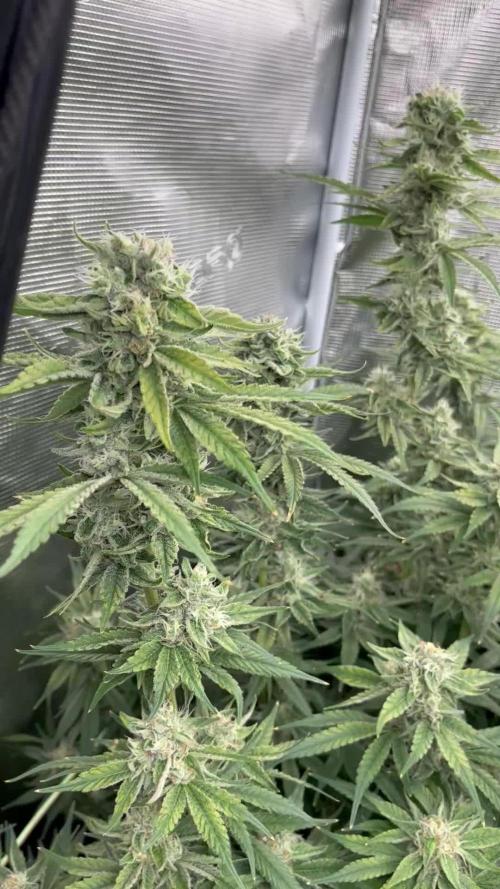
Beautiful smelling plant , sticky and phat . Fighting 40c outside temps and she’s handled like a champ . These dutchfem genetics shine above anything else . Stability, yield and flavour profile are on point every time


Processing
Likes
16
Share


@Max1973
Follow
Day 52 - before pic/vid
pulled em both out scrubbed tanks..... moved em into a different tent, with a different light....
did up completely different solutions, and currently still building it all....
Day 53 - still buildin... vids of new home...
Nutrifield, Rock Nitro, 1200-1500 ppm and 6.5 PH.... see if we can give em a good boost....
left em in pure water before puttin em in new solution....
Day 57 - pics vid.... been adjusting ph... down to 5.8.... they are just growin along nicely in the new home...
got a fan for the tent... looks good tho... solution temp is abit high,
fan will fix that..... changed just the tanks to 5lt Cereal containers, they are alot taller, more room below the container... fits perfect....
Day 59 - pics vids, , 6.2ph, 1300ppm ... water temps been getting abit high, fans should arrive next week....
👍😎
120W Aluminum+PC Plug 2835SMD 7995-9594LM
1131Pcs Red+234Pcs Blue
* Blue(wavelength: 430nm, 554nm
* Red(wavelength: 630nm 660nm)
Likes
18
Share


@MisterAeroponics
Follow
My ph test got spilled and ran into issues on the big girl. Got it fixed and back in action. Added mammoth p and orca. Also added pinch brown sugar. Going to use the greenhouse half for dry and other half as a lung tent. Have new plans for 8 plants monster aero going. Going to have a large single reservoir and a water cooler. Super excited, going to run some exotic strains. A bunch from sweet seeds 🤙🏻
Likes
21
Share


@CanadianFillmore
Follow
Harvest time for LSD! Another successful grow in the books with this strain. Absolutely a joy to grow, love this strain.
Thanks for stopping by growfessors, check back in 7-10 days for dry weight and smoke report.
Update July 1, 99 grams dry and typical fruity/citrus flavor from LSD.
