Likes
Comments
Share


@ZweetZkittlez
Follow
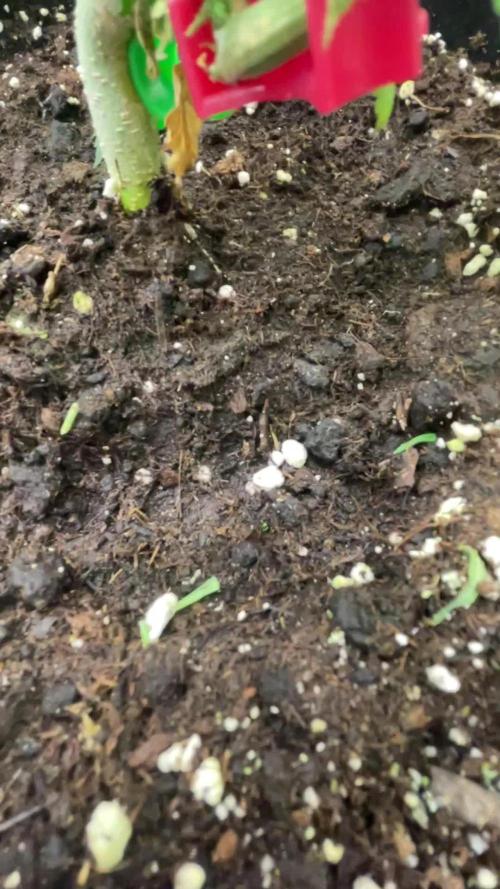
Activaron 24hs en un vaso de agua sin cloro. Luego al tupper con papel (rollo de cocina).
Luego de 3 / 4 días ya se pasaron a tierra.
En los primeros días y luego, en toda la etapa vegetativa vamos a usar un humidificador para tener una humedad entre el 70% y 80%



Likes
92
Share


@DogDoctorOfficial
Follow
🌱 Week 1: The Journey Begins! 🌟
Hey Grow Fam! 🙌 We’re off to an epic start with our TrolMaster adventure, and I’m already feeling the love for the setup, the seeds, and the growth happening in the room! So, let’s dive right in and get into the details of this exciting week!
🌿 Germination Update:
Our first Gorilla Melon seed from Fast Buds didn’t sprout, but no worries—round two was a success! 🦍🍈 The second seed has germinated and is looking full of potential. I’m throwing in a Sweet Seeds Papaya Zoap into the germination station too, so we’re keeping this exciting lineup going strong! Germination is such a key part of the journey, and having a healthy start is what it’s all about.
🔧 Room Build & TrolMaster Setup:
The build is coming along beautifully, and I gotta say, the TrolMaster system is blowing my mind! Everything’s under control like magic 🎩✨, and the TM+ app? Wow, just wow. I mean, I can literally be in the bathroom and still keep an eye on the plants—check all the metrics, adjust settings, and fine-tune what I need, all from my phone! 😂💧 This level of control is next level. I’m loving how smooth and seamless it makes managing the room. The gear is just unreal, and seeing it all come together is truly something special.
🌱 Nutrition Talk:
As for feeding, we’re starting light but smart! I’ve begun with 0.15ml of Regulator and 0.25ml of Startbooster per liter for now. I always believe in starting easy and ramping up as the plants develop. These early stages are crucial—balance is everything. For the time being, I feel this is more than enough to keep the babies happy and healthy. 🌿💧 The Regulator is working wonders in maintaining plant structure and health, while the Startbooster is fueling the early root and vegetative growth, laying down a solid foundation for the weeks to come. It’s about getting it right from the start—too much too early can be a killer. Keeping it steady with precision, that’s the goal!
Big Shout-Outs:
To the amazing team at @TrolMaster, @Fast_Buds, @Sweet_Seeds, @AptusHolland, and all the incredible sponsors—I’m beyond grateful for the support! 💚 And to my GrowDiaries fam and followers, you guys make this journey what it is—thank you for the love, and I’m so honored to have you along for this ride. 🙏
We’re just getting started, and I can’t wait to show you what’s next. Stay tuned for more updates, epic builds, gear reviews, and plenty of insight. Don’t forget to follow me on GrowDiaries, YouTube, and IG for exclusive content, and let’s make this grow the best one yet! 🌿🔥
Growers Love to All 💚💚💚
P.S.- A deep dive into the Full Spectrum Quantum Sensor (MBS-PAR):
The Full Spectrum Quantum Sensor (MBS-PAR) is an essential tool for any serious grower looking to optimize their light environment. This sensor measures photosynthetically active radiation (PAR), which refers to the spectrum of light that plants actually use for photosynthesis—typically between 400 and 700 nanometers and more depending .
What makes the MBS-PAR sensor special is its full spectrum capability, meaning it accurately detects not just visible light but also far-red and UV light—which are crucial for maximizing plant growth, development, and flowering. With this tool, I can monitor the exact intensity of light my plants are receiving, making sure they’re getting the optimal levels for every stage of growth.
By using this sensor in my grow room, I’ll be able to ensure that the light distribution is uniform across the canopy. Plus, it allows me to fine-tune the light output from my ThinkGrow LED setup, ensuring my plants are thriving under the best conditions. Whether it’s increasing light during the vegetative phase or fine-tuning it for flowering, the MBS-PAR sensor helps me keep everything on point. And the best part? I can monitor it all through the TrolMaster app, ensuring I can make adjustments whenever needed—even if I’m not in the grow room!
This level of precision means healthier plants, better yields, and maximum efficiency. It’s a game-changer for taking the guesswork out of lighting and getting closer to growing perfection! 🌱💡
Growers Love to All 💚💚💚


Likes
2
Share

@Luke_Lee
Follow
———————————————
Woche 09 / Tag 58-64
Blütewoche 02 / Tag 08-14
Mars Hydro FC-E3000
Floragard Professional GrowMix
11L Stofftöpfe
Lichthöhe: 50cm
Lichtzyklus: 12/12;
PPFD: 808umol/m2/s
DLi: 35mol/m2/d
24° C - 60RH
2L pro Pflanze
BioBizz CalMag 1ml/1L , Hesi Blühcomplex 5ml/1L
PH 6,5
Ventilator, Zu- und Abluft 24/0.
————————————————————
•Tag-58 / Blütetag-08
Die zweite Blütewoche beginnt, die Ladys haben haben einen guten Sprung gemacht. Sie sind jetzt alle ungefähr zwischen 40-45cm.
Die Lichtintensität und die Lampenhöhe wurden angepasst.
•Tag-60 / Blütetag-10
Alle Pflanzen wurden etwas entlaubt , anschließend wurde jede Pflanze mit 2L Wasser mit CalMag (1ml/1L) gegossen.
•Tag-63 / Blütetag-13
Die Pflanzen wurden etwas entlaubt und anschließend mit jeweils 2L Wasser mit 1ml/1L CalMag gegossen.

Likes
7
Share


@Squaregrouper
Follow
This is the second week of flowering for this tree I took an aerial view video to show the tops

Likes
21
Share


@Big0zGrower420
Follow
Super happy with everything so far, plants are growing fast and everything is going smoothly. I have all propped up a couple inches for better light penetration. Gonna need to take the humidifier out here soon so I can maximize all of the space for the plants. Haven't done any cutting, just some LST.


Likes
127
Share


@DutchFarmer
Follow
Weekly Update on the Runtz 🌱
Hey everyone! Just wanted to share how the Runtz is coming along. She's thriving under the care of the Plagron nutrients 🌿, reacting beautifully to every feed. Since my last update, she’s sprouted several new nodes and is showing incredible growth!
https://plagron.com/en/tools/grow-schedule-calculator
She’s definitely growing like a sativa 🌳, with those long, stretchy branches. To manage that, I’m planning to enforce some solid training techniques to keep her short and wide, just the way I like it 💪✨.
I’m loving the whole experience so far, it’s been such a rewarding journey 💚. I’ve attached plenty of pictures for you all to check out 📸. Please drop a like, leave a comment, and share any feedback or tips you’ve got! 🌟🙌


Likes
34
Share


@AshBrand
Follow
10/6/21 - All of the plants look really good. We are just watering when dry and LST on the tall plants. We will start nutrients after this week.
10/7/21 - Looking great! Gave them a small watering and a misting. Everything looks on point.
10/8/21 - It’s time to top one of the Lemon Kush. They all look amazing! They look very happy and are really growing nicely.
10/9/21 - They all look really good! We topped one of the Lemon Kush plants and it looks happy. The Gelato 41 are filling out. LST on the Platinum Wedding Crasher. ScrOG net was set up today! The ladies in the back are getting tall.
10/10/21 - They are really looking good. We took off a few leaves that weren’t doing well.
10/11/21 - Looking really good. Nothing new to report. Things are looking spot on with all strains.
10/12/21 - They look amazing! They have a lot of growing to do. Tomorrow I start feeding them Big Bloom.

Processing
Likes
21
Share


@DudeGrowsWeed
Follow
February 28, 2019 Update:
Chugging right along in the veg tent. I sprayed the plants with Neem Oil last week and the leaves look shiny from that, but no new signs of bug damage since then. I did feed them a little Recharge also and they really responded great to that.
After taking the pics I did some HST bending at the base of the stem on all plants. I didn't bend them over, just pinched real hard and wiggled the plant back and forth until I could feel the bend between my fingers. We'll see how that goes.
The DinaMed's are still taller than the MediKush's but the MediKush's still have a nice tight node structure. If all goes to plan I'll have my flowering plants chopped and hanging in 2 weeks and will then be able to move these girls into the flowering room.
Bonus pic at the end of the view from my bedroom window. I'd love to see my buds get that frosty!


Likes
12
Share


@2Stones1Bird
Follow
Checkout my Instagram @smallbudz to see the Small budget grow setup for indoor use, low watt, low heat, low noise, step by step.
06/02/2020 - Gave her 1,5l of tap water, checked the trichomes still transparent almost turning cloudy maybe a few more day!!
08/02/2020 - Showing her first amber trichomes going to harvest in 1 to 2 days !

Likes
30
Share


@TheCannaProphet
Follow
~ FASTBUDS TESTER #2203 ~
Well friends, here we go on another 'canna-venture' together!
The grow room has had a complete remodel and some upgrades done to it including brand spanking new 4x8 and 4x4 tents and a Trolmaster Hydro X controller along with a new Control Panel.
This tester strain is one of six tester strains that FastBuds has graciously provided me with and I'm looking forward to seeing what this girl has to offer when she's grown to her full potential!
One drawback of 'testers' is I have little to no information on it other than its number and that it's an autoflower... 🤪 But, it's ALWAYS a blast growing them for me because not knowing a lot allows me to just concentrate on the essentials: Light, Environment, Water, Nutrients and possibly a bit of LST... not complicated, just basics like keeping a constant temperature and RH in the tent at a level that gives a good VPD, watering when almost dry and maintaining proper light levels according to their stage of growth.
____________________________________________________________________________________________________________________________________________________________________________________________________________________________________________________________________________________________________________________________________________________________________________________________
~THE SETUP~
~Initially seeds were lightly scuffed, then soaked for 3 hours in 78℉ distilled water after which they were transferred to moist paper towels laid out in a Jiffy Pellet plastic starter tray with lid. Underneath the tray was placed a Mars Hydro Heat Mat with Controller that was set to 78℉ where they stayed until their tap roots emerged.
~Planted into Jiffy Peat Pellets that were hydrated with distilled water warmed to 78℉ with a 7.0 ph.
~Once roots emerge from the Jiffy Pellet they're transferred to their fabric pots.
~Grown 100% organic in a 4g Gronest fabric pot and a 3g fabric pot by Wraxly filled with Mother Earth 70/30 Coco/Perlite medium and initially amended with Dr. Earth 4-4-4 / Earthworm Castings / Dr. Earth Flower Girl 3-9-4 and Coast of Maine Stonington Blend Organic Plant Food 5-2-4.
~19/5 light cycle for the entire run with supplemental UVA added during flower. Lights are controlled by a Trolmaster Hydro X controller set for a 15min Sunrise/Sunset simulation.
~Top dressing every 3-4 weeks with slow release dry amendments and Earthworm castings.
~Straight water ph'd @ 6.2-6.8 when needed and bi-weekly Compost Tea's.
____________________________________________________________________________________________________________________________________________________________________________________________________________________________________________________________________________________________________________________________________________________________________________________________
Weekly Updates:
1/19- Here we go into Week Four of flower and these testers are ON FIRE!🔥🔥🔥
Both testers are in a flower frenzy and are ready to eat! Today I gave both girls their last top dressing with Down To Earth 4-8-4 Flower Mix at a ratio of 2tbsp/g and Coast of Maine's Stonington Blend 5-2-4 Organic Plant Food at a ratio of 1tbsp/g which I simplified by using 1/3 cup of the 4-8-4 and 1/4 cup of the 5-2-4 in the 4g pot and 3/8 cup of 4-8-4 and 1/8 cup of the 5-2-4 in the 3g pot. After working the amendments into the medium, I watered it in with 1g of straight de-chlorinated water ph'd to 6.6 @ 74℉. It will take a week for the microbes to begin breaking it down and will last for 3-4 weeks after that which should coincide with them finishing up, or close to it, enabling them to naturally 'flush' themselves out.
I've also increased the power to the HLG 650R's the the Trolmaster Hydro X Controller to 75% which has them pulling 990w at the wall and have them hung 32" above canopy. I also starting adding in 4 hours of UVA during the middle of the light cycle for the remainder of flower. I've been monitoring their leaf temperatures and they're running 71-73℉ which is perfect! I have the AutoPilot APC8200 co2 Controller set to 1100ppm with a 100ppm window and the AC Infinity Cloudline T6 controller set to maintain a 74℉ temperature in the tent while the lights are on.
1/21- I'm watering these thirsty girls daily with straight de-chlorinated water ph'd it to 6.6 @ 74℉ and they're both thriving! The #1 pheno stays in a perpetual state of 'praying' and remains the 'Frost Queen' in the run she is a VERY happy girl! The #2 pheno, while different from her sister, is looking gorgeous and starting to really ramp up her trichome production!
1/23- I watered/fed both testers today with 0.75g of de-chlorinated water each with GreenGro's Natures Brix, Granular Myco and Flower Finisher mixed in, after which I added 1 tsp/g of unsulfured molasses and then ph'd it to 6.6 @ 74℉. They'll be getting straight water from here moving forward as the medium has enough food in it to support them until they finish.
1/25- Daily watering continued today with both girls receiving 0.75g of straight de-chlorinated water ph'd to 6.6 @ 74℉.
OMG they're both looking fantastic with both looking amazing with a generous coating of trichomes covering their flowers, especially on the #1 phenotype and both have developed a funky sweet, creamy aroma! I'm really looking forward to Week Five of flower where these ladies should start to look epic! 😍💚
😎💚 Thank you for checking out my passion in life! Please visit as often as you wish and I hope you enjoy this journey as much as I know I will! Much love 💚 and Grow Strong! 💪😎🤙
Likes
24
Share


@Coopmc
Follow
King Juice 1 chelated for harvest in about a week
A few more days probably pull her Saturday morning
K1 up drying have harvest report next weekend

Likes
Comments
Share


@Laylowandgrow
Follow
Start of week 5, everything is healthy. Most of the plants are short I’m guessing those are the ones thats grape ape dominant. Only 1 plant ( Z 1 ) is a fast grower. They are now under 750 watt hps for the rest of vegg. Last week of vegg. Then flower for 10 weeks.

Likes
1
Share


@Michijardinero
Follow
Esta semana a ido muy bien la que estaba un poco más pequeña y resentida ya está mejor y algo me dará 😁 de momento tienen una medida de entre 14 y 15 cm desde la tierra a la punta yo creo que le daré un par de semanas más de crecimiento el riego sigue siendo el mismo que la semana pasada comentar que tuve mosca blanca la mosca de la tierra y con 3 pulverizaciones de jabón potásico diluido con agua y Santo remedio 👌la semana que viene OS sigo informando cualquier comentario o Consejo que me quieran dar bien venido es 😁 un saludo familia buenos humos paz

Likes
6
Share


@Lordshiva83
Follow
Auto Gorilla 00 está a surpreender a cada dia que passa, muito boa semente ao preço que é, estou contente, vamos começar na engorda das lindas flores, abraço companheiros.✌️🌱

Likes
27
Share


@adam_pawloski87
Follow
Today is Day 50 !! We have started flower an they are just looking amazing! We have switched up the nutrients for flower, instead of 1 tsp bloom and 3 tsp of veg , we just swap 3 tsp of bloom and 1 tsp of veg !! Can’t wait to see what these laddies do this week!!