The Grow Awards 2026 🏆 


Likes
Comments
Share
@Colectivegrow
Follow
Día 22 de Vegetación (día 27 desde la germinación)
Estoy contento con el progreso de mis plantas. Las riego con fertilizantes de BAC, micorizas de Great White y CalMag de Biobizz para estabilizar el agua de osmosis inversa. También he elevado las macetas para evitar que las plantas se espigen.
Día 26 de Vegetación (día 31 desde la germinación)
Las plantas han crecido de forma significativa en estos 4 días. La planta ya está desarrollando flores, lo que indica que estamos en la etapa de prefloración. La próxima semana, cambiaremos de alimentación para adaptarnos a la etapa más difícil, la floración.
Día 27 de Vegetación
Claramente nuestas Tropicanna Poision XL AUTO de Sweet Seeds estan ya preparando la floración. El olor ya es mas intenso.

Likes
Comments
Share
@Gram_Solo
Follow
Some nice colours coming through on the buddha , should be another week and then harvest 👌.
Laughing Buddha Barneys Farm!
sf 4000 4x4 advanced nutrients

Likes
43
Share
@Ygrowz
Follow
I grew 3 plants 2 grew well but stalled due to water and lighting at back of a cold tent once this was sorted all grew within there height range which is small and compact with my 6.5 liter pot range 8n biobizz all mix with mycorrhizal added. This is my first ever grow and the genetics wowed me i took a lot of info in about autoflowering plants and the 2 main things that run true are pot size and reduce feed as autoFlowering plants need less due to restricted height although I saw amazing growth in 3rd -6 weeks this if you dial in could increase your yields.
The plants had a mild floral berry smell during early stages and kept this smell allways through.
Once in bloom they grew vigours and buds oozed resin . There colour are truly amazing I have 2 dark plants that changed colours! And 1 tall lilac plant that too on its amazing colour during late Flowering planted in cold weather these came through sweet looking.
Final weight on last plant #2 dry buds in sugar leaf I leave on is 12.6 grams there still 2 lower branches I've tried to seed with her hermI pollen


Likes
19
Share
@ProfessorAutoflower
Follow
This plant has recovered from nutrient deficiency and is growing great. Doing lst everyday and plant is responding great. This is going to be a big girl. Still no signs of flower. The other NL from growers choice I grew took forever to flower also.
Monday update - did a little defoliation. Looks a little thin. Should get fuller in a few days


Processing
Likes
12
Share
@Greenlinejunkie
Follow
77 days today how mich long do i have ? Ita still staying in the 60s at night


Likes
16
Share
@Deer420
Follow
Vše v pořádku, akorá u Tangerine Sorbet pozoruji pomaleji pomaleji kvetoucí, řekl bych +- 14 dní. Jinak se některé holky pěkně zbarvujou. Začínají být pěkně pokryté ledovou peřinou. Řekl bych, že máme před sebou ještě tak měsíc. Moc se na ně těším
🍊🍧🌻🌺🌷💐🏵️

Processing
Likes
1
Share
@syguy83
Follow
Shes a beast, eating well, exploding in growth, continuing with LS training, trying to get her bushy.


Likes
4
Share
@ThomFoolery
Follow
2/2
We are about half way on the 2 biggest, 3 weeks on the SG, and about 6 weeks on the Blue cheese. Damn...
You can see how much I lose on the bottom half, but like I said before. It will still be more than I can smoke. And I want to make sure it all gets enough light to ripen and allow plenty of airflow. The only issues in really having is the godberry seems to be yellow 8ng too soon, but I still think it's from the light stress early on. She also looks a bit like nute burn. Probably the fish emulsion I gave it 2 weeks ago when I misread the light stress. I always have at least one plant that goes yellow too soon. Living soil.
More to come...

Likes
53
Share
@Roberts
Follow
Grand Daddy Purple auto is finishing up. She was switched to ph water yesterday. She has not color morphed for me. Still looks good, and smells good. Thank you again Medic Grow, and ILGM. 🤜🏻🤛🏻🌱❄️
Thank you grow diaries community for the 👇likes👇, follows, comments, and subscriptions on my YouTube channel👇.
❄️🌱🍻 Happy Growing 🌱🌱🌱
https://youtube.com/channel/UCAhN7yRzWLpcaRHhMIQ7X4g

Likes
14
Share
@Chuckwaggon420
Follow
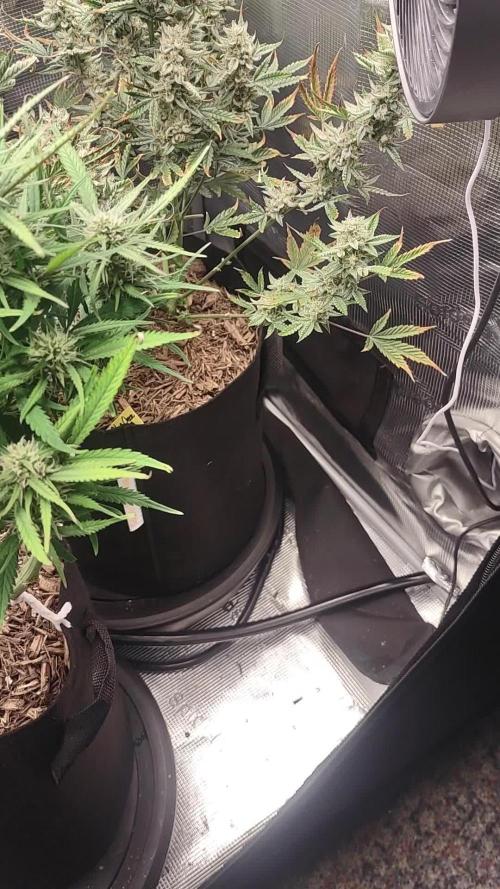
This week starts flush its week 7 of flower i think I feel behind a little on here maybe a day here and there.
But anyways those week has been awesome. I don't think these things can get any heavier! They weigh a ton literally i bounce a leaf and its gana pop it off its so heavy!
They smell like a hawian fruit punch. Not lemony like most weed and not going funky kinda exciting!! Like a bowl 🥣 of fruit 😋. They are so strong smelling its nuts had to get a gigantic carbon filter i swear u could smell it down the ROAD!!!
Insane sticky i don't touch the buds but on a stem rub my fingers stick to the stem. Lol so that's exciting. I have almost done a week of flush today is day 5 I am gana do lil over 2 weeks so I can harvest on a Friday when I am off.
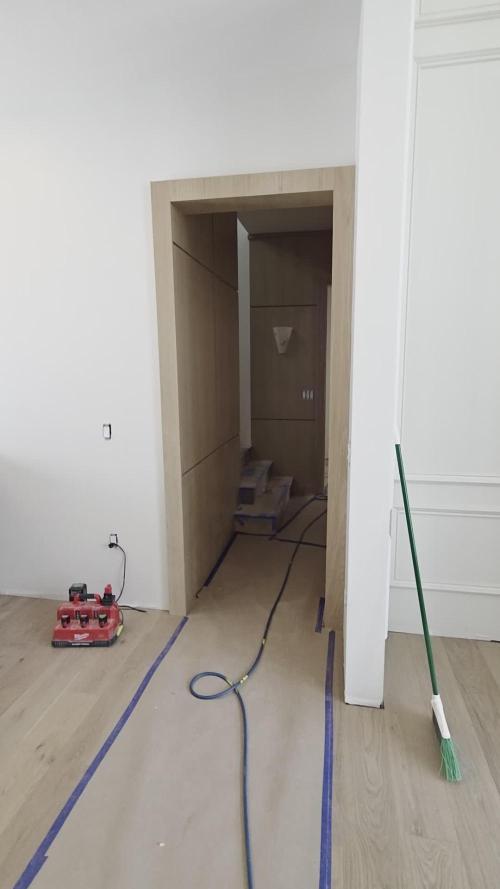
I have put up pics of my life to share. Some of the things I have been doing at work. On a normal day wherein a 3 -5million $$$ house. Do some really awesome stuff sometimes like that hidden door made out of oak. It's still in work but will take a video when done to show off.
Got me a new/ old vintage skateboard a California free former its about the size of my foot! It's from the 70s. Also am trying to grow me some peyote again last time was a fail. Wish me some luck.
Love yall
Thanks for checking in
Stay up
Peace
Likes
Comments
Share
@eldruida_lamota
Follow
Vamos familia, actualizamos la novena semana de floración y última de estas Fruit cake de Seedstockers, salieron las 3 de 3, 100% ratio éxito.
Temperatura y humedad dentro de los rangos correctos dentro de la etapa de floración.
La tierra utilizada es al mix top crop, por cambiar.
De 3 ejemplares seleccioné los 2 mejores para completar el indoor, también cambié el fotoperiodo a 12/12 y apliqué una buena poda de bajos, se ven bien sanas las plantas, tienen un buen color y progresan a muy buen tanto que se me fueron de altura un poco, la solución fue doblar un poco las plantas, también están madurando las flores y tienen una capa blanca de tricomas.
Agrobeta:
https://www.agrobeta.com/agrobetatiendaonline/36-abonos-canamo
Hasta aquí todo, Buenos humos 💨💨💨


Likes
21
Share
@Jennison
Follow
Day 22, 10-2-24: I did some trimming on them today for the first time! They needed some soil added, and I clipped the first 2 nodes and got them looking good!
Day 23, 10-3-24: They are absolutely amazing. So vigorous... Great genetics... One of the few genetics companies I've gotten 100% ratios on popping seeds. These ladies are going to be some fine looking ones.. The bigger pot is definitely larger, but oddly, the six inches of soil is bigger than the control five gallon. Didn't expect that but it is what it is 🤷
Day 24, 10-4-24: The leaves on 1 and 2, and it has to be heat. I lifted the aglex 240 w about 6 inches this morning, the lights were reading good, and it doesn't feel hot under the light at their level, so IDK why they are curling.
Day 25, 10-5-24: They are continuing to grow steady and robust. They are all generally the same again, and they feel good and flexible. Going to start lst'ing soon.
Day 26, 10-6-24: I did some training on #1 and 2. 3, the control, is, lacking. Both more and less soil is doing better than the 5 gal.. 🤷 Life's a garden, dig it?
Day 27, 10-7-24: I finally got my room moved around and got my 400 w Aglex in there and I have them at 17 inches from the light at 50% for around a 600ish par.
Day 28, 10-8-24: They are growing like crazy! All except the control. #1 and 2 are doing great and are ready to be trained out more. #3 is slowly growing and it's just creeping along...
