


Likes
8
Share

@Jardineiro_Br
Follow
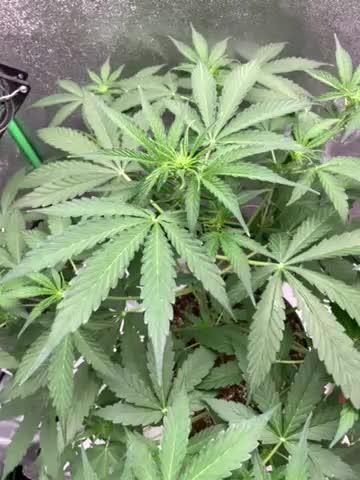
Reduzi um pouco os fertilizantes e parei de subir o PH , as plantas reagiram bem e as manchas sumiram. As cores estão vindo a menor esta com 35 cm , a mais colorida com 56 e a maior que as cores estão começando a aparecer esta com 64 cm.

Likes
12
Share


@Philippovic
Follow
Eigentlich gibt es nicht viel zu berichten, die Bananen haben sich nicht weiter gebildet und die Buds werden schön fett und Saftig 😍
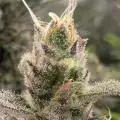
Heute hab ich versucht ein paar trichome vor die Linse zu bekommen, was ziemlich gut funktioniert wenn man die Lupe einfach vor die Handycam hält 👍🏻
26.07
Painkiller 3 wird langsam auch zu einer stattlichen Pflanze, sie bräuchte bestimmt noch 2 Wochen länger aber leider muss ich sie alle gleichzeitig ernten da das Zelt zum trocken benötigt wird… Echt schade


Likes
7
Share


Likes
2
Share


Likes
1
Share


Likes
97
Share


@AsNoriu
Follow
Day 64. they been moved to main tent !
All this week pure water, they should adapt not only to main lights, but i took Mars Hydro SP 150 and made mini side lightning for them. hope it will help. main tent plants are a lot bigger and cast shades ...
still not a right time for defoliation, but with better lightning i hope them to develop quicker and i think i will do it !
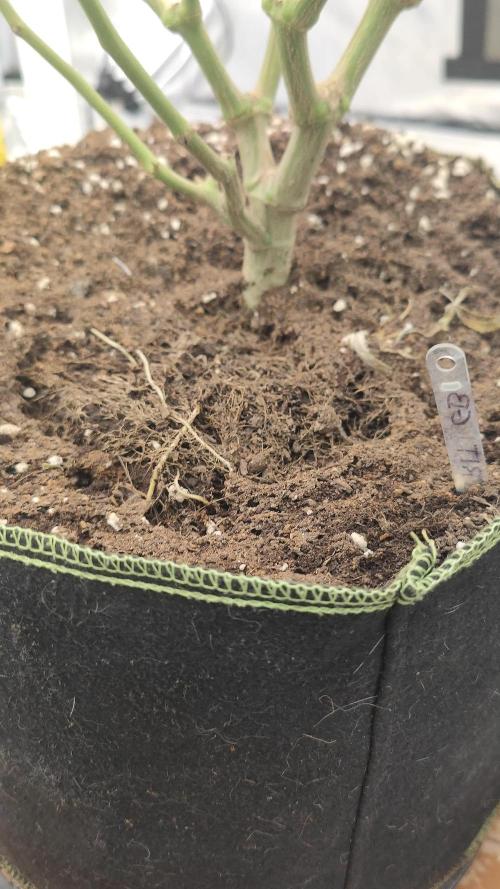
Day 69. Transplantation day !!! Girls run out old shoes and it's time for bigger ! Went for 10 gallons pots. Heavily cleared bottoms and lolipoped them. Amount of waist would be enough for few nice plants ;)))
This strain would perform amazingly with scrog , no doubts ! But I have no space .... ;((((((
Happy Growing !!!

Likes
18
Share


@Marmellata420
Follow
Le piante hanno qualche carenza, ho provato a rimediare con il thè organico e con il concime di copertura anche questo organico, ma sembrano non bastare. Questa settimana ho usato dei concimi organo-minerali per avere un effetto più efficace... Si spera🤞. Comunque, tralasciando qualche foglia ingiallita, i fiori si stanno sviluppando bene e hanno un profumo davvero ottimo!
Likes
3
Share
@PapaTerps
Follow
Blue Zushi - Dutch Passion
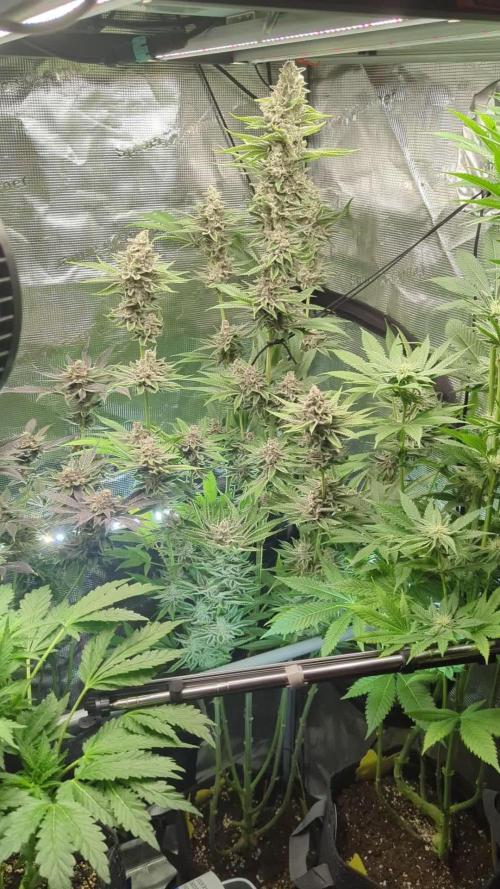
Day 103 - Watered with 3 litres of RO tap water, with defined nutrients, mixed in order (starting with BioGrow and finishing with CalMag) and then pH'd to 6.3. She has bulked up really well and her main stem now requires a little bit of support! She is still bulking in her some of lower bud sites, and has not yet had a colour change, so I will continue to water her with full nutrients until this happens, or when her trichomes start to turn amber 👍🏻
She is so tall that she might need to be harvested in two phases, just to give her lower bud sites more time with higher PPFD. I'll have to manage her nutrients differently than normal, as she won't get a flush for her first phase harvest... I'll figure it out! Most people agree that reducing Nitrogen in the nutrients is enough to remove toxins that affect the flavour and potency of her bud.

Likes
72
Share


@BoboStyle1996
Follow
At Day 12 I transferred the seedlings in pots. The auto strains were moved in their final pots(~10L) whereas the Cookies Gelato were moved in smaller pots(~6L).
Likes
6
Share


@Izlti_ocelopilli
Follow
Clones rooted with 7 days, started showing new growth around 10 days, they were only fed kelp powder and silica at around 300ppm foliar feed
Likes
6
Share

@Chrisandweed
Follow
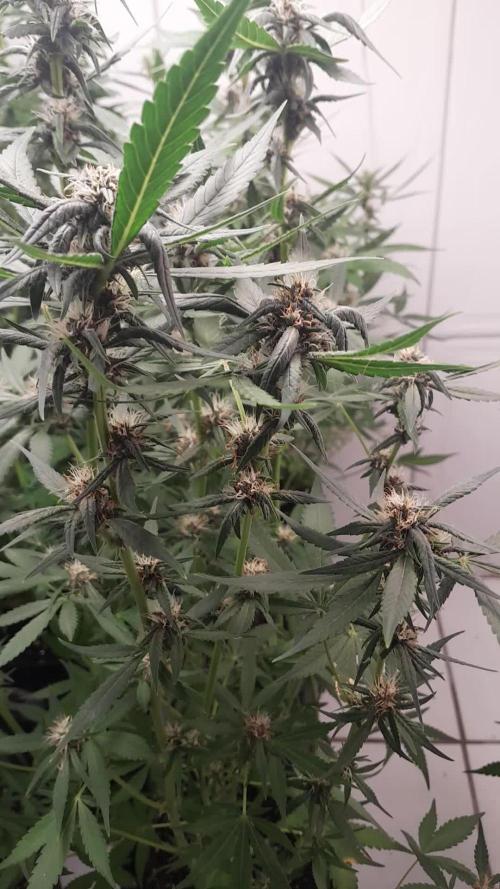
Pues como digo, de esta solo aprovecharé las cabezas, pero joder! Que cabezas se están formando jajajajaja seguramente para el proximo cultivo ponga un clon de esta a ver si lo saco mejor. El olor es riquísimo, no se explicarlo exactamente pero huele genial y a la vez muy fuerte.


Likes
3
Share

@zenderman
Follow
March 6, 26, day 29th after shedding the shell . Flowering began in the 5th week. Watering (1.5 liters with 6 ml of Terra Flores).
March 7, 26 - watering with B52.
March 9, 26-watering with 2.5 liters, pH 6.2. The plant has grown to 65 cm. Indica-dominant? That much? Only 30 days from seed!
12/3/26-watered with 3 liters of water.
I don't know about other light panels, but the Mars Hydro TSL2000,is a perfect choice for me on a 120/60 box.

Likes
17
Share


@Bobo_Zion
Follow
This is the first week of the plants being above soil, we did lose one but we are germinating another to replace that. I think the one we lost was due to heat stress, the others are holding up pretty well, there is another one that showed signs of heat stress, we just moved it a little deeper in the tent and it seems to be doing okay.


Likes
5
Share


@FourVentiFarms
Follow
So since I had the mold and bud rot problems I had to divide my schedule of harvest and divide the product as well.
- Healthy buds are ones belonging to branches where there are no signs of rot/mold.
-Mid-healthy buds are untouched by disease but still belonging to a branch where there was some disease.
-Last category are the salvaged ones, where I cut them from bigger buds that had disease or they were in some part affected.
These 3 categories each have their own drying space and where harvested in this order to prevent spreading of spores and stuff. For the salvaged buds every time I removed a part with disease I cleaned the scissors with alcohol.
I only removed the sun-leaves + penguin leaves and will be doing a dry trim for the sugar leaves later on.
Likes
9
Share


@DeepRootsGrowTrees
Follow
TRIPLE G by ROYAL QUEEN SEEDS
Week #22 overall
Week #5 Flower
This week she is doing good no issues to report her buds are getting sticky and full of trichomes she got a sweet aroma to her!! Stay Growing!!
ROYAL QUEEN SEEDS
TRIPLE G