The Grow Awards 2026 🏆 


Likes
Comments
Share


@Chumpkilla
Follow
9/16/23 - Day 106 - Today was the last day of nutes. Tomorrow I start my 6 day flush with just PH 6.1 water. This is the last step before the chop! I'll throw some pictures up tomorrow of the last water exchange. I'll take some videos of the process as well.
9/17/23 - Day 107 - I added a video uptop to show how a manual water change is completed. There are two options when you start your grow to either use a water hook up or add and remove water manually. I got the unit so quickly that I didn't have my water hook up ready. For the next grow it will be ready for automatic everything.
Over the next 6 days I'm going to let her drink up as much water as she can then on the 23rd I will harvest and then hang them in the box to dry.
9/22/23 - Day 112 - I've been on vacation for the past week. I turned 40 on the 18th and I took the family to Disneyland. I've had someone managing the box for me in my absence. The box is so easy to use the person who is house sitting was able to keep the operation going. That's a great sign that anyone can do this.
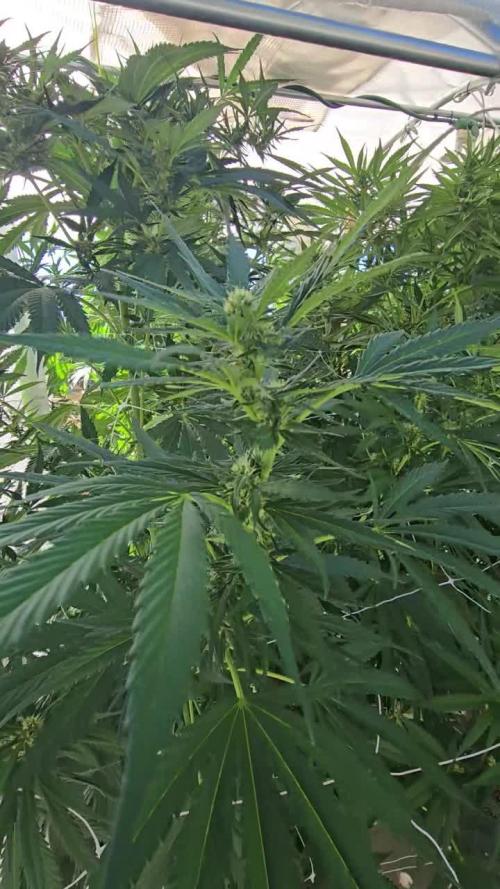
Tomorrow is the chop! I'm super excited! So far this week she has been taking in 2x the amount of water than normal. She's dying and she knows it! She still looks just as green, no welting. Looking good. Check out the photo up top.
I just got home after a CRAZY long drive home. The plant still looks the same as far as color. I was expecting her to welt, and to have yellow leaves. But she looks like shes still doing good. This is nuts. Shes not really showing any signs of dying even though shes been in .7 ppm for over a week! I may let it go another day or two? Im not really sure, I'm in super unchartered territory, you're all going to learn this along with me. Ill post updates.
Likes
11
Share


@Chubbs
Follow
This week has been wild. I had to cut the sides of the greenhouse as the plants had it bursting at the seams. These girls are all flowering beautifully and starting to frost up. Happy
Likes
29
Share


@Kirsten
Follow
Just seeing if the little buds develop any more this week, and the the chop is imminent! I need some space in the tent!
Although I've just trimmed 2 big plants, and this one will be an undertaking for certain!
Lovely big, fat, frosty buds! What's not to love?!
Here is what I did this week:
26.6.25:
I watered with 4L of dechlorinated water PH'd to 6.3 containing no nutrients.
PH: 6.3
PPM: 336
28.6.25:
I gave 2ltrs of dechlorinated water PH'd to 6.2 with the following nutrients;
♡ 1/2 Tsp Cal-Mag
PH: 6.6
PPM:1060
+
2 Litres of dechlorinated water PH'd to 6.6 and containing:
♡ 1/2 Tsp Bud Explosion
♡ 1/4 Tsp Sea K(elp)
PH: 6.6
PPM: 1170
29.6.25:
I watered with 4L of dechlorinated water PH'd to 6-6.2 and containing the following nutrients per 6.5 litres;
♡ 1Tsp Ecothrive Biosys
PH: 6-6.2
PPM: 1060
Thanks for stopping by 💚😊🍃✌️🌱
Likes
13
Share


@alexmagnus356
Follow
One plant has got purple top buds.
Very strong smell.
I’m doing the flushing for the excess nutrients.
Likes
Comments
Share


@Budking420
Follow
Well this one is also speeding along at a rapid rate! It's getting close. I'm very excited to see what she weighs as you can clearly see I had to add a rope to keep the cola from falling over. Hope you enjoy & check back again next week! Thanks for taking a look at this diary!
Likes
7
Share


@BtownOrganics
Follow
06.09. Sprayed the soil a bit with around 100ml water for each plant.
07.09. 200ml water for each plant.
08.09. 200ml water for each plant. First time used a bit of Bio-Grow (0,4ml/1l).
09.09. Sprayed the soil a bit with around 100ml water for each plant.
10.09. 200ml water for each plant with Microbes.
11.09. 200ml water for each plant with CalMag, Heaven and Acti Vera.
12.09. Sprayed the soil a bit with around 100ml water for each plant.
Processing
Likes
Comments
Share


@Pallanzo122
Follow
Yes man à la jamaïquain les frère la bonne sensimilia qui defonce les poto la prochaine arrivé
Likes
174
Share


@DreamIT
Follow
😬😆UnCoNvEnTiOnAl GrOwTh 😆😬
____________________________________________________________________________________________
🤪 6.2 I now start with the flowering week but the honey cream started flowering 6 days ago. So I hope to remember that I will have to allow for an extra week than normal. everything is going well. yeah!
🤪 7.2 ...
🤪 8.2...
🤪 9.2...
🤪 10.2...
🤪 11.2...
🤪 12.2 today we discovered that the cat does not like soap bubbles, never mind, muahuahauhauhaua 🤣😁
______________________________________________________________________________________________________
📜👀 A look at the details of what I'm growing 👀📜
🍊💚 Red Mandarine F1 🍊💚🌱🍭 Sweet Seeds 🍭🌱
📋 Details 📋
⚧ Gender
▪️ Feminised
➰ Genes
▪️ 55% Indica / 45% Sativa
🎄 Genetics
▪️ Red Poison Auto (SWS39) хCalifornia Orange x Skunk hybrid)
🚜Harvest
▪️ 400 - 500 g / m²
🌷Flowering
▪️ 49 - 63 days
✨THC
▪️ 16%
✅CBD
▪️ 0,2%
🏡Room Type
▪️ Indoor
🌄Room Type
▪️ Outdoor
🕋Room Type
▪️ N/D
🎂Release Year
▪️ 2019
___________________________________________________________________________________________
👀📷🥇 Follow the best photos on Instagram 🥇📷👀
https://www.instagram.com/dreamit420/
🔻🔻🔻Leave a comment with your opinions if you pass by here🔻🔻🔻
🤟🤗💚Thanks and Enjoy growth 💚🤗🤟
Likes
3
Share


@blaze454
Follow
Flower starts today.
Havent done much this week just letting the trim & transplant set in, a little defoliation.
Processing
Likes
7
Share


@Bills1995
Follow
Everything is looking good. Temperature and humidity under control. Tryed out a 24 hour light schedule for a week no difference so will be switching back to 18-6 to avoid having to water every day. Ghetto trellis 😂
Likes
3
Share


@coolesrat
Follow
Leaves are starting to yellow / and pistils are burning - I believe I’ve overwatered them slightly trying to flush them the best I could with clean water - this or perhaps my last feeding was to high? The EC was 2.5 . But these signs were increasing for a few weeks . Let’s hope it clears up !
Likes
50
Share


@Mr_Motalovah
Follow
Hello growers and tokers! 👋 👩🌾 🧑🌾.🔥💨
There has been much change this week!!
First there was a big defoliation done, I cleaned the bottom of the plants.
All the growth that wouldn't amount to anything because the light doesn't penetrate that low.
Also took off the biggest fan leaves to give more room for light.
Then finally switched to 12/12..
After just 36 hours after the defoliation there was a major change.
New growth everywhere, colas started stretching upwards fast.
By far the tallest girls in the tent. Her colas are stacking up nice and tight if she keeps that up we'll have some nice dense colas. 😁
Great reaction to the defoliation and 12/12 switch.
I'm still watering every other day, After the defoliation I watered with only Enzymes 2ml/L to clean the roots a bit then started with the nutrientes again.
I dropped the amount of grow nutrients from 3ml/L to 1ml/L and started adding bloom nutrientes 2ml/L for now.
I'll slowly be upping the bloom nutrientes and after week 2 I'll no longer add grow nutrients.
That's it for this week. Stay tuned to see how they flower.
Stay safe!
Likes
2
Share


@BudVision
Follow
Everything’s nice and steady – stable conditions, happy plants . La Bomba, however, decided to keep things interesting… she had some “birth pains” and even went through a tiny surgery 😀 (seed shell removal). That’s why she’s still the little sister of the bunch, but no worries.
Next week all the girls are moving into their final homes, and I’m really excited to see how each of them takes off.
Thanks for stopping by, and catch you all in the next update
Likes
24
Share


@Firepharmer
Follow
The Tropsantois was a male had to chop him :( . Having some issues with humidity I think it’s causing some hairs to turn red on few buds ! Other then that trichomes are getting crazy on The buds , they are really filling out now starting week 3 . Futur vert FM8 led is killer I’m loving it , added a SensorPush and a carbon filter the dank dank smells
are coming on strong
👃 🍓🍪🍉
Likes
14
Share


@Cannabot
Follow
Much better side branching on this strain.Pleased to see I have one definite Purple pheno possibly the other might be too but a bit early to tell on the one.Smells are coming through and growth has been decent.Once again very happy about the good lateral growth
Processing
Likes
5
Share


@PETEROG
Follow
Hey guys everything is going great with these ladies all 6 germinated and popped up in 3 days after planting 1 of the six shooters is a lot smaller than its sisters so I've order LEMON PIE from FASTBUDS should be here tomorrow to take its place and I'm going to move the six shooter outside so if you would like to see its journey comment and like bellow ⤵️
The only thing I wish I did differently would of been starting these girls under a cfl or a cheap led to stop stretching but lesson learned if anyone has any question's please comment and thank-you all for your support ✌️
Likes
11
Share


@cannacat777
Follow
I feel like I’m off the rails entering week 10! I’m definitely on trichome watch for Rachel. Chandler still has a few weeks more. But I noticed a significant decline in leaf health in Rachel particularly. I have several suspects:
My low ph problems are coming to bite me big time. I did have some poor watering practices week before last as well (I was sick and they went thirsty too long). I just hope I can careen this and stick a somewhat decent landing, come on weed gods, be the wind in my sails! Haha
Likes
3
Share


@CannaArchive
Follow
At the beginning of the week both plants were transplanted into their 20L final pots.🌱
During transplant some roots were unfortunately damaged, which resulted in visible stress over the following two days.
• Leaves were hanging slightly😕
• First two leaf pairs turned yellowish
• Minor dry tips appeared
The final soil mix consists of BioBizz Light Mix (peat-free), worm humus, perlite and coco. The medium was amended with Startrex, Silicium Flash and 4 BioTabs per pot. Mycorrhiza was applied directly into the planting hole and around the root zone to support recovery 🌱
The medium was already fairly moist at transplant. First watering (1.5L RO water + Advanced Nutrients CalMag) was done 3 days later 💧
By day 2 post-transplant, healthy green new growth appeared again and recovery became clearly visible 🌿
By the end of the week both plants were pushing strong growth with 4 developed nodes and reaching approximately 14–16 cm in height.
• New leaves are deep healthy green 💚
• Light praying observed towards the end of the week ☀️
• Structure stabilizing again
Six days after transplant the lowest damaged leaf pairs were removed ✂️
he next larger leaf pair will be gradually removed next week to avoid unnecessary stress while maintaining photosynthetic power.
• Light: 18/6 at ~400 PPFD
• Environment: 25–26°C / ~58% RH
A challenging week due to transplant shock, but both plants recovered impressively and are now back on track 💪
Strong resilience shown here.


