Likes
Comments
Share
@mrcrop
Follow
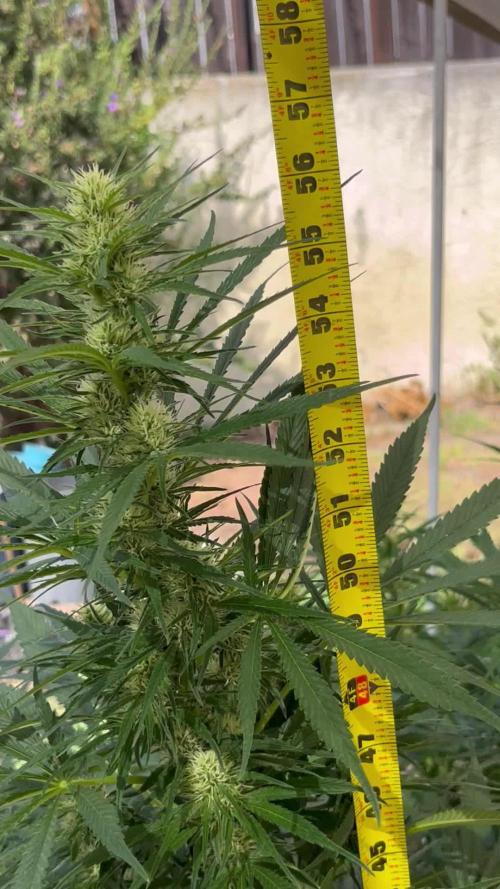
So this lady was the biggest of all and the fastest. The smell is very nice, sweet and lemon. Was very easy to grow, all natural, only good soil and water.
Likes
8
Share
@Piro420
Follow
Finally the stretched stopped. Cut about 10 tops bent about 20 with 90s. Still right in the lights. They are looking very happy even though they are so close to the light ( thanks to high c02 levels most likely.) Another week or 2 before I cut the temps and co2 levels down. Been trimming all leaves below light line. Stinky and brutally sticky I feel like Clark griswold with pine sap when ever I am bending the tops and such.. I think even with them being in the lights I will still get a few pounds of premium flower to smoke :)
Likes
19
Share
Day 7 of flowering & so far we’re off to a good start. They’ve grown 5” since last week so that’s almost an 1” a day. So far I’m still watering every other day with 1/2 gallon of water each-6.3 ph & that seems to be fine. I might have to start watering everyday here pretty soon though or I’ll have to increase the amount of water I give them each time I water. I’m having fun, I hope they are too.
Likes
156
Share
@StarLorr
Follow
Helloing 👋🏻friends and visitors. Welclone to my Clone diary🙃 Both Clones are doing fantastic! Some leaves are changing colour from green to burgundish underneath and dark green on top. Some top buds have so much frost on them that I mistakenly thought it was mold😳😅 all is good though 😉 ______________________________ Feeding: Tue 12Dec: 3L each w/nuts pH'd 6.5 Fri 15Dec : 3L each w/nuts pH'd 6.5 Mon18Dec:2L each water only pH'd 6.5 _______________________________ Thanks for stopping by, likes and comments are appreciated 👊🏻😎 Keep on growin! Keep on tokin!!! 😙💨💨💨💨💨
Likes
220
Share
These had a pretty good life. I actually only fed NPK the one time . Germinated them in a Zambeza propagator, i really recommend getting one of those propagators, they're reusable and really take the heat off those first days when you're sweating. Pooped them into their plugs they sprouted out strong, germinated 5 kept 3. transplanted them no problem. Veged these for 4 weeks, then they shot up. during veg they stretched out a bit early on i should have been giving some specialised micro i had on had but for some reason on the other i didnt. They needed extra support for their first three weeks, so i decided to LST them around week 2. Two camping hooks one anchor for the main stem and one to keep the plant down. Once i dialed in my lamp to plant distance they benefitted by slowing down on the stretch a bit. they all took to LST extremely well, bushing out and creating an nice even canopy. They pushedout these thick indica leaves, one of my plants was a lighter colored leaf pheno, the vertafort one. The Six Shooter genetic really stretches, if just off the top of my head it seems that the plants quadrupled in size over an 8 week period, completely eclipsing their neighbours and creating a thick dense canopy throwing shade down below. Each turned into a bush with three or more mains sticking out the top by week 6. IThe results start to look real pro around week 8. Before that though I hadn't been defoliating. This and simple lack of light means that I had loads of undevellopped colas. If I'm honest I should have tried to harvest in stages but by colas. Anyway these kind of grew like a gorilla glue but with much different and much better flower structure. The plants started pushing out flowers and pistils and preflowers etc early, but then took a while to gear up towards towards getting fat. The flower branch out in a spiral pattern up and down the main and secondary colas evenly, creating this misssile shaped colas, but they branch out once sometimes twice, which means less branch to nug ratio than a gorrilla glue by a full multiple. They started smelling like lemons around the time they were fattening up. Then they started getting buff, really little by little, what did rippen rippened evenly. Some colas was basically waste especially the colas stuck on the sides of the tent and some of the colas where for some reason or another there was no light there due to the dense canopy. Truly a BEAST OF A PLANT, HIGH POTENTIAL, great BRANCHING, if you look carefully each plant has more than a dozen colas, Timed it so the harvest was on a day the plants were chock full for plain water after ten day's worth of additive aided flushing. hung to dry slowly in the tent, got it around 55RH inside the buds over 12 days then trimmed and jarred in miron glass with boveda 62. The trim was a great experience, took a while but not that long because the flowers were so nice in the way they are. you do have to trim every sugar leaf one by one though if you're doing it by hand, broke these sizzors that @Mrs_Larimar sent me because of the resin lol. so I pull these plants out my tent and I just kinda look at them and they're basically dark green because of all the sugar leafs, i'm thinking to myself "shit i messed up this isnt even that frosty". well, what i found out is every time i clipped one of those trademark long sugar leafs off it revealed absolutely resious white frost. That's what can keep someone motivated. ! Once jared, if there's boveda in your jar, you dont really need to burp it daily, or even weekly i just let it sit there, obviously i've been smoking it and following the cure, let me tell you this one needs longer to cure than you're used to maybe, at least two more weeks of cure after a slow dry. Four weeks after the chop , it's a strong weed ! Didn't smell all that loud, but I have a 1300M3/H exhaust so... i'm not surprised. I will say though that my neihbour said she could smell weed even when I wasnt home and she could smell weed in the corridor, from the times I was trimming and basically every time I open my jar. Gonna need a new carbon filter for the next grow. I retired my lightbulb too. Hard to put my finger on the taste because the smoke is so smooth, and when i saw GD had a tag for Woody, i knew right away this was that taste i felt. I will say this though, cure this correctly, dont rush, dry it real slow, then cure it, citrussy tastes, usually those will evaporate, leaving this distinguished terpene heavy hitter much better tasting. So what can i tell you, this weed is white weed, so frosty. Bag appeal is great too, this strain pushes out pistills like no other, maybe even more than the gorilla glue. that means this is a chill weed right? One of the phenos I grew had more pistils than the other two. Mr. B's did, but i dont know if you can really tell from the close ups, i'll try to put some more pictures up. I got two maybe three phenotypes in terms of taste. Mr. B’s is much pine-ier than the others, and when the joint goes out and you light it again, it’s even more piney … I’m actually really happy about that reminds me of white rhino from the east coast back in the day but way piney-ier than that even. When you smoke the other phenos the smell is incense and the taste is really really smooth & woody. Sometimes I find different after tastes on the exhale like coffee, pepper, and maybe sweet/fruity sometimes too depends on the pheno I'm toking on. It is LOUD THOUGH, always have a spare filter on hand IT’S NOT WORTH IT get it ! Well at the end of my first grow, i'd like to quickly review all of Bulbi's own : Bulbi"s Own Early VegMicro: Fine green powder with calcium and all the rare metals in it. I didnt use it ! Damn, next time I'll amend my soil with it like i did this time on the FBT1 Bulbi's Own Cal Mag : Organic fine white powder with calcium and magnesium, i used it in the feed and sometimes as a spray. I didnt know how much to put in because these things dont come with instructions so i ended up putting 1/4 doses most of time. The correct amount should have been 2.5G/L. Bulbi's Own Flower Micro : Organic fine beige powder that I used mixed in with the sulfur. I think this one's a keeper, really helped my plants make it through the stress of bottom feeding and all that heat. Bulbi's Own Mag Sulfur : Organic fine red powder that I used mixed in with the Flower Micro I used this one in my spray too , to great effect, in my opinion Bulbi's Own Beneficials Trio : This was the base beneficials mix I had, you need to put 7.5 to 15g/l , watch out for clumps, use at the night fall, or when still dark. Bulbi's Own Anti Afid : I threw it in there i think just in time to protect my plants when I intentionally overwatered when I went on my trip. There were some white flies that emerged, because... well that's what they do isnt it. but there were just a few of them and they ended up flying around wierdly, and within four days, no more white flies, didnt even use yellow sticky tape ! You mix this one with the trio for even more effect. I used these in a spray I think , also. Bulbi's own Anti-Worm : This one is more directed against larvae, and can be combined with the base trio. I was weary of using it, but I'm glad i did to give my soil matrix that full spectrum of biological protection. Bulbi's own Humic Acid : This one i loved, looking back I'm regretful not having used it more. the dry humic acid is a great experience, the quality of it was impressive, clumps would seperated into more clumps ad infitum the feed slowly turning completely ink black. definituely using this once a week from now on Bulbi's own Amino Acids : this one is just amino acids, maybe next time I'll use it at the same time as the humic acid, but I'm not 100% on that. What i did do was spray the top layer of the soil with amino acids when I accidently ran into some issues from spraying kelp all over the place. So in that sense it's an absolute life saver and a must to have on hand. Bulbi's Own Kelp Extract Concentrate. Loved this one too haha, so thick, and green, check out the video of when i pour it lol. Worked great, raises the pH some so be careful, i used this one as a sprat aswell to get those plant growth hormones pumping during the seeding and veg stage. Bulbi's Own CO2 : well part of what I set out to do was to test the CO2 theory. Like roots do absorb CO2 but at a lower efficiency than leaves say 15% vs. 85% the theory being enriching your water or feed with CO2 would ultimately benefit the plant. So i enriched water with these ceramic based co2 tablets, because CO2 is a soluble gas, it stays in water. Then i fed the plants in this manner in the feed and also as a spray. The idea behind that was that co2 enriched water would come in direct contact with the plant allowing for absorption of some quantity of CO2 through the leafs. Someone explained to me that these are actually old school techniques. Well I know i started late and didnt follow a regular schedule like i wished for but the plants didn t die, or show any immediate negative upon innoculation, so what can I say? I'm doing this again, perhaps. Only problem is that these things are really a pain to pH correctly General Hydroponics Dry pH Down : GREAT PRODUCT, hard to find but amazing – not registed on GD for some reason I still have to make my bubble hash so any advice welcome ! 🚀
Likes
189
Share
@yan402
Follow
This two were part of another diary and got moved out due to space reasons at VW8 and moved back indoors at VW20 https://growdiaries.com/diaries/218151-auto-god-s-glue-grow-journal-by-yan402 13.09.25 VW21 Both are looking good and are developing tighter nodes than when they were outside, I'm going to have to keep cutting them back every once and a while I also applied nematodes against thrips and fungus gnats. 🌱💦🌱💦🌱💦🌱💦🌱💦🌱 Day to day tasks & actions 🌿 🌱💦🌱💦🌱💦🌱💦🌱💦🌱 13.09.25 VW21 – Fed 2l of #1 → 0.5l runnof 14.09.25 VW22 – Fed 2l of #1 → 0.5l runoff 15.09.25 VW22 – no water no feed 16.09.25 VW22 – Fed 2l of #1 → 0.5l runoff 17.09.25 VW22 – Fed 1l of #1 → 0.2l runoff 18.09.25 VW22 – Fed 1l of #1 → 0.2lk runoff 19.09.25 VW22 – Fed 3l of plain water→ 1l runoff 20.09.25 VW22 – Fed 3l of plain water→ 1l runoff (*RUNOFF reused for tomato plants) 🍶💧🍶💧🍶💧🍶💧🍶 💧 Nutrients in 30L #1 🍶💧🍶💧🍶💧🍶💧🍶 💧 TriPart Micro: 10ml = 0.33ml/L 🍶 TriPart Grow: 0ml = 0.00ml/L 💧 TriPart Bloom: 10ml = 0.33ml/L 💧 Cal-Mag: 60ml = 2.00ml/L 🍶 Home-made FFJ/FPJ (new batch): 30ml = 1.00ml/L 💧 pH Down: Citric acid (BuxXtrade) — adjust to ~pH 6.0 📦 TOTAL: 120ml per 30L 🔬 4.00ml/L 🍶💧🍶💧🍶💧🍶💧🍶 ⚙️✂️⚙️✂️⚙️✂️⚙️✂️⚙️ ✂️ Tools & equipment ✂️ ⚙️✂️⚙️✂️⚙️✂️⚙️✂️⚙️ ✂️ 2× MarsHydro SP3000 ⚙️ MarsHydro 150mm ACF Ventilator ✂️ Trotec dehumidifier (big unit) ⚙️ Mini no-name dehumidifier ✂️ Kebab skewers (LST – stainless) ⚙️ Wire + roast skewers (LST assist) ✂️ Scissors (HST) ⚙️ Vacuum (for spills & cleanup) ✂️⚙️✂️⚙️✂️⚙️⚙️✂️⚙️✂️⚙️✂️⚙️ 🍒🍭🍬🌈🍒🍭🍬🌈🍒🍭🍬🌈🍒 🦄Fantasy Feast (@kanorganics Seeds)🦄 🌈🍒🍭🍬🌈🍒🍭🍬🌈🍒🍭🍬🌈🍒 Species: Hybrid (Regular) Genetics: The mother is Unicorn Whip by Dirty Bird Genetics. The father is Charcuterie by Cannarado Genetics. Effect: Unknown Mixed effect body and head high Flavor: Some phenos are Skunky gassy fruity, some are fruity sour citrus with a chemical touch and a touch of skunk Flowering: Estimated 8–10 weeks Resistance: Strong — Testing phase done
Likes
25
Share
Realy looking forward to this grow. Two of my all time favourite blueberry and cheese combined in one plant. Thank you royal queen seeds lol. So I decided to give RQS starter pack a go. But I did modified it a bit. It’s a simple starter you make up 1l of water add the sachets stir then soak the tray for 10 secs and put seeds 5mm into the soil then wait 5 days. Well I grow in hydroponics with jiffy cubes as starting cubes so I just soaked jiffy cubes in the solution then placed seeds right in. Blow me down 3 days and 3 of the lady’s are out the soil well Impressed how well it worked and easy for this noobie grower. So far impressed with RQS got my eye on their pineapple Kush for next gen or the hulkberry maybe even north thunderfuck... to many to pick from will have to think it over lol. But happy with this starter kit and all going good so far.
Likes
19
Share
@Paultemp
Follow
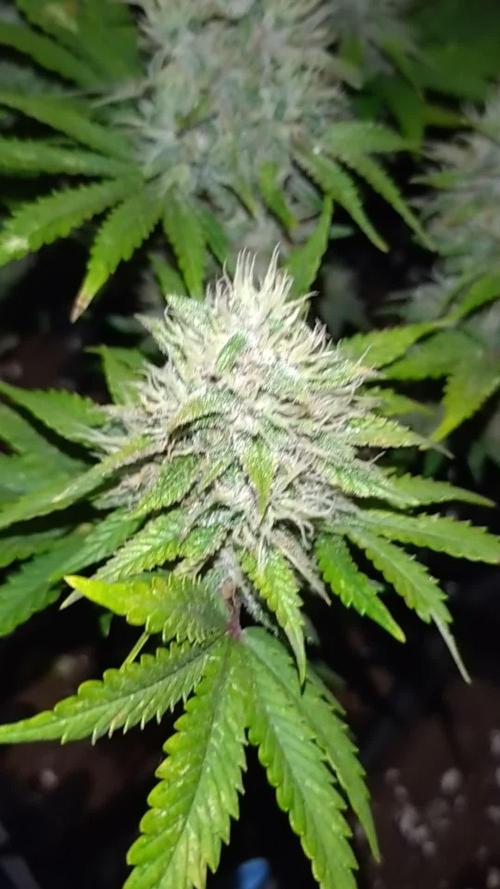
Hi all! 👊😊 Another week started ohh yeaahhh I do foliar 3 times this week and i see pistil white change in orange Smell very good pine and citrus :)
Likes
84
Share
@Scribs
Follow
CLAWING / WILTING LIGHT STRESS / OVERWATERING CLONES ARE LIVING THE LIFE MOTHER - DAY 92-98: • Problem: leaves point upward, curl downward - could be light stress / nitrogen or magnesium deficiency / soil pH • Solution: Switched to 450W LED, then 300W running at 25% power to reduce light stress, potentially causing clawing • Solution: Regular CaMg+ feedings in watering and foliar sprays • New LED, while less intense, generated way more heat: temp went up, RH went down • Soil dried out much faster; light watering on D92/93/94/96 -> overwatering, damnit • Growth upward picked back up on D97 • Hot temperatures probably freaked me out a bit and made me overwater, hence wilting, will wait / monitor pot weight D99: Clawing started disappearing. Seems like the 300W running at less than 25% intensity is much more gentle on the leaves. D99: Leaves feel like paper/dry / wilt -> overwatering symptom CLONES - D41-47: • A28 is vegging and growing much faster, bigger and stronger than her mother - will sample clones from her soon • A29 is in pre-flowering
Likes
8
Share
@Hempcules
Follow
WEEK 8 My Zoapaya is growing quite nicely and isn’t giving me any problems. It has also become very tall, but in return it has very strong and stable shoots. I’ll increase the nutrient supply from now on and hope that beautiful flowers will develop over the next few weeks. PPFD: 750µmol/m²/s Water: 2x water 1x nutrient solution Vpd: 1,6Kpa
Likes
13
Share
@NewMan
Follow
Holky vypadají zdravě, zálivka stále 4.5l každý třetí den, ph 6.2 ,ec 2.6.Dnes dostaly poslední "velkou" zálivku, teď už budu jen snižovat , Athena půjde na půlku, calmag vyřadím úplně a Green Sensation nechám 1ml/l . Tenhle týden je chci trochu prostříhat a už se asi jen kochat a čekat , tak ať se daří 🖖
Likes
5
Share
She's looking very good, however she's not developing as fast because I have placed too many big pots under my 2 panels and not every plant is growing at the same pace. She should be almost a bush already, I'm training her using lst technique using a wire and also I have topped her to break the apical dominance.
Likes
8
Share
Welcome to Flower week 3 of Fast Buds LemonPaya I'm excited to share my grow journey with you from my FastBuds Project . It's going to be an incredible ride, full of learning, growing, and connecting with fellow growers from all around the world! For this Project , I’ve chosen the Feminized Photo strain Lemonpaya : Here’s what I’m working with: • 🌱 Tent: 120x60x80 • 🧑‍🌾 Breeder Company: Fast buds • 💧 Humidity Range: 50 • ⏳ Flowering Time: 58 Days • Strain Info: 30%THC • 🌡️ Temperature: 26 • 🍵 Pot Size: 16l • Nutrient Brand: Narcos • ⚡ Lights : 600W x 2 A huge thank you to Fast Buds for allowing me to try my Best with this amazing collection from Automatic and Photo Strains they managed to Sponsore . Big thanks for supporting the grower community worldwide! Your genetics and passion speak for themselves! I would truly appreciate every bit of feedback, help, questions, or discussions – and of course, your likes and interactions mean the world to me as I try to stand out in this exciting competition! Let’s grow together – and don’t forget to stop by again to see the latest updates! Happy growing! Stay lifted and stay curious! Peace & Buds!
Processing
Likes
27
Share
@Hawkbo
Follow
These are doing pretty damn good for the most part. I figured out with the green buzz the only thing in bloom that raises ppm is the base bloom and the more PK which is good to know. Also been using lower ppm for the autos and they seem healthier than usual. These pics and the video were taken on Day 36.
Likes
2
Share
Won't be a big harvest from this girl, although the buds are fattening up nicely. Will stop adding PK in the next few days before getting ready to flush in the next couple of weeks. This plant is on the left of the timelapse video.
Likes
9
Share
In dieser Woche wollte ich eigentlich etwas weiter in die Breite. Leider wurde die Woche überschattet durch ein Missgeschick, bei dem mir eine Trieb abgebrochen ist. Den musste ich erst mal wieder flicken und habe die Erneuerung der Nährlösung verschoben, da ich die Pflanze so wenig, wie möglich bewegen wollte. Ansonsten entwickelt sie sich hervorragend. Auch die Wurzelmasse hat gewaltig zugelegt. Näheres dazu in meinen Vegi Woche 4 Video auf Youtube: https://youtu.be/1bpILLKdj7s Link zur Lampe (Mars Hydro FC3000-Evo: https://marshydro.eu/products/mars-hydro-smart-fc-3000-evo/?ref=docgreenthumb Gutscheincode für Mars Hydro (3% Rabatt): docgreenthumb
Likes
2
Share
both have responded well to defoiliation. Blueberryz stopped stretching after having to tie top down, Was getting dangerously close to hps light. Starting get some scent to