


Likes
Comments
Share


@Slobasian
Follow
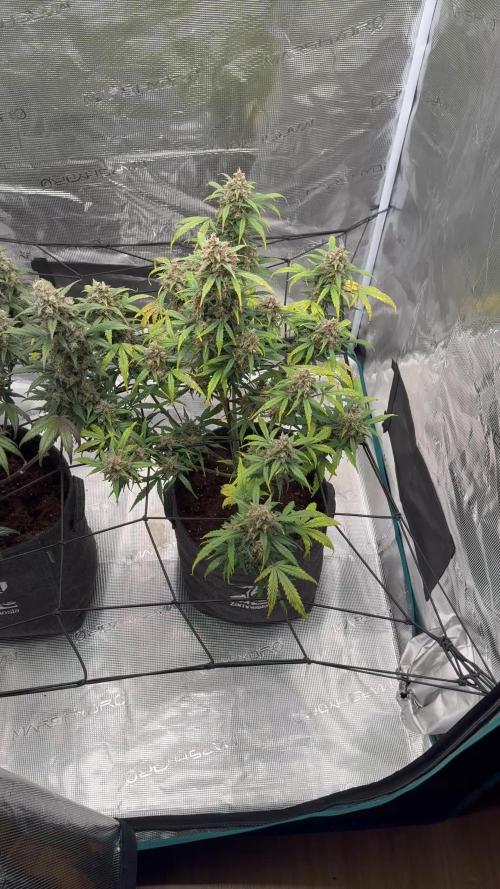
Love every plant each one is growing differently stacking different even the visual difference of one strain growin two different ways combined smells of diesel, pez candy and lemons


Likes
17
Share

@CannaArchive
Follow
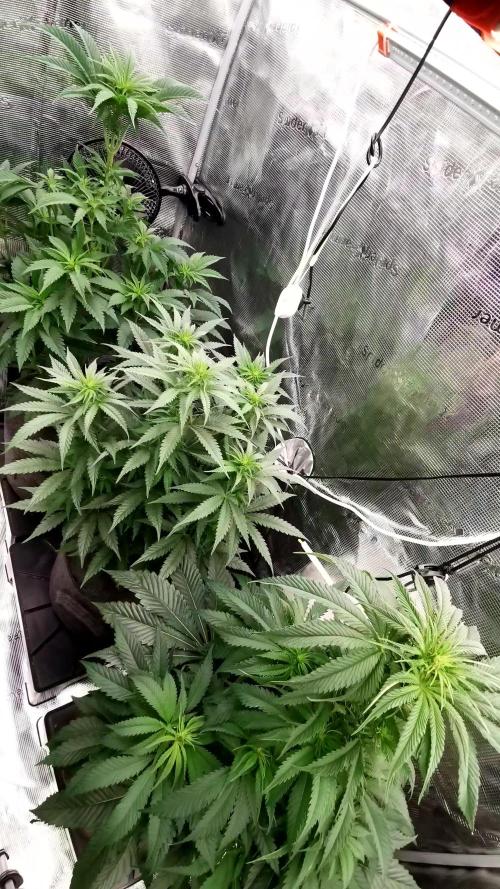
This week marked the start of the flowering phase as the light cycle was switched to 12/12, officially initiating bloom 🌸
For the first few days the plant continued normal vegetative growth, with the stretch becoming noticeable after about 3 days.
By the end of the week the plant had already gained noticeable height and the early stretch phase was clearly underway.
• Stretch beginning after ~3 days
• Canopy mostly even with only one branch slightly leading
• First few white pistils visible toward the end of the week
Light intensity was increased to ~750 PPFD ☀️ and the fixture was raised slightly to maintain proper distance as the plant began stretching.
Watering increased slightly as the plant entered the flowering transition:
• ~3L every 2–3 days based on pot weight 💧
Feeding this week:
• 1x BioTabs Bio PK
• Otherwise water + BioBizz CalMag
Environment remained stable:
• ~25°C temperature
• ~55% RH 🌡️
The plant remained healthy with balanced structure and deep green foliage.
The topping from earlier veg clearly paid off, as the canopy remained fairly even going into the stretch phase.
Overall this week marks a smooth transition into bloom with the first signs of stretch and flower initiation 🍩🔥

Likes
4
Share


@Kielon420
Follow
Trying to keep the conditions steady.
The seem to be growing faster, they really like the fertilizer.
All 3 have 4 nodes, but the bottom true leaves seem to be dying. Might have been inappropriate ph earlier.
Day 25: The plants started to smell, although it’s weak
Day 28: The fifth node is developing nicely. I think I’ll top them soon, maybe except the little one. It doesn’t seem to be growing well so far.

Likes
3
Share


@Sunday_Grower
Follow
Had a tough time mitigating heat in the summer when this grow took place. Was also not able to care for the two plants I had as best i could due to a lack of time. Harvest really suffered because of it but still got some great results. Didn't weigh it but i filled 12 32 oz mason jars. 6 Of which were from my cloned plant. 4 were God's Vagina and 2 were a mix of both buds.


Processing
Likes
14
Share


@Silverback_Guerilla
Follow
THURSDAY 7/18:
She really perked up in the sunshine with the boom boom spray and kelp dosing, so I put her outdoors again at first light today. I also re-planted her in the same cup, but I put about 2 centimeters of coarse perlite in the bottom along with another handful of soil. Her tiny lower branches are finally getting some light! I'll start training her a bit now, and I should be able to FIM her tomorrow or the next day.
She's in direct scorching sunlight for 8 hours a day and about 8 inches below a 40w Sansi 4000k LED and a 75w LED panel (6500k/460nm 1:1 ratio) for 16 hours a day, I'll dial it back to 22-hour days at the first sign of flowering and swap out the blue/white panel for an all 660nm red panel(or two), and continue to gradually decrease her nighttime until harvest I've also got a little 20w spotlight with a Cree chip that's tuned to 3000k that I'll probably hammer her "massive" cola with as she starts to ripen up.😎
SUNDAY:
She was looking a little bit haggard after yesterday...I think the sun is beating her up too badly. With such a tiny amount of soil, I think the roots are getting way too hot, even being in a cup within a cup wrapped with duct tape. Today, I'm leaving her indoors under the LEDs, but considering putting her cup inside another solo cup without any drainage holes, and setting that cup into pot of water with a fresh "blue ice" pack so as to keep the root temperature down...and replacing the blue ice pack every couple of hours while she's outdoors...or maybe I'll just take a pot and fill it with some of the orange-red clay that I find when I dig down a couple of feet..create a solo cup sized hole in it so that she has a surrounding layer of clay to keep her cooler during the day...not sure..
I foliar fed her and mixed about 4 grams of Bactrex into a jug with 3/4 gallon of bottled water and douched all my plants with about 2 pints each, except her...she got about 6 oz. of solution. That should really get the beneficial bacteria and fungus kicked into overdrive.
I started brewing a 4 gallon batch of compost tea today. Since I don't have any Orgatrex, I am using a little Big Bloom, Kelp Me Kelp You, and Grow Big in the tea in addition to the PK Compost Booster tea from Bio Tabs. I'll add Mycotrex to it about 2 hours before it finishes and thoroughly dowse them all tomorrow morning.
MONDAY:
Today, after I FIM'd her, I decided to move her outdoors into a semi-shaded spot, with the rest of the girls during the day. To deal with the heat on her roots, I decided to just bury the larger solo cup (no drainage holes or soil in it) up to the rim in a 3 gallon pot full of soil. This will allow me to easily bring her indoors every (or every other) night to soak up more light in my cabinet.
The plant's roots will never have any access to the other soil, but I'm hoping that if I keep that outer soil wet it will hold the root temperatures down in the soil inside the cup. If it turns out that her roots are so strong that they "break through" the plastic to get to the outer soil, I'll either remove the plastic and drop out of the contest, or just bring her indoors permanently.😁
She got some freshly brewed compost tea this morning along with a foliar feeding...a major pain in the ass to lug a 5-gallon pail down to the site...maybe I'll invest in a small solar panel and 12 volt battery and inverter so I can do the brewing on site...


Likes
23
Share

@TrickzCutz
Follow
Servus Moin!
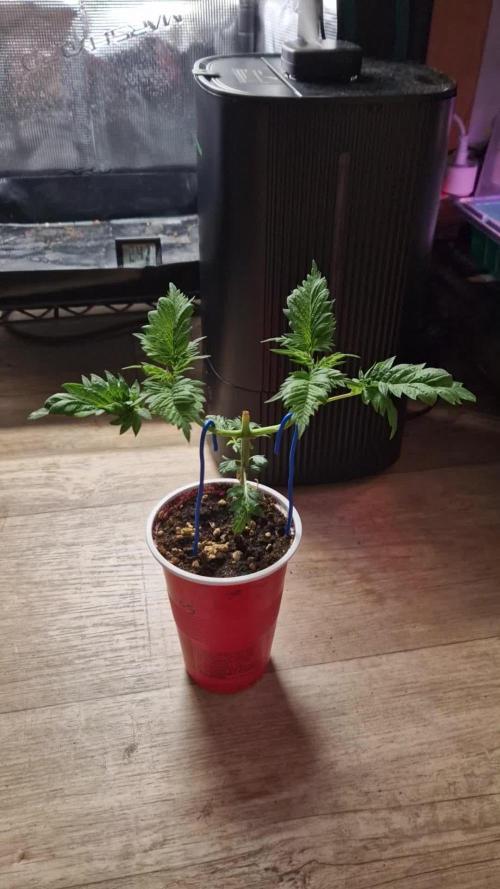
Die MDC Fern #1 Raptor wächst freudig bei den oberen Trieben, ein paar Blätter wurden entfernt, aber ich denke nicht, das die unteren Triebe noch aufholen werden.

Likes
16
Share


@BudsBanditUK
Follow
She is coming to the end now. Big fat juicy buds and a crazy sweet smell. I alreadt know this will be a good one. I will chop her this week and then update with a harvest and smoke report in a few weeks.

Likes
12
Share


@Northern_Ent
Follow
Aug 24: starting the sixth week of flowering and she’s looking pretty good. Trichomes are developing and the buds are thickening. So far so good.
Aug 27: looking close to ready but I’m not in a hurry. Will see in a week or two how it’s progressing.
Likes
68
Share


@cRypto666
Follow
Freunde der Sonne :) KURZE INFO DER LETZTE EINTRAG HIER IST IMMER DER AKTUELLLSTE NACH DATUM NACH UNTEN SOLLTEN UNTEN SCROLLEN UM ZU VORHIERIGEN EINTR'GE ZU GELANGEN : <3 WEEED
wollte dir ein text drücken :) hab mich vertippt... aö ich bin heute eine Bewustseinsstufe beim Grown aufgestiegen ! Endlich kann man jetzt Täglich meine Real Talk oder Reaktion ViD/PIC anschauen. Absofort werde ich meinen GARTEN anderts wahr nehme wer rein schaut kann Exklusive Tipps für seinen Garten gebrauchen. Gerne bin ich für Fragen offen und ich helfe wenn ich kann fals nicht findet sich in der Gruppe immer jemand.
DER GRUND IST DAMIT ICH NACHVOLLZIEHEN KANN WAS ICH FALSCH GEMACHT HABE BZW UM WISSEN ZU MANIFESTIRE UND GEWISSE GEDANKENVERBINDUNGEN GESACHFFEN SIND. IM GRUNDE MEIN GROWTAGBUCH ICH TEILE MEINE GEDANKEN MIT EUCH GLEICHGESINNTEN UND WÜNSCHE ALLEN EINE ERFOLGREICHEN GROW brO
cRypto666
2 minutes ago
cRypto666
<LIEBE> BRUDER ICH LADE DIE VIDEOS UND BILDER NOCH HOCH UND ICH BIN MIR EIGENTLICH SICHER ES KÖNNTE DIR GEFALLEN VIEL SPAß
AUF QEEN SEED GIBTS WIRKLICH GUTE BLOGS MIT TOURTORIALS FÜR NEULINGE/ANFÄNGER .
Konnte mir so mein Verständnis und Grundlage die fürs grown wichtig ist gut lernen und Aneignen ! WIRKLICH VIELE UND GUTE INFOS !!
https://www.royalqueenseeds.de/blog-cannabis-anbau-c3
https://www.royalqueenseeds.de/blog-die-10-grossten-fehler-von-cannabiszuchtern-n86
es ist soweit heute beginnt Woche 1 ... BEVOR WIR STARTEN, WICHTIG WASCH DIR GRÜNDLICH DIE HÄNDE UND BENUTZE GUMMIHANDSCHUE BEIM ARBEITEN! SEHR WICHTIG!
Ich freue mich das ich heute wieder das Gärtnern begonnen habe und eine Hällfte der Samen in der Erde sind. Kennt ihr das Gefühl der Vollkomenheit wenn man sich im Garten beschäftigt ? Für mich ist das Therapie und für euch?
Ich spiele mit dem Gedanken anstatt Samen zu growen mir einfach eine Mutterpflanze Anschaffe um mir meine Stecklinge zu ziehen ! Dafür brauch ich aber noch ein anderes Zelt und eine Lampe. Die Mütterpflanze kann dann erst mal wachsen und ich kann nebenbei noch mal ein Durchgang mit Autos schaffen bevor die Steckis fertig sind. Wenn es soweit ist gebe ich euch bescheid wenn ich Samen und Setup bei mir stehen.
So jetzt aufs eigentliche zurück. Ich habe heute erst mal mein Setup geprüft und so gut wie möglich desinfiziert. Es ist verdammt wichtig das nach jedem Durchgang sauber gemacht wird also zb Zeltwände, Boden, Topfe, Boxen, Wasserbehälter. Habe ich gemacht und habe meine ersten Samen in Anzucht Erde gesetzt, befeuchtet, markieren und in die Box. Wände und Deckel mit zersteuber befeuchten und ab unter die Lampe. WICHTIG MACH DIE ERDE NICHT SO NASS ! DAS GEFÄLLT IHNEN NICHT SONDERN HALTE SIE AM BESTEN FEUCHT IN DEM DU ABEND / MORGEN EIN BISCHEN WÄSSERST!
ICH STELLE DIE LAMPE AUF CA 40 cm zum Boden ein bzw der Box. Ein gewisser abstand muss sein um die Fläche komplett zu Beleuchten. Da meine Lampe dimmbar ist muss sie nicht ganz oben hängeng sondern Kann näher an die Pflanzen ran und Stelle den Dimmer auf 20 %. Das reicht anfangs in dem Stadium völlig aus, muss aber dann später angepasst bzw hoch geschraubt werden!
Lüfter I läuft 24/7 und sorgt für optimale Bedinungen! WICHTIG
LAMPE 20/4 HELL/DUNKEL (REGLER STEHT AUF 20 % LICHTLEISTUNG)
DANN HABEN WIR ES EIGENTLICH SCHON GESCHAFFT UND ALLES RICHTIG GEMACHT!
Ich versuche schon so viel wie möglich von meiem Wissen an euch weiter zugeben bzw auf Papier zubringen, ist aber NICHT IMMER ZU 100% Möglich, da es einfach zu viele Informationen sind !
Bei fragen einfach fragen und die Comiunity hilft sicher !!!
KOMMT ZEIT KOMMT RAT ... ich hab 2 Monate Infos eingeholt und Produkte verglichen !
Auf Queen Royal Seeds gibt es gute Anfänger Tipps sogar teilweise mit Video. Mir hat das sehr geholfen mein Grundwissen aufzubauen.
BEVOR IHR DAS GÄRTNERN ANFANGEN KÖNNTE MACHT DIR GEDANKEN WO DEINEN GARTEN STEHEN KANN.
#1 AM BESTEN IHR HABT EIN GARTENZIMMER DER NUR ZUM GÄRTNERN BENUTZT WIRD IST DIE BESTE LÖSUNG DA DU DEINE UMGEBUNG VIEL LEICHTER SAUBERHALTEN KANNST
#2 DU KANNST DEIN GARTEN AUCH INS WOHN. BZW SCHLAFZIMMER STELLEN WENN DU KEINE MÖGLICHKEIT HAST EIN GARTENZIMMER ZU MACHEN. DAS IST NICHT DIE PERFEKTE UMGEBUNG ABER WENN DU ABLUFT RAUSLEITEN KANNST DANN MACH ES ! DU KANNST ES AUCH IN DEN RAUM STRÖMEN LASSEN MUSST DIR ABER BEWUST SEIN DAS ES EVTL DAS SCHIMMELN IM RAUM ANFÄNGT! IST MIR SCHON PASSIERT ! LEITE SIE WENN MÖGLICH AM BESTEN RAUS !
ACHTE DAS DARUF DAS DEINE LUFTFEUCHTIGKEIT UND TEMP KONSTANT BLEIBEN UND ES NICHT EINMAL ZU WARM UND EINEMAL ZU KALT... IHR WISST SCHON SORGE FÜR EINEN KONSTANTE UMGEBUNG IN DEINEM GARTEN. DIE WAHL DER SAMEN IST AUCH WICHTIG DA ES SORTEN GIBT DIE EINE WARME UMGEBUNG EINE KONSTANTE ODER EINE EHER KALTE UMGEBUNG. AM BESTEN IHR PASST EURE SAMEN EURER UMGEBUNG AN HEIST DU WOHNST IN EINEN LAND WO ES EHER WARM IST ALSO 25-30 ° C dann WÄHLE AUCH EINE PASSENDE SORTE AUS!
MEHR GIBTS ERST MAL NICHT ! BIS ZUM NÄCHSTEN MAL!

Likes
16
Share


@DonKrika
Follow
I starting to see a bit of light bleaching this week.
This week I did a bit of defoliation but nothing too crazy, next week I will do the last defoliation.
DAY 87
PH - 5.95
Solution Temp - 15
PPM-1900
Watering Volume per plant - 5L
DAY 90 - Water
PH - 5.95
Solution Temp - 15
PPM-560
Watering Volume per plant - 5L
Likes
27
Share


@w33dhawk
Follow
21.06.21 heute ist Tag 17 nach Samen Pflanzung habe gestern das erste Mal great White benutzt und habe 0,3 Gramm des Pulvers in 1 l Wasser gelöst und alle 4 Pflanzen damit voll gegossen hab auch den Ph wert eingestellt auf 6,2 da ich keine Ahnung von great White habe hoffe ich das die Bakterien usw. das Vertragen (hab erst Ph wert eingestellt und dann great White zugefügt).bitte belehrt mich falls ich great White falsch angewendet haben sollte mein Plan war ich Gieße wenn Grießzeit ist immer im Wechsel ganz schwache Nährlösung und beim nächsten Guss dann nur great White und wieder von vorne da die Erde genug Nährstoffe enthält .

Likes
4
Share

@GERGrowDesigns
Follow
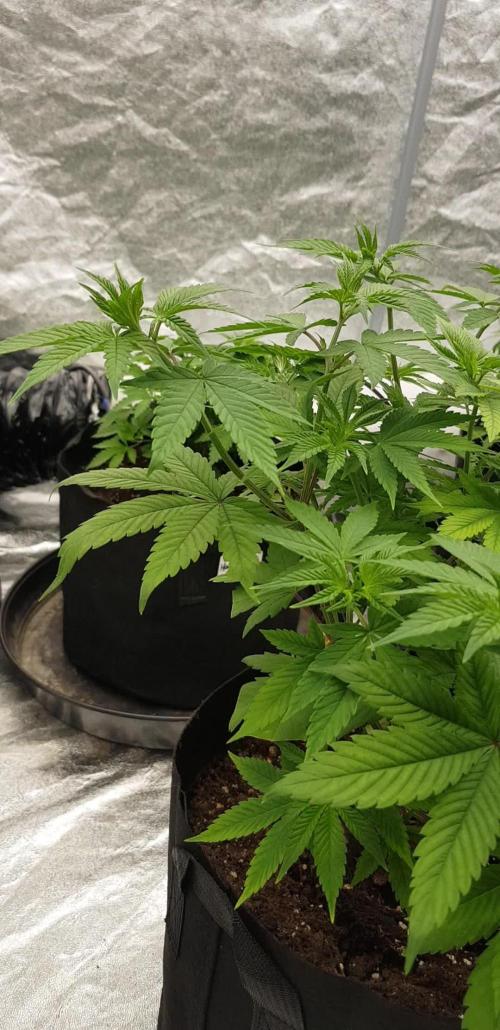
Welcome to Veg Week 5 of Sweet Seeds Sweet Mandarine Skittlez F1
I'm excited to share my grow journey with you from my
Sweet Seeds Project . It's going to be an incredible ride, full of learning, growing, and connecting with fellow growers from all around the world!
For this Project , I’ve chosen the Feminized Photo strain Sweet Mandarine Skittlez F1 :
Here’s what I’m working with:
• 🌱 Tent: 120x60x80
• 🧑🌾 Breeder Company: Sweet Seeds
• 💧 Humidity Range: 60
• ⏳ Flowering Time: 7weeks
• Strain Info: 19-24%THC
• 🌡️ Temperature: 26
• 🍵 Pot Size: 0.5l
• Nutrient Brand: Narcos
• ⚡ Lights : 600W x 2
A huge thank you to Sweet Seeds for allowing me to try my Best with this amazing collection from Photo Strains they managed to Sponsore . Big thanks for supporting the grower community worldwide! Your genetics and passion speak for themselves!
I would truly appreciate every bit of feedback, help, questions, or discussions – and of course, your likes and interactions mean the world to me as I try to stand out in this exciting competition!
Let’s grow together – and don’t forget to stop by again to see the latest updates!
Happy growing!
Stay lifted and stay curious!
Peace & Buds!
Likes
42
Share

@RakonGrow
Follow
+
data+charts online rakongrow.lima.zone/growme-mango-kush-auto-015.html
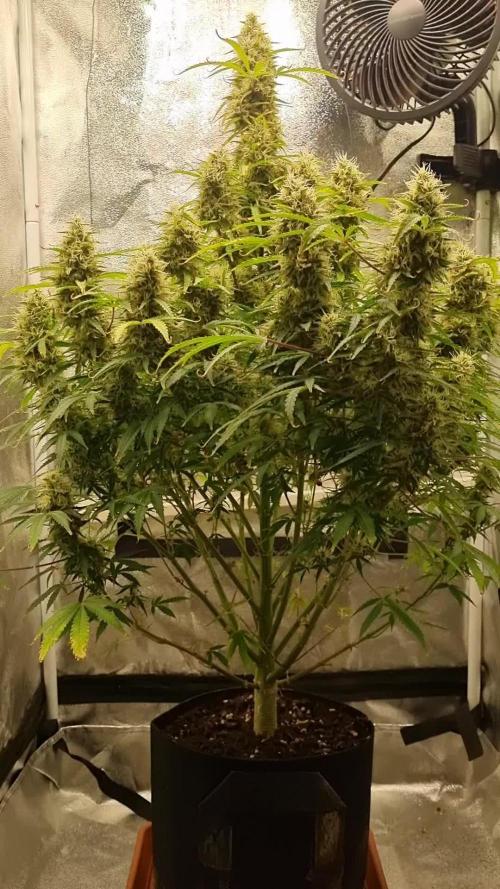
Tag 92:
und sie werden fetter, da der dünger gerade perfekt ist. nein ich hab auch keine ahnung wann da welches problem kommt. es ist einfach so . ich schüttel immer gleich , aber es kommen verschiedene ergebnise lol . eigentlich hab ich im lager auch kaum temperatur problem . ja irgendwas ist immer lol . nur was .
+

Likes
4
Share

@cangrowz
Follow
So wir neigen uns dem Ende von diesem Grow, Denke eine Woche lasse ich sie noch stehen. Dachte nicht die beiden bauen nochmal so auf. So im großen und ganzen bin ich sehr zufrieden mit dem Grow gewesen. Einen letzten Nachtrag nach der Ernte mache ich noch. Der nächste Run wird Lemon Haze :)
Likes
5
Share


@BenChasinBigBudz
Follow
Initiated flower with a 48 hour period of darkness on the 35th day from seed.
#SFgrow


Likes
1
Share


@DmbTexasRanger
Follow
I’m happy with my canopy. I’m trying my best to sit and watch. Slow season with 1 3x3 waiting for dry back/ feed

Likes
8
Share


@BuddyHolly
Follow
2 plants made it to harvest. Small nugs, about an ounce per plant dry. A lot of frosty trim and small nugs I’ll be using for hash later. I had rooting issue when I flipped to flower that definitely negatively effected nutrient uptake. Small yield but quality is good. Smells almost like a sugary jelly bakery. Cured for a week, tastes sweet almost.

Likes
12
Share


@mikemobes
Follow
I am pleasantly surprised with this grow. This is my second time growing Cream Cookies and my yields have increased by 400%. Cream Cookies #2 was the heaviest yielder coming in at 224.04 grams wet. Coming in at almost a quarter POUND for one plant just makes me grin from ear to ear. Im so extremely happy with how ive been taking care of them. It seems that proper and methodical defoliation is the key to massive yields. Cutting fan leaves which block out a significant portion of the available light to the lower and developing bud sites proved to be a great choice. The plants look a little 'skinny' after defoliation, but the newly exposed bud sites explode into the canopy. Im just so very happy with how everything went.
Haven't smoked yet its curing now, will update in two weeks!