Likes
Comments
Share
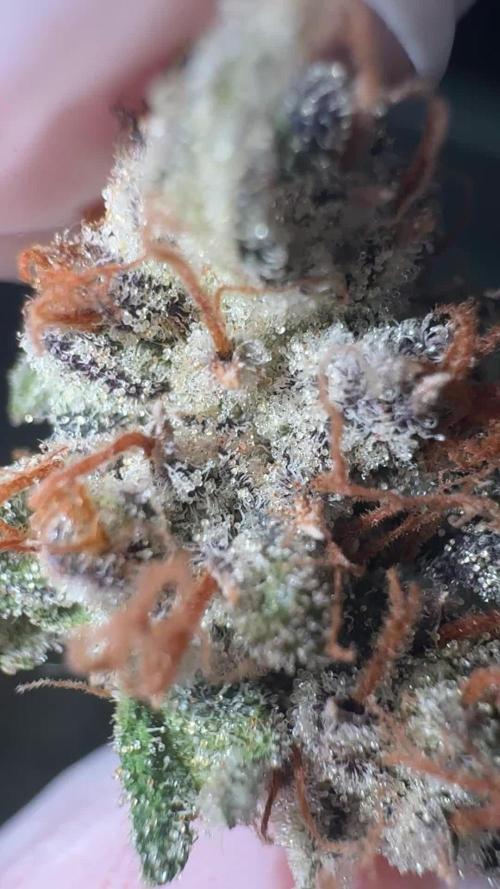
Soo dense and that deep smell with à toutch of cane sugar im in love wish ô hade more then one plant yeild 3.5 oz in one litle plant was à blast to grow
Likes
6
Share
Week#11 Gnomo Auto By Kannabia Week#11 Jan. 6th-13th Gnomo Auto is a superb 👌 strain to grow for any grower. She is covered in trichomes and her buds are dense she has a nice aroma to her and she looks amazing 👏.
Likes
42
Share
@noodle
Follow
Yo ho ho things are getting a little out of control here. By the end of this week the single plant has grown from the windows to the waaaaallls, measuring 30 inches across and somewhere around 20 inches tall. Humidity is a real problem now with all that transpiration, and because my house is 60-65% RH it is pretty hard to keep the tent humidity below 70% even with ventilation and a dumb thermoelectric peltier dehumidifier. The dehumidifier pulls 160-170ml of moisture out of the air each day but I feel like I might need something bigger (although I'm pressed for space already). VPD ranges from 7.6hPa in the morning and climbs to around 9.5hPa by lights out as the tent warms up. I've seen a lot of people who use the Growmau5 / RapidLed "Far Red Initiator Puck" to help kick their plants into bloom but $37 shipped and it doesn't even have built-in scheduling? I designed my own puck with 4x Cree XPE-2 Far Red (730nm) LEDs, a driver, wifi access and control for scheduling and setting brightness, and while I was at it I added in 0-10V dimming with override dimmer potentiometer, as well as a DHT22 temperature and humidity sensor for logging. I call it the Initgnokt. I am also seeing pairs of fine little hairs coming out at nodes, we definitely got a ladyplant here, hope to get some blooms coming soon?
Likes
5
Share
@zongo
Follow
The outdoor plant's stems are thickening and hardening af. This will be perfect for when my next light arrives; I will switch it back to flower and will support some fat buds. It is windy af; I am also twisting all stems on the outdoor plant every 3-4 days so they harden/thicken even more. I really might need to cut it to size before going inside again... I am giving it full veg nutrients (2.5ml/L fish emulsion, 1ml/L Activera, 0.8ml/L Bloom) with tiny bit of bloom; There are also some small pests eating some small holes through the leaves, but seems to handle it; I get rid of anything I see and will give it an organic pesticide (garlic and neem oil) spray before bringing it back inside. Indoor plant is going OK, the buds are fattening a bit slower than I want, The light is now also a bit too small for this plant as well; I want also the lower buds to fatten so some of the higher leaves are burning a bit but the middle is best. I might have given it a bit of nitrogen toxicity a bit ago but I lowered my fish emulsion and it stopped spreading,
Likes
3
Share
5. Woche Hab sie letzte Woche nomma getoppt und jetzt darf sie sich erstmal bisschen erholen. Update von Tag 40: Topping nr. 4 ist durch und jetzt darf sie sich erstmal erholen 😊
Likes
4
Share
Welcome to week 5! Things are progressing along as some plants have started to display sex. I've removed some of the males that have shown themselves so far as we aren't looking to breed this run. Going to let them veg for this week and then I will be flipping the lights to get the flowering cycle started. Huge shout outs go to @MarsHydroLED for allowing me to grow with their kick ass gear! Huge huge shout outs go to all my followers and to the people who stop into the diary alike! Keep on inspiring. -The Projexx Day#29 Ladies are growing along and recovering nicely from the topping , Watered 1.5L from the bottom. Day#30 Plants seem to be doing ok from the water increase. Things moving along nicely Day#31 Pictures N/A. Plants are growing along remove 2 males Day#32 Watered 1.5L from the bottom , Plants arent very happy. I think the issues is i'm not waiting long enough between waterings. I will have to practice the technique more for now I may go back to top watering. Day#33 Pictures. N/A.Top fed 3.5 L each at 550PPM I knew I wasnt giving them enough water. Things are about to change heavy duty now Day#34 Pictures. N/A Plants are ridiculously happy now. Im going to cut away all the dying leaves and flip the lights. Day#35 Pictures N/A Last day of veg for this project. Im excited to see what these plants do in flower! Recap: Things where ruff at the start of the week but by the end we were rocking and rolling again and ready for flower! Wont be long now till we see some real action!
Likes
84
Share
🌱Welcome to my 2 x 4 ft autoflower tent. Here we have Ganja Farmer's Strawberry Banana Purp. We just finished the 8th week of flower and it's harvest time! The terps really changed more into a strawberry Orange on this one and I am not complaining it is mouth watering and I am looking forward to the harvest report in about a month and a half from this post. 😌💨 💧She has been receiving water every other day about 1 L of pH adjusted to 6.5. ✂️ TRAINING: NONE 💡⚡Check Mars Hydro out on Instagram! @marshydro_aliexpress2 💡⚡
Likes
27
Share
1/20/2023- So much to do pre grow and over the next 16 days, absolute first order of business is that I have to take down my current Grow---TIMBER-- Then I have a list of things I have to get done in order to be ready to start this grow 1 Feb. With that said T - 2 days until start 48 hour Flush T - 2 days until Start 48 hours of Light T - 4 days until TIMBER!!! Items that need to be done before 1 Feb 2023 1. I need to clean the tent out 2. I need to clean the equipment- Proper Sanitization between grows in Hydro is a must!!! 3. I need to get the hole in the ceiling above my tent repaired- For my last grow I had a deep sink installed in my grow room, to make Hydroponics a little bit easier and have a water source in the same room. The seals on the pipes they were installing broke and leaked through the ceiling causing some damage all the way across my grow room, I was already weeks into my grow and couldn't risk them working above my tent and it would have been very awkward positon for them to be working in as well, so have to get this done quickly between chop and germination. 4. I have to install my new light- I was using a Vivosun 4000 and for this grow I am switching up to a Spider-farmer SF 7000. 1/20/23- For this upcoming grow I am working with M/F photo seeds so I ordered 4 Sex determination kits. I recieved my my 4 Sex determination testing kits from Rimrock Analytics today. I will be using these to test my plants at week 2 of Veg so that when/if I take clones I know I am taking them off females. As well as I don't want to accidently pollinate my tent during this grow I am looking for big beautiful buds not seeded buds. :-) 1/24/2023- Harvest of current grow- Started at 2:00pm and finshed wet trim and firt batch into the freeze dryer. 1/25/2023- Next batch into the freeze dryer and cleaning all my equipment for this Grow. T-1 Day until the workers are supposed to be here to fix the hole in the Grow Room. T-3 days until I instll my new Gorilla Grow Tent and my New Light Spider Farmer SE-7000 for this grow. T-7 Days until Start of Germination 1/26/2023- Harvest is done ran through the Freeze dryer and dry tim completed. 1/27/2023- Grow Room repairs completed. Hole is gone Letting the paint dry before I install the new tent. T-2 days until Install the New Gorilla Grow tent and the new Light T-3 days until I put the hydro equipment in the new tent T-5 days until Germination 1/29/2023- Day 0- Final Pre Germination activities Germination Start T-3 days The paint on the ceiling was dry and it was time to finish prepping for Germination. I got the following items knocked off my list. New 4X4 Gorilla Grow Tent is up and ready New Spider Farmer SE-7000 Light is installed- Thanks Moony Grows for the suggestion and for the Code that got me some money off and free shipping (Moonygrows)!! I turned the lights all the way up to max and set the timer to 18/6 0600-0000. I will keep an eye on the temperature and humidity without my plants and see how hot it gets with the new light. I put my Hydro system back together and put in 40 gallons of water into it, time to monitor for leaks the next few days. I Setup my cloning machine for Germination Days 3-11 1/30/2023 let me break down the situation, ROOM in the TENT.. Enough said.. No really I tried putting my exhaust system up in the new tent with my new light, The light is so big corner to corner that it really didn't give me enough room for the lights be be raised, with the exahust hanging the buckets my plants are Starting in are 2 and 1/2 feet off the ground, great for plenty of room for roots but not so great for upwards space for the plant to grow. In a 6' 11 tent with the exauhst in side and hanging that only gave me a little over 4 feet of grow room to play with. My last grow if you saw my diary, anyone could tell I was struggling to keep the buds off the lights. No good, Since space was such an issue I was running my carbon filter inside on the ground but It really needed to be up sucking the heat out not shooting the cool out. With that setup I was sucking air through the filter and pushing it out the tent at a bottom exhaust hole cold out. Wasn't doing me any good for my heat. I was hitting temps of up to 85 degrees. I bought a portable AC unit and have been running it in the grow room to try and keep temps below 85 and I have had to lower the power on my lights during grow also not ideal.. With that said a friend of mine MoonyGrows (Check out his diary) took the time to look at my issue send me a picture of my grow tent setup with detailed instructions on how to suck the air out from the top but putting my filter and fan on top of my tent so no room issue and I am sucking the air out from the top where the heat is instead of pushing the air out from the bottom where the cool is... THANK YOU MoonyGrows For taking the time to help me get this straightened out.. Now I have room and I have the exhausts working right and now my temps with everything at 100% are topping out at 80 this dropped the temp by 5 + degrees at 100% max. T-2 days until Start of Germination Prepped my seed tray with humidity dome Prepped my Rapid Rooter plugs. I Used RO water, and I added a few drops of Hydrogen peroxide to Oxygenate the water. I then PH balanced between 5.7-6.0 the same that they will be getting in the Cloning Machine and when they get to thier final grow pod. I perfere the 5.8x range and I hit 5.84 for these rapid rooters. If you want to see a complete video on the process HowWeedGrow has an amzing video that shows step by step how to do it and explains it better than I ever could including how to plant the seeds. Which I will cover when I get to that step on Wed. https://www.howweedgrow.com/how-germinate-weed-seeds-cannabis-rapid-rooters/ 1/31/2023 T-1 day until Germination Start All set and ready have my Rapid Rooter plugs ready to go have my seeds out.. Have my seed tray warming up tonight. Tomorrow morning right into the Rapid Rooter then strait into the tray. I will spray the dome to start the humidity in there. 2/1/2023 Germination Day!! Let the games begin! 0600am Put the seeds into the Root Riots. And then put the seeded Root Riots into their first home the Seed tray. I have them under the light 24/7. Sprayed the dome 7:30pm Sprayed the Dome to keep humidity going on the dome. 2/2/2023 Day 1 of Germination Sprayed the Dome in the morning Sprayed the Dome in the evening 2/3/2023 Day 2 of Germination Roots are starting to come out the bottom of the root riot plugs and the heads are slowly popping out of Number 4 just below the surface. Afternoon- Number 4 has popped up Evening- Number 3 has popped up as well. Happy Dance!! 2/4/2023 Day 3 - Germination Surprise Surprise Surprise- all 4 have now poked their heads up.. Happy day!! 100% Germination succeeded. Now major milestone to track is how many are female and how many are male. I will take look at the roots this afternoon/evening and see if they have enough root to go into the cloning machine for the next 7 days before they go into their Hydro Pods. Day 3 - Germination - Evening.. Roots looked good and they were tall enough to make it into the cloning machine. Now that they are all in the cloning machine I have switched the lighting to veg state 18 on 6 off. 2/5/2023 Day 4 - Germination - Morning All the Ladies (fingers crossed) looking great stretching nicely and look nice and green, Photo synthesis underway.... UPDATE!! After a very interesting POD cast on FSTS by Dr. Bruce Bugsbee from Utah University, I have shifted my lighting to 24 hours on through seedling and then I am going to shift to 20 hours on the rest of Veg. 2/6/2023 Day 5 - Germination While Checking on my conditions inside the new tent last night, I found that the Humidity was down to 39 Percent. I added an AquaOasis Cool Mist Humidifier, the reason I selected this humidifier is that I needed one that could be turned on and off utilizing my Inkbird Humidity Controller IHC200 that I have my Pro Breeze Dehumidifier currently running with. Root structures are starting to get there about 1/4 of an inch. 2/7/2023 Day 6 - Germination Everything seems on track more roots poking out of each today. They are each getting a little taller as well. Checked in the evening and number 3 was drooping the Root riot plug on the bottome was dry and the roots were not in the water yet. I raised the water just enough that the longest root that was sticking out is now hitting the water. 2/8/2023 Day 7 - Germination Everything looked good while checking in on them this morning number 3 is now full up and no droop again. 2/9/2023 Day 8 - Germination T-2 days until Plant into Forever Pods and we start week 1 of Veg .. :-) Surprising thing to me is that number 1 and 2 were later in popping then 3 and 4 but the roots are growing longer in 1 and 2. 2/10/2023 Day 9 - Germination Number 1 and Number 2 are definitely ready for transplant today.. Based on how they were yesterday and where they are today I am hoping by tomorrow 3 and 4 are ready. Today they look to me where 1 and 2 did yesterday.. I really hope 3 and 4 catch up by tomorrow since.. T-1 day until transplant to new/ final home for grow. Need the roots long enough to have some clay down in the basket to keep the root riot out of the water and only roots in the water.. 2/11/2023 Day 10 - Germination Today they got placed in thier forever Home, 7 days from Sprout and 7 days until Week 1 Start. PPM- 180 this is water out of the Tap Temp Water: 70.7 Temp Tent: 77 Humidity: 40% I have a humidifier going 24/7 to try and bring this up.. I also have Humidity Domes on each plant. 2/12/2023 Day 11 - Germination Sprayed the domes, all are looking good.. Nothing much to do at this phase but Keep monitoring the PH level in the system and making sure they have a comfortable home. T-6 days until Week 1 start 2/13/2023 Day 12 - Germination Sprayed the domes, They were looking a little yellow today so I moved the light down to assist. Nothing much to do at this phase but Keep monitoring the PH level in the system and making sure they have a comfortable home. T-5 days until Week 1 start 2/14/2023 Day 13 - Germination Sprayed the domes, They were looking a little Florissant yellow today, with what looks like slight burn on the tips, I talked with a fellow grower and we agreed that It was probably that I was drowning them, Yes you can drown you plants even in Hydro, but only early on.. :-) It usually happens with the water being too high, which soaks not only the roots but the medium (root Riot plug in this case). I lowered the water from touching the bottom of the pot to about 1" away. This will probably take 3-4 days to resolve. I will continue my daily monitoring. T-4 days until Week 1 start 2/15/2023 Day 14 - Germination Sprayed the domes, continue my daily monitoring they look a little darker green instead of lime green now that I lowered the water levels in the system, so I think that I might have resolved the issue but it will take a few days for recovery to happen. T-3 days until Week 1 start 2/16/2023 Day 15 - Germination I looked in on them this morning, 3 and 4 look like they are doing well and recovering nicely. Number 1 not so much it has brown spots on the leaves, this very well can still be a side effect of the overwatering but I decide to go ahead and add Nutes earlier than I was planning just incase. I was going to wait until Saturday but I think intervention is necessary now especially after drowning them early on. I added 1/2 what I am planning on adding for week 1 start. I also think I am going to adjust my chart to add 1/2 2 days after plant from now on. I don't think it would hurt it to have some Nutes to pull from. .25ml/Gal Calmag = 12.5ml 1ml/gal GH FloraMicro= 50ml 1ml/gal GH FloraGro = 50ml 1ml/gal GH FloraBloom = 50ml T-2 days until Week 1 start = I will drain the system and start it over on Saturday with Week 1 Nutes. 2/17/2023 Day 16- Germination I didn't even want to post today after looking in on them this morning, 3 of the 4 are now showing signs of dronwing.. Brown spots on the leaves, the water levels were still too high.. I drained about another inch out of the tanks.. Will see how quick they recover.. I start week 1 tomorrow and will have to ensure my water levels are at least 1" away from the basket on this round.
Likes
4
Share
@ReinDeer
Follow
I've been working on my tent previous week and updated what's essential in this phase of growth. I've set up a new carbon filter to prevent the smell to distract my kind neigbours and I've purchased a small fan. Both, are serving now well and adding more than needed fresh air to the plants. They're all producing small flowers and hopefully they'll form huge buds by the end of the harvest season. I had small issues with the plant positioned just in front of the fan that is showing some wind burns on leafs but nothing major. I raised the fan and the problem is now gone. Other than that I feel very confident that this run will be majestic 😀 Wish you all a nice week and see you around soon! p.s.: Hope you love my new videos
Likes
6
Share
Started with the LST. The idea is to not top them, just do LST. This week I'll probably start making my SCROG net and start tucking.
Likes
44
Share
For LIQUIDS & NUTES ******GREEN BUZZ NUTRIENTS***** organic. Also i’m using their LIVING SOIL CULTURE in powder form! MARSHYDRO ⛺️ has large openings on the sides which is useful for mid section groom room work. 🤩 ☀️ MARSHYDRO FC 3000 LED 300W 💨MARSHYDRO 6” in-line EXTRACTOR with speed-variation knob, comes complete with ducting and carbon filter.
Likes
21
Share
@deFharo
Follow
🖐️👨‍🌾 Bienvenidos amantes de la Marihuana, comienzo una nueva temporada de cultivos, primavera/verano 24, con esta cepa que me va a llevar de viaje por el viejo reino de Siam a la búsqueda de la marihuana que pude fumar allí y antaño, tal vez en este camino cargado de recuerdos, me encuentre con otras flores... con más recuerdos. Después de unas semanas de descanso de la temporada anterior, comienzo este nuevo viaje con ganas y la esperanza de conseguir la mejor cosecha hasta el momento. Preparé concienzudamente el sustrato donde puse las semillas de las 9 cepas que voy a cultivar esta temporada, mi intención era emular la germinación espontanea que se produce en el bosque o campo, pensé en reproducir este escenario, mezclé un sustrato "cocinado" durante meses con nutrientes y minerales, añadí fibra de coco inoculada con Microorganismos de Montaña y mi Bio Coco EM que contiene minerales, hormonas, enzimas, etc. puse la semilla en superficie de ese sustrato y lo tapé con materia orgánica seca proveniente de Mulch rescatado de mi anterior temporada de cultivos, a continuación humedecí todo con agua caliente y miel, lo tapé y lo puse al calor de una manta eléctrica, a los 3 días asomó esta semilla de Thai Fantasy, dos días después otra semilla de Colombia Gold también salía del sustrato, pero 8 días después ninguna de las otras 7 semillas germinó, a la vista de una lupa, todas la semillas estaban podridas y con ácaros similares a los que se ven en el compost, el fracaso ha sido total, la ley de la selva a imperado y solo han sobrevivido las más fuertes, estas dos semillas tendrán las mejores macetas, se las han ganado. Ahora he vuelto a poner las semillas a germinar, pero esta vez sobre servilletas húmedas y calor, y prepararé un sustrato menos caliente para el momento del trasplante... adelante! Espero lo mejor de esta cepa con dominancia sativa, las cepas de Kannabia siempre sorprenden, y mi bodega está a falta de sativas asiáticas, así que a jugar!! ================================ Info de la cepa Thai Fantasy de Kannabia seeds: https://www.kannabia.com/es/semillas-marihuana-feminizadas/thai-fantasy "Nuestros paladares occidentales se abren a nuevas dimensiones cuando nos adentramos en los universos exóticos de Tailandia o Camboya." Kannabia Seeds - Genética: Thai x Black Domina - Sativa 80%, Índica 20% - Tiempo de Floración - 58-65 días - Rendimiento en interior: 500 g/m² - THC: 18,6 % - Sabores: Dulce y terroso ================================
Likes
14
Share
@b_deal
Follow
This week was amazing guys. I literally watched the buds getting fat day by day. I am still feeding with a similar program and adding Aptus Regulator once per week to boost silica and some other minerals like molybdenum and boron. I'm flowering my plants in a hot environment with CO2 boost. PPFD is high to support these settings and thankfully my the pots aren't getting hot. No fungus gnats or any other pests, no root rot and bad smell. Everything is perfectly neat and buds are exploding. My expectations from this harvest is really high and I'll keep adding CO2 for another week. Some fellow growers asked for CO2 and PPFD measurements. I am sharing these information on this week's pictures. I got my CO2 meter fixed and I tested the CO2 PPM in different places of the canopy. Typical value for this grow tent with this CO2 setup is around 1100-1350. Temperature is fluctuating between 28-31 and the average PPFD on the bud sites is 1100 micro moles. I'm sharing CO2 measurements right under the fan, where you expect it to show the lowest value. Then I'll also share the CO2 PPM value coming out from the air pipe, which is normally attached to the grill of the fan. Direct output is now around 5500PPM and in the first two days, the meter shows 10000PPM which is the max value that it can reads. This bucket yeast CO2 reactor lasts for four days and I'm refreshing the mixture twice a week. This is huge CO2 with a fairly low cost compared to propane burners or CO2 tubes. Edit: I refreshed the CO2 bucket today and got you guys a video of the direct output. The system is outputting more than 10000PPM of CO2 and the meter can't measure it for the first two days. This CO2 method is a killer one for tent grows. Very low cost for very high CO2 concentrations. Hope these information helps. Happy growing 💪
Likes
4
Share
Soaked seeds all in peroxide solution for effortless germination 48 hours or until root pops out 1mm, than I paper towel them for 2 days for tap roots before planting in the medium. Note: Smile now Cry Laterz and FX3 were started one week later. Not pictured in this post. The first 6 popped were lemon cherry pop, which are from S1 seeds I made from 2 females using the stress method. I just raised my flowering temps for one day at 92 degrees during week 4 flowering to make them herm as an experiment and it worked😅! This was during a hot summer and I just shut off the a/c for a day in the room which I usually keep at 77-82 degrees! So I basically tricked them!
Likes
46
Share
Buds starting to get really fat and frosty. One of the blueberries have a distinct smell of sweet berries. Too bad its an auto or i would have monster cropped it (clone). Looks like i will get a descent and potent yield.
Likes
39
Share
4/9/25 Welcome to another week. Week 5 since the flip of 12/12 just ended. So today is day 36 since 12/12. The begining of week 6. About halfway done with flowering. Time to start packing on weight. also its important to note that it took a week or so after 12/12 to have pistils show up. So its closer to 28 -30 days of Flowering. I have a foxtailing pheno thats mostly green with thin buds. I have a super chonker green pheno with ridiculously chunked up golfball sized nugs everywhere.(R3) I have a sativa style but thicker buds with nice long connected colas (R2) another smaller pheno with traits of some of the others and also green. and then a singlular pheno that looks gelato dominant and its purple pretty much everywhere to the point that i didnt notice its coloring until it was next to all of its sisters that are straight green. Very beautiful plants and a nice display of phenotypical expressions Top dressed 2tsp bloom 2tsp microbe charge 1tsp bloom booster A Special thank you to Zamnesia and
Processing
Likes
1
Share
Week 5 purple showing , 2 slight differences in the structures on each plant . Had both these phenotypes before
Likes
27
Share
@Dunk_Junk
Follow
Wow she's grown 24cm this week. I'm getting excited about her! I think she's looking to be a fab plant. Doing well in her fabric pot.
Likes
3
Share
@djsalin
Follow
Haven't touched much of anything, and the roots are starting to find their way out of the basket.
Likes
7
Share
@HookahCli
Follow
La Kosher Kush de la derecha abajo, tiene las hojas más finas y es más alta, las otras 3 Kosher Kush tienen las hojas más gruesas, la del medio abajo tiene un poco de color morado en el apical. Las Kandy Kush se parecen bastante, un poco más altas la de los laterales, pero se las ve bastante bien. Las Lemon Krystal son pequeñas y no se nota mucho, pero la del centro izquierda, tiene las hojas un poco más anchas. Si os fijáis en la de abajo izquierda, tiene una planta pequeñita al lado que es la anterior 1024 que se quedo una ahí en la tierra y la otra la saqué y la puse en una maceta de cactus, que también ha germinado, pero les ha costado, por eso están fuera y tenemos las Lemon Krystal, en el próximo trasplante, la sacare y la pondré en alguna maceta por el patio. Se han trasplantado a maceta de 6L.