The Grow Awards 2026 🏆 


Likes
Comments
Share
@Finniegrow
Follow
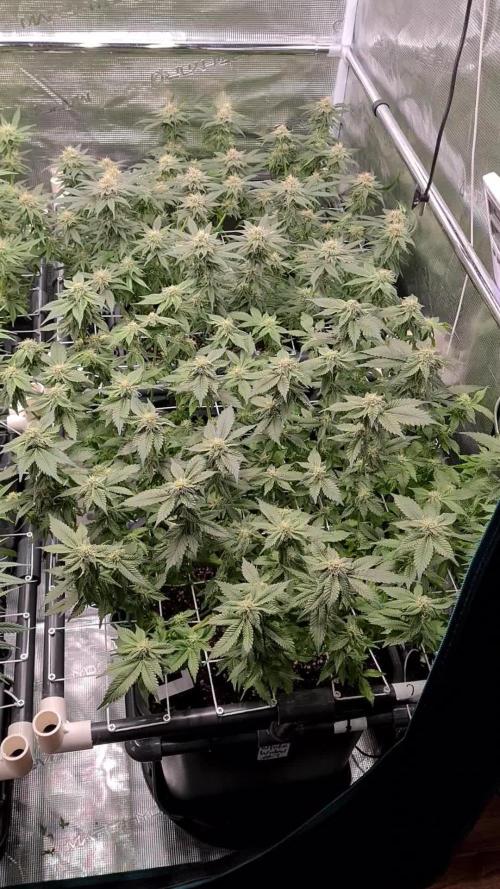
Vegetation: To keep temperature and moisture on optimal levels at around 23°C / 65% I'm using two mechanical timers.
- 24/7 on: Fans and water pumps (+Ventilation after 3.11.)
- Timer 1: Lights and Humidifier
18h on / 6h off
- Timer 2 (BROKEN 3.11.): Ventilation
18h (15min on / 15min off) / 6h off
NOTES:
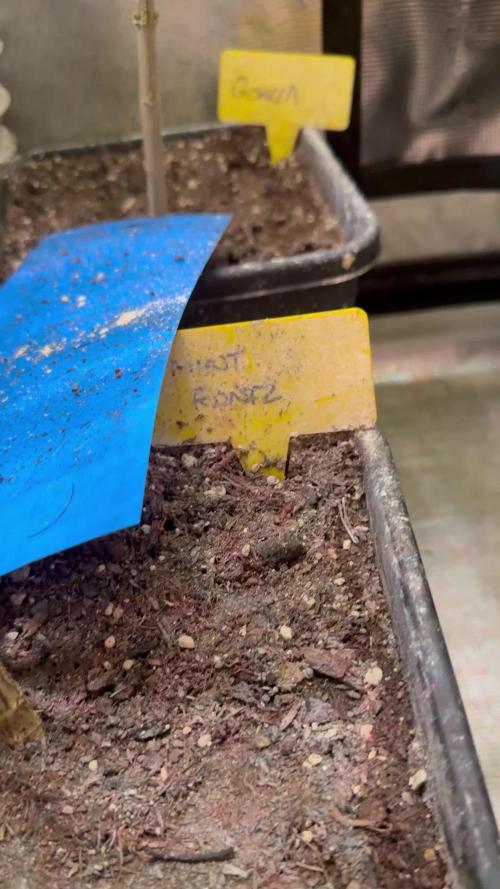
Everything looks good and the roots have appeared from almost every (11/13) rock-wool cube.
From now on I'll mostly water the plants from bottom by adding the wanted amount of nutrient solution on a plate, and then placing the plant on top of for ~15seconds
This week I'm also starting to prepare the hydroponic systems (2x NFT-GT90, and 1x EBB-flow I think) and stronger nutrient solution since my plants are becoming ready to be transferred. Spreader-mat is the base of my plants when I have transferred them in to the hydroponic systems. DO NOT place more than one layer of the spreader-mat as it is not meant to be used like that! As you're cutting the mat for NFT's, be aware to have some extra for your peace to reach nutrient solution below the tray. That way you won't get noise from water dropping when systems are turned on.
Day 15 (1.11.)
Day 16 (2.11.)
First watering with a bit stronger nutrient-solution (~ EC 0,6 / pH 5,9) than before, starting with 50ml/plant and watering once from above. Slowly increasing EC to 0,8.
I cleaned and assembled 2 out of 3 hydroponic-systems which I'm going to use. I'll do the same also to the last system, but it currently has my plants on top of it so I'm going to do it later.
I want to make sure that my plants have built healthy and big enough root system before transplanting to hydroponics. I'm waiting for the rock-wool cubes to be bursting of roots so they won't drown on their first day in hydro. Also, as the plants are bigger before the transplant, I'm able to fill my nutrient-solution tanks full with correct strength nutrient-solution for Mid-Vegetation from the start, therefore no need for that much adjusting later on.
Day 17 (3.11.)
I noticed my other timer which controls the lights had stopped working... The lights were on when they shouldn't have been, I noticed it an hour after they were supposed to turn off. I think I caught up to it early, but it may have been on for maximum of 2 days straight. No worries there since on vegetation-phase the plants don't necessarily need any sleep (Even though you should avoid quick changes like that!).
Roots have appeared from the bottom of every cube and plants are looking pretty healthy. I think they are almost ready for hydroponics.
Day 18 (4.11.)
Few plants are showing symptoms of nutrient deficiences or some sort of sickness, not certain what exactly. I'll be keeping an eye on it. I'll be transferring in to hydroponic systems in maybe a week, so I don't want to stress my plants more than what's necessary.
Increased my solution strength to 0,9 EC with a bit more Cal-Mag than before, and watered the plants for 50-150ml each plant depending on weight and size. I'll be slowly increasing the strength by around 50% during upcoming week. Thanks for tips!
Day 19 (5.11.)
Day 20 (6.11.)
Plants are recovering well from deficiences and I just transferred all of them to hydroponics. I don't have the water pumps on for 24/7 just yet, at this point I water them a couple times a day by keeping the pumps on for somewhere around 15min at a time. Lights are now set to 60% and I also added a tower fan to circulate the air and shake the plants.
Day 21 (7.11.)
Lights are now set to 70% since the Led's and plants are spreaded wider in the tent than before. Distance to plants stays the same at 75cm.

Likes
9
Share


Likes
34
Share
@Grey_Wolf
Follow
Original Sensible seeds GIRL SCOUT COOKIES update 6th Jan 2020
Welcome back to my Original sensible seed sponsored grow . The girl scout cookies plant has now had 9 weeks of veg and is really starting to look better and capable of
producing atleast a couple of ounces for Me to try. Still only feeding water as that is all she needs until flowering starts next month.
Thanks once again for looking in on my diary and I will be back next week with another update 👍

Likes
7
Share
@JBudsCanada
Follow
Going good this week. Really packing on the buds now.
Added some more nutrients that I now have kicking around for a hydro grow. Plant 6 was transplanted last week as I thought it may have been having some issues. I pulled off all the yellow leafs and it seems to be alright. Just glad it’s still kicking.
Question:
Should I be pulling leaves off my other plants? There’s a few covering up lower bud sites but I’m unsure how it’ll effect my auto flowers.
Question:
Wondering when to harvest these bad boys. Trichomes don’t appear amber yet. Website for the seeds say 70-90 days seed to harvest. I’m wondering if I can push it to 90 days (13 weeks(ish)) even if they appear ready at 70. Will that effect my harvest?

Likes
Comments
Share


Processing
Likes
29
Share
@RushGreen
Follow
Sayer le grand jour et arriver, nous passons enfin en floraison.
Changement photo-période : 19/10
(Croissance J37) (Pré-Floraison J0)
On va laisser faire la nature, le stretch va bien renforcer nos petite et espérons pour cette première récolte une réussite absolue à la hauteur de nos attentes.
Arrosage 1L : 19/10
Pulvérisations
(Vita Race + Sugar Crystal) : 19/10


Processing
Likes
10
Share
@BodyByVio
Follow
After 21 days in turbo cloner I transplanted 4 Sweet seeds Green Poison into 1 gallon plastic pots filled with Cana coco. Few days later I transplanted another 4 clones into DWC!
Stay tuned!
Coco feed at 700ppm
Dwc feed at 480ppm

Likes
25
Share
@Jessemon1106
Follow
Day 141 from start and this will be the last week in flower. Buds have gotten so heavy they split the stem. So I had to repair her because of that. But it looks like i will have a great yield from this one. I have 3 clones off her doing good. I definitely am proud of her and can't wait to get her cured.
Thanks everyone and I'll update some after harvest then drying.


Likes
15
Share
@BLAZED
Follow
Week 14 (28-4 to 4-5)
28-4
Temps: 19.5 to 24.9 degrees
Humidity: 53% to 59%
Watering: Both 1000 ml. EC: 1.6
29-4
Temps: 20.1 to 24.9 degrees
Humidity: 55% to 61%
ring: Both 1000 ml. EC: 0.4
30-4
Temps: 19.6 to 24.5 degrees
Humidity: 54% to 60%
Watering: Both 1000 ml. EC: 1.6
1-5
Temps: 18.9 to 27.1 degrees
Humidity: 52% to 62%
Watering: Both 1000 ml. EC: 0.4
The plants are a bit bushy again, so i did a last defoliation today.
Leaves removed #1: 72gr #2: 59gr.
2-5
Temps: 20.8 to 26.1 degrees
Humidity: 50% to 61%
Watering: Both 1000 ml. EC: 1.6
3-5
Temps: 18.5 to 23.4 degrees
Humidity: 49% to 61%
Light set from 65% to 70% strength.
4-5
Temps: 18.5 to 23.5 degrees
Humidity: 50% to 58%
Watering: Both 1000 ml. EC: 0.4

Likes
18
Share
@Canna96
Follow
Hey now, hope everyone is having a great weekend. Not much to report on the Sundae Driver, she smells amazing, just kidding. I am feeding her with a syringe just plain water every 2-3 days and just lightly around the edge of the solo cup. I then go by weight of the cup to avoid over feeding. I will hopefully transplant to a solo cup in 7-10 days if all goes well.
This is my first run with Royal Queen Seeds Genetics but I have smoked the hell out of some sundae driver genetics in the past and they were some of the best tasting nugs you could ever ask for. I plan to build a mainline and flip to 12/12 as soon as all 5 mainlines are built, hopefully around week 7. This Medic Grow light is perfect for a 5X5, and the AC Infinity 8" exhaust does an excellent job of keeping the tent cool. I will set up an auto feeding system which consists of a reservoir, and some 1/2" tubing that is hooked to a submersible pump in the reservoir and set to feed for 1 minute every 6 hours through halo feeders connected to ball valves to adjust the flow. The runoff then flows via gravity to a 5 gallon bucket in the tent with a shallow pan condensate pump that pumps the runoff out of the tent when it gets above 3 inches to another reservoir. I have been growing fruit and vegetables for over 40 years and I have recently switched to high frequency fertigation in Coco Coir for my tomatoes as well, as I believe this growth medium combined with this technique is the safest, most environment friendly, and foolproof method of getting monster yields no matter what crop you are growing, and I have seen massive results in both cannabis and tomatoes. My goal is to have these ladies transplanted by around day 14-17, and have the first toppings done within 48 hours or so of transplant. I hope everyone has a safe and peaceful weekend.
Thanks for stopping by, Stay Safe and Blaze On!!! 💪
Website: https://medicgrow.com/
https://growdiaries.com/grower/medicgrowled


Likes
11
Share
@SintrexGrow
Follow
Plant is showing fast growing and responded well to my diy setup and diy lights 💪

Likes
71
Share
@DogDoctorOfficial
Follow
Week 11 Flower Report for the Anesia Run 🌸🌿
Hey Grow Diaries fam! 🌱✨
Welcome back to another exciting update on our Anesia run. We’re deep into Week 11 of flower, and let me tell you, the garden is absolutely thriving! The girls are showcasing their full potential, and the canopy is a vibrant sea of frosty buds. Grab a cup of your favorite brew, sit back, and let’s dive into this week’s report filled with fun facts, details, and a sprinkle of positivity! 🌟🌸
Nutrient Update 🌿🔬
This week, we’ve continued with our nutrient regimen, making a few key adjustments to ensure the plants are getting everything they need to produce those sticky, resinous buds. Our mix includes:
• Regulator: Keeping the plants’ stress levels in check and ensuring optimal growth.
• CalMag: Providing essential calcium and magnesium for strong cell walls and overall plant health.
• P-Boost: Enhancing flower development and increasing bud size.
• K: Introducing potassium to boost bud density and improve overall flower quality.
• Top Booster: Supporting the final push in flower production, ensuring those buds are as big and healthy as possible.
Our TDS has been adjusted to 500, with a pH of 6.0, keeping the environment perfect for nutrient uptake. 🌿💧
Environmental Control 🌞🌡️
Temperatures have been steady at 21°C, creating the ideal environment for our girls. Consistency is key in these final stages, as we want to avoid any stress that could affect bud development. 🌡️
Fun Facts & Details 🌸✨
1. Trichome Wonderland: The trichomes on these ladies are sparkling like diamonds. Did you know that trichomes are the plant’s way of protecting themselves from UV rays and pests? They also contain the highest concentration of cannabinoids, making them the heart of the plant’s potency.
2. Pistil Party: The pistils are starting to turn a beautiful amber, signaling that harvest time is approaching. Fun fact: pistils are the female part of the flower and are responsible for catching pollen to produce seeds. In our case, no seeds, just beautiful, potent buds!
3. Aroma Explosion: The terpene profile is off the charts. Walking into the grow room is like stepping into a fragrant garden. Each strain has its unique scent, from the sweet and fruity notes to the pungent and earthy undertones. Did you know terpenes not only provide aroma but also enhance the effects of cannabinoids through the entourage effect?
4. Leaf Yellowing: Some of the lower leaves are beginning to yellow and fall off. This is perfectly normal as the plant focuses its energy on bud production. It’s a sign that our girls are nearing the end of their life cycle, putting all their effort into flowering.
5. Bud Density: The buds are getting denser by the day. Proper potassium levels have been crucial in achieving this. Dense buds mean more weight and better quality, making all our efforts worthwhile.
Special Shoutouts 🌟❤️
A massive thank you to our amazing community and all the support we get on Grow Diaries! Your comments, tips, and encouragement mean the world to us. 🌍✨
Anesia Seeds, thank you for these incredible genetics. Each plant is a masterpiece in its own right. 🌱❤️
To our sponsors Aptus Holland and Future of Grow LED, your products have been pivotal in creating this green oasis. And let’s not forget the TrolMaster for keeping our environment in check.
For everyone following along on YouTube, don’t miss out on our series Welcome to the Green Oasis. This week’s episode dives deep into the latest updates, techniques, and everything you need to know about growing these beautiful plants. 🎥🌿
Invitation 🌟
Don’t forget to check out our YouTube channel for more detailed insights and exclusive content. Let’s grow together and spread the positivity! 🌿🌞
Conclusion 🌸✨
Week 11 has been a journey of growth, learning, and joy. The girls are almost ready to reward us for our care and patience. Stay tuned for the final stages as we approach harvest, and as always, keep growing and glowing! 🌟🌱
Thank you all for being part of this journey. Until next time, happy growing! 🌿❤️
#GrowDiaries #AnesiaSeeds #AptusHolland #FutureOfGrowLED #TrolMaster #CannabisCommunity #HomeGrow #CannabisCultivation #PositiveVibes #KeepGrowing #WelcomeToTheGreenOasis #Episode11
Apricot Oreoz = AO
Zoomiez = Z
Future#1 = F
https://anesiaseeds.com/
Plant nutrition - Aptus Holland - https://aptus-holland.com
LED Photons - Future of Grow - https://www.thefuturofgrow.com/
Controls - Trol Master - https://www.trolmaster.eu/
Watering - Autopot - https://autopot.co.uk/
Tent - Mars Hydro - https://marshydro.eu/
Love and attention - Me, myself and i
As always thank you all for stopping by, for the love and for it all , this journey of mine wold just not be the same without you guys, the love and support is very much appreciated and i fell honored and blessed with you all in my life, With true love comes happiness. Always believe in your self and always do things expecting nothing and with an open heart , be a giver and the universe will give back to you in ways you could not even imagine so
More info, the ocasional give-away and exclusive updates from all my adventures can be found - links in the profile description
Friendly reminder all you see here is pure research and for educational purposes only
Growers Love To you All

Likes
14
Share
@Hazecat_420
Follow
Hermosos colores, exquisito olor afrutado, resinosas, las frutas engordan con normalidad. Terminará de buena manera este cultivo.
Likes
10
Share
@sunshinegroww
Follow
She is definitely came back to life and now under 12/12 so far looking very healthy indeed
Likes
22
Share
@Damonkey
Follow
Was a really nice plant to grow, though odd from day 1. Very strange leaf formations from the start and very slow during vegetation but still, very beautiful to look at, kind of weird awesome. The taste and smell are outstanding. Without a doubt a true beauty, this part of the harvest will be smoked alone and secretly, it just really is too good to share😂


Processing
Likes
59
Share
@Silverback_Guerilla
Follow
TUESDAY 1/15:
MuthaPHucking PH fluctuations again!!!!! 😖
I calibrate my 2 cheapo- ph pens everymotherPHucking day and STILL it happens....PHuck the dumb shit....I just ordered a $100+ Apera tester.👈
I watered everybody with about a half-gallon of water, plus heavy boomerang and calimagic, some bud candy, some terpinator, some kelp me kelp you, some armor silica, and the bloomers got their first dose of open sesame..no big bloom or grow big for anyone.
WEDNESDAY:
I foliar fed them a few times and calibrated my new ph tester.
The big C4 is branching like crazy...the little one is flowering now..hopefully she stretches really well too.
All 3 WW's have started flowering. I FIM'd the last 2 WW's today, so everybody's done.
Debbie Diesel is looking strong..big thick main stalk. The Northern Lights is also showing me some vertical growth now. All 3 Candy Canes are budding up nicely.👍
FRIDAY:
I fed everybody about a half-gallon and foliar fed them a couple of times.
SATURDAY:
Foliar fed a few times
The Candy Canes have stretched so much that I may need to raise my lights a little..they are about 16 inches from the tops now....monitoring...
SUNDAY:
Foliar fed a few times
Still no sign of light burn on the CC's, so I'm leaving the lights where they are.
MONDAY:
Still moist..will water tomorrow with my new pump-driven system👍


