
Likes
Comments
Share


@BadGrower
Follow
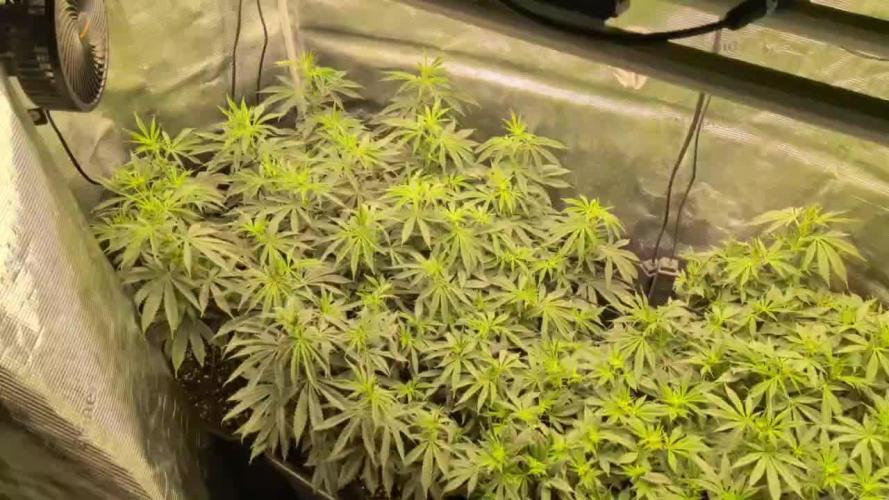
As we venture into week one of the flowering stage, the living soil within our garden beds has already been enriched with carefully selected amendments, laying a robust foundation for our plants to thrive. Living soil is not a static entity; it's a dynamic, breathing ecosystem that needs as much care and attention as the plants it supports. At this crucial juncture, our primary responsibility is to maintain the delicate balance of this ecosystem. Watering practices continue to play a pivotal role—moisture levels are kept at an optimal level, allowing the soil to dry between watering sessions, thereby preventing saturation and promoting oxygen uptake to the roots. Such measures are not merely about quenching the plants' thirst but also about preserving the intricate web of life that exists within every handful of soil.
This web of life has indeed become more intricate with a massive explosion of predator mites that have become an integral part of our soil's community. These tiny but formidable allies are voracious predators of various pests that can threaten our plants. Their increased activity is not just a sign of a healthy ecosystem but also a natural form of pest management that reduces the need for chemical interventions. These mites, along with a host of other microorganisms, play a critical role in nutrient cycling and disease suppression, further enhancing the resilience of the plants during their flowering phase. The very life of the soil is now visibly bustling, indicating a thriving micro-ecosystem that contributes to the health of our plants.
Above and beyond these microscopic interactions, the larger creatures in our ecosystem—the worms—have begun their vital work. The 'chop and drop' cover crops and clover that were introduced earlier have now become fodder for these earthworkers. As they consume this organic matter, they are not just feeding themselves but are also processing it into rich castings, a natural fertilizer full of available nutrients for the plants. This activity does not just nourish; it aerates the soil, creating spaces for roots to expand and for air to circulate. The sight of such activity is evidence of a living soil that is not just a growing medium but a thriving ecosystem in its own right. The soil, with all its biodiversity, is an orchestra where every organism, from the tiniest mite to the diligent earthworm, plays a critical part in the symphony of growth that supports our flowering plants. As each day passes, this ecosystem draws closer to perfect harmony, bolstering the plants in their quest to bloom with vitality.

Likes
10
Share

@Thedibber
Follow
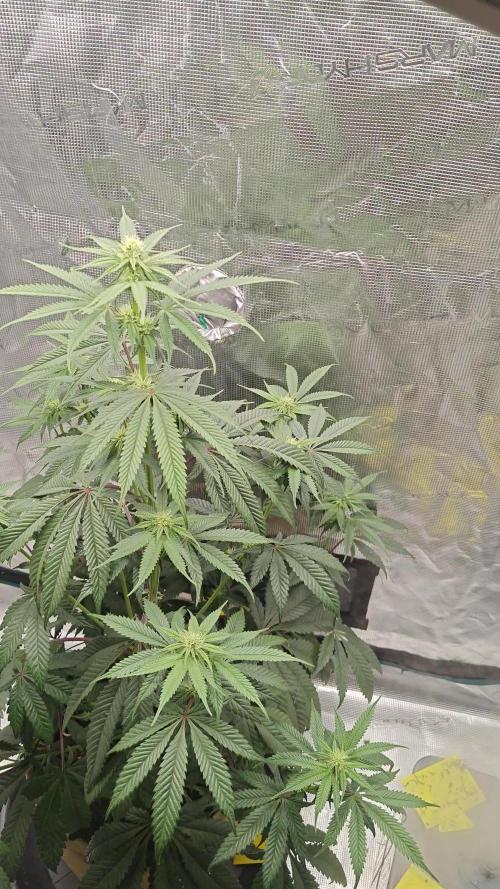
Week 2 starts the 3 plants on the right are the Blood moon gelato. Jungle inc 😅
Likes
3
Share


@HookahCli
Follow
d68
Llevamos todo el mes de abril con lluvias y las plantas no reciben las horas de sol que quieren, por desgracia, la planta de LST ha sacado unos pistilos y para que no continúe con la floración le tendré que hacer una poda apical.
El resto de plantas parece estar bien respecto a esto, pero voy a estar observando a Mimosa Evo, puede que le pase lo mismo que a la LSD.
d69
Le he hecho la poda apical por la mañana a la LSD.
He realizado poda apical a Mimosa Evo.
He regado con 8L de agua a estas 4 plantas y 2 más, he utilizado la mezcla de arriba.
d71
Parece que crecen bien, todavía estoy dudoso porque LSD parrce que quiere sacar flores, la dejare una semana a ver como progresa, Meganuska necesita agua, esta muy liviana la maceta será la única que se riege hasta la proxima semana.
Estan empezando a llegar los insectos, la semana que viene empezare con los preventivos.


Likes
77
Share


@biggreens420
Follow
fat banana is starting to frost and thicken branches are nice and thick and stacked quite well to say I was unable to spread as much as the purple queen she's drinking a good 3l before any runoff and is one of the thirstiest strains iv grown so far iv been removing odd leaves here and there to try keep a decent penetration shes going to have a mini flush and a few days water and start back on nutes thanks for reading happy growing guys

Likes
18
Share


@naturalmedicineman
Follow
Actually top dressed with DTE about a week ago before flip. Also top dressed with a few tbsp of worm castings from the back yard.

Likes
47
Share


@ChachoGreenCrown
Follow
Llegamos al final! Ya con todo seco vamos a ir catando cada variedad a su debido tiempo. Esta cepa concretamente ha salido brutal! Unos niveles de thc superiores...


Likes
7
Share


@WeedleyScott
Follow
Die Pflanzen erholen sich sichtlich von den Strapazen der letzten Woche und zeigen nun eine gesunde Farbe sowie zahlreiche neue Blätter.. Ich gieße Aktuell mit 1L Wasser pro Pflanze und treibe sie nach Außen via Low Stress. Wenn diese am Rand sind lasse ich die Pflanzen an höhe gewinnen um eine schöne Krone zu erhalten.

Likes
Comments
Share


Likes
34
Share


@ILoVeThiSpLaNt
Follow
Cime dure come cemento ricoperte di zucchero. Profilo terpenico fruttato con tocchi zkittlez. Che dire?Non vedo l'ora di fumare anche questa 😊


Processing
Likes
2
Share


@Cannibalgardens
Follow
Well we are going to week 8 and this is the first of the many weeks of flowering that has started .. The girl is very stinky and she smells almost citrus like .. The male flower is a great healthy looking baby 👶 I'm excited to get some pollen off of her . Keep your eyes on this one
Likes
6
Share


@Staffedition
Follow
Привет друзья.
Наше знакомства продолжается с новым сортом автоцветущих растений от Smail_Seeds сорт TROPICANNA POISONZKITTLEZ XL AUTO F1 reg.
Сегодня растению 83 дня.
Растение очень хорошо развилось, ни каких сбоев в генетике не наблюдалось за весь цикл.
Шишки наливаются очень хорошо😀
Так же стрессую, что бы получить пыльцу.
Скоро будут феминизированные растения.
Сорт выводим сами.
Смотри мой профиль, у нас всегда есть что то интересное.
Не забудь поставить лайк❤️, если понравилась как прошла неделя
И читайте наш TELEGRAM: https://t.me/smail_seeds
#Smail_Seeds 😀
Likes
13
Share


@Johnny420_pt
Follow
Very very happy with this strain, adapting well to LST, starting to smell good 😜
Likes
39
Share


@GrowWiththeBro
Follow
Start of week 3.
Feeding a little more consistently. 1gal of the above every 3 days.


Likes
2
Share


@HornGanjaman
Follow
Mutantes primeiras aparições.
Foram 18 sementes freak, 16 drunken e
4 Cherry bastard.

Likes
33
Share


@iLoveGoodWeed
Follow
She is very not tall but bushy did some defoliation and hopefully she will start stretching this week
Likes
278
Share


@Metatronix
Follow
A big hello to all the cannabis growing gardeners...and all the other visitors that came across my grow journal.
This week was very relaxing, i add only PH+ (again ;), Calmag and PowerZyme.
----------------------------------------------------------------------------------
Now cannabis smell is overpowering in my grow room I can finally write something about Spider Farmers 6-Inch Inline Fan with Smart Controller and Carbon Filter :)
As my grow room gets really stinky at times i always invest in a top shelf carbon filter almost twice the size of the one provided by Spider Farmer, to my shock Spider Farmer carbon filter absorbs the smells wonderfully well.
No smell leaks and that just when the fan is running at 5 out of 10 levels of output. The smart controller is something completely new to me, and had a lot of fun experimenting with it during the veg and early flower, when the smell began i needed it to run full time at level 4 or 5 to rid the fragnance.
All in all the whole combo is a great deal. If you are not as keen on technology the set without the controller is awesome on it's own. But to have some extra options open, the controller at the device throws at you a ton of settings you can use to optemiase you grow enviornment.
The SE 7000 is hanged at 28 cm. over the canopy and runs at 550W.
This whole grow's main sponsor is Spider Farmer. You can easily obtain all the great grow equipment we use at: spider-farmer.com
A big thank you to Jessie and the whole Spider Farmer crew for supporting me with the newest technological advancements in horticulture. Thanks to them what i do here is possible.
Thank you SeedsMafia for giving me the opportunity to try out your stock.
seedsmafia.com/en/feminized-cannabis-seeds/moby-dick-feminized.html
Plagron did send us their Contest package for the Power Buds competition .
Thank you for your visit, please leave a like and hope to see you beck here in about a week.

Likes
18
Share


@BlackCousin
Follow
This strain was easy to grow.
I started out without an hygrometer. Due to delivery problems i had it very late and my girl noticed that becauce the envirement wasnt optimal for her.
She did survive that period, after that she got defoliated multiple times, and i got really rough with her sometimes and broke of some stems, and that was no problem for her.
I also had an encouter with thousands of thrips, which i had to nuke to remove them from my girl and she didnt even bother.
In veg she was a good to handle, in flower it was a little bit harder and i think she likes alot more PK at the end of her lifetime than i offered her. But thats more of a guess.
The smell matches more a cross between blueberry and lemon kush in my opinion.
The gelato part is not so noticable at the end of the road.(for me atleast)
But the blue in other hand is very dominant and strong by smell and taste.
I ended up with hardrock buds even the smaller ones, so im very happy with the outcome.
Because of my thrips invasion and usage of bioquant, i wanted to wash my buds for once to clean of all the dirt, dust, insect remains and other particles that shouldnt be in my bud.
I did the oh so underrated BUDWASH, and wauw if would deffinatly recommend it to every grower with just a few plants.
It really cleans your buds without effecting your potency, terps and overall buds.
I also noticed that all buds dried at the same rate cause of the evenly spead moisture i guess.
I ended up with 48.34 grams of hard and dry buds
I took about 10 grams and turned it into superdelicious rosin because i also love to dab 😍
Thank you growdiaries for this amazing platform.
I wanne give a big thumbs up to Barney's Farm for this strain, Keep up the good work.
Also a big thumbs up and thanks to all the growers and bud lover for looking @ my diary and especially if you liked it, i appreciate it very much.
It was a great journey and experience for me.
Thanks again and till next time.
And dont forget, Always Keep On Growing my friends, Peace. 😎✌️🏾

Processing
Likes
3
Share


@Ogbangbang2981
Follow
week 9 was a good week I watch my pollen sacks grow into beautiful pods cant wait to use it plant doing pretty good health and strong

Likes
5
Share


@encrypted33
Follow
Unfortunately there were problems with the GCA this week and the CCA also showed slight problems. The problem is a severe magnesium deficiency because my water unfortunately has a ratio of 5.25:1 and this was now very clear. I have now set a ration of 3:1 water with bitter salt and CalMag and hope that the plants do not show any further problems