The Grow Awards 2026 🏆 


Likes
Comments
Share
@Insaniac_0
Follow
All feeds with nutes use either a whole ratio or combination of "Veg Mix" and "Bloom Mix"concentrates DILUTED in water until a total ppm of add in is reached using a (Total Dissolved Solids)TDS Meter measured in PPM (parts per million). The "Veg Mix" concentrate will eventually be added in smaller ratios and "Bloom Mix" concentrate what will eventually replace the "Veg Mix" concentrate entirely with the ppm and ratios listed when I feed. Veg mix recipe is on week 3. Bloom Mix recipe is on week 5.
84/14 Fun with Filters
VPD was controlled at reduced temps and RH today - RH now set to 55% max and Temps are 75F at max Over night allowed down to 67F when lights go out. Lights were good and same as yesterday with some light LST PPFD at 750 down to 550. I used 20 minutes of UV and 1 hr of IR with 15 before and after main lights on/off. She's now about 25" tall and 35" wide.
Also took some black back and shadow pics for fun (no filters or sharpen only)
Day 85/15
Feed Day I gave 2 gallons of de-chlorinated tap combined with 25:75 Veg/Bloom mix total 600ppm and a ph of 6.4. Foliar sprayed some on the outer leaves and left the tent door open to help dry them. (took like 15 minutes with the fans.) top soil ph checked at 6.22ph and run off was at 5.74 with 1580ppm
Lights at a range of 750 to 500 Ran 25 minutes of UV and the standard 1hr IR with 15/15 before and after lights on/off and 30/30 at that time.
VPD was easy to manage with the doors open and then the fan seemed to have to work more today but just more often and not high fan.
Day 86/16
Humidity was high at 60%RH for most of the day, the ILV was kicking on throughout the day and I have two humidifiers going on high.
Temps on the other hand was controlled at about 74F.
Tips carried a little burn on them today, some all over which makes me think nute burn because ppfd was 550 to 750 as it has been for a few days now and there are tips on leaves with little direct light showing burn as well. Will continue to monitor as well.
IR and UV are set on timers and I screwed up with mine today. I was supposed to change the setting and forgot (time change screwed me up and I thought I did it when I changed timers that needed correction) until it was too late and ended up giving her 30 minutes of IR and 1 hour of UV... will have to check/monitor for effects tomorrow. The good news is that she's had a little over two weeks with UV so maybe not so bad. (fingers crossed it doesnt stress her too much)
Day 87/17
Again, humidity was high at 60%RH for most of the day, the ILV was kicking on throughout the day and I have two de-humidifiers going on high. Temps on the other hand was controlled at about 74F. If I open the tent for a while I can get the humidity down by about another 5% so tomorrow I plan to leave it open after I feed again.
Took some light burn from yesterday's extended UV exposure, but read that it's not bad to take on some stress from UV in flower, especially if you still have time to recover. The pros suggest that you can stress her to grow defensive systems that may create thicker/stickier leaves and flowers with more terpene production. The cons however suggest that it could stress too much and stunt the growth or in extreme/sudden cases, cause her to herm. (thus why they say in mid flower is best if you plan to stress with UV) So it is what it is. I will monitor the leaves that took damage and likely remove them this week when I defoliate schwazz style.
I still resumed the schedule of increasing UV as planned but ahead a few days now so 45minutes of UV and 1 hr IR with 15/15 before and after main lights on/off.
Day 88/18
Lots happening today.
Firstly, I found a split today... on the main stem trunk, so I used superglue to seal the cracks and held together while it set. Then I wrapped it with heavy duty gorilla tape, two 1ft pieces as both a clamp and a support on the other side. I then tied each cola to the inner ring.
So then I decided that since I am here having to work on this I may as well go ahead and do the defoliation I was planning for tomorrow. Schwazze style defoliation (at least my interpretation of the method without having to buy the book, super defoliate week 1 and 3 of flower - so almost)
Then after that I also preformed heavy strength training - I broke each cola right under the bud sites that I left and bent her outward.
I then upped the lights ever so slightly and have a max of 850 ppfd and low of 650 ppfd now.
She had 45 minutes of UV and 1 hr of IR same routine, IR on/off at main light schedule with 15 before and after main lights.
VPD is better now that I placed another open air vent at the bottom, this one is 6 inch. I also placed the fans a little better to blow directly on the leaves left behind. Low speed for now, but as the leaves come back I plan to increase to get dancing leaves in the middle too. Temps were 74F and RH 55% with the ILV set to auto.
I plan to feed 2 gallons of 650ppm 25:75 Veg/Bloom mix. Since my last ph was really low I am going to increase the feed to 7.0ph - not sure what if anything I can do about ppm.
Day 89/19
VPD was normal with the exception of holding the tent open as I said I was going to today. Temps at 74F and RH mostly 55% with the ILV set to auto.
PPFD also checking in with the same settings/results today, 880 to about 650 ppfd. UV was set for 45 minutes midday, and IR with the same 1 hr with 15 minutes before and after main light on/off.
Water feed today with about 2.25 gallons of 7.0 ph de-chlorinated tap diluted with 25:75 ratio of veg/bloom mix (690 ppm total) watered until drip started and I got about .25 gallon runoff. Runoff measured 5.75 ph and 1630 ppm (top soil tested 4x with avg of 6.35)
Next feed will be a plain water salt flush.
Plant looked so nice a day today that I decided to take some more black back pics.
Day 90/20
VPD and PPDF were fine today with normal settings of 74F/55%RH/Auto ILV - PPFD ranged from 550 to 750 because of HST on the limbs. This will be the last stress I give her and hope it wasnt too much. Hoping this all results in a big yield and not a herm.

Processing
Likes
1
Share
@Drecstnd420
Follow
My first grow she looks sexy.this week I clipped of the top. I think I missed up a lil, I went to far down but she still looks great. She is starting to smell and is getting stronger And thicker. Any suggestions I would love to hear about them.

Likes
3
Share
@Weeder_Griffin
Follow
Started to harvest buds from the strawberry banana so that it could move to an area with lower lights due to the main breaking a few weeks ago.
The other plant Tropicana Cookies Purple is stacking flower like crazy. Dare I say near forearm size bud at harvest keeping my fingers crossed.


Likes
18
Share
@Pokan187
Follow
This week went by well, I will start checking the trichomes on the Runtz at the end of this week. It should be ready for harvest in the next 2 to 3 weeks
The G13 is still smelling like magic, looking majestic.
The GDP buds are starting to put on weight

Likes
28
Share
@Vincent11
Follow
Hi all grow buddy's.
Hopefully you all got a great week.
And nice, exiting things happening in your Grow rooms.
Another week gone in the cupboard with the RQS Organic Grow Gorilla Autoflower.
She's looking stunning. Day-36.
I am in Love 💕
She Started to form her buds slowly and nicely she's loaded with them all over.
Pistils poking out every where and we have a full canopy of bud sites.
Starting to smell slightly.
Accepted Easy Bloom booster tablets 1/4 twice this week with 1.2l water and only water 1.2L 6PH once.
I can say I haven't enjoyed an easy Grow as this RQS Organic Grow is turning out to be so far.
RQS have done amazing job on the organic fertilisers Easy Boost Organic Nutrition and Easy Combo Boosters Pack.
Congrats on that.
No other nutritions added and not any sightings of deficiency showing at this stage.
Last 10 pictures mid week update day 40 from germination
Thanks for following and good luck with your grows.
Happy Growing.
Likes
14
Share
@Greenmartini
Follow
All good this week too. The strawberry lemonade turning purple!:)) gg#4 it’s a hermy… the other plants are good! White widow xxl it’s the first to harvest…In 3 weeks…. Fxxk

Likes
17
Share
@Budophile
Follow
Day1: Tent is getting a bit crowded so I had to flip the switch and let the stretching begin! Raised the lamps about 10cm to get some more spacing between the nodes and removed a lot of the leaf mass to promote the lower branches grow. Sunset Sherbet #1 had its newest growth tips turning a little yellow and I'm not sure yet is it overdose/deficiency/heat issue or just a little pH mishap from overwatering.. gave her a little less nutrients to see how it responds. Gonna wait a little more time between next watering to let the soil dry up a little better (saw a fungus gnat flying in the tent and I don't want those f*ckers to overpopulate.)
Day3: Some training, all seems fine
Day4: Raised the lamps a bit again, not sure if the other Sunset Sherbet and now OG Kush too is suffering from mild nutrient burn or light stress
Day6: My hydrohomie fucked up the Gelato#45 cuts I gave him so I took Peyote Critical as my next mother victim. Took 12 good sized shoots from below which I would've lollipopped anyways.. Hope she wont mind since I wasn't planning on defoliating/lollipopping this soon. Planning on training at around day 10 and 20 give or take and then I'll let them grow stress-free. Stretching ain't so crazy at least yet and the canopy is staying pretty much at the same height. Next defoliation/lollipopping I think I will remove all the bindings to avoid snapping the stems. All girls are now showing at least few pistils. Tried using the blooming leds on Viparspectra for two days and the temps are staying pretty much at 28C at most but switched back to just blues since not sure if there's a bit of light stress on SS/OGK. Will switch to full power when the stretching ends.

Likes
5
Share
@CannaBossBizz
Follow
So it's week 3 of vege and it's looking good so far. Small plant big Leafs. Last week i did some topping ON her and she Looks good 💪🏽 the Future will Show US what will Happen next. Still Happy to grow it. 😄 I'm hoping for a purple Pheno 😄🙏
Likes
35
Share
@StonedandSteady
Follow
I'm Loving these #divineseeds #divineseedssquad #divineseedsbreedingcompany Genetics!💯

Likes
38
Share
@J_diaz420
Follow
Encantado de la oportunidad de crecer estás variedades, sin duda, llenaron todas mis espectativas 🍀😍🤩

Likes
2
Share
@UrbanBoer
Follow
I thought, i posted last week, but it seems like I did not click the save button, but luckily I did not delete last week’s images and videos, so I posted them and with the latest images and videos. I am honoured to be growing this strain, because my first attempt was gorilla glue but I lost it when I moved back to jozi from Limpopo… but here I am getting another stab at it, though it’s not GG#4, strains that contain the gorilla gene seem to be high THC strain, I am expecting couch potatoe high.
Likes
14
Share
@AndrewC
Follow
So this is the Tear Down week. The timing of it makes it so i will need to the harvest flag in a few days when I can weight and test the plants.
I have included the Cleaning, and Cutting and some Root Porn.
I will make the harvest post in about 4-5 days, when I can trim these plants. There is a lot of Plant here. I got way more than I was expecting. I don't have a scale that measure this amount of plant, without taking like 10 measurements and then adding them together. So I will just be posting the dry weight. I will post the wet weight as dry weight * 1.65.
Autopots: Wow, what a great product. I have been blown away by how well and how easy it was to work with them. They really did solve the watering issues. Excellent product. If you are a beginner, start with Autopots.
-= Lessons Learnt =-
- Overdrive the air to your Autopots. In my control plant, I used a small rectangle air stone (instead of a standard air dome). This lead to root rot and some other issues, it also put significantly less air into the water. The root rot, give the material for the Brown Algae to grow. Using a huge Air-disc-Air-Stone would be an excellent combo to mix in with the air dome itself. Something like this: https://www.amazon.ca/Pawfly-Diffuser-Suction-Hydroponics-Aquarium/dp/B01MY3AQ33 at the bottom and the air-dome on top of it, will be what I do with my next experiment.
- Air stone in the reservoir. I had two instances where algae grew into the res. An air stone would have helped. It would have also helped my control plant get less root rot. Given the amount that the air-domes and air sources got engulfed, having the water have more o2 in it would have only been beneficial.
- Don't grow 6 plants in a 4x4. Since my control plant was about 1/8th the size of the others, I think I could have grown 5 in the shape of a 5 (on a 6 sided dice)⚄ This placement would give a much more spaced canopy for airflow and more importantly light. The sides of some of the plants were lighter green and produced larf due to lack of light penetration.
- This tent was on 19-5 schedule. This worked out very well for this strain. After every lights on, they were in the praying position, so this strain was able to recover in that 5hrs off. If I had more seeds, I would run these again, and try 20-4. I think this strain could handle it. All for all, I think I'm going to 19-5 as my default timing. This kept up a solid DLI.
- Staring at .9EC (really .7 EC cause my water here is .2 EC) Then bumping up at .1 a week, until 1.6EC worked out VERY well. I experimented on this crop all the way up to 1.9EC, which burnt the tips of this plant. I think if I did this strain again, I would do 1.6EC until 3-4 weeks left then crank it to 1.9. It did plump them up when I went to 1.9, however it left them looking rough. Bulk was added though.
- Sticking to 6.0PH for all of veg, and 2 weeks into flower worked great. The plant had solid and consistent color and leaf shape . The plant's did get hurt, due to some issues (as noted on the weeks). I switched to 6.5 PH in the last 3-4 weeks and it helped them recover, and plump up noticeably.
-VPD. The #1 thing I focused on was VPD. I keep it .9kpa range, as best as humanly possible. It was honestly, HUGELY noticeable compared to my other grows. I know truly understand the value of properly dialed in VPD. This is the one lesson that will stick with me forever.
- Super-cropping: On the plants I give the chiropractic treatment too, had much thicker stems as much larger channel internally. I did this treatment to 4 of the 6, and the 4 that had it done has larger buds and recovered from defoliation faster.
TLDR; VPD is king. Super-cropping is worth the time. Keeping PH and EC dialed in were all wins. Autopots kick ass.
Processing
Likes
19
Share
@BudahBudz2020
Follow
Leaves are looking chunky on this one
Top or not to top ?
Day 17 Note
Watered with plane tap water
And finally Top her feel she is going to be a beast
Day 21 Notes
Repotted into a larger pot
Likes
2
Share
@GasStation420
Follow
Currently transfered into 30l bags and freedom farm antifragile super soil

Likes
119
Share
@DogDoctorOfficial
Follow
Greetings, fellow cultivators and botanical enthusiasts! Buckle up for the Week 6 Veg Report, where the saga of Jealousy unfolds with even more green grandeur. It's been an absolute thrill, a week of excitement, and a dash of horticultural finesse.
First things first, let's talk about the latest addition to the Jealousy fanfare – the installation of a Scrog net. Oh yes, my friends, we've entered the world of controlled chaos, guiding our leafy companion into a magnificent dance beneath the net. It's like creating a green tapestry of foliage, where each leaf has its own place in the botanical ballet.
This intricate web not only adds a visual spectacle to our growing sanctuary but also serves a practical purpose. It encourages the growth of an even canopy, ensuring that every bud site gets its fair share of light. It's like orchestrating a symphony of sunlight, allowing Jealousy to bask in the full glory of the grow room spotlight.
And speaking of spotlight, let's talk about a little nutrient boost I introduced to our plant banquet – CalMg. It's like giving our green diva a backstage pass to the nutrient extravaganza. Calcium and magnesium play crucial roles in plant health, contributing to cell structure, enzyme activation, and overall nutrient uptake. It's the secret sauce for ensuring our Jealousy is getting that extra touch of botanical TLC.
Now, let's dive into the art of bending and twisting. It's not a yoga class for our plant, but rather a strategic maneuver to shape and guide her growth. By gently bending and twisting the stems, we're encouraging an even distribution of energy and promoting the development of multiple bud sites. It's like teaching our green companion a choreographed routine, ensuring she takes center stage in the grand spectacle of growth.
As we revel in the green symphony of Week 6, let's extend our heartfelt thanks to Zamnesia and Plagron for being the guiding lights on this verdant journey. Their support is the cornerstone of our horticultural adventure.
A round of applause to the Grow Diaries community – your shared experiences and camaraderie continue to elevate our collective knowledge.
To my fellow contestants and growers, may your plants continue to thrive, and may the joy of cultivation be a constant companion. Here's to a week of Scrog magic, nutrient symphonies, and the artful dance of bending and twisting. Stay green, stay inspired, and keep cultivating those dreams!
As always, thank you all for stopping by, for the love and for it all. This journey of mine would just not be the same without you guys. The love and support are very much appreciated, and I feel honored and blessed with you all in my life !!!
With true love comes happiness. Always believe in yourself and always do things expecting nothing in return, with an open heart. Be a giver, and the universe will respond in ways you can’t even dream of .
Friendly reminder: all you see here is pure research and for educational purposes only.
Genetics - Jelousy @Zamnesia
Nutrients @Plagron
Light - @viparspectra P2000
Room size - 3x3 - 0,9x0,9
Likes
2
Share
@Borberad
Follow
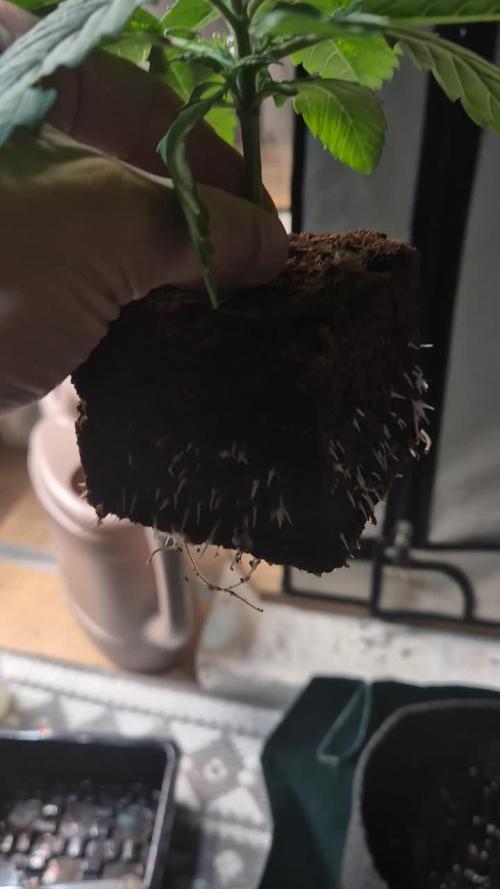
Woche 3
Das Fundament wird gelegt und Umtopfen steht an.
Der Regenbogen ist in der dritten Woche seines Lebens. Die ersten Seitentriebie bilden sich und die Pflanze ist gesund gewachsen mitlerweile hat sie 3 Nodien. Und ist über ihren Cube hinausgewachsen und hat diesen kräftig durchwurzelt. Somit wird jetzt in den 3l Stofftopf umgepflanzt. Danach gibt es zum ersten Mal die standart Düngedosis, angepasst an das Pflanzenbild 2,5 -5ml Hesi TNT für ordentlich Nährstoffe im Wachstum, 5 ml/l Hesi Root für eine kräftige Wurzelentwicklung und 2 ml/l Calmag, um unser Osmosewasser aufzuhärten. Der DLI wurde auf im Laufe der Woche auf 40 erhöht.
* Zustand der Pflanze: Die ersten "echten" Blätter sind vollständig entwickelt und wie durch die EasyCubes zeigt sich wie eine kräftige Wurzelbildung.
* Wichtige Ereignisse: Beginn der Nährstoffgabe. Anhebung des DLI. Umtopfen in 3L Stofftopf
* Düngung & Messwerte:
* Gießwasser: pH ca. 6,0. Leitwert ca.1,4 - 2 S.
* Drain: Wir messen sporadisch, um die Abweichung von +/- 500 S einzuhalten.
* Anpassungen: Wir sind überrascht wie gut sich die Pflannze im Easys Plug System entwickelt hat.


Likes
24
Share
@ganzigunnu
Follow
finally managed to heat the tent everything is good. i use 240 watt for bottom heating and 300 watt for blowing hot air inside. it's not a lot but lights spend much less.


Processing
Likes
10
Share
@YAKDADDYDWC
Follow
Had major problems with temps rising this week was forced to pull out the aircon..... gona cost a fortune!!! To top it off i got gnats but 8 think im on top of it geez i have had some troubles from enviroment because its summer and i would have better results in winter
