
Likes
Comments
Share


@Chase13852
Follow
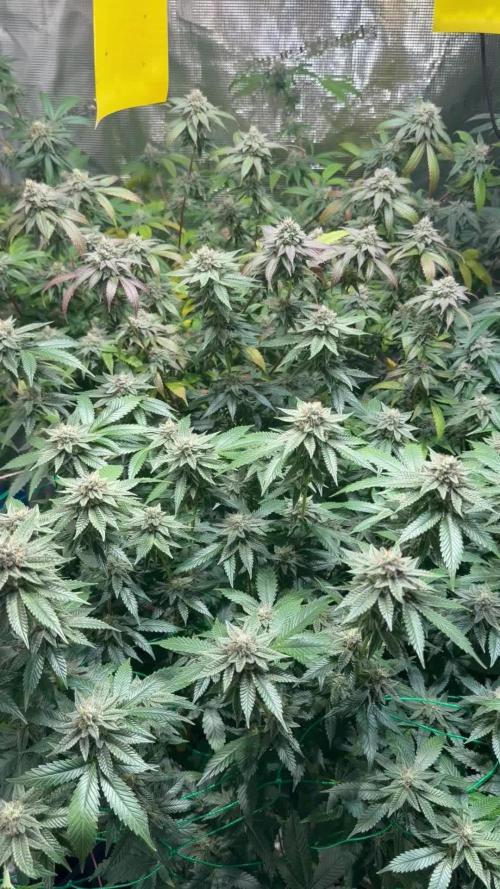
Been slacking at updating this. Putting in a lot of OT at work and the diary has fallen to the wayside for a bit. Had to put the trellis netting up. The two Lemon Haze plants are getting chunky and falling over under their own weight. Looks like they only have a couple weeks left where as the two Grandaddy Purp on the left side look more like they have 3 to 4 more to go. Hard to tell as they don't seem to be swelling up as much as the other two. Getting so close I can SMELLLLL IT!!

Likes
14
Share


@MG2009
Follow
04/23/2022
I think lemon OG is done
Give her a few days more, Biscotti Skunk, grape skunk about 2 -3 weeks out, the Biscotti Skunk has very strong camphor mothballs smell. Not quite sure what to think of her hope buds fill out well. Grape Skunk is doing a bit better but lemon og has performed best in my specific micro climate, others have more flowering to.
If I'm going 63 days in flower it might as well be a Sativa variety.

Likes
5
Share


@GanjaByDesign
Follow
Was away from them at end for a long time. Still awarded me with nice quality buds.

Likes
86
Share


@DogDoctorOfficial
Follow
Greetings, fellow cultivators and green enthusiasts! Week 5 of our Apolo F1's journey has unfolded with the promise of blooms as she gracefully transitions into the pre-flower/flower/late veg phase. Join me as we continue this botanical saga, witnessing the emergence of blossoms, the transformation into a lush green bush, and the strategic shift from last veg mix water to the imminent flower mix.
The botanical ballet of bending and shaping persists, guiding our Apolo F1 into a beautifully orchestrated dance of controlled chaos. Every leaf and branch is a stroke on the canvas of growth, creating a masterpiece that reflects both elegance and efficiency. The green virtuoso is not just growing; she's evolving into a captivating bush of vitality.
As she enters the pre-flower/flower/late veg phase, the first signs of blooms are beginning to grace our Apolo F1. It's like witnessing the unveiling of nature's artistry, as tiny buds emerge, promising a bounty of blossoms in the weeks to come. The anticipation is as exciting as the first notes of a symphony!
The bold decision to top our flourishing Apolo F1 is revealing its impact. Multiple colas are forming, creating a lush and bushy canopy. This strategic haircut is paying dividends as our green virtuoso prepares to showcase a rich and complex performance. It's a testament to the power of calculated risks in the art of cultivation.
Amidst the botanical crescendo, a shift in the aqueous symphony is underway. This week marks the transition from the last veg mix water to the imminent flower mix. The nutrient-rich serenade continues, with a TDS of 390 ppm and a pH of 6.0, ensuring our Apolo F1 receives the specific nourishment needed for the impending floral spectacle.
With each passing day, the moon on harvest day beckons. Our green companion is on the trajectory to a bountiful harvest, and this journey is not just hers; it's a celebration for flowering girls around the world. Each bud, a testament to the collective magic of cultivation.
As we marvel at the unfolding blooms and the lush greenery, a heartfelt thank you to Aptus Holland for being the architects of this nutrient symphony, and to Royal Queen Seeds for the botanical star of our green opera.
Join me in the next chapter of our Apolo F1 Mission Diary, where we'll witness the crescendo of blossoms and the anticipation of the moonlit harvest. Until then, may your gardens flourish, and your green endeavors be ever abundant!
As always thank you all for stopping by and for supporting me on this journey, i am super passion about growing and fell blessed to have you all with me on this new journey

Likes
15
Share


@Trueorganics84
Follow
I love this girl. She grows tall and fast. Super easy grow so far. Just starting to lst her a little bit more.
Posted 4 videos on how I make my tea. I use this When I start seeing hairs until the last 2 weeks.
Then I flush
Just a compost tea you see here.


Likes
8
Share


@FrostyAutoflowersTV
Follow
I harvested 2 of the 5 plants on day 71. The other 3 plants got harvested on day 80 and are in the drying process. My inline fan is running on 25% and I got a fan running on the lowest setting on the bottom of the tent, so I doesnt blow on the buds directly.


Likes
84
Share


@Mrs_Larimar
Follow
May, 18th
Amazing, thats the word that hits this Lady
No big talking , just doing AMAZING!!!
Started with additional Bloom Nutrients today

Likes
8
Share


@Ieiogrow94
Follow
Eccoci di nuovo qui!!!
Super eccitato per questa nuova collab con Anesia Seeds, team davvero al top, che mi ha dato l’opportunità di testare questa nuova genetica e di condividere i progressi con tutti voi!!!
Come sempre partiamo nei bicchieri per poi travasare.. Questa volta verrà svolto tutto sotto la Lumatek Zeus 465 ProC, mi aspetto molto da questo ciclo!!
Settimana pazzesca!!!!
Piante davvero incredibili!!!
Grazie a tutti per il supporto ❤️🍀🔥


Likes
21
Share


@Rollex420
Follow
Dos Si Dos # 33 ready for drying in the jar, honest weight (53,5g) seeing the structure which was very small I would have expected something less..
but I am very satisfied. the quality of this weed is absolutely at the top, the taste is very well defined.. when smoked it makes your nose tingle,flavor it is mainly pure lemon with a hint of mint in it. even the strong smell induces an entire room in a few seconds without even smoking it yet.
I also collected a 0.4g of scissor hash which turned out very well.
it is my favorite in this crop because it surprised me in everything both for its unique terpene profile and for its yield that I never expected given its size compared to wedding cakes.
the total weight therefore of all three plants is (135.5g) and a total trim of (44.9g)
that according to the calculations even of these crops I reached (1g/watt) precisely. (And im not a pro)
I am certainly satisfied with that. 🙌🏻💚


Likes
5
Share


@Ninjabuds
Follow
7 archive seeds are legit super dense tricomb production like nothing I've seen b4. I would NEVER BUY SEEDS FROM ARCHIVESEEDBANK.COM.... they have great genetics but there customer service is garbage. This summer I spent 50 on these 3 seeds and 125 on a 12 pack of reg seeds of a diff strain the reg seeds didn't grow at all and archive never responded they sold me old ass seeds and stole my 125$ I'm happy I already got 32 seeds from the crappy plant of the 3 that I already cut down. I'm letting the last 2 finish up completely

Likes
1
Share

@Black_Magic
Follow
First flush was today
So much back pain 😭😭
I did manage to raise pH by 0.2
PP is still high as fuck
I am so done for today
Likes
3
Share

Likes
43
Share


@Rasta_Faraev
Follow
Green Gelato develops as 100% sativa. The branches are long and very promising. Fairy tale. Everything is sticky and snow-white. Trichome paradise. Ph: 5.8 / 6.2, ppm: 900/1050.
t: 26/21 ^ C. Humidity: 60/50.
Likes
3
Share


@Therbalist
Follow
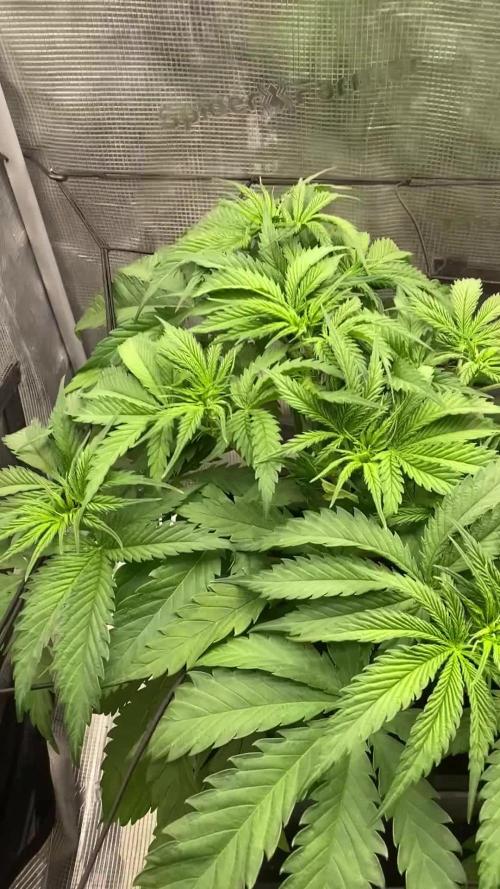
Back into Veg again, never Lollipoped anything before. Was tough not cropping them buds lol the few I did have to were delicious!
In the big square green pot to the left of the little silver haze X critical XXL is several different cuttings off three different zkittles plants.
One showing bright purple buds the other is less colourful.
The silver haze X critical XXL has had the lowest branch converted to produce male sacs for seeds wasn't very successful so I'm lollypoping to try again.
The other Greenhouse has my favourite large Zkittles which I had a few buds off! Superb taste.
Three chocolate skunk in the same pot two smaller one where fully converted to male. Had all the best cola buds of her also delicious smoke.
Aim is to cross chocolate skunk with zkittles hopefully with more success this time round!
