
Likes
Comments
Share


@Terpio1500
Follow
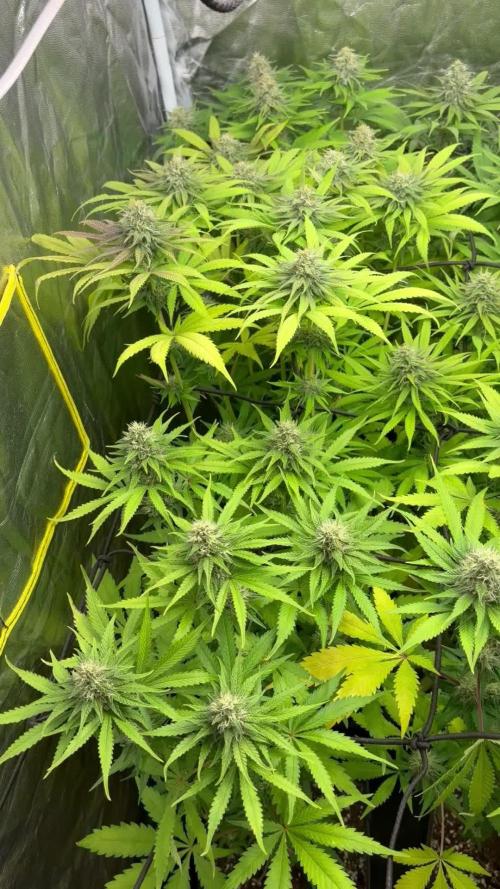
Week 4
Last week was good gave the last defoliation for day 21. Adding a higher feed for her.
This one got crazy pistil produced & it’s going all the way down the plant it’s the shortest out of the 3 but has the 2nd most pistil producing on it
Check out my IG for more content @therealterpio & check out my other dairies (jungle verde & Gelato Cake)

Likes
7
Share


@Staffedition
Follow
Всем привет. Вот и вылезли мои маленькие малыши!
Выглядит растение счастливым и здоровым!
Сегодня 4 день от каски.
Увидимся на следующей недели друзья!

Likes
8
Share


@jaydee702
Follow
she finally showing pistels after three weeks(21) days in 12/12 tent.she is Thriving in its tiny pot dwc hydro spam.she is about 16 inches tall was 4 inches 21 days ago .She has a min of 5 weeks to go still hope she slows her stretch some to stay in the baby bears bed for light distance.

Likes
6
Share


@Drewseph
Follow
Solid start to flower for these ladies... Starting this grow diary now and filling in as much as I can from the ~8 weeks before this point. I'll keep updating from now 'til harvest.
Struggling to keep the heat down so had to rig up a styrofoam cooler "AC" I found on YouTube, like this one: https://www.youtube.com/watch?v=TpqUr6bEYOs
Keeping the DIY CO2 generator running full blast while the lights are on and have some side-lighting led bars in the works that I'll have installed later this week.
Drip system has been working great, dialed back the feedings so I don't overwater and can give the top layer of coco a chance to dry out a little bit.
Heavy defoliation tomorrow to clean up the canopy...
Likes
12
Share


@BLKSWN
Follow
Another late week, but... so like I said I add the 300w led (150w)to the room and I think the girl is loving it. I had to raise the HPS up due to the heat, so the HPS is at 17” from the top of the canopy and the LED at 12”. The colour in the room is unbelievable. I can’t wait to see how this GG turns out.

Likes
30
Share


@WeWantItToGrow
Follow
Did a little outside action this week as I had to clean out the tent and make some ventilation adjustments I’m 9 weeks in on these plants and it kinda has me wondering why I’m not seeing much more vertical growth I’ve decided to pull the light up a bit and decrease the intensity let ‘‘em work for it a little bit.They are healthy tho and as usual the vegetation never fails to impress happy growing yall

Likes
4
Share

@Centollo
Follow
Día 35 de floración, última semana de abonados al máximo, y el fin de semana lavaré las raíces. Están engordando bien, sin sorpresas, todo va de maravilla. Queda lo mejor!! Feliz semana!!


Likes
14
Share


@MG2009
Follow
04/23/2022
I think lemon OG is done
Give her a few days more, Biscotti Skunk, grape skunk about 2 -3 weeks out, the Biscotti Skunk has very strong camphor mothballs smell. Not quite sure what to think of her hope buds fill out well. Grape Skunk is doing a bit better but lemon og has performed best in my specific micro climate, others have more flowering to.
If I'm going 63 days in flower it might as well be a Sativa variety.

Likes
17
Share


@Naujas
Follow
She is much prettier than she was a week ago :) I remembered that I have my first grow light, which is more compact and it will give me more space, so I changed my light, now the girl's side branches get light too:) I add a lot of video memes, because I really want to win Iphone16 pro ;) and those who don't take risks don't drink champagne:) good luck to everyone.

Likes
27
Share


@adam_pawloski87
Follow
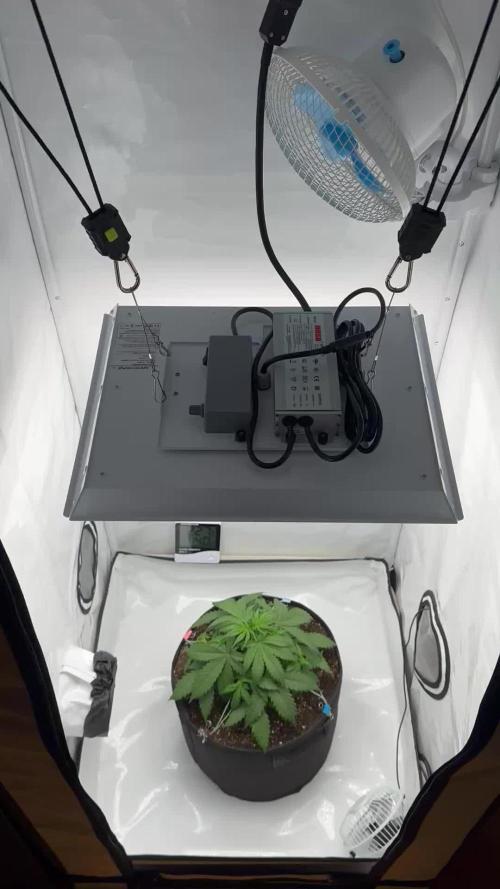
Ladies and Gentlemen we are back!! This project started last Sunday an Germination week was a success for these Purple punch’s an Forbiddin Runtz from Fastbuds 😍! I went with my paper towel method, sprayed down paper towel with pure water, folded it up inside sandwich bag un seeled in a dark cupboard. Checked everyday to make sure paper towel was still moist and on 3rd day we had all 6 pop open! I planted them Wednesday and all 6 popped up in soil on Friday in my Ac Infinity pots using Fox Farms Happy Frog soil! Tomorrow we will give them a small dose of nutrients, will be doing nutes on Monday, Wednesday and Fridays only rest get pure water! Well y’all let’s have another great week , keep them eyes peeled for next weeks photos an pics !!
Likes
10
Share


@BodyByVio
Follow
This week I Supercrop all the plants and spred them out over both lights. One more week of Veg and they are ready to explode
Check me out on Instagram @growmorestressless

Likes
47
Share


@Staple_1
Follow
The plants got a big defoliation of a lot of the lower growth in lolipop style fashion, either flipping to flower next week or waiting two weeks. I’ve had to start using neem oil because it seems some little critters are eating my plant leaves. It’s very minimal and small just better to be safe than sorry, currently at day 40 of the Grow. Just moved the light up a few more inches compared to the plants canopy. Seems as if they’re getting a little light stress since I turned the light all the way up to the full 1,000 blast. Same feeding schedule. Let me know if y’all have any tips! Always appreciated

Likes
2
Share


@Firepharmer
Follow
Trichomes trichomes !! What a beautiful plant 🌱 to grow , not big bud producers but absolutely coated.u can definitely tell it’s got the GCS in her , Terps are getting stronger now that really forum cut Girl Scout cookies terps with some creamy peanut tons . The stretch is about over now
Likes
3
Share


@Cultivoporpasion
Follow
I’m very happy to see this baby’s resistance to hot summer!! I hope she grows up nice and healthy


Likes
9
Share


@DisTentAint4Campin
Follow
I can't complain she hasn't skipped a beat since I took over only problem im seeing is very leggy and not vigorous branches but I have a strong feeling things will be different next week stay tuned my fellow plant janitors 👨🌾
Likes
5
Share


@Willy_Balls
Follow
21 st day of 12/12. Defoliation.
Try smaller containers or longer veg. Plants should be able to drink at least its pots water holding capacity once a day.
Will try 5 liters of medium.
Somę of them drinking more than 2 liters a day.
Much better to overage and remove branches than not enough root mass.

Processing
Likes
63
Share


@AsNoriu
Follow
Day 99. Garden is flying. Nothing else to mention now, you can easy spot - they bulk up !
Heavy feed in the morning, then 2 more cycles of feed/pure_water left till flush for Gorillas, all others at least a week behind.
Hate to split waterings and feed, but even lazy person sometimes is forced to ... ;))
Happy growing !
Day 100. Disaster in Garden !!!!
Had enough of RQS Royal Cookies. Two of them went Hermie.
So current stats :
5 out 5 are mutated
2 out 5 currently Hermie
5 out of 5 overfed without any food even
Because of that shitty genetics, had to make Control Garden.
Even Cookie from CG which is in green house still grow mutated and leaves are on max healthy green side. Had no nutes for last 30 days, still haven't returned to normal ...
So two girls chopped, hope they didn't pollinate all garden...
In photos you can find bananas...
Those air pots works really great, all space is used and roots are really nice. Just i think i will go to 30 liters next time.
Have fabrics, but my doubts of those air pots are gone.
Bad day for sure. 15 weeks, 50 pounds for seeds, 30 for soil, 50 for nutes. Thats my bill without electrics .....
#RQS is crap !!!!!
James from them just asked where i bought the seeds, never had balls to replay back ...
Ironic theirs girls has BALLS and it makes me angry ...
Day 101. Damage is done, i see many seeds growing, it took me unprepared ....
I dont sell weed, but to check every bud before grind is lame for me ...
F@%k you RQS. Never again, despite having like 10 more theirs beans of 4 dif strains .... to the bin now !!!!
Day 102. Girls are nice, but i see seeds forming and it makes me sad.
Doubt it will be many updates till review.
Happy Growing !!!!


Likes
29
Share


@MadeInGermany
Follow
Info:
Unfortunately, I had to find out that my account is used for fake pages in social media.
I am only active here on growdiaries.
I am not on facebook instagram twitter etc All accounts except this one are fake.
Flowering day 58
since time change
to 12/12 h.
Hey guys :-) .
The lady is getting closer and closer to her end :-).
The next 7-14 days will be harvested :-).
The trichomes are now checked every day 👍.
This week she got a watering with GBL Clean Fruits (see nutrient table above) so much was poured that about 10% drain came out again.
Now she is allowed to use up her last available nutrients until the harvest.
Catching your leaves are very nice in autumn :-).
Have fun with the update 👍.
Stay healthy 🙏🏻
You can buy this Nutrients at :
https://greenbuzzliquids.com/en/shop/
With the discount code: Made_in_Germany you get a discount of 15% on all products from an order value of 100 euros.
You can buy this Strain at :
www.Zamnesia.com
Type:
Runtz
☝️🏼
Genetics:
Zkittlez x Gelato
👍
Vega lamp: 2 x Todogrow Led
Quantum Board 100 W
💡
Bloom Lamp : 2 x Todogrow Led
Cxb 3590 COB 3500 K 205 W
Soil :
Canna Coco Professional +
☝️🏼
Nutrients :
Green Buzz Liquids :
Organic Grow Liquid
Organic Bloom Liquid
Organic more PK
More Roots
Fast Buds
Humic Acid Plus
Growzyme Big Fruits
Clean Fruits
Cal / Mag
Organic Ph - Pulver
☝️🏼🌱
Water: Osmosis water mixed with normal water (24 hours stale that the chlorine evaporates) to 0.2 EC. Add Cal / Mag to 0.4 Ec Ph with Organic Ph - to 5.8 - 6.4

Likes
20
Share

@Naujas
Follow
Well, I managed to do something that I really didn't expect :) the yield is small, just like the pot :) it was a wonderful trip ;) but from now on I will only grow it in big pots :) good luck to everyone :) I will add weight when it is ready :)
