


Likes
Comments
Share


@SantaStone
Follow
Hello friends! Thank you for visiting! 👋
🌿 The strongman continues to gain strength. The last 2-3 weeks are ahead.
-The plant eats well, drinks 2-3 liters of fertilizer solution every day. Rinsing with water with pH 6 twice a week.
-Very dense inflorescences and a lot of resin.
-A bright smell of sweet berries appeared.

Likes
2
Share


Likes
19
Share


@420DeepGrow
Follow
Gracias al equipo de Royal Queen Seeds, Marshydro, XpertNutrients y Trolmaster, sin ellos esto no seria posible.
💐🍁 Gelato #44:
Los criadores de Tyson 2.0 criaron Gelato 44 a partir de cepas finas. Al cruzar la Sunset Sherbet y la Thin Mint Girl Scout Cookies, crearon un híbrido de dominancia índica que asesta fuertes golpes en el cuerpo y la cabeza.
Su contenido de THC del 22% crea sinergia con terpenos colocantes para ablandar los músculos
Mantenla hidratada y con una dieta constante y pasará por la fase de floración en unas ocho semanas. Las plantas de interior alcanzan una altura máxima de 120 cm y producen 400-450 g/m², mientras que sus homólogas de exterior alcanzan los 180 cm y producen hasta 600 g por planta.
🚀 Consigue aqui tus semillas:
https://www.royalqueenseeds.es/rqs-semillas-cannabis-tyson/664-dynamite-diesel.html
💡TS-3000 + TS-1000: se usaran dos de las lámparas de la serie TS de Marshydro, para cubrir todas las necesidades de las plantas durante el ciclo de cultivo, uso las dos lámparas en floracion para llegar a toda la carpa de 1.50 x 1.50 x 1.80.
https://marshydro.eu/products/mars-hydro-ts-3000-led-grow-light/
🏠 : Marshydro 1.50 x 1.50 x 1.80, carpa 100% estanca con ventanas laterales para llegar a todos los lugares durante el grow
https://marshydro.eu/products/diy-150x150x200cm-grow-tent-kit
🌬️💨 Marshydro 6inch + filtro carbon para evitar olores indeseables.
https://marshydro.eu/products/ifresh-smart-6inch-filter-kits/
💻 Trolmaster Tent-X TCS-1 como controlador de luz, optimiza tu cultivo con la última tecnología del mercado, desde donde puedes controlar todos los parametros.
https://www.trolmaster.com/Products/Details/TCS-1
📆 Semana 2:
Fantástica semana, estan creciendo de una forma espectacular gracias a la ayuda de @marshydro, @xpertnutrients y @trolmaster.
Se puede apreciar un tercer nudo aunque la aplicación de cola de caballo y el estar en una maceta pequeña ha influido en el tamaño de ella, se recupera muy rápido 😁.
Esta semana espero trasplantar a la maceta definitiva.
Potencia de la lámpara: 50%

Processing
Likes
6
Share


@NastyNug
Follow
Start of Week 2 Flower. Looks like the fan is blocking some light on the far left and will replace it with a slim profile box fan. Also found a light leak coming from a vent and
Likes
5
Share


@GermGrowFox
Follow
10. November
Neue mainline schnitte plus LST per klammern an der Cookie gelato
Cookies Gelato 26 Tage alt
Tropimango 23 Tage alt
Runtz 12 Tage alt.
Lichtwechsel wenn die runtz 4 Wochen alt ist, bzw die Cookies gelato 6 Wochen alt ist.
Tag 50 Lichtwechsel? Quelle YouTube Video
12. November.
Cookies gelato hat an den beiden oberen Mains neue mainlinefrisur bekommen. Die unteren Mains haben noch alles behalten dürfen.
Das topping steht bald an.
Tropimango reagiert gut auf LST. Blätter weiterhin noch krank, allerdings nicht mehr so dramatisch
Die Runtz wächst und macht ihr Ding. Die wachstumsphase hat nun sicher begonnen: Stiel wird hölzern. Runtz wurde getoppt.
(Vor einem Monat +1 ist die Cookie und die Tropimango zum keimen gelegt worden)
13. November
Runtz wirkt gestresst und stagniert im Wachstum wegen des toppings. Besprühen mit Eisen hat sie auch aus der Ruhe gebracht.
Tropimango wächst. Immer noch kranke Blätter vorhanden, aber wenige.
Cookies gelato wächst.
14. November
Die runtz wächst wieder!! Eventuell ist mir unfreiwillig ein fimming schnitt gelungen?
Tropimango und gelato auch alles wie bisher.
Begleitpflanzen (weißklee&Kerbel) hinzugefügt
Cookies gelato ist 30 Tage alt
Tropimango ist 27 Tage alt
Runtz ist 16 Tage alt
15. November
Cookies gelato wurde zum zweiten Mal getopt an allen Trieben. Sie wird’s schon wegstecken
16. November
Topping gut überstanden. 👍 sind jetzt 8 Mains. Wachstum fühlt sich jetzt mega langsam an. Aber ich bin auch ungeduldig af 😅
Tropimango weiterhin kranke Blätter. Hab leider keine Idee woran es liegen könnte.
Runtz scheint tatsächlich neue Triebe an der schnittstelle zu entwickeln 🎉🤝. Archivement unlocked. Ich kann jetzt den fim schnitt.🤝💪
Alle drei Pflanzen haben ordentlich Wasser bekommen.
17. November
Habe feststellen können, dass der Wasserbedarf doch deutlich höher war als ich vermutet hatte. Alle drei reagieren sehr positiv auf die erhöhte Menge Wasser. 🚿 Ich hätte wohl großzügiger sein dürfen in den vergangenen Tagen.
Habe der Cookies gelato einen Edgar mit taperfade geschnitten (Mainlining). Eventuell habe ich an den unteren beiden unteren Mains ein Blatt Zuviel abgeschnitten? Ich werd’s im verlaufe der nächsten Tage sehen.
Der unfreiwillige fimming schnitt bei der Runtz war wohl „unsauber“. Einer der beiden Triebe ist dominanter als der andere. Vermutlich liegt es am schrägen Schnitt.
Tropimango macht tropimangosachen. Weiterhin mit kranken Blättern. 🤝.

Likes
5
Share

@JoExotic
Follow
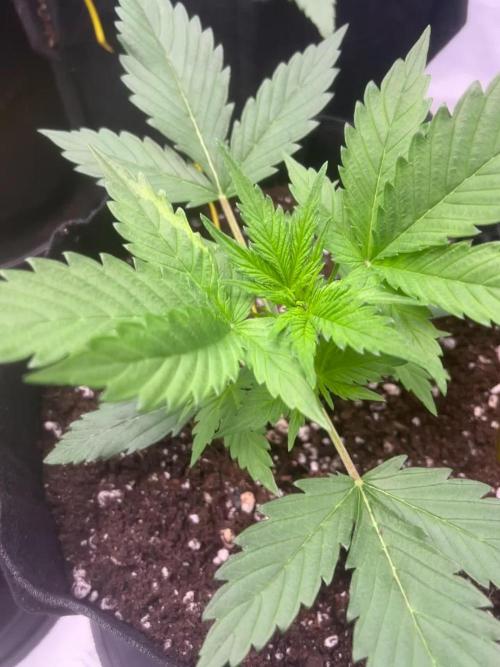
Week 3 - These plants are turning out Straight Fire. I’ve been watering every 3 days. Using Athena CaMg .5ml/Gallon PH 6.3. You can tell these are more towards the Sativa side. I’ll update next week good luck everyone comment your thoughts !
Likes
112
Share


@PEAKYPLANTERS
Follow
hello everyone, fellow farmers! did you have a good holiday? we too! but now is the time to carry on our work and why not ... maybe even to reap its magnificent fruits!
Peaky returns in style just for you! I hope the contents are to your liking!
But guys ... do we want to talk about these magnificent colors of these gems? Excellent reaction to the scrog and no kind of fucking parasite to bother with its presence! Great as well! We are doing well .Please continue to support us And stay up to date


Likes
3
Share

@leithsffs
Follow
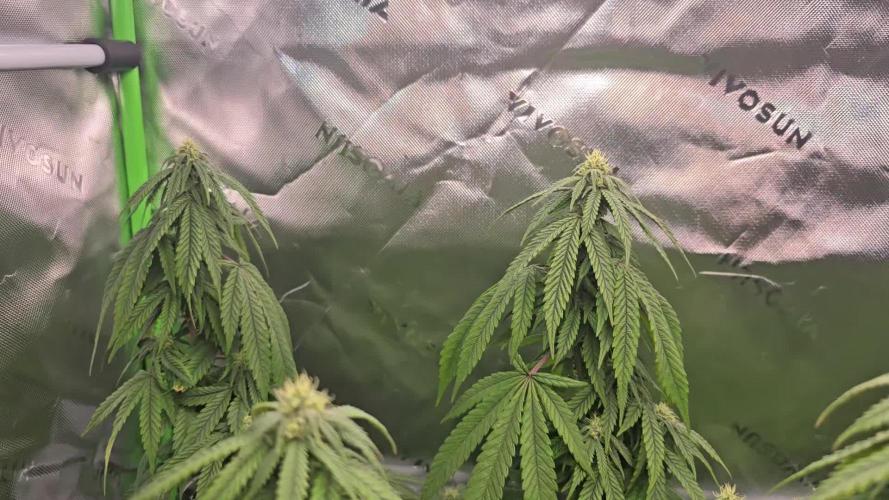
Nothing new to report this week. The buds are growing, even in this cold. The temp when the lights go on is in the middle 60s. So, that's a happy thing.
Happy growing eveyone!
Likes
4
Share


@I_Identify_As_A_Dan
Follow
Week 4 for Amnesia Zkittlez by fastbuds
Been getting some great growth from her as well definitely not as tall as her sister strawberry gorilla but she's not doing bad whatsoever.
Still getting fed FPJ. No training or anything just yet but likely by next week ill be doing some LST to widen her up.
As she's not as tall as her sister i reckon i can keep her in the tent for a little longer😎
Likes
6
Share

@k0nz1
Follow
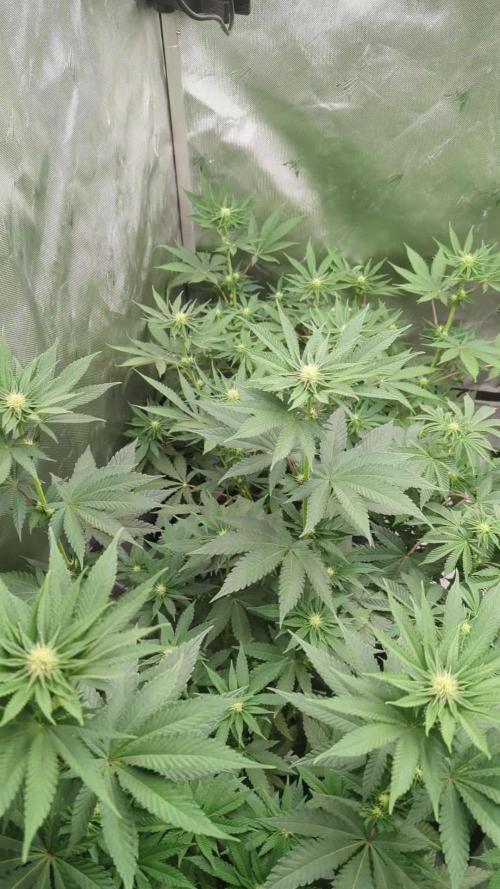
The tent ist getting really full rn. Big defoliation and lollipopping in the coming days .
The Lemon Orange stretching crazy. The Blueberry Pancakes are Bushmonsters with lots of Side branches. One of the BBP has little Nitrogen deficiency. Nothing serious.
All in all very healthy plants. Waiting for the first trichomes and aroma in the tent.
~55- 60 % rh
~ 21-26 celsius


Likes
7
Share


@BushDoctor740
Follow
The girls are moving along nicely just watering with water ph to 6.4 this week as I top dressed with Gaia green 4-4-4.Spider farmer Se7000 dialed in at 30 percent and to the ceiling.Noticed some minor deficiencies Day 12 and check soil slurry 50/50 soil/water and the ppm was at 780 lil high at this early stage and the culprit.Going to work on lowering that a bit this week.I did add a top layer of fox farm ocean forest as well which runs a little hot with nutrients rather than the pro mix.I have to remember with these beautiful auto flowers less is better :)
Likes
16
Share


@Rinna
Follow
I’ll update ya’ll on the smells and tastes after drying and curing! So far both are packed with ice and smell very potent, a little overpowering still, so I want to give it some time before they’re cures and can show their true terpene profile!
Likes
5
Share


@Dunk_Junk
Follow
Wow all her pistils have changed colour! Trichomes all milky!
She's absolutely smashed flowering quick!
She is as frosty and smelly as can be!!
Will be harvested within 24h.
Likes
22
Share


@Gram_Solo
Follow
Got all 5 sprouted with in 3 days under sf4000 , beast of a light. Humidity was around 80, 90%
Planted straight into 5 galon pot about
😎👌😎
Likes
14
Share


@Targona
Follow
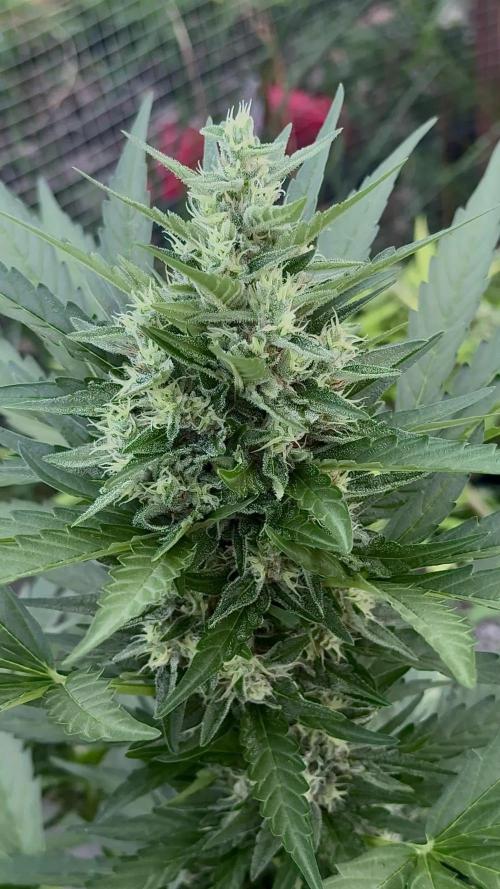
Sometimes I just cut a few sheets, otherwise I don't do any training. The girl grows well and looks healthy 😉



Likes
5
Share

@Kaya666
Follow
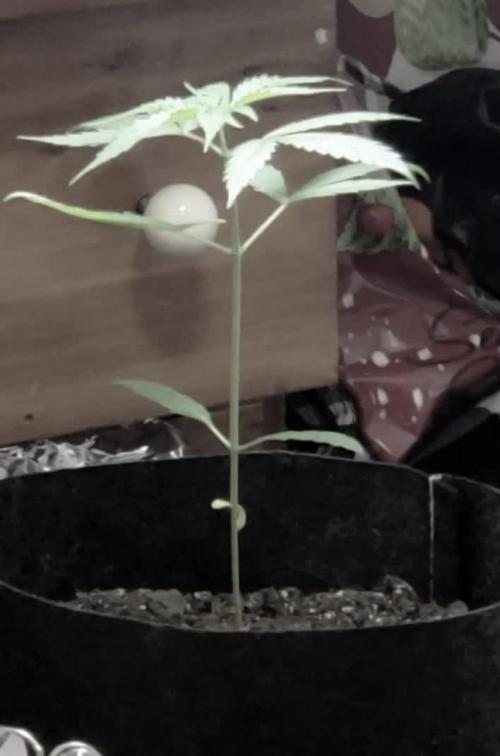
Last week of actual veg! I plan to stick to the same old lighting and watering schedule this week but am gonna experiment with a foliar feed of the potassium humates to see how she likes it. I figure it's better to test things like that now than in flowering. She's beginning to develop something between the nodes, though it's still too early to tell for sure if she's a girl. (It was a feminized seed so I certainly HOPE so!)
This plant has given me absolutely zero problems despite being in the most maligned soil under a weak-ass CFL bulb AND transplanted, which is supposed to be a no-no for autos. It def looks unmistakably like pot now lol so I've gotta figure out where to hide it should the landlord come in. (Legal state, illegal building). Hoping this Ona Pro Gel will be sufficient to offset the stench once she starts reeking. 😁
So my 1st attempt with the humates was a fail. I for some reason thought the pH was too high so I sprayed some white vinegar into the mix to bring it down, which it did. But then I read that you're NOT supposed to mix the two, plus I'd possibly made the solution way too strong by using online "recipes" vs. what the package said: 1 tsp per gallon water. YIKES. I'd used 0.7 grams in 2 liters the 1st time. 🤦🏻
Thankfully I only sprayed that mix on the two bottom leaves before realizing what I'd done, so I sopped it up, poured out the rest and made a more dilute mixture without the vinegar this time. I used my little 8 Fl. oz spray bottle to mist the plant from a healthy distance before her brief dark period, which is where she's at now.
Did a 2nd foliar feed the following day and she's looking just dandy! (Aside from the twisty taco leaves at the top lol). After watering, she was incredibly bloated with leaves curling downward in that tell-tale "over watered" claw. How this is possible when I water only 1x every 7 days, grow in a fabric pot, keep fans on her at all times and am using moisture control soil is beyond me, but it would appear this plant HATES water. The soil was bone dry when I watered & I even pH'ed the water this time before giving her a drink.... no luck. Oh, and the H2O is room temperature every time. Same 16.9 FL oz. purified drinking water as last time...
After some reading it looks like this strain is just highly finicky and somewhat harder to grow than other autos, though most people ended up happy with the results. This also explains why she's so tall with so few leaves/branches: they say Zkittlez Auto stretches like crazy. I'm gonna try to stop obsessing now.
I added a 2nd CFL bulb (yellow) to see if it boosted her growth any, and sure enough, I got some noticeable and rapid change in her appearance after only one night. So that was a good thing. Next week will be when I switch to 20/4 light schedule and try a soil feed of the Potassium Humates with her once-weekly watering lol. Stay tuned.
Final update for the week: I put pipe cleaners on the ends of her big branches to help open up the bud sites. It's too late for actual LST, plus she's so sensitive I doubt she'd like it. Don't wanna waste 1-3 days recovering from that. But I'll probably lop off 2, if not 4, leaves early next week. (1-2 sets total). She's not leafy enough to "leaf tuck" as planned but some of those bottom ones are def redundant.


Likes
57
Share


@DeepWaterGrower
Follow
🗓️ WEEK 8 / DAY 50-56
⚡ Light: 30 cm / 150 watt;
⌛ Schedule: 18/6;
🌡️ 24.5° C - 65% RH average;
📑 PH 6.1 - EC 2.3;
🌱 Phenotype #1 is forming beautiful flowers, for two weeks I have been rotating the plants 180° every 3 days, so as to make the buds that would receive less light also swell. Height: 48 cm;
🌱 Phenotype #2 just stopped stretching and begins the flowering stage. Height: 55 cm;
⚙️ Fan, extractor and pump ON 24/0.
👯♀️ As you can see in the pics, I have other seedlings in my grow-box, here the diaries if you want to take a look:
- White Widow (GHS): https://growdiaries.com/diaries/198827-green-house-seed-co-white-widow-grow-journal-by-deepwatergrower
- Opium (Divine seeds): https://growdiaries.com/diaries/206602-divine-seeds-opium-grow-journal-by-deepwatergrower
Likes
Comments
Share

@Eniiamrej_01
Follow
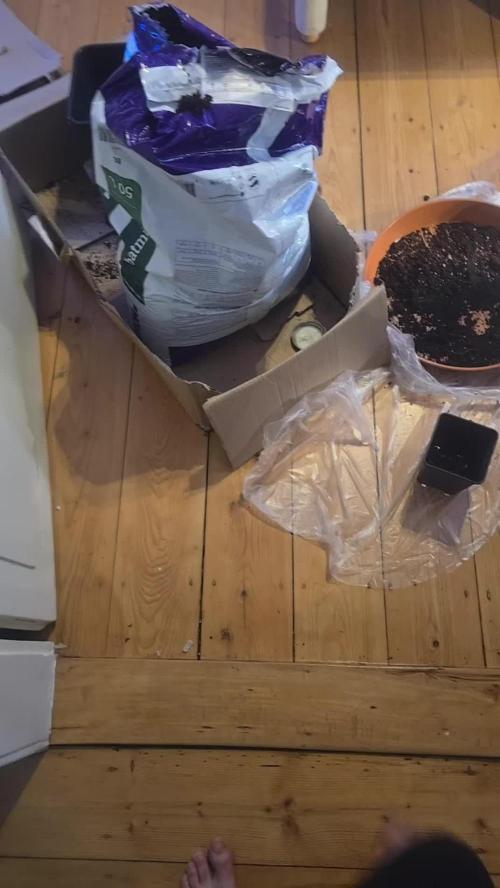
Umtopfung erfolgreich.
Aber es wurde ein Mutant entdeckt mal sehrn wie der sich macht ansonsten wird dieser aussortiert.
Deshalb sieht man noch noch eine plant mehr als angegeben. Das war die cherry poppers
