


Likes
16
Share


@Sur_cannabico
Follow
5ta semana 12/12
#greengelato by RQS.
Alimentada con Quemanta nutrientes bajo un spectrumboard de 75w de los chicos de heaven Grow ligths.

Likes
7
Share


@Weedganja420
Follow
Ha sido muy facil cultivar estas cepas, si las vuelvo a cultivar le daria unos dias mas de crecimiento ya que se quedan un poco pequeñas al ser tan indicas, pero el resultado me ha encantado!

Likes
127
Share


@DreamIT
Follow
There isn't much more to say about this fantastic strain. Hardy, easy to clone, quick to flower and absolutely delicious in every respect. It resists well to high temperatures, "accidental" over fertilization, and recovers soon after a period of drought. Easy and fast.

Likes
13
Share


@DaisyNabis
Follow
cada dia mas glotonas mis bellas, estoy aplicando riego casi día por medio, solo una vez a la semana las abono, el resto solo con agua. hice algunos amarres a los tutores ya que están en pleno crecimiento


Likes
44
Share


@Papablob
Follow
08/12 Au pain sec et à l'eau. 🙂👍
12/12 😀
14/12 😍 🤤 Je vais dire que tout était calculé..😂

Likes
59
Share


@Coopmc
Follow
Going to call these LemonWalker CB? Since it is about 50/50
Chance of being either hight THC or medium THC/CBD first one will go to flower Saturday
Looking good definantly tow diffrent growth phenos
LemonWalker 1 goes to flower
Tomorrow after I take clones
Likes
12
Share


@CANNASIM
Follow
WEEK 1 of flower. This is insanely quick, veg for three weeks and on week 4 we are flowering strong.
It is raining a lot, so i had to use a top dressing, ingredients on the week 3, to manage the soil nutrients till the end of the cycle. About two table spoons.
Watering once a week, with the mix above, otherwise rain is taking care of them, very natural as a grow, nothing much complicated, no science fiction with fertilizer or chemistry.
I’m curious about the yield, and how much can i pull out of this way, with minimal work and a nearly inert soil. Let’s see how this experiment turns out.
Likes
9
Share


@HIAZ_urbanbudfarmer
Follow
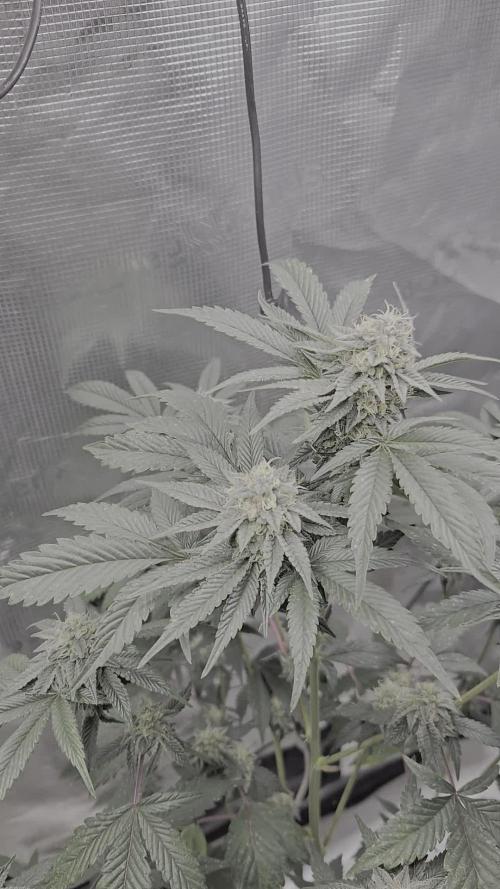
Busy week getting the new setup going. GG is going really good has taken to training well. Expecting a bit of stretching off her in flowering. Can notice the sativa traits in her with more distance between nodes, and her slimmer sativa type leaves . Have noticed how sticky she's starting to get when training her, left with sticky resin coated fingers😋 she's a nice plant


Processing
Likes
1
Share


@Luv2Grow
Follow
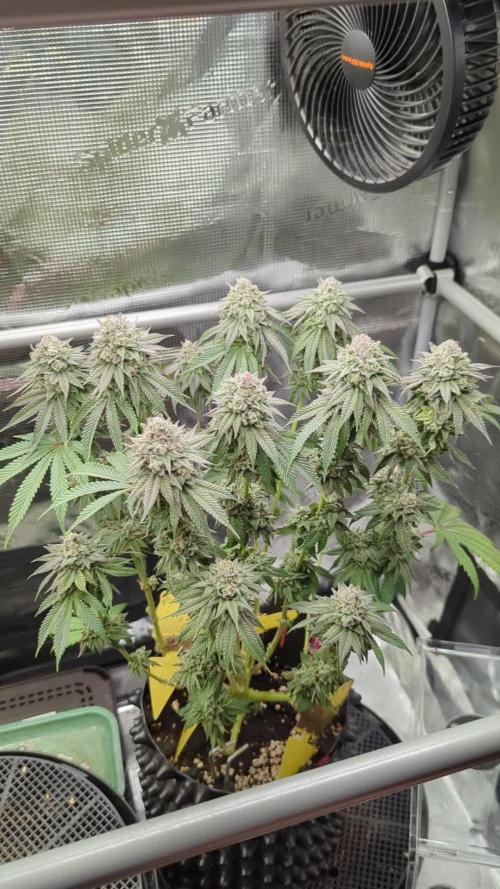
Day 51 - Week 8 started and it’s looking like I really need to stay on top of watering her. If she doesn’t get water every 2 days, she seems to get severely dehydrated and droopy. Within an hour of watering she perks right up. Went ahead and gave her a feeding of nutes and tucked some leaves as best I can.
Day 52 - She’s perked back up again and looking normal. Did some defoliating to get more light to the bud sites and also tucked a few leaves to avoid over stressing her from plucking leaves. From the way she’s been acting, I will be giving her a gallon of water every 3 days to keep her from drying out and drooping.
Day 53 - Did a little more leaf removal and tucking today to try and keep her opened up. She’s starting to fill in a bit more and will be giving her some water today to make sure she doesn’t dry out too much like the last couple times.
Day 55 - All looking good and she’s dried up a bit but gave her a gallon of water today. Didn’t do any defoliating today, just watered her and tucked some leaves. The wife will be taking care of my girls while I’m out of town for a week so hopefully they survive till I get back.


Likes
3
Share


Likes
6
Share


@Elguacho420
Follow
Buenas a tod@s... Décima semana de floración de estás tropicanna poison, décima y última semana, ya pueden despedirse, la semana q viene ya entran a poda, está semana un buen lavado de raíces un poco de defoliación y listo, la planta tiene cogollos compactos y pesados, buen aroma, bastante recina... A mí me gustan, aún q no tengan buen aspecto, no juzguemos las apariencias 😉 tiene muy buena pinta, contento con el resultado pero a seguir mejorando... Buenos humos para tod@s 💨💨💨😎⚕️
🇦🇷🤝🏻🇪🇦


Likes
4
Share

@PapaTerps
Follow
Glue 31 - Compound Genetics
Day 107
🚿 Watered every three days with 2L of RO tap water pH'd to 6.3.
✂️ No work on her this week, she had a good defoliation last week, so she is just sitting there waiting for harvest 👍🏻
🌸 Week 10 of bloom, all her trichomes have taken on a cloudy white colour, with her pistils drying and becoming amber. She has been thoroughly flush over the last 10 or so days, so she should be good to harvest in the next couple of days 🙌🏻

Likes
407
Share


@LegacyMarketFarm
Follow
APRIL 18TH 2024 - The 3rd batch of clones was taken yesterday and mother plants stripped back aggressively now that focus will be going toward the beds and clones. The generation 2 mom's are going to be vegged up and ready to produce our second harvest's set of clones. We have taken 3 batches of clones kept them in half gallon bags in each of the beds so we can pick the absolute best of each to transplant into the beds & proceed into the grow with. Next update will be of each individual diary! We got @Seedsman Purple Ghost Candy in this cycle by splitting the Exotic Animal bed half Purple Ghost Candy !
On the Kitty cat front, Barns finally got the courage to approach us over a few days, Maybe a week. We where finally able to pick her up and bring her inside, She has been a happy new member of the family ever since, Making that another successful rescue animal adopted from outside.
FOLLOW US ON X for EXCLUSIVE UPDATES : https://twitter.com/LegacyMrketFarm
MAKE SURE TO CHECK OUT OUR YOUTUBE CHANNEL FOR IN DEPTH TUTORIALS : https://www.youtube.com/@LegacyMarketFarm
SUBSCRIBE TO OUR GAMING CHANNEL TO JOIN OUR AWESOME COMMUNITY & GAME WITH US : https://www.youtube.com/@LegacyRadioGaming
AND MOST IMPORTANTLY DON'T FORGET TO TAKE ADVANTAGE OF OUR PROMO CODES FOR EACH OF OUR GREAT SPONSORS !
PROMO CODE GREEN PLANET : LEGACY
PROMO CODE MARS HYDRO : LEGACY
PROMO CODE SEEDSMAN : LEGACY10

Strawberry Cookies · Super Sativa Seed Club

Exotic Animal · Exotic Seed

Jungle Lava · Original Sensible Seeds

GG4 Sherbet FF · Fast Buds
Stinkin' Bishop · Original Sensible Seeds

Lamb Chops · Thug Pug Genetics

Purple Ghost Candy · Seedsman
Fuel DOG · Seedsman
Peyote Zkittlez · Seedsman
RudeBoi OG L.E. · Seedsman
Banana Jealousy · Seedsman

Sugar Cane · In House Genetics
Likes
64
Share


@Prof_Weed
Follow
Der Sour Jealousy von FastBuds geht es ganz gut 👍.
In Hydroponic dauert es am Anfang immer ein wenig länger bis die Pflanze richtig durchstartet..
Ich denke mal in 2 Wochen fängt es dann richtig an.
DLI liegt bei 16.92 ( 20 h Licht bei 235 PPFD).
Heute wechsle ich das 1. Mal Wasser und gebe additiv Silicate von Terra Aquatica hinzu.
Die ersten Tage hatte ich Schwankungen im PH Wert,ich denke weil der EC Wert so niedrig ist und weil die Blähton Kugeln auch erstmal den angestrebten Ph Wert annehmen müssen.
Die Pflanze bekommt hier und da gelegentlich Streicheleinheiten von dem Mini Ventilator damit sie kräftiger wird.
Bye


Likes
67
Share


@GanjaReaper
Follow
Welcome back everyone,
As you can see are almost all seedlings growing. Some where still in the soil.
Might happend when giving water(seedlings can turn or get deeper), checked it out and they are alive and well.
All pictures are from day 4.
The humidifier had been added, so I had to adjust the room.
I spotted a corner of the room that gets dryer faster. I adjust the fan for now and see what happens.
Corners are always hard to get perfect. Sometimes the light, air, watering doesn't come there properly.
Seedlings don't need much nutrients, neighter do autoflowers. with normal soil I would recommend to only give water for 1-2 weeks, since it holds nutrients in it as well.
But since I'm using Cocos for this grow, I might have to add some basic nutrients in the upcomming week.
For this week I gave/give only water turns and Startbooster/rhyzotonic turns.
Update day 5:
- Lowerd the lights to avoid stretching, they are now at 75cm distance from lamp to pots.
I want them at 40-50 cm, but I don't want to rush it.
- Added another layer of cocos to avoid the soil from drying up therefore the roots from dying.
This will happen because of lowering the lamps down, the soil will get exposed more to heat.
As you can see, the humidifier is doing his thing haha. Pictures and videos where taken without the lights + fans on.
because of that, it will look like this. Still fun thought.
Arround 7 seeds didn't reach the surface yet, lets hope they make there way up soon.
Enjoy!