The Grow Awards 2026 🏆 


Likes
Comments
Share
@MTUZZIO
Follow
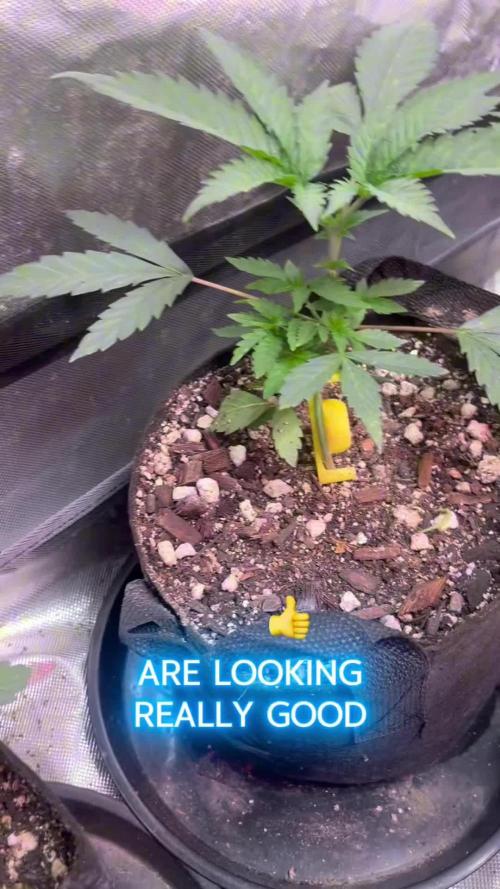
starting to see some crowning. nice stretching going on. very happy with how it's all going (except for the wyze camera timelapse, which still stops working halfway through the week)
I do have some weird stuff going on with one plant, I'll post some pictures, if anyone has any advice. the only thing I can really find online that looks like this is tobacco mosaic disease, but I don't think it's that. maybe this one plant had a little extra stress or something. I have some of that mosaic looking pattern. it's showing up mostly on one plant, and like two leaves on one other plant. maybe calmag defiency? i guess it can kind of look like that, and my RO system was down for a week or two so I had to use tap water, and to keep EC consistent that meant less nutes for a week or two (that was taken up by the tap water EC of like 150).
anyway, super excited. wish i had more to do, but it's pretty much just riding it out at this point. was crazy busy with work this week, i wanted to have got in a good defoliation already but I will get to that this weekend. going to remove everything below a certain point, all the lower leaves and the lower nodes that aren't going to make it to the top. probably going to put a trellis net up as i don't think they are going to be able to support their own weight once they start to really stack. i may do one or two final foliar sprays, all organic stuff, but one last IPM and maybe one amino acid / coconut water / aloe / bloom boost after the defoliation, just to help them bounce back quickly as i'm going to be removing a lot of biomass. all that is organic and there are barely flowers on so i'm not worried about it.
getting such a strong lemon scent off these already, skunk is starting to come in. can't wait to get some real flowers on them and for the terps to develop.
i'm not going to judge yet, but i think if i was to run these again i wouldn't do quadline. quadline was super interesting to me when I first started growing, but after having a bunch of grows under my belt, really i think my preference is to mostly let them grow natural, maybe supercropping the main cola, but my favorite grows have been the ones i did the least amount of hard training on. not sure why i decided to quadline this run, but i'm happy with the even canopy so it's all good


Processing
Likes
1
Share
@MG2009
Follow
07/31/2019
She wants to flower outside she gets 14.5 hours of sunlight, and flowering will definatly grow in garden next year as she flowering early and no doubt that she be done before first freeze, I was hoping to veg a little longer but I made more clones but all four clones are going along great and I picked a new mom.
This girl, I fed her Espoma garden tone 5-10-5 which is good for 30 days hope for a nice stretch, difinatly stronger against powdery mildew than my Banana Kush plant, nice OG scents in the air she's going to stink!


Likes
5
Share
@hinterhofgrower
Follow
🌱 :
💧 : 4l day 70, 4l day 74
💡 : Dli: 45 mol/m²/d
🤔 : One week to go?
Likes
5
Share


Likes
190
Share
@Ju_Bps
Follow
Hello growmies 👩🌾👨🌾🌲🌲,
👋 This ladies is very frosty ❄️, buds coming along, the main bud is very strange 😅.
Look doing good and some leaves start to turn purple 💜.
💧Give water each 2 or 3 days
1,5l Water + Nutri NPK Bloom + Nutri NPK Cal Mag
1,5l Water + Nutri NPK Bloom + Nutri NPK Cal Mag + Sugar Royal
PH @6
- Nutri NPK
Calmag
1/8 tsp for 1 gal.
Bloom
1/2 tsp for 1 gal.
💡Mars Hydro - SP 3000
100% 40 cm.
🔥 Thanks community for follow, likes, comments, always a pleasure 👩🌾👨🌾💚🌲.
Mars Hydro - SP 3000 💡💡
https://www.mars-hydro.com/sp-3000-samsung-lm301b-greenhouse-led-grow-light
NUTRI NPK 💥🔥
https://www.nutrinpk.com/product/npk-mix-pak-for-4-to-5-plants-cannabis-fertilizer/
Sweet Seeds - Mimosa Bruce Banner XL Auto 🌲🌲
https://sweetseeds.es/en/autoflowering-seeds/3232-mimosa-bruce-banner-xl-auto.html

Likes
283
Share
@love_2_grow
Follow
D56 - Today is the first day in the eighth week of veg for #2 and the seventh for #1. This will be the final week of veg for the girl as I'm ready to flip in a few days.
I did the last heavy defoliation by removing most leaves and branches except the tops. I aim to get the girl to put all the flowering energy into the tops and hopefully result in big colas without popcorn nugs or larf.
I did keep a few clones from each girl, though.
After defoliation, I sprayed down the girl with my chili tincture to combat the thrips. I took great care to hit all leaves on both sides. This tincture is harsh to work with, and I was coughing like mad, and I damn near filled my N95 mask with snot (yummy!).
After all this snot, drool and coughing, I just wanted to be done for the day, so I stressed checking out how my new scrog frame fits. The frame, of course, fell and broke one of the tops clean off. Ugh!
I tried to fix it with some tape but the break was in a weird spot and it didn't work. Not a massive deal as it was a corner top, and there will be 15 other tops. Still annoying, but hey, it's my damn fault for stressing.
D57 - The girls have bounced back nicely from their heavy defoliation. I just snapped a couple of pics as I hung a blue sticky trap in the tent. I always have regular yellow sticky traps in my tent to monitor pest pressure. However, thrips aren't that interested in yellow but are attracted to blue.
D59 - I flipped my lights today from the veg mode to the flower-inducing mode. I have no idea how much these girls will stretch, so better sooner than later. Also, I finally got around to start training one of the tops toward the middle of each girl. (About damn time!) I've thought about it for quite a while but have been ignoring it. The lights are flipped now, so we are almost out of veg time. Now or never!
D62 - The girls look healthy, and I can't see any thrip damage on the newer leaves. Fingers crossed that the buggers are gone! I gave each girl around 2.5-liters of water @ pH 6.3.

Likes
1
Share
@Billy_Piff
Follow
Really kicking myself in the ass for not taking cuts of this. Probably some of the better outdoor/greenhouse flower i have produced.
Likes
8
Share
@Audi_grows98
Follow
This week has gone great! Apricot auto has taken very well to the topping,feedings and the low stress training. I must say,it’s a very resilient cultivar. Very excited to see the flower she produces.
Likes
40
Share
@BudXs
Follow
Explosive growth this week. They are ready for the flip and will be going into 12/12 in two days
This strain is by far and away the fastest and most heavy veg growth in the garden. Seeing some of the harvests on here (AstroBoy) makes me drool.
Big thanks to OSS for the tester beans


Likes
10
Share
@iLoveGoodWeed
Follow
She is very fat now and the buds are heavier as the steams want to bend to one side.
Likes
85
Share
@Tropicannibis_Todd
Follow
Seed sat in glass of luke warm rain water till it sank , then moved to paper towel for total 24 hrs till sprouted then planted in its main soil medium 45L, popped less then 24 hours ...
First time using CANUKSEEDS
Idea , decided to try my hand at growing an autoflower to learn it's traits , as I having a feeling it will suit my grow style👌
((( Who the hell is TropiCannibis Todd😎......... Well this is not only my First AutoFlower but my First Grow in over 11-12 Years😳 I Grew from 2002-03 TO 2010-11 , I'm back nahnahnahnahnah , LETS DO THIS 😎😁 )))

Likes
Comments
Share
@UrbanBoer
Follow
I would be lying if I knew how far her flower phase come, this couple weeks been absence only gave me results, and left me with a catalogue nightmare, but thank goodness my previous posts are dated, so it gives a rough idea, but genes differ within strains, some strain grow vigorously at certain stages, and I think this baby hit her phase. She will be my best tree when it comes bud quantity, when it comes to potency, I will have settle with what I encounter and except the outcome.
Likes
10
Share
@CorinnaFarm
Follow
Die Sorte riecht und schmeckt super fruchtig.
Nach den ersten 4 Tagen trocknen wurde getrimmt hat etwas Zeit in Anspruch genommen aber es hat sich gelohnt. Fast 100g trocken was mich sehr gefreut hat.
Sie riecht extrem und ist schön harzig.
Eine echt schöne Sorte, da ich fruchtige Strains bevorzuge.
Likes
24
Share
@Finniegrow
Follow
NOTES:
Keeping the pH between 5,8-6,0 and EC at around 1,4-1,6 depending on system. EC at 1,5 seems to be optimal and my measurements are staying pretty steady at that level. Humidity is lowered to around 50% if I can.
The tops are now at around 45-60cm height from the soil.
Continuing the last heavier defoliation/pruning process that I started yesterday at the end of 2nd flowering week. I saw no signs of mold or any other issues as I went through the plants.
After this week I'm going to change the nutrient solutions on the tanks and fill them with fresh nutrients with minor changes: Dropping the amount of Grow from 1,5ml to 0,5ml and increasing the amount of Bloom from 1,5ml to 2,5ml. After the change I'm only going to refill the tanks without adding any Grow and will instead increase the amount of Bloom to 3ml. Propably a one more change of fresh nutrients until flushing with Final Solution prior harvesting.
Day64 (19.12.)
Some more defoliation focusing on the upper growth revealing bud sites below them and keeping off the moisture. Already got a trash bag almost full of leaves since they've been pretty bushy plants on average.
Day65 (20.12.)
Continuing the last defoliation process.
Day66 (21.12.)
Continuing the last defoliation process, pretty satisfied with the results so far. Light penetration and airflow have increased greatly so I don't have to worry that much about humidity or possible mold any longer.
Each strain has started flowering, all plants are females and buds have started to develop. Defoliating didn't seem to stress the plants as much as I thought it would.
Day67 (22.12.)
Day68 (23.12.)
Refilled and added some nutrients with a stronger Bloom/Grow -ratio (~4:1) and left my girls to enjoy the Christmas Holidays as I did. I'll be gone for around three days, after that I'll change to new fresh nutrients as I mentioned before.
One Ayahuasca Purple seems to be ahead of others, and a few other ones have clearly started to develop some buds too, rest of the plants are following closely behind. Each strain has some truly astonishing individuals, and I think Ayahuasca's have shown most variety between different plants. Overall everything looks pretty good I think. Hopefully can say the same after a couple of days as I come back.
Happy holidays everyone!
Day69 (24.12.)
Day70 (25.12.)
I added another Led light to my tent just before the lights turned off. Everything looks amazing!
