Processing
Likes
Comments
Share
Likes
17
Share
@m0use
Follow
This was a fun project that was a few years in the making and a year later to see if they would last a season for this upload to happen. Before any of this I would bike aorund town grabbing up all the old Ikea solid pine bed slats that I could find and storing them in the basement. I have a lot of wood down there, any size worked as long as I have enough of them. The hot days to find them were the first and last of the months because that's when people where moving in/out. I also kept an eye on the free section on local online classifieds as well. The entire purpose of this was to recycle as much off the streets as I could before buying anything to finalize the project. In the end I only bought sealer, screws and some takeaway/beers. All the wood was 100% free and salvaged off the streets of Toronto saving it from the dumpster bin. After collecting all the slats for about 2 years I was playing aorund with them on how I wanted to make this work. I had previously done a little project like this before but I messed it up and the boxes where crap. did not last longer then 2 seasons, they where thin and shallow as well could not grow much of anything in them. I Was talking to my friend who is renovating their house and we brainstormed some ideas on the boxes, I found some designs I liked online and said lets make something like this out of what I have here. We tossed out a few of the design features when looking at them as it would have been wasted wood and extra work not needed. If I had more wood them maybe it could have been an option but simple was the name of the game. They taught me what I needed to know like how the miter saw and sander worked, plus all the other tools I was using. They did help out with a table saw and creating the triangle support joints in the corners, They used some pine left overs they had while making a staircase indoors. I did not feel up to the task of using a table saw given all the relatives I know who have lost a finger to them. In the end we decided the design would be three boards high and take an alternating pattern on corners. layer one short, layer 2 long, layer 3 short. Went with a galvanized and painted deck screw so it can take the weathering. Ran into some problems like making everything level as some of the boards were warped and other ones had undesired aspects like knots and tacky sticker goo I could not remove. So I used them for the base that will not been seen so much. Clamped everything down and called it a day. Once it was all done and over with, I then brought them back home from my buddies work garage and started to seal them. I went with a boiled linseed oil as its a food safe option should the wood degrade into the soil I will plant in them. I will need to reapply it to the boxes year after year but the main coat is the most important one and I put it on 3 layers with a good dry in between coats. the inside of the boxes that where coated did not degrade at all as the sun did not hit them so it will not need a new coat just the outside. Overall the end result was very impressive for myself, I've never taken a woodworking class ever and It was a near perfect outcome for me. Heavy Duty Planter Boxes for all my gardening needs. I made a last min decision to add in a plastic liner to preserve the wood even longer and stapled that into the frame. it has held up quite well and may need replacing end of 2nd or 3rd year out in the sun. Used a thick moisture wrap plastic with UV protectors in its formula. Lets see what I can grow in them this year! m0use's haus of projects - garden box edition
Likes
23
Share
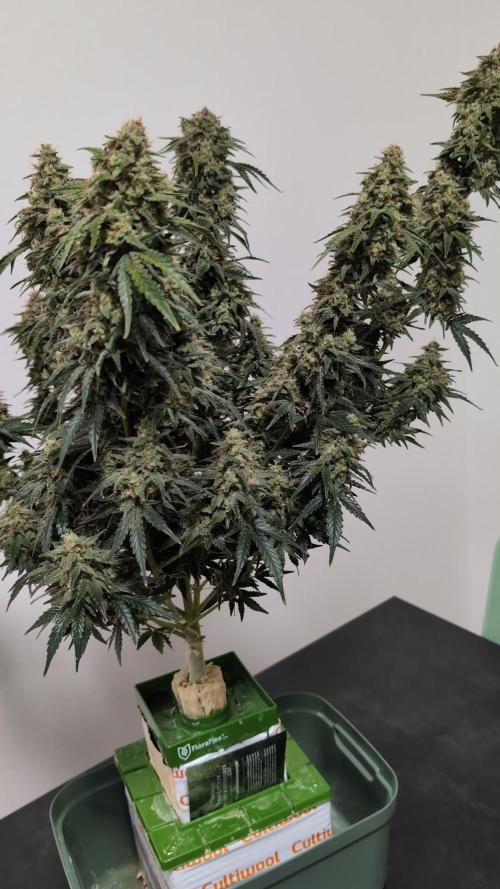
Week 14! I am starting to get really excited about this plant! She is plumping up and producing a lot of trichomes! Smell is very enjoyable. Fruity, sweet and lemony are smells that come to mind. Doing minor defoliation if I see leaves shading buds.
Likes
17
Share
@Lazuli
Follow
They start looking very dense now, i flushed a day ago and instantly fed 8liters per pot with 650ppm ripen so the runoff is also in the 600 range. Now there is 9 days left with this feeding it will kick in hard now. All buds are rockhard there is no fluf anywhere in the plant as these are small plants and can only focus on nice marure buds. I love this strain i think this has a very good leaf to bud ratio and fattens up really fast also not much stretch diring the preflower. See u next week at the harvest day.
Likes
151
Share
@PapaNugs
Follow
Girls are doing great! Especially for entering the final week! They are getting watered every day to every other day. Letting them dry out a little. Got hit with some recharge and mammoth P for the first time. Just cause I got some for Black Friday. Pulled plant number four from the other tent. Wanted to wait for some amber and happy I did
Likes
23
Share
Le ragazze dopo 24 ore che sono state messe nel fazzoletto umido sono germinate senza problemi....💪
Likes
70
Share
They are doing good, flipping into flower next week. They love the new light. It’s been a little too hot since adding in new light. 30-31 degrees during peak heat - thinking about getting an ac machine next week
Likes
42
Share
@MrJoint
Follow
✂️ Defoliation one more time and LST adjustment. 🥦We stay training. ✌️🎃Thank you for checking my cultivation.
Processing
Likes
29
Share
@Grey_Wolf
Follow
Ginger Nut Cookies & Aussie Music Videos Fastbuds GSC x Barneys Red diesel 6 weeks of flowering completed 9th April 2020 Hi Everyone I hope you are all feeling well and keeping busy during the lockdown. It's raining cats and dogs here (lucky there's no chinese around LMFAO) and the humidity is 100% so today Ive chopped this little lady down and she is now drying up in my shed with fans going 24/7. I was quite pleased with the amount of bud I got off her and it's smelling fantastic and is very sticky.The trichomes were very milky with a few amber as well. 😍 very easy to grow no fuss and no problems but we'll have to wait and see as to whether she is a good smoke or not . Now for this weeks Aussie Music videos 👊 Because we are almost at the end of this grow I thought I had better add a few extra songs this week to make sure I get a decent selection of Diffrent music videos for you all to check out. So for this weeks selections I chose Empire of the Sun 👊 Walking on a Dream https://youtu.be/eimgRedLkkU Big Pig 👉 (from Bill n teds excellent adventure) 👊 I can't break away https://youtu.be/f_rfXVdYelA Peking duk 👊 Reprisal https://youtu.be/4GboBAg2Syo The white stripes 👊 Seven nation army https://youtu.be/0J2QdDbelmY Grinspoon 👊 Chemical Heart https://youtu.be/58mXxWuUqYw The hilltop hoods 👊 Leave my lonely https://youtu.be/yKifJ4Q5ph0 And Silverchair 👉Not bad for a bunch of 16yr olds which they were at the time this video was made https://www.youtube.com/watch?v=RZD982yrmx4 The Next update will be the Final harvest update with the dried n trimmed buds etc. I will also have to add another heap of tunes in that I had wanted to play , so keep an eye out for my next Update of Ginger Nut Cookies & Aussie Music videos .😀 Until then Stay safe and Keep lit And we'll all get thru this Together 🙏 👍
Likes
7
Share
@panorama
Follow
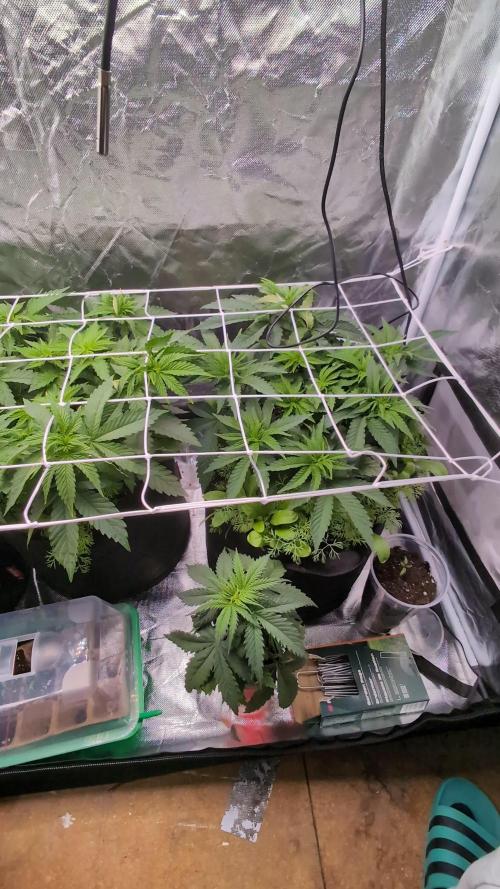
The third week is almost over and the ladies are looking way better than last week. They completely recovered from the grub incident and are growing faster and faster. It seems like I really missed the FIM -.- I just haven't removed enough from the main trunk and it is just growing as if nothing had happened. Only the leaves are looking quite messy. But, no problem, it was our first time and we just try it again. Hopefully I didn't remove too much this time. The light intensity was increased from 50% to 75%. I water them every other day, adding some root juice and Acti-Vera. Soon, I'm going to FIM/TOP the rest of the plants in preparation for LST and SCROG. Stay tuned.
Likes
91
Share
WEEK 5 START OF DAY 28 NUTRIENTS— Front Row AG Part A 4.2g per gallon Front Row AG Part B 2.8g per gallon Front Row AG SI .5ml per gallon Front Row AG Phoszyme .4g per gallon Front Row AG Clean Up .2g per gallon I am not sponsored by Front Row AG. I have purchased the entire lineup of Front Row AG after seeing it on a commercial level with great success…freakin great success! This week everything was transplanted to their final pots. I will change some things next run, but I already had 5 galling fabrics pots so this is where I’m at. I made homemade drip rings out of 1/2 inch tube. Each tube had 1/8 inch holes drilled into the bottom of it. They will be controlled by their own shut off valves individually. This is also because I’m using the last of a bunch of stuff. Some pots are pure coco, some coco/perlite, and 1 pot of promix hp. Because they will all take water at different rates, and I have an automatic water system, shutoff’s will be used to control the amount of water when the pumps turned on. This seems like a lot but I had everything on hand. Next run will be rockwool slabs and double the plants. Lights are only running at 30% 250ppfd at the top of the plants. I will update as much as possible. Thanks for stopping by and I’ll see you next week.
Likes
114
Share
@Natrona
Follow
RQS Titan F1 week 5 Hello friends and followers, 2/25 This has been an exciting week. My Titan girls started flower 🌼. T3 in the 3-gallon air pot is larger at 6.5 inches. Last week I noticed her new growth was getting long and thin. A sure sign the pistils will emerge in a day or two. T3 started flower 🌼on 2/25. 2/26 Surprise surprise, T3 stretched an inch overnight and T2 about a.5 inch. That stretch meant I had a busy plant workday ahead. First, I defoliated T3 since I could see what I had to work with. Then because I’ve been following @yan402 on his Titan grow, I said I was going to top her. He said its ok if done correctly and at the right time. Well, fingers crossed 🤞, I hope it was not too late or cut in yhe wrong place since T3 was already in flower. Her short (.75-1” long) stems are so close to the stem, it was difficult getting the tie down pins placed. With T2’s stretches her tippy top is just peeking above the copper pot rim. She is towering 😅 at 2.5 inches. T2 was defoliated on 2/26 as well. Her defoliation pictures above show how many I was able to trim off 7 and the leaf relative size. T2’s largest leaf is the size of a quarter and the smallest set I cut off, about the size of a penny. I keep supplementing and folar spraying with Cal-mag but the internodal chlorosis is still visible. I think Teapot gal (T2) has a copper excess.  Slowed Growth,  Fewer branches  Internodal Chlorosis  Stumpy roots (I won’t see this until I harvest and reveal the root ball) Given these symptoms of copper excess, and that RQS Titan are F1 hybrids and should be stable, I believe the height and the health differences are attributable to the copper wire teapot. They are in the same soil, same tent environment, same nutrient solution, same light, same everything. As I stated in previous discourse, I expected the overall plant to be smaller than T3 simply based on the pot size but did not expect to see such size differences so early, not to mention the nutrient issues. How I wonder? The copper wire is separated from the plant and soil by coco liner (which should be neutral, then coffee filters because I thought the soil would was out). Then the soil and plant. T2 is towering at 2.5 inches and started flower on 2/29. I expected a delay in her flowering time (4 days after T3) since she was transplanted to the teapot when T1 failed to thrive (maybe also the teapot cause?). Any time you train your plants, the stress causes delays in flowering then harvest. I defoliated T2 on 3/1 day 30. The pictures after defoliation show the tight node structure with 3 or 4 nodes crammed in only 1.5 inches of the main stem. Sheesh. So, as we enter March, we are off and growing buds. RQS says harvest 70-75 days or 40-45 days of flower. My calculations – harvest will be April 13-18. Be sure to come for my tea
Likes
14
Share
D85/F41 - 24/06/23 - She's almost ready, I think I'll start the flush soon D86/F42 - 25/06/23 - Temp is still too high, I'm trying to refresh the environment with air conditioning D87/F43 - 26/06/23 - First Thricomes Video. I'm going to start the flush today and I'll arwest next WE D88/F44 - 27/06/23 - Flushing D89/F45 - 28/06/23 - Flushing D90/F46 - 29/06/23 - Flushing D91/F47 - 30/06/23 - She's ready. Tomorrow I'll cut her
Likes
4
Share
Learned a lot from this grow and am very happy with the results. Pulled 2.8 Oz and 1.1 Oz of trim/popcorn buds in a one gallon pot. Definitely wont be doing that again, but had a lot of fun throughout the entire process. Going to be starting another grow soon! Very excited for that.
Likes
1
Share
@c1note
Follow
geht mir bisschen zu langsam mit dem Blühen, also Lampe 60 auf 80 %(1100ppfd) hoch, 1300- 1600 ppm CO². Mal schauen was passiert. Überlege noch ob ich denen eine Stunde UV-B gebe, nach meiner Erfahrung gibt es mehr Stink/Gas dazu und die linke Pflanze ist eine Mischung aus Glue/Fruity + Nadelbaum mit frischer Windel😁
Processing
Likes
13
Share
@rainman
Follow
Plant is looking and feeling great. Buds are full of trychomes, sticky icky icky stuff. This week i'll give ripening nutrients and will begin flushing, so i can harvest in the end of next week. Peace.
Processing
Likes
24
Share
@Grnhead
Follow
Just getting going again after some mods to my grow box. I’ve replaced the main CFL bulb with an LED and it is much brighter. I also removed the second carbon filter to create more space in the box. The new setup allows for more even space and light distribution and overall more growing space. With the additional light I thought I would try out CO2 so I added an Exhale365 bag. Starting out with 3 plants, 2 Pineapple Express and 1 Pineapple Skunk. There was some type of burn on the first seedling but that was earlier on and it has grown a lot since I first noticed it. I planted the seeds days apart so a few are behind. Growbox summary: * grow space: 19”H x 17”W x 21”D * 4 small, 1 medium internal fans * 3 gallon hydro reservoir * 6 inch exhaust fan + 4 inch exhaust fan in sequence * 150W Mars Hydro TS-1000 (new) * 3 X 20W LED side lights (+1 new) * Exhale CO2 bag (new) Water temps are ranging from 68 up to 70. It’s a small space, but with light covering all sides I think I can get a decent yield. Last time 3.2 ounces were harvested from it. Hoping to hit 5 ounces this time by creating fewer, but larger colas. Day 6 update: * The pinex-1 is looking a little funky. It has weird leaf growth, some minor defects in color, super short compared to the others, and the first leafs are starting to canoe a little. * pinex-2 and pskunk are looking good and growing well, but the leaves aren’t very green. * decided to bump up nutrients a little by moving to week 2 on the schedule and diluting to 60%. That took the ppm up from 400(200 base) to 630(210 base). Hoping if they weren’t getting enough nutrients that this will fix it. * the new light might be a little to bright for these babies. Dimmed it to about 75% power.
Processing
Likes
7
Share
SUNDAY 4/21: I fed them about 1/3 gallon each today. Switched to Beastie Bloomz and increased terpinator. I inspected them for nanners and found none today. Will take some photos tomorrow- MONDAY: Too busy to spend much time with them today. TUESDAY: I rearranged and took some photos today. There are 2 of them in the small tent and one in the big tent. WEDNESDAY: I watered the one in the big tent and took some photos and a video. Will water the ones int he small tent tomorrow. THURSDAY: I watered with about 1/3 gallon and included some terpinator, calimagic, and beastie bloomz. I did a bunch of training on them to get some separation and better light penetration into the lower flowers FRIDAY: I did some more training on them today and I made some improvements to my fresh air a/c intake in the tent that dropped the temp a couple of degrees, and the new dehumidifier is keeping the RH right where I want it..45-50%.👌 This allows the evap cooler to be more effective at cooling as well...above 50% RH and it's basically just a fan..
Likes
9
Share
📆 Semana 12 Semana de corte con maduración completa. Cogollos muy compactos, resinosos y bien formados, con tricomas en punto óptimo entre lechoso y algo de ámbar. El aroma alcanza su máxima intensidad y el fade final se acelera por el ajuste de nutrientes, sin comprometer la calidad. Se realiza el corte e inicia el secado, cerrando el ciclo. Seguimos creciendo fuerte 💪!