The Grow Awards 2026 🏆 


Likes
Comments
Share
@zombikush81
Follow
Conclusion and a plant that grows quite slender in bloom doubles if it does not treble its size, responds well to defoliation, it is usually harvested in 8-9 weeks but if it is left a week more mature to perfection. on a scale of 1/10 my vote for this variety is 8.

Likes
21
Share
@BrieflyGrowing
Follow
All good so far, all plants growing at about the same rate except one of the RQS Northern Lights (#1) that's seems to grow considerably faster...
Hoping for a monster!


Likes
Comments
Share
@eldruida_lamota
Follow
Vamos familia, actualizamos la cuarta semana de floración de estas Granny’s Home de Seedstockers, salieron las 2 de 3, 66% ratio éxito.
Aplicamos varios productos de Agrobeta, que son increíbles para aportar una buena alimentación a las plantas.
Temperatura y humedad dentro de los rangos correctos dentro de la etapa de floración.
La tierra utilizada es al mix top crop, por cambiar.
De 2 ejemplares me quede con los 2 para completar el indoor, también cambie el fotoperiodo a 12/12 y aplique una poda de bajos, se ven bien sanas las plantas, tienen un buen color progresan a muy buen ritmo por el momento, las flores están formándose y empezaron a tricomar, hasta aquí todo.
Agrobeta:
https://www.agrobeta.com/agrobetatiendaonline/36-abonos-canamo
Hasta aquí todo, Buenos humos 💨💨💨.


Likes
43
Share
@PEAKYPLANTERS
Follow
it's always a pleasure to do business with Barney's Farm!!!
They have never let me down even once!!
Even in the worst situations and conditions they have always been able to bring out the best for me!!
I really enjoyed forcing these plants to see their reactions, but I wouldn't do it again as a technique because it only serves to keep the canopy low but not to increase the yields...or...at least in my case I didn't find it of fundamental importance....maybe a simple cut of the apical top and that was it! but that's fine!😋

Likes
3
Share
@Del_grow
Follow
Practically overnight the Blackberry Moonrocks darkened to almost black from its blackberry Kush parentage, Kinda signaling that it’s ready. I mean it’s caked in trichs, many cloudy but still not quite there. All these strains look and smell great.


Likes
11
Share
@Chubbs
Follow
420 Fastbuds Week 2 Veg
FBT2304
The two of these are starting off great. The few rust spots stopped and stayed on the couple leafs it showed up on. I feed 500ml of solution every other day. I did start the General Hydroponics 3 part Flora series as well as the Calimagic. On week one I started 1/4tsp per gal ratio every other feed, so far no burn so will probably bump it up this coming week and see how they respond. All in all Happy Growing.
Likes
41
Share
@HollowSource
Follow
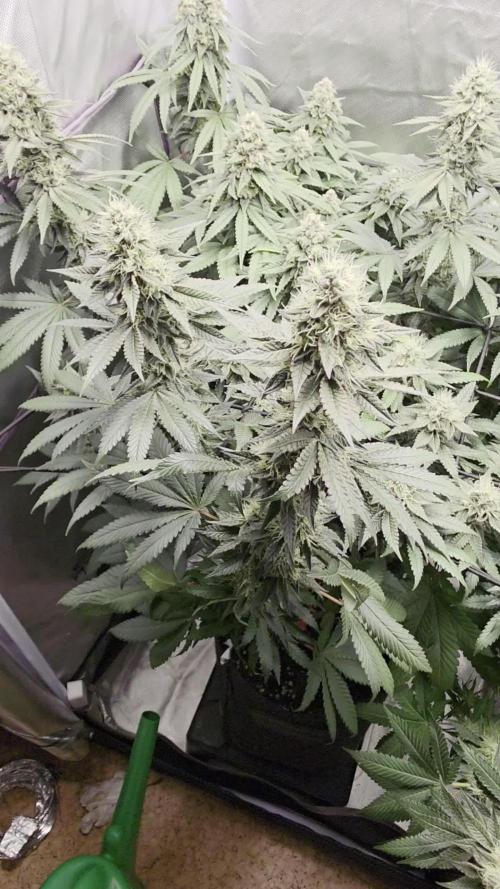
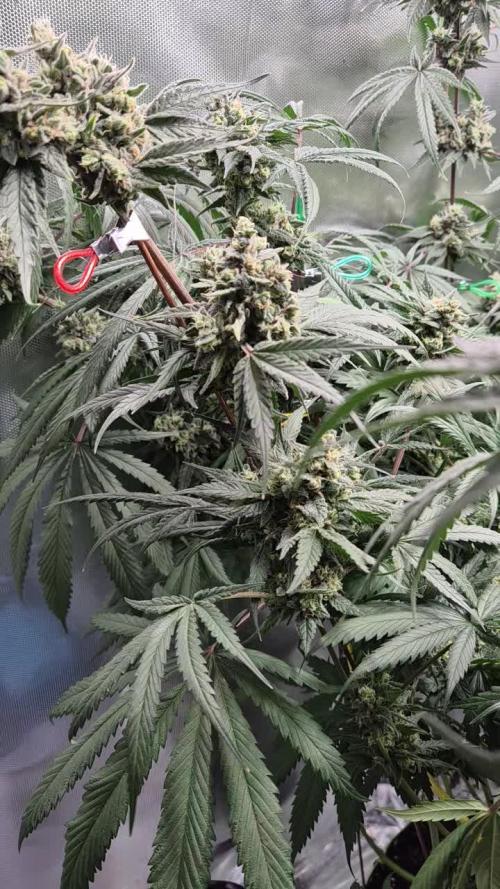
This girl is just huge, buds everywhere, fat tops and lots of them. She is really starting to fill out and is super top heavy. I don't even try to take her out the tent now. Her aroma is insane, that typical haze smell, with a gas undertone. Super sticky and developing lovely sugar. Over half way now. Can't wait to get to the finish line!


Likes
3
Share
@CheeRz
Follow
We are nearing the finish line! Both ladies look great, and the delicious aroma wafting from the tent brings a smile to my face every time. I think we should finish the run in about two weeks. 🍋🍋🍋🍒🍒🍒


Likes
59
Share
@Secretflower
Follow
Hello everyone,
🌿.17 May 2021... Day N°105.🌿
🌻 .Flowering Day 32.🌻
SPLIFF SEEDS+RQS ORGANIC NUTRIENTS+MARS-HYDRO= Look at the Photo..😊
5th week of flowering for my three Feminized Amnesiac.
The plants are going well, the buds are going strong and start to release very pleasant smells, the leaves have not yet changed color et je retire toujours les feuilles qui font de l'ombre aux Buds..👍
💉 .. I give them only Calgreen.
🔦 .. Led lamp Marshydro Tsw 2000 at 100% power and 20 cm from the canopy. This lamp is ball, look at my plants how beautiful they are and all this organic..😘
www.spliffseeds.nl
www.mars-hydro.com
That's all for now my friends, thank you for going through Sub and I will follow you back.
Take care of yourself and your loved ones.
I wish you only happiness with your darling.. 😘
.. See you soon.. 💨


Likes
5
Share
@Naujas
Follow
the girl got a lot of heat sun and rain this week :D everything looks good she is already starting to bloom :).
Likes
57
Share
@DogDoctorOfficial
Follow
Welcome back, fellow growers, to the next chapter of my Medusa F1 adventure! We're now in week 9 from seed and week 5 of flowering, and boy, oh boy, things have taken a colorful turn in my garden. The buds on my Medusa are showing off a mesmerizing range of hues, with shades ranging from pink to purple, adorned with hints of red and green. It's a botanical masterpiece that feels like walking through a vibrant artist's palette!
Now, let's dive into a fascinating aspect of the final weeks: stopping the feedings. As we approach the grand finale, I've decided to halt all nutrient supplements. Why, you ask? Well, it's like preparing for a fancy dinner party. Just like we ease up on appetizers before the main course, withholding additional nutrients allows the plant to focus its energy on ripening those gorgeous buds to perfection. It's like providing a VIP treatment, pampering the flowers as they reach their peak potency.
Speaking of peak, I must admit, I've become quite the trichome enthusiast. Every day, I examine those tiny resinous structures, observing their development with a level of dedication that might make my Medusa think I'm an extraterrestrial trichome investigator. But hey, it's all worth it when you witness those trichomes shimmering like a galaxy of sparkling diamonds!
A big shoutout to Royal Queen Seeds for providing us with these incredible genetics. The Medusa F1 has truly been a joy to cultivate, showcasing its genetic prowess in every stage. Thank you, Royal Queen Seeds, for making our growing journeys magical!
Stay tuned for the thrilling conclusion of my Medusa F1 adventure. Until then, keep nurturing your green beauties, embrace the kaleidoscope of cannabis colors, and enjoy the wonders of nature's botanical artistry. May your harvests be abundant and your experiences with Royal Queen Seeds continue to exceed expectations. Happy growing, my fellow green-thumb comrades!
As always thank you all for stopping by and for supporting me on this journey, i am super passion about growing and fell blessed to have you all with me on this new journey <3 <3 <3
Genetics - RQS MEDUSA F1
Ligth - LUMATEK ZEUS 465 COMPACT PRO
Food - APTUS HOLLAND
All info and full product details can be find in can find @
https://www.royalqueenseeds.com
https://aptus-holland.com/
https://autopot.co.uk/
https://lumatek-lighting.com/
With true love comes happiness <3<3<3 Always believe in your self and always do things expecting nothing and with an open heart , be a giver and the universe will give back to you in ways you could not even imagine so <3<3<3
<3 <3 <3 Growers love to you all <3 <3 <3
Medusa F1
Medusa is a true F1 hybrid created from pure, inbred cannabis lines. She boasts uniform grow traits, mouthwatering aromas and flavours, and plenty of potency. If you're looking to bring stable, elongated plants into your room, tent, or garden, look no further. Mouthwatering Aromas, High Potency, and Mid-Size Plants
Though she won't turn you to stone like the mythical goddess after which she's named, Medusa F1 is bound to get you plenty stoned in her own special way. Combining genetics from inbred lines deriving from Sugar Magnolia, a thick and sweet indica, and American Beauty, a fast, fruity hybrid loved for its well-balanced, positive high, the result is an autoflowering F1 variety that produces fresh flavours, a unique cannabinoid profile, and large yields.
A very aromatic cultivar with a vibrant concentration of terpenes bearing notes of fresh mint alongside an upfront peppery kick, backed up by hints of fresh fruit, berries, and tangy fuel. Her thick, frosty flowers consistently produce high levels of THC and CBG, as well as high concentrations of myrcene, ocimene, farnesene, and caryophyllene. As a result, Medusa F1 has strong effects that relax and stone the body from head to toe (brought on by particularly high concentrations of myrcene and farnesene) while motivating the mind with an uplifting, creative, and motivating kick (thanks to high concentrations of ocimene).
Medusa F1 seeds produce elongated autoflowering plants with long, strong branches and well-spaced internodes. Plants regularly grow up to 80–85cm tall and boast a fast flowering time of just 42–45 days (72 days from germination to harvest). Thanks to her genetics, Medusa F1 produces plenty of thick flowers with big, swollen calyxes that make for very easy trimming. Medusa F1 is very stable, handling stress and unfavourable growing conditions with ease, though she is somewhat susceptible to Botrytis, so make sure to keep tabs on the humidity in your grow room/garden


Likes
48
Share
@AsNoriu
Follow
Day 117. Trim jail and heavy upload session for 24 hours at least. Don't like to keep photos, so ill upload each plant separately and will delete them. Phone camera is still cracked and off-focus, but they are all nice !
Day 128. I knew that those plants will be smallest, but Mini was in centre and her buds were still not nuggy nuggy ... sadf .....
#1 67, #2 68 , #3 75 , #4 56. 266 total .
836 from 720W is good, not my best, but good, just that airy quality ....
Happy Growing !!!
Likes
8
Share
@Pirangueiro
Follow
This Week they grow up good! I think i ll put This for flowering because I dont have space enough!! 👊🏻👊🏻☘️☘️