The Grow Awards 2026 🏆 


Likes
Comments
Share
@SantaStone
Follow
🎅 So, as for the smoke after 30 days of harvest day. Biscotti Mints have a high concentration of THC, definitely above 25%, you can feel it.
Beginners should exercise caution.
-The taste, I wouldn't exactly call it mint. It's similar to peppermint, but it doesn't taste like mint, it tastes like flowers. Bottom line, the taste is similar to pepper flowers.
-The effect is only evening, not daytime. It will be good for an evening relaxation or in the company of friends.
-The appearance is something beautiful. Everyone who saw him liked him. Dense, stone buds, green-violet color.

Likes
9
Share
@CBDezz
Follow
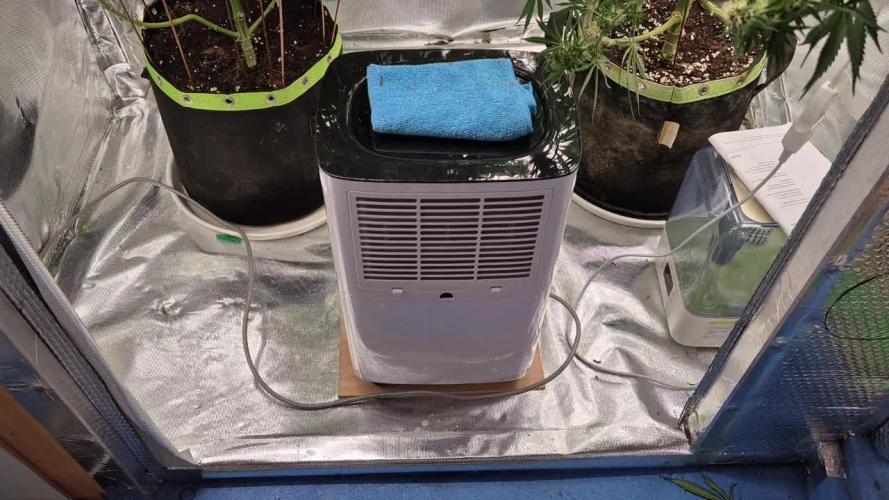
It was a rough week for the girl. We had bad weather this past week very high humidity and lots of rain. I also dealt with some powdery white mold which I was able to get under control by using baking soda and water and removing lots of leaves. The buds are much more dense and the trichomes are starting to turn milky. Ideally I would have liked to keep this plant in the ground one more week but we have more nasty weather coming so I will be most likely be pulling this girl in the next three days. It has been about 11 days since I have given her any nutrients and she has received a lot of rain water. I pulled some of the lower branch when I found the PWM just in-case and I have those dry right now.

Likes
2
Share
@Borberad
Follow
#1 Blütewoche 7/8
#2 Blütewoche 9/10
Blütewoche 2- 8: Die volle Blüte
Die Blüte ist in vollem Gange! Die Pflanzen haben sich kräftig und leider diesmal zu unkontrolliert gestreckt. Wir sind der Sativa Genetik aufgrund mangelnder Zeit und schlechtem Lichtmanagment nicht so ganz Herr geworden. Wir haben versucht den DLI sukzessive durch höhenregultion auf 40-45 anzuheben jedoch wohl erst zu spät. Aufgrund der zu ungleichmäßigen ausleuchtung im für diebLampe zu großen "Zelt" wurde eine zweite GCX9 installiert. Der Düngeplan bleibt unverändert.
* Zustand der Pflanze: Enorm kräftiger Blütestretch, Stiele kaum zu kontrollieren
* Wichtige Ereignisse: Anhebung des DLI.
* Düngung & Messwerte:
* Gießwasser: pH ca. 6,3. Leitwert 1,4 bis 2 S.
* Drain: Wir stellen sicher, dass der pH-Wert nicht unter 5,5 und nicht über 6,8 liegt und der Leitwert die +/- 500 S Abweichung einhält.
* Anpassungen: Einsatz von Haltestangen, Einbau einer zweiten GCX9 zur besseren Ausleuchtung und Inbetriebnahme eines GC Signal zur Sonnen Auf- und Untergangssimulaion
Blütewoche 9 bzw 10 Letzte Woche/n vor der Ernte: Das große Finale
Das große Finale naht! Der Tangie Ghost Train nähert sich mit einer Blütezeit von 9-10 Wochen dem Erntefenster. Ab heute wird die Pflanze täglich nur noch mit Osmosewasser gespült, bis das Drainwasser klar durchläuft. Dies soll alle überschüssigen Nährstoffe enfernen und und für ein sauberes und geschmackvolles Endprodukt sorgen die Meinungen gehen dabei auch bei uns auseinander und das Endprodukt und auch der Ertrag sind nicht spürbar schlechter wenn man spült jedoch spart man Geld bzw. Rohstoffe also spricht aus unserer Sicht nichts dagegen. Die Trichome werden genau beobachtet, um den perfekten Erntezeitpunkt zu bestimmen.
* Zustand der Pflanze: Ernte rückt näher. Die Trichome sind langsam zum großen Teil milchig.
* Wichtige Ereignisse: Beginn der Spülung.
* Düngung & Messwerte: Es wird nur noch mit reinem Osmosewasser gespült.
* Anpassungen: Zur gleichmäßigeren Ausleuchtung wurde eine zweite Lampe installiert jedoch sind dabei an dieser Pflanze einge Köpfe gerollt. Collateralschäden sind bei umbaumaßnahmen leider nicht selten. 🙄


Likes
13
Share
@Rwein93
Follow
Ciao ragazzi e bentornati qui per gli aggiornamenti sul diario stellare
Questa settimana è andata più che bene direi, 3 ragazze hanno preso il volo rispetto alle altre 2, che mostrano ancora rallentamenti dovuti alla troppa foltezza delle foglie e la poca luce nei siti inferiori.🤙
Nel complesso alla grande, ho eseguito dell altro LST e nel giorno 24 e 28. Negli stessi giorni ho anche defogliato per aggiustare i rami mentre li legavo.👍
Ho bagnato loro nel giorno 25 con 2 litri di acqua e nuts, avevano davvero sete il vaso era leggerissimo.🔝
Anche per questa settimana è tutto amici
Grazie per aver guardato e restate sintonizzati per nuovi aggiornamenti stellari.🙏
Buona settimana e felice crescita🌱🌱🌱


Likes
19
Share
@Naturalist
Follow
Trimmed a little more & started LST on day 67 with clips, first time using these, I'm pretty happy with them, even bent one stem to HST breaking & the clips supported the break.
Runoff PPM is 2828 average, it will only go to 2000 on here.


Likes
42
Share
@AutoCrazy
Follow
This plant was a BEAST!! She loaded up on frost as much as one could want. She smells super pungent!! The weight of the buds are becoming too much for the branches.
This plant was pure gold for a fast photoperiod!!
😎🌱
Likes
6
Share
@Chucky324
Follow
End of week 9 and the beginning of week 10 of veg.
Got them outside... A bit late this year because of the weather. Cold nights.
I put a heat sink in there this year to help keep the temp up at nights.
40 gallons of water is under the table. 8 - 5 gallon containers.
I'll get them out of there when the weather gets warmer at night.
The plants sure look happier in the last pictures that were taken this morning.
The soil is 5 gallons of Sunshine Mix #4 (70% Moss) and 5 gallons of compost out of my composters, and mixed them.
When I transplanted the plants I surrounded the root balls in the Sunshine mix that has neutral ph, so the roots will grow into the compost and not get burnt by the hot soil right next to the root ball. I added another 3 gallons of Sunshine mix to do that, and to top dress and fill the pots. All the plants have about the same amount of soil in their new pots.
Just rain water for now. There is lots of food for them when the roots get to the compost mix.
OK. Be Cool.
Chuck.

Likes
11
Share
@Kitties_and_Colas
Follow
Both girls were up-potted into their final pots, one in a 5gal fabric pot and one in a 6.5gal plastic container. I planted them in fresh FFOF with a few handfuls of perlite and stopped feeding (water and 3ml/gal cal-mag only), both girls seem happy and look healthy albeit small for their age...i did a heavy defoliation on the bigger of the 2 plants and will do the same to the "runt" next week...
Edit: 5 days after transplant and brown spots have appeared, I believe it to be calcium lockout, possibly a PH drop after switching to a hot grow media..i removed effected leaves, applied a top dressing of dolomite lime (tablespoon each) and watered 1 gallon PH'd to 7.5..will update


Likes
27
Share
@adam_pawloski87
Follow
This grow was so amazing!! The purple punch’s came out super sticky dense nugs, super frosty , an a huge smell of blueberry muffins! Super fun grow along with the Forbiddin Runtz definitely one of the sweetest berry smelling strains of ever grown, highly recommend everyone to try out the purple punch’s, you will be highly satisfied!! Stay tuned for next grow!!


Likes
36
Share
@TheGreenLeopard
Follow
Went west trim and will tidy up dry trim as I’m simply terrible At it. Great aroma
-
Very sticky !!! Very frosty. Almost a sun actually to cut them down. But they’re up for it, they know the medicinal love they bring. Think the smoke report should be high grade


Processing
Likes
37
Share
@Sillyasswhitedude
Follow
10-17 mainly just on a watering schedule...im really just STILL trying to keep them healthy and low...they are having to stretch for light but its workin out good with all the topping I think...im trying to time it so that I can clone again and then flower these...im not transplanting in hopes of restricting their size for awhile...the plan is to get new lights for my closet and invest in a 2x4 or so grow tent for flowering photoperiods in and move these mars hydro 300's in there...for now I'm just trying to get the most from my space as I can...sorry about the purple pics this week guys but like I said the name of the game is just to maintain these for now...im having to water them quiet frequently in these small pots but I don't mind...if you have a spare minute feel free to check out the autos I'm growing for AUTO SEEDS as well...one is measuring 13 inches the other 13.5 inches....

Likes
105
Share
@Natrona
Follow
Frostbanger Plants 1-6
Week 9 May 18– 24
FLOWER 5
Nutrients : 3 gal
GH Micro 20 ml
GH Gro 10 ml
GH Bloom 30ml
CalMag 15 ml
Recharge 10ml
Green sensation 15ml
Power buds 7.5 ml
5/18 PH 6.67, PPM 935, temp 68.5 1 ltr each
5/20 PH 6.67, PPM 1330, temp 68.5 2ltr each
5/23 PH 6.6, PPM 1570, temp 68.5 2ltr each
5/24 pics & vid
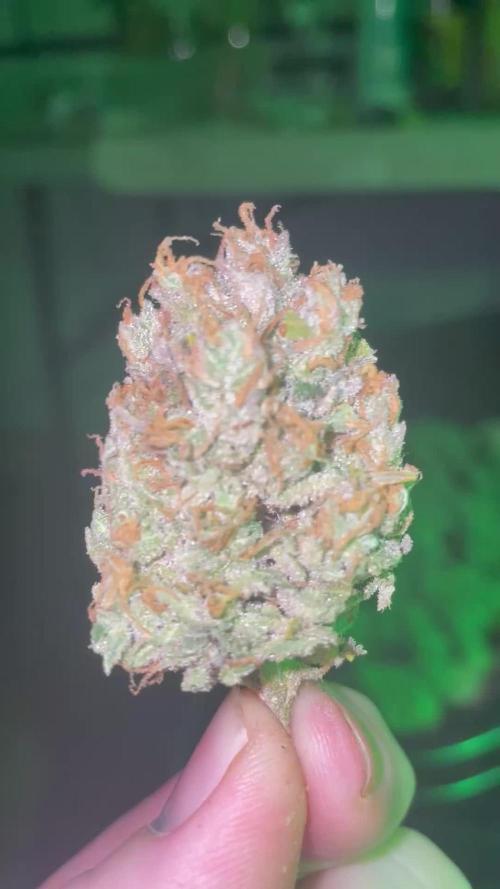
Since all 6 gals are getting frosty, I did some trichome pics. The statistics on Frostbanger indicate 50-day flower. Pics show mostly clear and milky.
There are a few with amber trichs and many orange pistils indicating maturation. At least 3 more weeks for maturity on these gals.
I continue manual control of the environment and using 3 circulating fans and the 4” exhaust vent from my 3x3.
I have the AC pushing air in and the exhaust pulling air out. This creates a neutral pressure tent environment-neither positive nor negative.
It looks like growth has stopped and plant height has been reached. Now is the time for buds to fatten and frost up. All 6 of them are short remaining less than 3 ft. They range from 15 to 31 inches. #4, 5 &6 are showing some fade, particularly #4.
Upon opening the tent, a melon smell comes off the buds if I get close, and more stickiness was observed during the process of defoliation. They are living up to the new strain’s name. #5 is the frostiest followed by #2. Wow week 3 of flower and that much frost already. Before FastBuds announced the strain name and characteristics, I was disappointed that FBA2502 could be an indica sleepy strain but the universe provides what you need at the time. The new strain profile indicates a whopping 29%THC with mainly sativa uplifting, euphoric, social effects with sweet fruity flavors which I love and enjoy. In addition, I recently bought a dap press and this strain is frosty and resinous. She will be great to press for live rosin.
FBA2502 is FROSTBANGER. Meet Frostbanger Auto, an autoflowering and Indica-leaning hybrid packing a staggeringly high THC content averaging 29%, making this one of the most potent strains on the market. It was created by Fast Buds through crossbreeding Gorilla Glue and Chemdawg, two equally iconic strains. Growers must know that these difficult-to-grow plants will pose specific challenges in terms of environmental control and nutrition, making them best suited for cultivators with some experience under their belt. The flowering cycle is short, averaging only 50 days, and yields are usually around 300g/m². The Frostbanger Auto flavor and aroma are both mouthwatering with a delightful combination of sweet, fruity, and flowery notes. The high is mainly Sativa-driven with uplifting and happiness-inducing effects that lead to euphoria and a general sense of well-being. You might feel sociable and talkative, but too spacey to say something. Following this surge of energy comes a deepening sense of relaxation, leaving you sedated and completely at ease with the world. Due to its potency and these long-lasting effects, medical patients hail Frostbanger Auto for treating chronic pain, stress, and even depression.
Measurements:
#1 15”
#2 20”
#3 17”
#4 30”
#5 31”
#6 24”
P.S I added a no churn ice cream recipe in week 4 of Natronas recipes. It is easy 3 ingredients. I bought Mango puree instead of fresh and reduced that to reduce water content. Try it. 😋
Your likes and comments are appreciated. Thanks for stopping by.
Growers love 💚🌿
💫Natrona💫
Likes
6
Share
@Creatorknbsland
Follow
Semana de crescimento em alta! Seguindo so com.agua nessa semana que passou e entrei com fert hj 02/03 para obter os resultados nessa semana q começam hj !troquei elas de armario que improvisei com uma geladeira velha!mais uma semana e ja estão prontas para flora!obrigado mister soma por essa particularidade que sao suas genéticas!acredito que nao sao todas somango que ha possibilidades de ter outra cepa,ja que as semente vieram d presente de um amigo !
