
Likes
Comments
Share


@Highgrade_Harvests
Follow
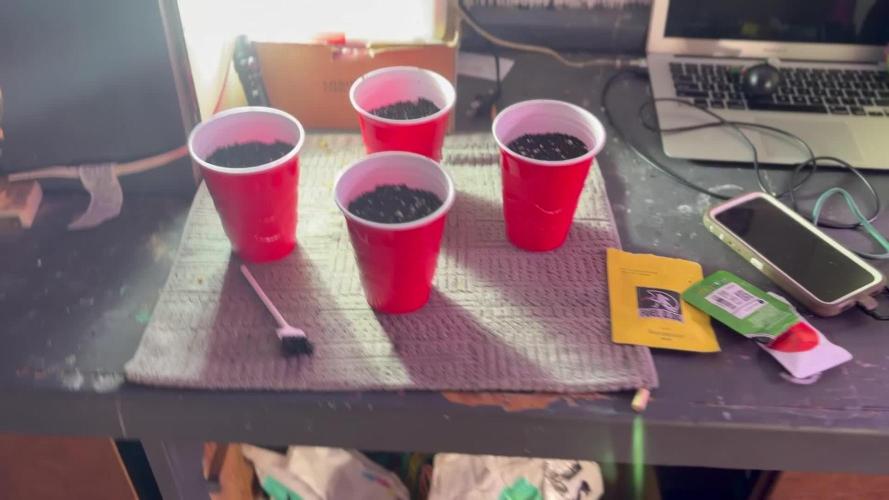
Starting to put on some weight now. Everything is looking good at this point.

Likes
3
Share


@Weedzoks
Follow
Welcome everyone
Here is the diaries of a friend, this is his first culture.
He chose for this session five Hulkberry from Royal Queen Seeds, a BubbleGum offered by Zamnesia, as well as a Big Bang Auto from GreenHouseSeeds.
All these ladies are under HPS 600W, 150cm square area.
Here we go!


Likes
18
Share


@Dunk_Junk
Follow
She's chugging along this week. A few more tirchomes on show and the buds have swelled noticeably.
Had to add some scaffolding to support some stems....
On she goes........
Likes
6
Share


@IamCy
Follow
Rolling into week 7. Time to dial down the nutes and start my UVB regiment. I use Reptisun 10.0 bulbs due to LED UV's giving far less than optimal performance. Reptisun 5.0 bulbs work 2. I only run them from week 7 to flush and for only 3 hours a day within the current light cycle.
Update day 45: After doing a trichome check, it finished EARLY!! Time to do a quick flush then harvest. I was going to add the nutes to the fresh water today 😂😂
Likes
8
Share

@Pennuts
Follow
After a week of curing the flavour and aroma are already good, I imagine in a few weeks it will be the best.


Processing
Likes
11
Share

@Dunk_Junk
Follow
She's done. Her trichomes are going milky. I want to harvest her earlier rather than later to get the 'high' trippy effect as opposed to the couchlock when there are amber trichomes present.


Likes
15
Share


@Seabass
Follow
21.07.
Harvested 1 small plant + majority of middle plant. And tried sample of last weeks dry out trial. What a great smoke, very mellow smoke, intense high.
Likes
10
Share


@Audi_grows98
Follow
Gorilla cookies has been thriving and starting her transition into flower,super excited to see this one chunk up🔥💚
Cherry cola is transitioning very nicely,taking very well to the feedings and all training. Super excited to see this one chunk up as well🔥 Both cultivars are right on schedule and thriving nicely 💚
Likes
21
Share


@Zzaps94
Follow
Going to pull the greener 2 bubbas and the biscotti on the right Sunday and let the other ones finish up together


Likes
2
Share

@Selkot
Follow
.
YEAR 5 - 3rd quarter
-----------------------
In the 3rd quarter, I start 3 Strawberry Banana from FB and 1 Royal AK from RQS.
But I allow myself a small upgrade: I replace the two TS 600 (100 W) with two TS 1000 (150 W).
The four plants give me 247 g, my best harvest so far,
With an average of 62 g per plant.
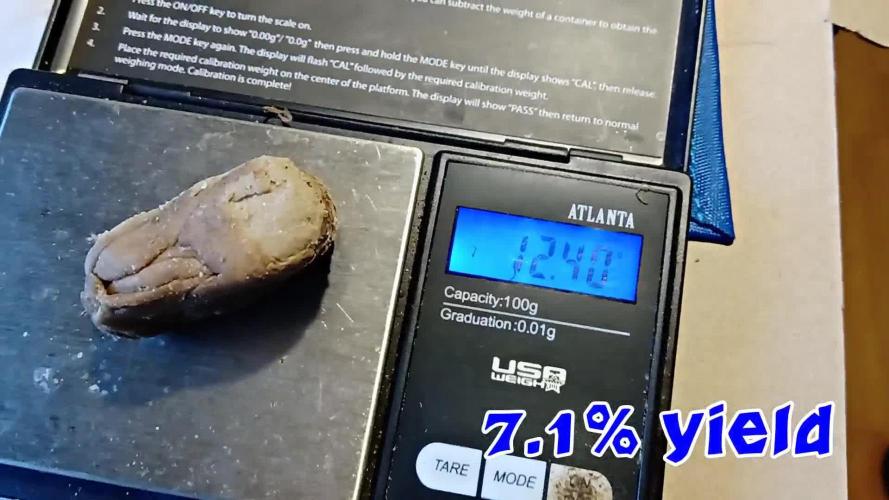
I also made a bit of bubble hash 😏
Likes
49
Share


@Ferenc
Follow
Day 71, 29th of November 2021:
Nice group strong girl! They are different in sizes and structure but all of them are lovely! We just getting closer to the final week as we just entered to the 5th week of the flowering stage.
The only changes I made is the ventilation and the extraction fan is off at the same time with the lamp so only switches on when the lamp does.
So this is the set up and and operation schedule now:
ViparSpectra XS2000 is on full power which is 240W so 100% capacity.
Ventilation: As I mentioned it is off when the lamp is off so 12 hours. When the lamp is on it switches on in every hour and off for one hour.
The extraction fan is on 12 hours when the lamp is, and then it takes a rest with the lap together lol ;)
Watering pretty much remains the same. Humidity quite is approx 50%, temperature as well approx 26-27 Celsius.
Fertilization remains the same since last week, the BioBizz family raised up to be 2ml/L each so it is like 2ml/L of BioGrow, 2ml/L of BioBloom, 2ml/L of TopMax... see the ratio above.
The schedule of the fertilization has not changed happnes 2x a week except epsom salt just 1x a week.


Likes
26
Share


@Bread_n_Buds
Follow
It was a wonderful journey, I really had the honor of doing this girl many times, this time even close to the Monster Zkittlez with which they generated the Runtz who was also in the grow. Super modern family situation, I wanted to try to figure out which one I liked best, and I still haven't been able to. at least I'm still tasting Runtz's first flowers and it's heavenly but the freshly picked Gelato and the upcoming Zkittlez are scary just to see them. Super resin, it really looks fake, I also have some macro photos that will make you cry. The resin is everywhere the trichomes are even in the largest leaves the scent is of the garden of eden. wow. Show. Really nice. It was freshly cleaned I want to try to do the resin the first time and then I have freshly cleaned and hung the whole girl upside down under the crop data next week when I clean and can give the detail. Gorgeous. Before being collected, she did two music therapy days, one of which in the dark with frequencies for plants and together we listened:
1 - Paolo Conte - "Gelato" al Limon
2 - Raekwon - Ice Cream to stay on the "Geato" theme and then all the M83 discography to be collected with the very famous Outro of Interstellar really seems to pass to a better life listening to that stuff. Top of the top
Likes
6
Share


@420DeepGrow
Follow
📆 Semana 7:
La Candy Bubatz XL avanza con fuerza en floración. Los cogollos se densifican y brillan con una capa creciente de tricomas, mientras el aroma dulce se vuelve más penetrante. La estructura sigue firme y la planta responde bien al plan de riego y nutrición, sin mostrar carencias ni estrés.
¡Seguimos creciendo fuerte! 💪
