




Likes
6
Share

@CaveGanja
Follow
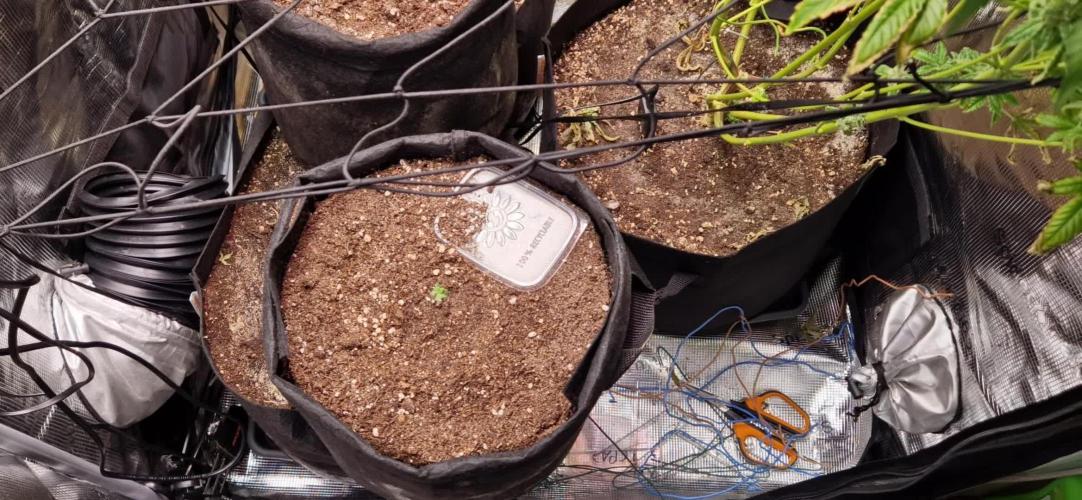
Cant cut her down she wasnt ready when i harvested the 2 other plants.
Was trying to move the 2 big buds under the light but they like it up there complet stuck and rocksolid😝
move 2 autos in the 90x90 to dry the other plants in my 60x60.
I hope thy dont mind 12/12 for 1week at least they get a lot more ppfd.
i give her only water.

Likes
8
Share


@Canna_Enthusiast
Follow
Placed 2 of 3 Seedlings into the hydro set-up
The third seed will be used for an outdoor soil grow.
Will change the water in 1 week to vega and cannazym with rhizotonic.
Planning to switch to aqua bloom on day 15.
Currently the lights are set back to 75% to save electricity.
Once flowering starts I’ll put in on 100%

Likes
7
Share


@El_Bottanico
Follow
Hello everyone.
Another week passed, gave her water and some enzimes on day 33, I noticed some leaf intervenal discoloration, not too concerning in my opinion. Maybe the enzimes were too much or some nutrient lock out due to a somewhat excessive fertilization. Any opinion on this issue?
I think will go on with plain water to the end I think, hoping the problem will sort out itself. What do you think?
Other then that I think buds oare forming fast and fine, she's putting out a little resin and smell now.
Ciao 😊

Likes
5
Share


@Reng420_vn
Follow
Có vẻ như pheno wedding cake đã vô tình quay trở lại thời gian ăn chay
Hay số N dư thừa là flower bị phát triển lá ?
Likes
3
Share


@Mr_nugs_lover_David
Follow
She has become a beautiful little bush full of fat dense nuggets completely covered in fruity and sweet resin glands with some purple no tones in the buds. Love It!

Likes
4
Share


@Forrbiddenterpz
Follow
I gave the girls an organic compost tea for nutrients(1 tsp Blk molasses,1cup worm cast,2 tablespoon kelp,2 tablespoon alfalfa meal,1tablespoon bat guano) and lsted again to get more bushier autos. I also moved my smallest autoflower to my 4x4 tent which is on a 12/12 schedule on 3/18/23


Likes
32
Share


@LockDownGrow
Follow
So after a very slow , deformed and sluggish start , as you can see this girl has now come into her own and very healthy and produceing really well , I seems as soon as I removed all the very first droopy leaves coving up all the branches she shot out in all directions ,
So I am pleased with her progress now and she looks too be a good yelding plant even at this stage ,


Likes
16
Share


@RFarm21
Follow
Olá growmies.
Esta gorilla está a demorar muito mais tempo comparando com o meu primeiro grow. Penso que o problema tenha sido as doses baixas de nitrogenio que dei durante a floração e as temperaturas no máximo chegaram aos 23 graus.. no próximo correrá melhor. Vivendo e aprendendo 👍
15 janeiro: continuação do flush - regada só com água, 2l.
Vou esperar mais uma semana no máximo para cortar. Na esperança que alguns tricomas comecem a ficar âmbares.
18 Janeiro - harvest day! Ja está a secar! Atualização em breve!


Likes
56
Share


@Ultraviolet
Follow
What's in the soil? What's not in the soil would be an easier question to answer. 16-18 DLI @ the minute. +++ as she grows.
Probably not recommended, but to get to where it needs to be, I need to start now.
Vegetative @1400ppm 0.8–1.2 kPa 80–86°F (26.7–30°C) 65–75%, LST Day 10, Fim'd Day 11
CEC (Cation Exchange Capacity):
This is a measure of a soil's ability to hold and exchange positively charged nutrients, like calcium, magnesium, and potassium. Soils with high CEC (more clay and organic matter) have more negative charges that attract and hold these essential nutrients, preventing them from leaching away.
Biochar is highly efficient at increasing cation exchange capacity (CEC) compared to many other amendments. Biochar's high CEC potential stems from its negatively charged functional groups, and studies show it can increase CEC by over 90%. Amendments like compost also increase CEC but are often more prone to rapid biodegradation, which can make biochar's effect more long-lasting. biochar acts as a long-lasting Cation Exchange Capacity (CEC) enhancer because its porous, carbon-rich structure provides sites for nutrients to bind to, effectively improving nutrient retention in soil without relying on the short-term benefits of fresh organic matter like compost or manure. Biochar's stability means these benefits last much longer than those from traditional organic amendments, making it a sustainable way to improve soil fertility, water retention, and structure over time. Needs to be charged first, similar to Coco, or it will immobilize cations, but at a much higher ratio.
a high cation exchange capacity (CEC) results in a high buffer protection, meaning the soil can better resist changes in pH and nutrient availability. This is because a high CEC soil has more negatively charged sites to hold onto essential positively charged nutrients, like calcium and magnesium, and to buffer against acid ions, such as hydrogen.
EC (Electrical Conductivity):
This measures the amount of soluble salts in the soil. High EC levels indicate a high concentration of dissolved salts and can be a sign of potential salinity issues that can harm plants.
The stored cations associated with a medium's cation exchange capacity (CEC) do not directly contribute to a real-time electrical conductivity (EC) reading. A real-time EC measurement reflects only the concentration of free, dissolved salt ions in the water solution within the medium.
98% of a plants nutrients comes directly from the water solution.
2% come directly from soil particles.
CEC is a mediums storage capacity for cations. These stored cations do not contribute to a mediums EC directly.
Electrical Conductivity (EC) does not measure salt ions adsorbed (stored) onto a Cation Exchange Capacity (CEC) site, as EC measures the conductivity of ions in solution within a soil or water sample, not those held on soil particles.
A medium releases stored cations to water by ion exchange, where a new, more desirable ion from the water solution temporarily displaces the stored cation from the medium's surface, a process also seen in plants absorbing nutrients via mass flow. For example, in water softeners, sodium ions are released from resin beads to bond with the medium's surface, displacing calcium and magnesium ions which then enter the water. This same principle applies when plants take up nutrients from the soil solution: the cations are released from the soil particles into the water in response to a concentration equilibrium, and then moved to the root surface via mass flow.
An example of ion exchange within the context of Cation Exchange Capacity (CEC) is a soil particle with a negative charge attracting and holding positively charged nutrient ions, like potassium (K+) or calcium (Ca2+), and then exchanging them for other positive ions present in the soil solution. For instance, a negatively charged clay particle in soil can hold a K+ ion and later release it to a plant's roots when a different cation, such as calcium (Ca2+), is abundant and replaces the potassium. This process of holding and swapping positively charged ions is fundamental to soil fertility, as it provides plants with essential nutrients.
Negative charges on soil particles: Soil particles, particularly clay and organic matter, have negatively charged surfaces due to their chemical structure.
Attraction of cations: These negative charges attract and hold positively charged ions, or cations, such as:
Potassium (K+)
Calcium (Ca2+)
Magnesium (Mg2+)
Sodium (Na+)
Ammonium (NH4+)
Plant roots excrete hydrogen ions (H+) through the action of proton pumps embedded in the root cell membranes, which use ATP (energy) to actively transport H+ ions from inside the root cell into the surrounding soil. This process lowers the pH of the soil, which helps to make certain mineral nutrients, such as iron, more available for uptake by the plant.
Mechanism of H+ Excretion
Proton Pumps: Root cells contain specialized proteins called proton pumps (H+-ATPases) in their cell membranes.
Active Transport: These proton pumps use energy from ATP to actively move H+ ions from the cytoplasm of the root cell into the soil, against their concentration gradient.
Role in pH Regulation: This active excretion of H+ is a major way plants regulate their internal cytoplasmic pH.
Nutrient Availability: The resulting decrease in soil pH makes certain essential mineral nutrients, like iron, more soluble and available for the root cells to absorb.
Ion Exchange: The H+ ions also displace positively charged mineral cations from the soil particles, making them available for uptake.
Iron Uptake: In response to iron deficiency stress, plants enhance H+ excretion and reductant release to lower the pH and convert Fe3+ to the more available form Fe2+. The altered pH can influence the activity and composition of beneficial microbes in the soil. The H+ gradient created by the proton pumps can also be used for other vital cell functions, such as ATP synthesis and the transport of other solutes. The hydrogen ions (H+) excreted during photosynthesis come from the splitting of water molecules. This splitting, called photolysis, occurs in Photosystem II to replace the electrons used in the light-dependent reactions. The released hydrogen ions are then pumped into the thylakoid lumen, creating a proton gradient that drives ATP synthesis.
Plants release hydrogen ions (H+) from their roots into the soil, a process that occurs in conjunction with nutrient uptake and photosynthesis. These H+ ions compete with mineral cations for the negatively charged sites on soil particles, a phenomenon known as cation exchange. By displacing beneficial mineral cations, the excreted H+ ions make these nutrients available for the plant to absorb, which can also lower the soil pH and indirectly affect its Cation Exchange Capacity (CEC) by altering the pool of exchangeable cations in the soil solution.
Plants use proton (H+) exudation, driven by the H+-ATPase enzyme, to release H+ ions into the soil, creating a more acidic rhizosphere, which enhances nutrient availability and influences nutrient cycling processes. This acidification mobilizes insoluble nutrients like iron (Fe) by breaking them down, while also facilitating the activity of beneficial microbes involved in the nutrient cycle. Therefore, H+ exudation is a critical plant strategy for nutrient acquisition and management, allowing plants to improve their access to essential elements from the soil.
A lack of water splitting during photosynthesis can affect iron uptake because the resulting energy imbalance disrupts the plant's ability to produce ATP and NADPH, which are crucial for overall photosynthetic energy conversion and can trigger a deficiency in iron homeostasis pathways. While photosynthesis uses hydrogen ions produced from water splitting for the Calvin cycle, not to create a hydrogen gas deficiency, the overall process is sensitive to nutrient availability, and iron is essential for chloroplast function.
In photosynthesis, water is split to provide electrons to replace those lost in Photosystem II, which is triggered by light absorption. These electrons then travel along a transport chain to generate ATP (energy currency) and NADPH (reducing power). Carbon Fixation: The generated ATP and NADPH are then used to convert carbon dioxide into carbohydrates in the Calvin cycle. Impaired water splitting (via water in or out) breaks the chain reaction of photosynthesis. This leads to an imbalance in ATP and NADPH levels, which disrupts the Calvin cycle and overall energy production in the plant. Plants require a sufficient supply of essential mineral elements like iron for photosynthesis. Iron is vital for chlorophyll formation and plays a crucial role in electron transport within the chloroplasts. The complex relationship between nutrient status and photosynthesis is evident when iron deficiency can be reverted by depleting other micronutrients like manganese. This highlights how nutrient homeostasis influences photosynthetic function. A lack of adequate energy and reducing power from photosynthesis, which is directly linked to water splitting, can trigger complex adaptive responses in the plant's iron uptake and distribution systems.
Plants possess receptors called transceptors that can directly detect specific nutrient concentrations in the soil or within the plant's tissues. These receptors trigger signaling pathways, sometimes involving calcium influx or changes in protein complex activity, that then influence nutrient uptake by the roots. Plants use this information to make long-term adjustments, such as Increasing root biomass to explore more soil for nutrients. Modifying metabolic pathways to make better use of available resources. Adjusting the rate of nutrient transport into the roots. That's why I keep a high EC. Abundance resonates Abundance.
Likes
32
Share

@Wojkers
Follow
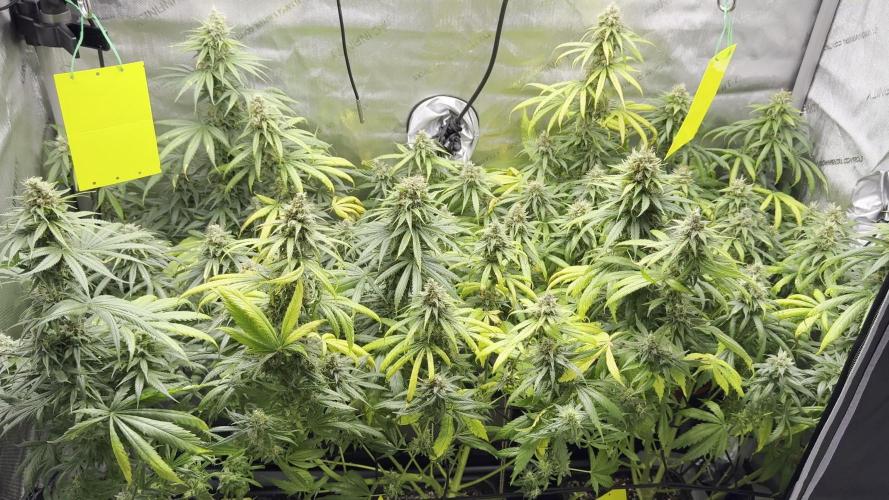
Week 7 – The Pest is Dead
Found the source of the whiteflies – two infested CBD plants I’d placed in the tent. Removed them, and since then only a few flies on traps. Problem solved. Buds are swelling nicely with more trichomes and orange pistils. Some yellowing leaves toward the end of the week, likely natural fade. Watered twice with pH water and gave one light HESI feed (½ dose) on Sunday. Dimmed light from level 7 to 6; PPFD is ~800 top / ~550 lower. Everything’s on track!

Likes
25
Share


@OZDAOgrow
Follow
I'm really contemplating dropping Bruce & Diesel. They're developing very badly. We'll see how they continue to develop, another week and it will be clearer.


Likes
25
Share


@Prototype0181
Follow
The lady's are a bit shocked after the ✂️ decapitation (topping) on 10-05. going for 6/8 cola's per plant👌
Stay tuned growmies 💚
Likes
10
Share

@carlitoshaze44
Follow
Día 20!!! Estamos en el punto de comienzo de la 4 semana de floración ! Esa en la que notamos como el cultivo nos da el cambio que queremos y a partir de los dos vemos como
Nuestras flores evolucionan de una manera u otra dependiendo de clima,genética,nuestra mano con ella etc..
Vamos a comenzar la media floración bien cargados con la paleta de nutrientes alta en potasio y nitrógeno!
Siempre añadiendo también,nuestras mañanas de agricultor.
Tuve el fallo de abrir el tupper de lombrices y echarlas a el cultivo y no poderos grabar el proceso.
Fue algo rápido que hice con el armario apagado..lo tuve que iluminar por un minuto para añadir la bola de lombrices unas 60!!!
La siguiente tanda de flores si empezara a sacarle provecho a estas amigas!!
Deciros que el cambio en altura es muy grande no para aún de crecer!
Y las últimas están engordando mucho las flores a pesar de el corto periodo se ve que nuestra selección de amnesia haze,es un fenotipo muy especial..
Es de unas 8 semanas de floración y muy buena productora!
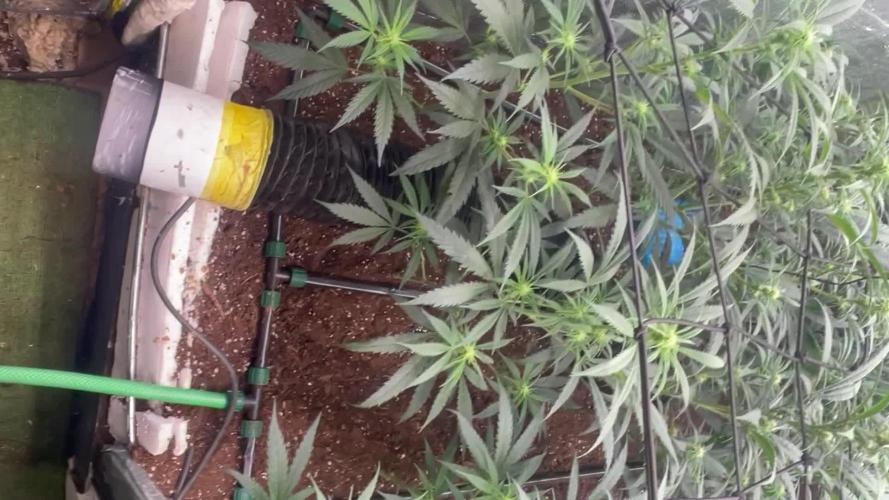
Día 21
Primer día de la cuarta semana de floración tenemos una escalera
Desde la puerta del armario hacia el fondo tenemos alturas que van 54cm/62cm/71cm/80cm
Gracias a el control individual en altura de cada luminaria iré trabajando con el control de dividir el área en tres Alturas diferentes,así lo requiera cada planta.
Una pequeña planta que está cerca de una rendija de ventilación tuvo unas pequeñas picaduras de tips”.
Observaré si no es de un periodo anterior de antes del fumigado..
Si no es así trabajaré un poco de jabón potásico y ajo!
De momento el olor es muy sutil.
Algunas flores empiezan a producir resina de manera temprana.

Likes
2
Share


@eldruida_lamota
Follow
Que pasa familia, vamos con la décima semana de floración de estas Gorilla Melón feminizadas de fastbuds.
Vamos al lío, de las 3 plantas, me quede con 2 por espacio, siempre pongo alguna semilla de más por si no abriese alguna por no perder ese hueco del indoor.
También se trasplantaron a su maceta definitiva, en este caso de 7 litros que además provocó un shock que también solucione.
El ph se controla en 6.2 , la temperatura la tenemos entre 20/24 grados y la humedad ronda el 50%.
Las flores están bien prietas y sacan unos aromas afrutados y dulces increible, palazo de variedad, como se han puesto.
Hasta aquí todo, Buenos humos 💨💨💨
Likes
64
Share


@valiotoro
Follow
Bud trim is super easy and nicely sticky, not too many leaves just perfect!
