Likes
Comments
Share


@Gassynugsgrow
Follow
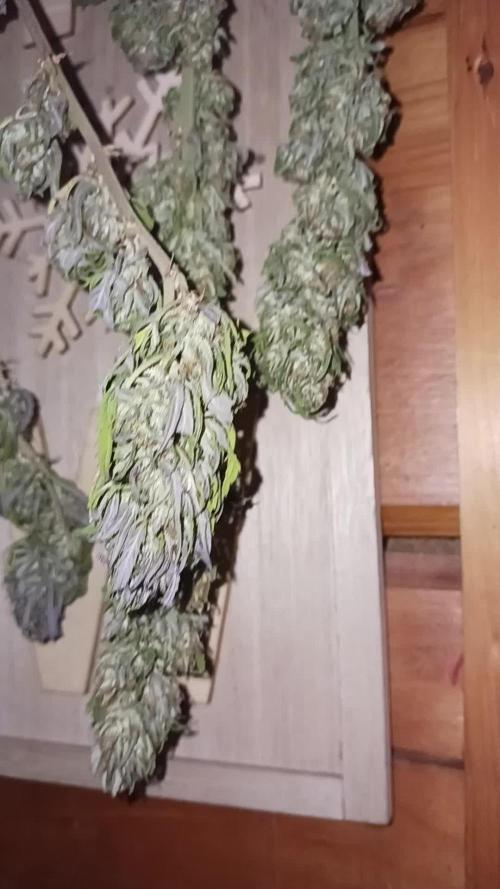
I think I chopped them too fast. They should be able to bloom for another week.
But I don't have a drying room. Therefore, it must be cut and dried together with other strains.


Likes
4
Share

@Zdenda
Follow
První týden v květu.. moc se toho neděje.Objevují se první samičí pestíky a začíná se to vytahovat.
Holky rostou krásně a vypadá to, že jsou spokojeny.
LST jsem dělal v tomto týdnu naposledy a už je nechám jen růst.. počkám až se ještě trochu vytáhnou a přidám síť. stále pH 6.2 a Ec 1-1.1.. začínám v květu hnojit zlehka a postupně přidávám podle toho jak se holky budou chovat. Mají docela velký listy.. chce to protrhávat, aby šlo dovnitř světlo a snížila se vlhkost.
Už je to zase prorostlé tak to zase proberu.
Celkově zatím žádný problém a s kmenem spokojenost.. hezký růst bez velkých nároků😄👍🏻

Likes
7
Share


@SecretC8keSociety
Follow
Gary Payton smell earthy pine on the nose. Very smooth on the exhale . Smoking a blunt and feeling good outside today 6/20/24. On my way to get tattoo so yeah I need to be high as a kite right now . Good looking MSNL I’m a return buyer.


Likes
5
Share


@Terpio1500
Follow
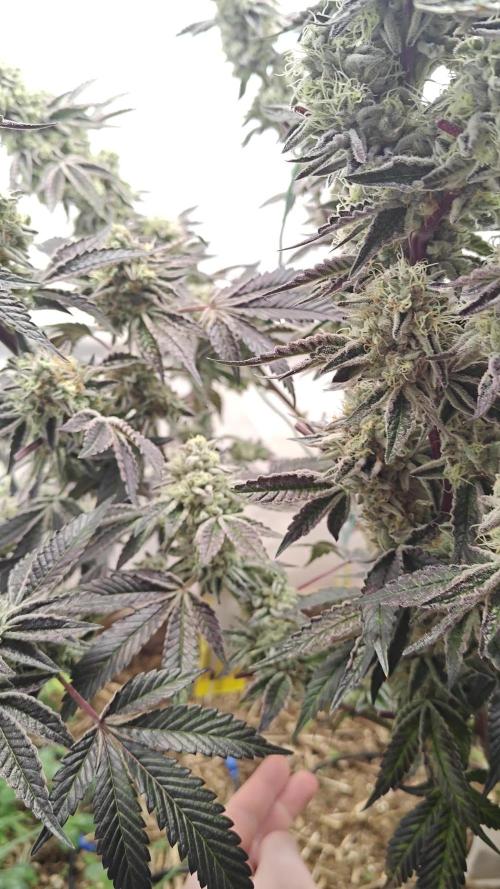
This plant is getting really big it looks lovely through out about to start feeding a little lighter do when the buds come in the smell is beautiful it’s smells gassy & stinky.
Week 5 check out my other grows (Jungle Verde, The New)
& follow my IG @therealterpio
Processing
Likes
4
Share


Likes
2
Share


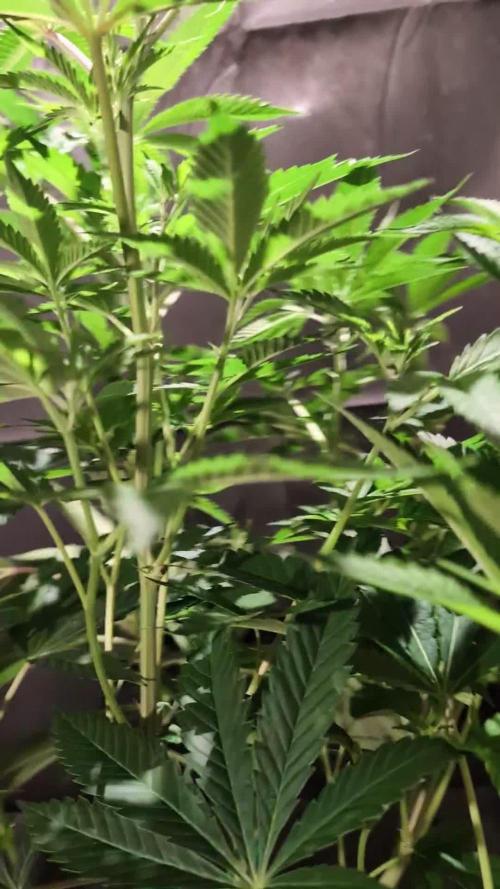
@Cysolja
Follow
I topped her this week and she became very bushy within two days. I also changed her into a 10 gallon grow bag and she is loving it. I have increased nutrients this week as I noticed a slight bit of leaf curl due to too much nitrogen so washed roots down a bit a diluted nutes slightly and she came around pretty quickly! Growing quickly


Likes
4
Share

@TrickzGrowz
Follow
Hat sich super entwickelt und es war der perfekte Zeitpunkt für sie, getoppt zu werden.
Die 4 Triebe sind alle auf einer Höhe und können jetzt gemeinsam groß werden.
Likes
3
Share

@hinterhofgrower
Follow
.
🌱 :
💧 : 4l day 43, 2l day 45 no nutrients, 4l day 47, back to 0,1ml/l pk 13-14
💡 : Dli: 40 mol/m²/d
🤔 :
Likes
5
Share


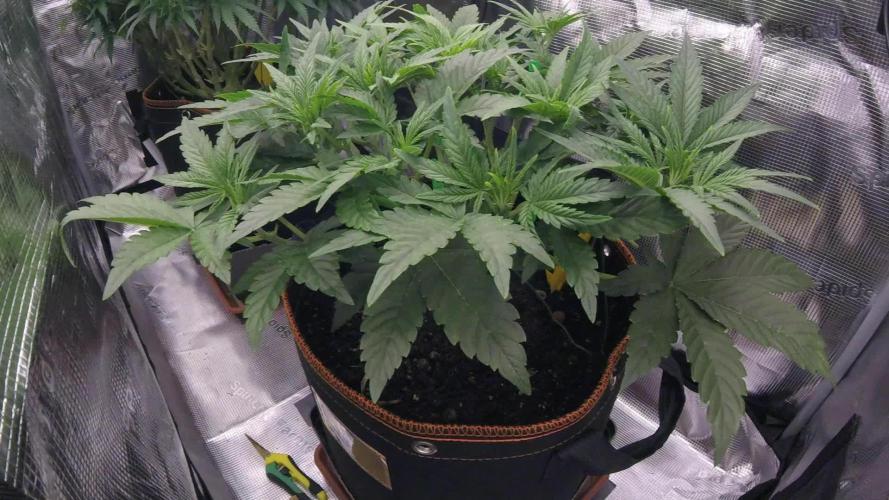
@homegrownowngrown
Follow
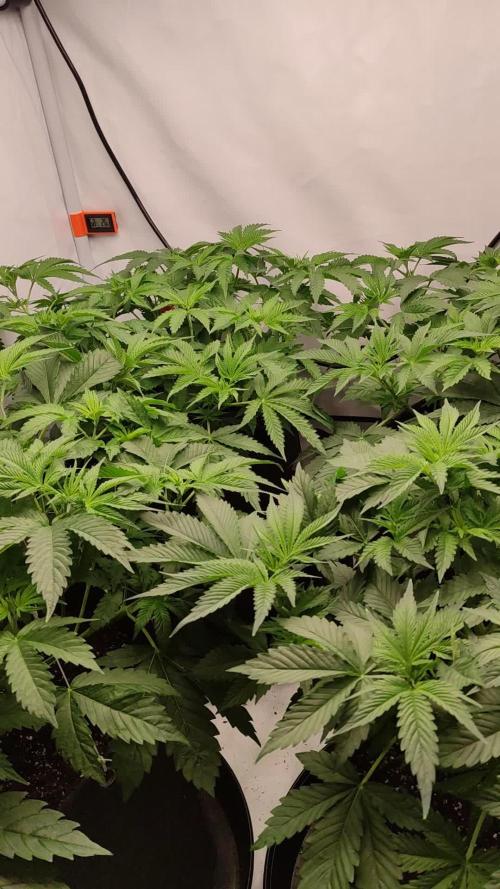
A good week for ICC photo.
I topped her and started bending branches for some horizontal development.
Once she’s covering the entire pot with some budsites and tops I will let her start stacking nodes vertically.
I am using “garden hooks” I’ve made with metal food skewers and will use those to bend and guide branches outwards.
Feed is the same really and I am really digging it so far, Gaia green and coco loco for a supersoil type grow in regards to waterings and feeds.
No ph checking, no dechlorinating water, just tapwater and a few add ins like fishshit and recharge, a seaweed/kelp foliar, and worm castings/topdresses.
Trying this routine out and hope to be able to reamend the pot and drop again.
This plant is in midweek5 of veg and has about 6-8 weeks to go before I can flip her to flower.

Likes
16
Share


@Mopish
Follow
27 Dec - 2 Jan
27 Dec
Started flushing due to nutrient burn at 26 Dec 22:00 - Finished Flushing on 28 Dec 06:00
2ml/l Flawless Finish
1ml/l Sensizym
400PPM
28 Dec
Lowered feed due to nutrient burn. Aiming at 900ppm
29 Dec
I don't see any new damage, but I'm keeping an eye on them.
31 Dec
I saw a few leaves with probable calcium def, so I added
0.8ml/l of Sensi bloom part A
0.8ml/l of Sensi bloom Part B
Likes
14
Share


@MG2009
Follow
03/03/2022
Down to one Lemon OG, one Biscotti Skunk, and three Grape Skunk all looking super vigorous
including Lemon OG .
Very happy with the genetics so far trimmed up the legs a bit lots of potential clones!
Ps.
Forgot picture of Biscotti Skunk it's lights out so that will get done tomorrow.

Likes
10
Share


@Iamjeeves
Follow
So excited that this grow went well. Just making sure the dry tent stays the right conditions for a slow dry and will trim and weigh these girls before putting them in jars for a few weeks to cure. Sticky and with a earthy fruity berry smell. Maybe a hint of citrus. Can't say enough good things. Happy to luck out with good genetics and optimal conditions during the grow cycle.

Likes
3
Share

@GoodTimesOrganics
Follow
Welcome Back!💚
Die erste Blütewoche ist ins Land gezogen und die Pistolen an den Blütenansätzen zeigen sich durchweg.
Der Stretch war bisher moderat und dennoch spürbar.
Nach dem Umzug in das größere Zelt, war es nun an der Zeit den Greenhouse Feeding Dünger einzuarbeiten und mit dem dazugehörigen Bioenhancer zu gießen.
Ich bin sehr gespannt, wie sich dieser Strain entwickelt.
Die Werte im Zelt sind optimal auf die Blüte eingestellt.
———————
🌞 Temp: 24°C
🌚 Temp: 20 °C
💨 RH: 56%
VPD: 0,97 kPa
😎PPFD: 830 mqm
———————
Stay Tuned! 💚

Likes
19
Share

@DogDoctorOfficial
Follow
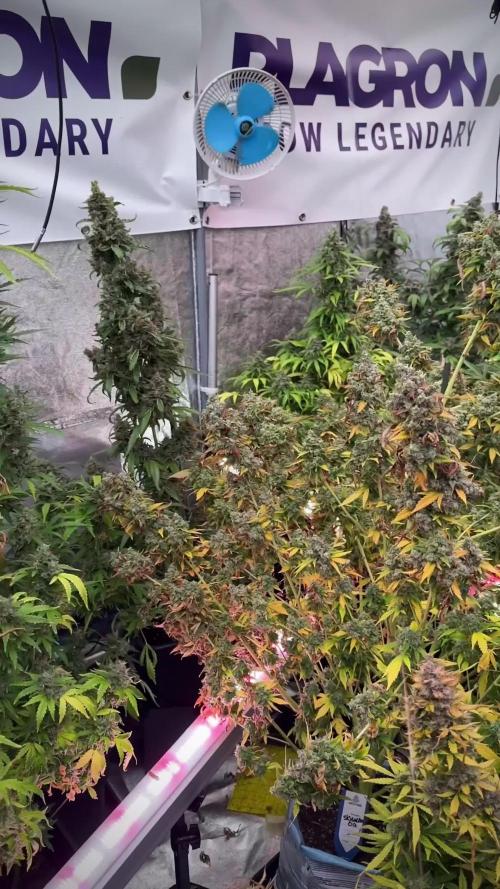
Skywalker OG — Harvest / Trim / Cure
Part 1 — The Giants Begin
First of all, we want to apologize once again for dividing this harvest series into multiple parts.
But honestly… there was simply no other way to do this properly.
This Skywalker OG run became massive.
Not just in terms of plant size and harvest weight, but also in documentation, photos, observations, and the amount of details we wanted to properly share with everybody following this journey.
So instead of rushing everything into one overloaded update, we decided to divide the:
* harvest
* trimming
* drying
* curing
* and smoke review
into three, maybe even four different reports.
Mainly because we are dealing with:
three huge plants
all with slightly different expressions, structures, and personalities.
And honestly?
These girls deserve proper attention.
⸻
Quick Recap — 12/12 From Seed
This entire run was done:
12/12 from seed
with almost no training at all.
No topping.
No aggressive manipulation.
No heavy canopy control.
Mostly:
* gentle leaf bending
* small adjustments
* minor defoliation
* and simply opening light paths where needed
The rest?
We allowed the plants themselves to decide.
To grow naturally.
To express themselves freely.
To shape their own structure.
And what they became honestly surprised us.
⸻
Legends Of The 12/12 Galaxy
These plants did not become extremely tall.
Instead…
they became monsters horizontally and structurally.
Massive production.
Heavy flowers everywhere.
Dense stacking all across the branches.
Everywhere you looked:
* colas
* side branches
* swollen flowers
* branches collapsing under their own weight
Support or no support…
it honestly barely mattered.
These girls were simply too heavy.
The branches kept bunching, leaning, and dropping from pure flower mass alone.
Exactly the kind of “problem” growers love having.
⸻
The Fade
One thing we absolutely loved during the final weeks was watching the senescence develop naturally.
Toward the end, these plants received mostly:
* water
* enzymes
* patience
And they faded beautifully.
The yellows.
The pale greens.
The autumn-like transitions.
The dying fan leaves surrounding swollen flowers.
It gave the room this incredible “end of season” energy.
The plants truly looked finished.
Not forced.
Not rushed.
Just naturally reaching the end of their cycle.
And visually?
Beautiful.
⸻
The Flowers
Honestly…
these flowers are ridiculous.
Huge colas all over the plant.
Top colas. Side colas. Lower colas. Everywhere.
And dense.
Very dense.
The kind of flowers where even holding them lightly leaves resin on your fingers instantly.
You can see it in the photos too:
our hands next to the flowers almost look small beside some of these colas.
And we don’t exactly have tiny hands.
The stacking came out incredibly effective too.
No wasted structure.
No airy towers.
Just thick, compact, greasy flowers from top to bottom.
Exactly the type of structure we hoped Skywalker OG would give us.
⸻
Harvest Day
So finally…
week 14 from seed arrived.
And it was time.
We harvested the first giant.
And honestly, carrying this girl into the studio already felt surreal.
Huge branches.
Massive colas.
Beautiful fading colors.
Trichomes absolutely covering the flowers.
Most of the trichomes sat exactly where we personally like them:
* mostly cloudy
* a touch of amber
* and still a few clears remaining
Because honestly?
It is impossible to have every single trichome perfectly identical at once.
And this specific harvest window gives us the balance we personally enjoy most:
* potency
* terpene expression
* complexity
* and overall effect balance
Not too early.
Not too late.
Right in that beautiful middle ground.
⸻
Charas & Resin
One thing that immediately stood out during harvest was how absurdly sticky these plants were.
Simply removing fan leaves and touching flowers started building resin layers onto the gloves almost instantly.
And naturally…
we started collecting charas.
For people unfamiliar:
charas
is a traditional hand-rubbed cannabis resin made directly from fresh living or freshly harvested plants.
Unlike dry sift or ice water hash, charas comes purely from physically collecting the resin through contact and friction.
And honestly?
We absolutely love this type of medicine.
There’s something incredibly old-school and ritualistic about it.
Sticky.
Greasy.
Dark.
Aromatic.
Almost alive in texture.
Very different from the finger hash we’ll later collect during dry trimming sessions.
Fresh charas feels softer, oilier, richer, and incredibly expressive terpene-wise.
This Skywalker OG produced beautiful charas too.
Easy to collect.
Very greasy.
Very resin-heavy.
Exactly the kind of resin that instantly tells you:
“This plant is loaded.”
⸻
Full Plant Drying
After harvest, we decided once again to dry the plants whole.
Entire plant hanging.
All of them.
We personally love this method because it slows the drying process slightly and helps preserve:
* terpenes
* moisture balance
* aroma complexity
* and overall flower quality
This first plant will now dry roughly:
7–10 days
under:
* 18–20°C
* ~60% RH
Although during the first couple of days we intentionally lower humidity closer to:
~45% RH
mainly because these plants are extremely large and dense.
And with flowers this thick, we prefer removing the initial excess surface moisture a bit faster to reduce risks of unwanted issues like:
* trapped moisture
* stagnant humidity pockets
* or bud rot
After that initial phase, conditions stabilize again for slower drying and proper curing preparation.
⸻
What Comes Next
The next reports will continue covering:
* the remaining Skywalker OG plants
* their individual structures
* harvest observations
* drying progress
* trimming sessions
* cure
* and eventually full smoke reviews
All while still staying within this same harvest week timeline.
Because honestly?
Each plant deserves its own spotlight.
And each one brought something special to the room.
⸻
Thank You
Huge thanks once again to everybody following this journey.
To the growers.
To the silent viewers.
To the curious minds.
To the old followers.
To the new followers.
To the skeptics.
To the lovers.
To the people stopping by for just a few seconds.
To the breeders at Zamnesia behind these genetics.
To Plagron for the nutrients.
To Future Of Grow and Lumiflora for the LEDs helping drive this jungle.
To everybody creating the gear, tools, and spaces that allow growers like us to keep learning and sharing openly.
And especially to the growing community itself.
Because without growers sharing knowledge with growers…
none of this culture survives.
From grower to growers.
Skywalker OG harvest series officially begins.
📡 DELETED @ 1K Please stay tuned.we never quit https://www.youtube.com/@TheDogDoctorOfficial NEW 🙏 Thank you for your patience and continued support.
FOR DISCOUNT CODES AND MORE JUST FOLLOW THE LINK https://website.beacons.ai/dogdoctorofficial
📲 Don’t forget to Subscribe and follow me on Instagram and YouTube @DogDoctorOfficial for exclusive content, real-time updates, and behind-the-scenes magic. We’ve got so much more coming, including transplanting and all the amazing techniques that go along with it. You won’t want to miss it.
GrowDiaries Journal: https://growdiaries.com/grower/dogdoctorofficial
Instagram: https://www.instagram.com/dogdoctorofficial/
YouTube: https://www.youtube.com/@dogdoctorofficial Deleted by Youtube - https://www.youtube.com/@TheDogDoctorOfficial NEW
Vimeo : https://vimeo.com/dogdoctorofficial Under construction stay tuned ⸻
Explore the Gear that Powers My Grow
If you’re curious about the tech I’m using, check out these links:
🔆 Lighting & Environmental Control
• Future of Grow — Advanced LED lighting technology
https://www.futureofgrow.com/
DISCOUNT CODE: DOG20
• Lumiflora — Under-canopy LED lighting
https://lumiflorade.com/
• TrollMaster — Environmental controllers and automation gear (past collaboration)
⸻
Genetics
• Zamnesia Seeds — Genetics used in this project
https://www.zamnesia.com/
⸻
🌱 Soil, Substrates, Boosters & Root Support
• Plagron — Substrates, bio mixes, and supportive products
https://plagron.com/en/
⸻
🎒 Storage, Curing & Preservation
• Grove Bags — Curing and storage solutions
https://grovebags.com/
⸻
📸 Photography Equipment & Tools
(Not sponsors, but part of my creative toolkit)
• Sony A6700
• Sony full-frame macro lens + few more
• Stacking photography workflow - learning
• iPhone (for behind-the-scenes shots)
We’ve got much more coming as we move through the grow cycles. Trust me, you won’t want to miss the next steps, let’s push the boundaries of indoor horticulture together!
As always, this is shared for educational purposes, aiming to spread understanding and appreciation for this plant. Let’s celebrate it responsibly and continue to learn and grow together.
With true love comes happiness. Always believe in yourself, and always do things expecting nothing and with an open heart. Be a giver, and the universe will give back in ways you could never imagine.
💚 Growers love to all 💚
📸 P.S. – The Eye Behind the Lens
All photos in this diary (for now — except for the ones showing the camera, which I took with an iPhone) are taken with a Sony A6700 paired with a Sony full-frame macro lens and a few more.
Photography is part of the story — it’s how we share the fine textures, the glow, and the quiet details that words can’t always capture.
I’ve also started experimenting with photo stacking — a technique where multiple images, each taken at a slightly different focus point, are layered together to create one perfectly sharp image from front to back.
It’s not digital enhancement or AI; it’s pure photography — a way to reveal the plant’s beauty in microscopic depth, from trichome to petal.
You’ll even see a few shots of "ghost me" capturing the shots — camera, lens, setup — because every grow deserves not just to be cultivated, but documented like art.
FOR DISCOUNT CODES AND MORE JUST FOLLOW THE LINK https://website.beacons.ai/dogdoctorofficial
NEW DISCORD - Official Server Invite Link : https://discord.gg/ksjAkA5T74