The Grow Awards 2026 🏆 


Likes
8
Share
@Farmer1
Follow
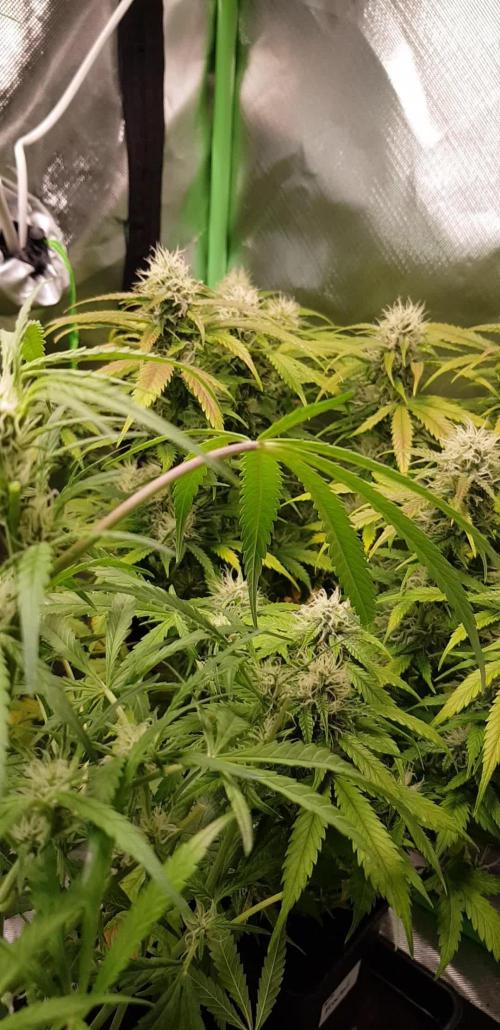
first day of week 7, pheno #1 stretched very little with short internode looking compact while pheno #2 stretched amazingly with lots of young buds. I slightly increase the dose of bloom and quantity of water.being bushy plants a good defoliation did them good.See you next week, bless and protect ✋🌳


Likes
2
Share
@GERGrowDesigns
Follow
Welcome to Flower Week 2-3 of Divine Seeds Auto 77 Days
I'm excited to share my grow journey with you all as part of the Divine Seeds Autoflowering Competition 2025. It's going to be an incredible ride, full of learning, growing, and connecting with fellow growers from all around the world!
For this competition, I’ve chosen the Feminized Automatic strain: Auto 77 Days
Here’s what I’m working with:
• 🌱 Tent: 120x60x80
• 🧑🌾 Breeder Company: Divine Seeds
• 💧 Humidity Range: 60
• ⏳ Flowering Time: 56 Days
• Strain Info: 21%THC
• 🌡️ Temperature: 26
• 🍵 Pot Size: 0.5l
• Nutrient Brand: Narcos
• ⚡ Lights : 200W x 2
A huge thank you to Divine Seeds for allowing me to be a part of this amazing competition and Sponsoring the Strains. Big thanks for supporting the grower community worldwide! Your genetics and passion speak for themselves!
I would truly appreciate every bit of feedback, help, questions, or discussions – and of course, your likes and interactions mean the world to me as I try to stand out in this exciting competition!
Let’s grow together – and don’t forget to stop by again to see the latest updates!
Happy growing!
Stay lifted and stay curious!
Peace & Buds!


Likes
5
Share
@Audacissimus
Follow
Later on week 1, all the plants were given aprox. 1,25 grams (Bactomatik) on 500 ml water (ph 6,5)
This week was the first feed with BioBizz Grow.
They all responded very well to the above and are growing normally.
Later on, will add end of week 2 video.
(Added video for end of second week)


Likes
2
Share
@ThatsmyGrow
Follow
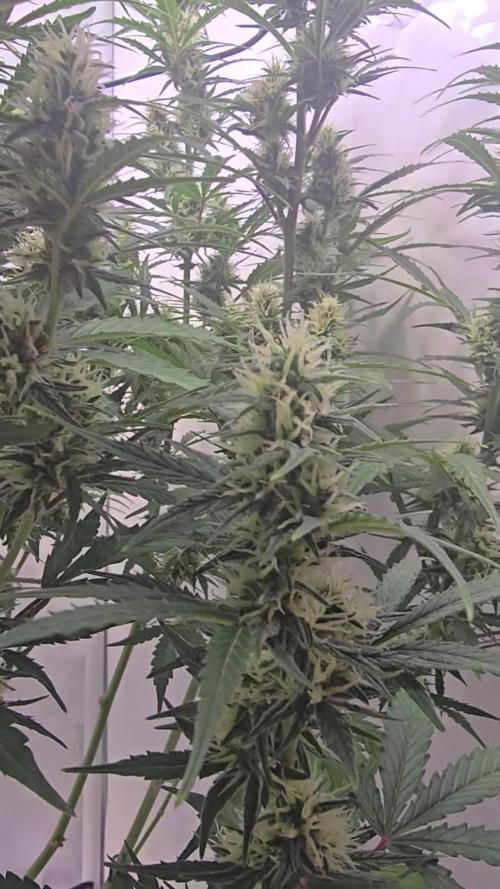
How big and wide she get under the evo-4 80 its crazy, i think she its the biggest one i ever grow.
And how dark she turn with the Master recepi from advanced nutrients its amazing. Love that stuff as well
Likes
9
Share
@Mr_nugs_lover_David
Follow
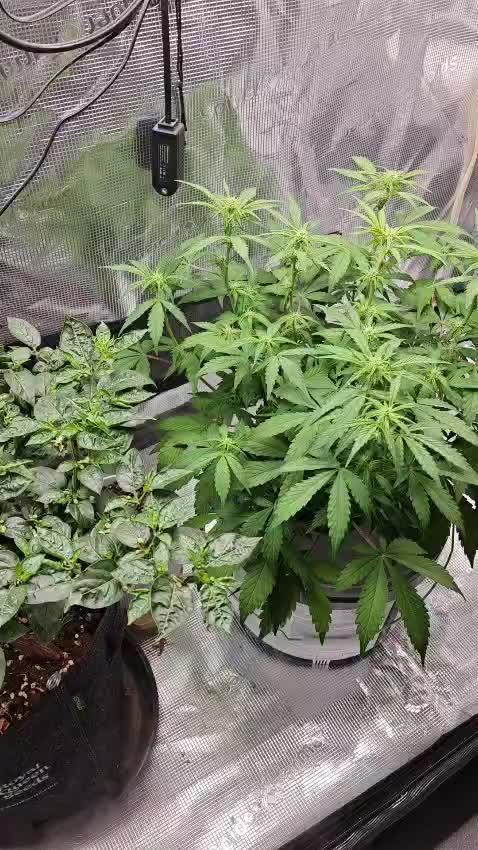
She looks super healthy and gorgeous,she's just starting to flower,so let's see how she reacts to the lst and lollipoping I applied on her,can't wait to see this amazing strain in full flower 😍💚👀
Likes
11
Share
@Willy_Balls
Follow
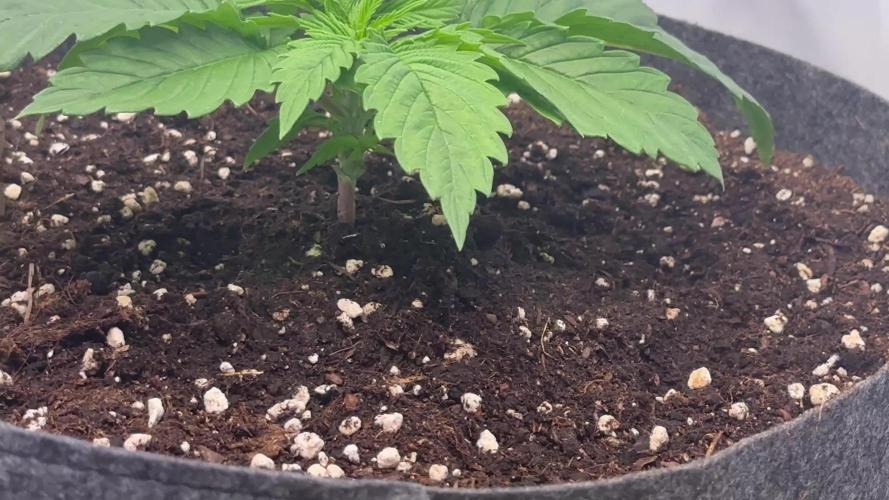
5.07 Clones rooted 0,3 l pots and waiting under weak light around 200 ppfd
Likes
12
Share
@Staffedition
Follow
Привет друзья. Моей растихе сегодня 80 дней.
Растение хорошими темпами приходит в себя.
Через неделю буду переводить на цвет.
Начал применять LST технику на 19 дне и продалжаю применять её через день, а 18 августа добавил ДЕФОЛИЗАЦИЮ
С 20.08 ДЕФОЛИЗАЦИЮ делаю каждые 3,4 дня
С 20.08 LST технику делаю каждые 4.6 дней
На сегодняшний день влажность 54%
5.09.2023 заметил высокий Ph 7.9
С 48 дня Ph не ниже 5.8
На сегодняшний день Ph 6.0
Начал кормить с 60 дня Canna Terra Vega
PPM 550
Погладитель влажности хорошо справляется со своей задачей. Рекомендую
Всем мира и добра!
Не забудь поставить лайк❤️, если понравилась как прошла неделя
И читайте наш TELEGRAM: https://t.me/smail_seeds
#Smail_Seeds 😀
Likes
10
Share
@DeepRootsGrowTrees
Follow
COSMOS F1 CBD /
ROYAL QUEEEN SEEDS
Week#8 OVERALL
WEEK #2 FLOWER
This week she's looking good and healthy for being in a small pot she's in flower mode her buds are getting shape and smell to them. Stay Growing!!!
Thank you for stopping by and taking a look it's much appreciated!!!
Thank you ROYAL QUEEEN SEEDS!!
COSMOS F1 CBD / ROYAL QUEEN SEEDS
Likes
3
Share
@ChubbyBudBros
Follow
-
Day 43
Refreshed the tank today. pH was reading at 5.5 so seems like she is mostly drinking the water and not really the nutrients..I think. she's drinking a lot so the nutrients get a lot more concentrated. Gonna have to keep an eye on that. Think it's good that I switch to a schedule now of replacing the water reservoir twice a week now. Also checked PPFD, the top canopy is getting about 620 PPFD.
Day 44
Flowers are starting to set in nicely. She is drinking a lot right now, have to top up the 4 liter reservoir every day now it seems. pH went up to 6.4, so brought it back down to 6.0 now.
Day 45
She had another big stretch over night. I've raised the light a bit as she was getting close to it now and I don't wanna overstress her. She is still drinking a lot, topped up the reservoir with another 1.3 liters of ph 6.0 water. Will be doing a full water change tomorrow.
Day 46
Fully renewed the water today with new nutrients, I did put in a bit less of each nutrient this time, I'm seeing some minor leaf tip burn starting to happen. Seems to correlate with the higher bloom nutrient dose, so I will dial that a bit down from now on. Removed some fan leaves on the fastest growing stems also to slow them down a bit, a lot of the smaller stems are starting to catch up nicely now.
Day 47
Had to top up with 1.5 liters of water, she is definitely drinking even more now...after adding the water (6.0 pH) the pH was 6.1. She is still growing a lot as well, especially those side stems are catching up to the top of the canopy. I should probably do some lollipopping soon.
Day 48
Ph was down to 5.8 today, had to top up the water again with 1.5 liter of 6.0 pH water, which brought the pH up to 5.9. She is still stretching quite a bit right now. Also did my first defoliation today, I removed a ton of leaves but it looks like barely anything was removed because there so much foliage 😅.
Day 49
pH got down to 5.7 today. It keeps surprising me to see how much she drinks in one day. Was able to top up the bucket with almost 2 liters again. Made the water 6.1 pH which brought the pH in the bucket back up to 5.9.
Likes
12
Share
@Krissci
Follow
Most of "week 4" and this week I'll be flushing with flawless finish...
Try to ensure I get all the flavours out.
Likes
22
Share
@Naujas
Follow
well, that day dawned :) growing in a suitcase was really difficult, temperature, humidity, plant growth, everything was very difficult to control, but I managed something, it was an extremely interesting experience :) 119 gr wet, I think it will be between 25-30 gr dry , which I think is really good from the suitcase :) it was something different than usual, and now I'm going to grow another begina, which is much bigger than this one :) good luck to everyone, and thank you.:)


Likes
Comments
Share
@CHEF-KOCH
Follow
Danach habe ich leider vergessen Fotos zu machen beziehungsweise auch Videos deswegen folgt nach Woche zwei Woche vier


Likes
13
Share
@TheHighNews
Follow
Day 30 toady, i switched to 12/12 3 days ago e the babies are already stretching hard and some are showing preflowers i'm pretty happy i'm watering with no nutrients as i'm using Canna Pro Plus soil and it should have enough nutrients for the first 3/4 weeks of flower. I cleaned the bottom of the plants from lowers branches and leaves and i will continua till day 14 of flower and i fixed it with a bamboo stick i got gifted from @AlpineGoat i will fix the other branches in the next weeks i'm pretty stocked with this grow this genetics are really solid growing strong and fast! Good job @Exotic_Seed!!🙌👍

