


Likes
Comments
Share


@BakingBaked
Follow
🗓️ Day - 23
⏰ Hour - 8:20 am
🌬️Air Temp. - 77
💦Humidity - %68
⛽️ TDC (ppm) - 780
⚱️Reservoir Tmp. - 75
PH - 5.6
📝 Notes - at 8 pm added 2 gallons of tap water to bring down ppm (from 830 to 690) and to raise PH (from 5.6 to 5.8).
🗓️ Day - 24
⏰ Hour - 8:30 am / 10:00 pm
🌬️Air Temp. - 76
💦Humidity - %64 / 52
⛽️ TDC (ppm) - 710 / 490
⚱️Reservoir Tmp. - 73 / 74
PH - 5.8 / 6.0
📝 Notes - Complete clean up of reservoir.
Rinse and washed with hydrogen peroxide and tap water. The system was rinse until achieved a ppm of 100 with clean water before adding new water and nutrients.
Feed 12 gallons of tap water with 1/4 Flora pro-series RDWC week #3 vegetation.
🌿 Daisy - She was cloned today. 4 Clones were taken from upper area. 2nd and 3rd node from top to bottom. Each around 2”-3”. Couple fan leaves were also removed.
🗓️ Day - 25
⏰ Hour - 8:00 am / 11:10 pm
🌬️Air Temp. - 76 / 77
💦Humidity - %60 / 57
⛽️ TDC (ppm) - 500 / 530
⚱️Reservoir Tmp. - 76 / 72
PH - 6.1 / 6.1
📝 Notes -
3 ml of PH down were added to reservoir because PH was on 6.2 by 5 pm.
🌿Daisy - Removed two extra large fan leaves that were casting shadows over the exposed steam area. She still looks stressed .
🗓️ Day - 26
⏰ Hour - 9:00 am / 11:30 pm
🌬️Air Temp. - 76 / 76
💦Humidity - % 60 / 52
⛽️ TDC (ppm) - 540 / 570
⚱️Reservoir Tmp. - 72 / 73
PH - 6.1 / 6.1
📝 Notes -
The ppm levels are rising. They reached 560 by 6:00 pm.
🌿 Daisy : Still recovering, bouncing back.
🗓️ Day - 27
⏰ Hour - 9:45 am /
🌬️Air Temp. - 76 /
💦Humidity - % 65 /
⛽️ TDC (ppm) - 580 /
⚱️Reservoir Tmp. - 73 /
PH - 6.1 /
📝 Notes -
The ppm reached 580 by 9:00 am. Reached 600 at 3:00 pm.
🌿 Daisy looks better. Leaves starting to lift again so I I went ahead and did some extra pruning and cleaning.
🗓️ Day - 28
⏰ Hour - 8:30 am / 10:00 pm
🌬️Air Temp. - 74 / 77
💦Humidity - % 50 / 54
⛽️ TDC (ppm) - 630 / 650
⚱️Reservoir Tmp. - 73 / 72
PH - 6.1 / 6.1
📝 Notes -
The ppm levels keep rising.
🌿 Daisy: Looks perky and happy after pruning. She’s is recovering very well. Her root system is showing new white roots so seams she’s liking the higher TDC levels.

Likes
58
Share


@Mrs_Larimar
Follow
March 30th.
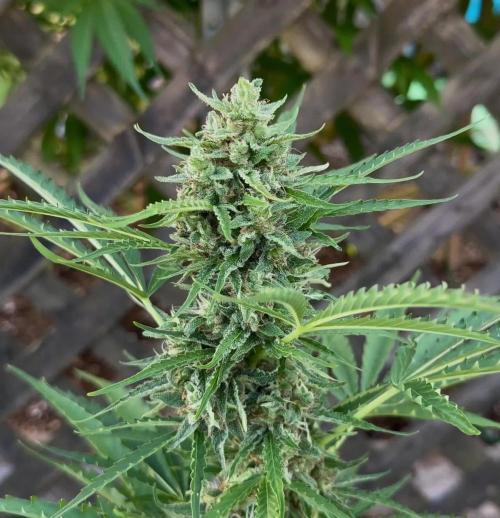
Awsome growing Plaant,
It feels like she doubled Size
Flowerws appear more and more,,, iam very happy with those Girls
They are drinking around 0,5l a day, Feeding every 3rd. Day
Still stretching.... stay curious



Likes
33
Share


@Ju_Bps
Follow
Hello my friends growers,
Week was good,
Buds look stoped to grow up, so i'll start pk 13-14 next week,
I've start to give tera flores and sugar royal this week.
Plant look healthy and buds look nice with lot of pollen, it will be probably a sticky weed :).
Have a good week mate growers, see you next week 😘


Likes
19
Share


Likes
7
Share


@GYOweed
Follow
Finally getting copler nights but heat wave keeping temps high which is ok for getting most out of it.
Did a last heavy feed.
Then one last organic top
Their structure and yield does suck.
One is tk leaning.
No clones survived.
Not the best strain but smell and taste are boutique.

Likes
8
Share


@Plumbcat19
Follow
I am finding it difficult to get my camera to take photos and videos with the proper colour hence the double videos! It is unreal how thicc these are getting!! They smell wonderful! The other two plants are starting to show a bit more of their red/purple colours too! Noticing a bit of potassium stress from feeding but since they are nearly finished (I STILL CANNOT BELIEVE THAT!) I am only going to pull back a bit. They just need to survive another 14-21 days by the looks of them!
Likes
4
Share


@Chasingterps
Follow
The plants are on the final stretch in flower. I’m still working on getting the calmag up to make the ladies look nicer. Overall I’m happy with these aircubes. The ladies grow extremely fast in them.


Processing
Likes
8
Share


@Max1973
Follow
Day 63 - lookin good.... haha....
um, tanks stabilized, ph 5.8 - ppm 1200 .... she's feedin alot.....
buds are fillin and lotsa white furries....
listed the nutes and amounts etc.., but i'm kinda feeding her as she needs.... so every few days she is drinking
2 lts +- and i'm just mixing up a neut solution in a 2 lt bottle every day or 2 ..... sometimes she just wants abit of water......
Day 64
+vid....shows her deep green and gloss... abit of crystalic :)
Day 65 - vids pics.... trimmed her, and abit of bending....
Added blood and bone.... she's stretching alot, 60cm+ ........
Day 67 took all the early buds on all the stringy 0ff shoots....
Poor lighting vids, but don't want to mess with her flowering, :)
👍😎👊

Likes
4
Share


@QixxGrows
Follow
Day8: First day of the new week. I assume still pretty much focusing on roots, as the top didn't really do much today.
Day9: Nothing special. But she's growing
Day10: Still roots, it seems. Very little happening up top.
Day11: Effort being put into growing the top leaves. They increased in size. I assume that the next node will start tomorrow - kicking off the switch into Veg.
Day12: Next node already showing :D
Day13: I put in a humidifier and changed the cycle of the extractor to keep more moisture in the growbox. My humidity was way too low.
Day14: This time the humidity was too high. It was sitting at around 95% when the lights went on.

Likes
6
Share


@Ninjabuds
Follow
The Permanent Markers are finally taking off! They've at least doubled in height since last week. Of course, they're still really small, but it's cool to see them finally getting going. They look healthy and are developing nicely.
Well, another year has come and gone. Yesterday was New Year's Eve, and I want to wish all of you a happy and healthy 2025. May this year bring you all the things you've been wishing for. Let's make this the best year yet!


Likes
20
Share


@PREPPYPUNK
Follow
Trichomes look small, not tall and big. I gotta stop complaining about everything. I have at least enough to get through the holidays and its good stuff. I suspect my real problem lies in dry and cure. Sometimes you pop a couple of autoflowers and they just grow like mad dogs and sometimes its a major challenge esp if you screw something up like over water. I maintain that i have never had a dry/ cure that ended up smelling like anything at all. I have been blaming the seed vendor but it just cant be as plenty of people have good harvests with same strain im doing. Problem is i have a neighbor whos having same issues. I got the idea of 70 degrees and 50-58% rh. Every dry and cure is different but i got my not good program from youtube videos. You never get enough information to learn anything most times and you still have to watch your grow like a hawk and be patient. I have a new program for dry. After the cut, the rh needs to be at least 60 from that time all the way into the jar and onward or you 100% lose terpines. Other thing is temprature. So i have a small room with a window ac unit and next dry will take 7-12 days at a constant temp of 65 , so ac will be on nonstop for a few days and rh has to stay at 60 so humidifier needs to be maintained. THE OTHER THING IS AIR CIRCULATION. YOU DONT WANT A FAN BLOWING ON IT BUT STAGNANT AIR IS NO GOOD. So, if this works, and i start getting that dank bag apeal with terps and sticky resin everywhere and crystals......What im thinking is hang it all in the tent which is in the room with ac unit and maybe 2 6 inch fans and exhaust on at 190 cfm. LET SIT IN DARK 48 HOURS BEFORE CHOP. The must have ac and 65degrees came from youtube guy i think canucks grow. Everything this guy touches turns to gold and his house is xtra clean. Its too clean. Has to have a cleaning lady. but hes changed his mind over time on dry and cure and the latest is 60 rh and 65 degrees temp to dry and 60 rh till its all gone. Maybe this will work and the harvest wont smell like hay or nothing at all. Growing weed is a big comitment and a shitload of work and you need to do alot of research and make all the mistakes i think. I dont know why people title "first grow ever" and it comes out looking like top shelf shit. I dont buy it. Its not that simple. Though with the right genetics and proper watering you could have an amazing harvest first time out. I just have a hard time accepting the fact that i have no idea what im doing and do not have the knowledge regarding nutrients and when and how much etc...but i have a good idea. This COVID SHIT IS SOME FREAKING SHIT but if you have an indoor garden to maintain, you always have something to look forward to. I gotta go see the Wizard. actually the Wizard owns the head shop and the grow supply guy who looks like he has been ripping bongs since a toddler, hes zombie boy. Zombie boy recommended that i add this fungal growth shit called orca and the main reason was i need it according to his assesment of what i said i was using and his final closing statement was, its only 10 bucks so.....and then hes like, you should buy some fish shit, you want some fish shit? What i want to do is make the clock go faster and it aint happening so plan next grow while maintain current. I got some skunk comming from seedsman if it ever gets hjere. Im going to treat the skunk better than i would a good friend!!!!!

Likes
10
Share


@kukos
Follow
I finally installed my net, I love how easy it becomes to bend or acommodate branches. it makes harder the watering part but is justifiable. this will be the second week of flowering and all is looking great Happy grows

Likes
41
Share

@DevelGrow
Follow
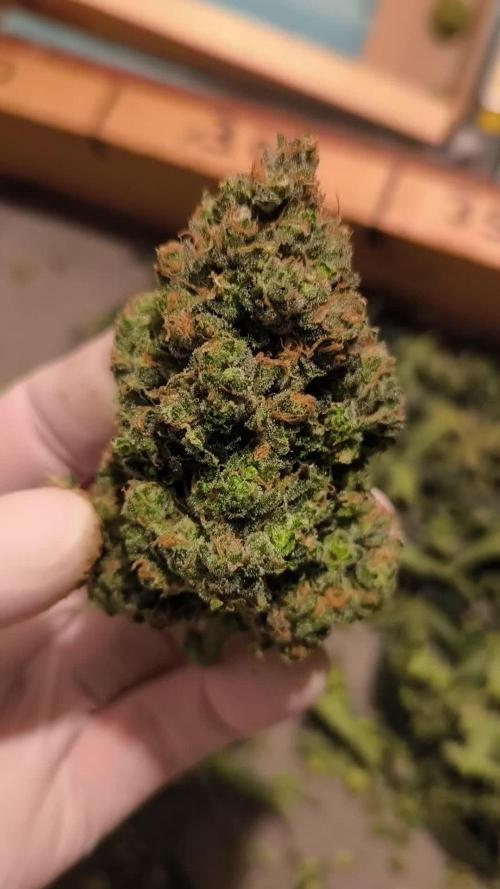
Es ist fast geschafft ☺️! permanent marker im Dognabiscup wurde geerntet und hat schöne große Feste harzige buds geliefert,die nun für mindestens 7 Tage im Dryferm bag Trocknen werden! Für ihre Größe ein sehr gutes Ergebnis! Es hat Spaß gemacht und ich sage Mal keep Green and grow High ✌️🍀😉🍀
❤️🔥❤️🔥❤️🔥❤️🔥❤️🔥❤️🔥🏆🏆🏆🏆🏆🏆🏆❤️🔥❤️🔥❤️🔥❤️🔥❤️🔥❤️🔥❤️🔥

Likes
11
Share


@russrahl
Follow
Last Obi-Wan girl was left in dark for 3 days and then chopped on day 66 and is now drying. She was definitely the largest of all 4 plants in the tent. Cant wait to see the dry weight on this girl! Next update will be when all the bud is dry and we have a final weight for all 3 together. The first one we chopped only gave us just over 4oz dried but she was half the size as the other 3 girls and kinda lower in the corner. Pulled 7.4oz off the Wedding Cake in the same tent/setup and these last 2 Obi-Wan’s that are still drying are bigger then she was by a lot I think. Cheers 💨

Likes
9
Share


@TrueG
Follow
Its really goin fast
In every grow i see better results
Couldnt be more happy
Start to feed the girls


Likes
16
Share


@BudsBanditUK
Follow
She is budding nicely now, looking like 16 colas once they have fully developed. Now starting to a get sweet smell. Very nice purple colours are now appearing. I cant wait to try this strain.