Likes
Comments
Share
12/25/2023-Germination Day 1 Merry X-mas 2023 I decided to start a run of SolFIre Gardens Hoodz Candyz S1. I am going to do a cup filled with RO water a touch of Hydrogen peroxide and let it sit for 24-48 hours until I see tap root then I am going to put it into a rapid rooter.. Tap root Down and put it about 1/4 of the say down the Rapid rooter. I made some modifications to my basket on this run.. I have taken a few Pods that I use for my cloning machine and decided that I am going to try and use them as sure plants, so that I can take my water right up to the bottom of the basket this time and see if these can make my planting more consistent.   12/26/2023-Germination Day 2 Tap root achieved Planting Commencing 12/27/2023-Germination Day 3 Misted the dome lightly misted the rapid rooter and added a little water to the bottom of the pan to encourage root growth to the pan. 12/28/2023-Germination Day 4 Ground Hogs day 12/29/2023- Germination Day 5 She is up, she has broken surface, I misted the root riot, and around the bottom of the tray to try and entice root growth down rapidly. 12/31/2023- Germination Day 6 Ground Hogs Day 1/1/2024-Germination Day 7 HAPPY NEW YEARS!!.. I did it I planned it out so my planting day would fall on New Years and it worked.. Yay!!! 1/2/2024- Germination Day 8 Since the roots are not to the water yet, I am pouring one cup of water lightly on the hydroton around the lady to try and encourage root growth down to the water.. 1/3/2024- Germination Day 9 Ground Hogs day, will continue until roots hit the water. 1/4/2024- Germination Day 10 Ground Hogs day, will continue until roots hit the water. I will just continue to top feed until roots are in the water.. Shouldn't be more than a few more days. 1/5/2024- Germination Day 11 Ground Hogs day, will continue until roots hit the water. I am going to change the water Sunday and kick off Week 1, I will just continue to top feed until roots are in the water.. Shouldn't be more than a few more days. 1/6/2024- Germination Day 12 Ground Hogs day, will continue until roots hit the water. I will just continue to top feed until roots are in the water.. Shouldn't be more than a few more days. 1/6/2024- Germination Day 13 Ground Hogs day, will continue until roots hit the water. 1/7/2024- Germination Day 14 Ground Hogs day, will continue until roots hit the water.
Likes
7
Share
Apart from the bud rot problems towards the end of the grow, wich in this plant were actually small comparing to my other plants I had at the time, it all went really well! I even broke the main branch in half around week 5-6 but the plant recovered really fast and developed two main branches like in a topping and in a few days was back growing and stretching a lot!! From a 3L vase I got about 40g of dried weed wich I considered really good!
Processing
Likes
33
Share
@Titoff
Follow
Coucou la team Growdiaries , désolé du retard pour l’ajout de la semaine 10 mais là voilà, c'est la semaine du rinçage, que de la flotte pour les petites gourmandes afin que celle-ci soient savoureuses à la dégustation. Plus on avance, plus elles deviennent blanches et collantes, impossible de passer la main pour retirer une feuille ou l’autre sans plaqué de partout, c’est magique, certaine branche se plie ou penche tellement certaines sont lourdes, j’adore, hâte de pouvoir goûter tout ça, enfin reste encore le séchage et le curing, c’est long mais c’est comme pour une femme, avant de consomme faut un peu de patience….
Likes
15
Share
@Chubbs
Follow
These ladies have grown amazing this past week. I took of a few of the bigger fan leafs of but other then that just feed this week. The flower sites are starting to form. Definitely starting to smell stronger. All in all Happy Growing.
Likes
4
Share
@Ensign420
Follow
|»» LOG DISCLAIMER: Not intended as a grow guide. Grow log entries are usually posted 3 weeks later and are for my learning reference. ««| Introduction - Week 26 Summary - Ensign's log, stardate 17608.3, Wow what a week! Drying is always pretty simple and been checking daily. Buds are drying nicely and terps are smelling pretty dank!! Most of the week has been in the veg tent with tissue culture! Mixed another batch of establishment media and took proper explant cuttings. Also super-cropped the mothers to even out the canopy. Ahh yea! Getting hyped for trim day next week! Next week will also be the last week for this grow log, but am already planning out the next cycle. Anyways! Onwards to next week! [START OF WEEK 26] ========================================================== ---------- [ 4x4 MAIN TENT ] ---------- Heady OG BX1 #1 [Round4 ~Wk19] - WEEK 26 - Dry Wk1 ----------- [ 3x3 VEG TENT ] ------------ TKO - WEEK 09 - Full Veg Gorilla Goat #1 - WEEK 05 - Full Veg Heady OG BX1 - WEEK 09 - Full Veg Garlic Budder OG#1 - WEEK 05 - Full Veg 10/13/25 → 10/19/25 This Week's Estimated Goals ---------------------------------------------------------------------------------------------- DLI: ~0 mol/m²/d PPFD: ~0 μmol/m²/s VPD: ~1.5 kPa This Week's Meter Readings & Averages ---------------------------------------------------------------------------------------------- Light On/Off: 00:00 - 00:00 | Wattage: ~000.0W [LV00] Distance From Canopy: ~00” DLI: ~0.00 mol/m²/d PPFD: ~0 μmol/m²/s VPD: ~1.17 kPa Soil %: [47.4, 34.1, 35.0, 55.7, 43.7, 43.6, 44.0, 43.3] ========================================================== Day 01 - Monday - 10/13/25 - Total Days: 183 ----------------------------------- Daily Averages ~[+01:00] - Temps: 78.8°F [26.0°C] - Humidity: 64.4% - VPD: 1.19 kPa - Soil %: [49, 34, 35, 57, 44, 44, 44, 42] ----------------------------------- - [22:05]: Night check on the 4x4 tent. --- Ca-Caw!! Looking great! --- Heady OG BX1 #1 is drying along and no signs of mold. Also airflow and RH is stable and within the 60-70% range. --- Getting stoked! Trim day is 9 days away! - [22:09]: Checked the Ecowitt soil moisture sensor data: ------------------ [ 4x4 MAIN TENT ] --------------- ------ 48% - [CH01 FT » G30 - Heady OG BX1 #1] ------ 35% - [CH02 FB » G30 - Heady OG BX1 #1] ------ 35% - [CH03 BT » G20 - TKO] ------ 56% - [CH04 BB » G20 - TKO] ------------------ [ 3x3 VEG TENT ] ---------------- ------ 46% - [CH05 BL » GR7 - TKO] ------ 40% - [CH06 BR » GR7 - Gorilla Goat #1] ------ 40% - [CH07 FL » GR7 - Heady OG BX1 #1] ------ 40% - [CH08 FR » GR7 - Garlic Budder OG#1] --------- Veg: 38% - 45% | Flower: 45% - 55% --------- General: 30% [Dry] «| 45 - 60% [Moist] |» 70% [Wet] - [22:18]: Checked the 3x3 veg tent. --- Looking healthy in the veg garden! --- All of the vegging mothers are looking great and the canopy is starting to even out. --- Also clones look healthy and no need to water yet. --- The stems, err, I mean, explants, don’t show any signs of contamination. --- Staying positive, glad the growth media is sterile and the overall procedure was successful. --- Anyways! Plan to create more establishment media and cut proper explants soon! - [22:21]: Checked the humidifiers. --- Tanks are still full and no leaks found. Day 02 - Tuesday - 10/14/25 - Total Days: 184 ----------------------------------- Daily Averages ~[+01:00] - Temps: 76.9°F [24.9°C] - Humidity: 64.8% - VPD: 1.11 kPa - Soil %: [46, 34, 35, 56, 43, 43, 44, 43] ----------------------------------- - [21:44]: Night check on the 4x4 tent. --- Looking good in the dry tent! --- Heady OG is drying along and humidity levels look great! --- Nothing to do but maintain and wait to trim in 8 days! - [21:55]: Checked the Ecowitt soil moisture sensor data: ------------------ [ 4x4 MAIN TENT ] --------------- ------ 45% - [CH01 FT » G30 - Heady OG BX1 #1] ------ 34% - [CH02 FB » G30 - Heady OG BX1 #1] ------ 35% - [CH03 BT » G20 - TKO] ------ 56% - [CH04 BB » G20 - TKO] ------------------ [ 3x3 VEG TENT ] ---------------- ------ 41% - [CH05 BL » GR7 - TKO] ------ 40% - [CH06 BR » GR7 - Gorilla Goat #1] ------ 47% - [CH07 FL » GR7 - Heady OG BX1 #1] ------ 46% - [CH08 FR » GR7 - Garlic Budder OG#1] --------- Veg: 38% - 45% | Flower: 45% - 55% --------- General: 30% [Dry] «| 45 - 60% [Moist] |» 70% [Wet] - [21:59]: Checked the 3x3 veg tent. --- Looking healthy and growth is raging! --- All mothers are looking beautiful! --- Clones are getting taller and looking healthy! --- Gorilla Goat #2 needs watering. Let’s go Ensign! - [22:03]: Here is the starting initial watering range: ------ Gorilla Goat #2 » 255.4g → 300.3g and was last watered 4 days ago. --------- General Solo Range: [Dry] «| [Initial Cup Weight] + ~55-100g |» [Wet] --- Took the starting weight before watering, ------ Gorilla Goat #2 » 230.8g --- While on a scale, --- Gently misted her straw mulch with RO water. --- Tried to keep the top growth dry. --- Misted 5-10 sprays. Waited a few seconds, then misted again. --- Made sure to reference the watering weights. --- Repeated this process until the cup weighted at least 300g. --- There was no runoff. - [22:23]: Took the saturated weight after watering, ------ Gorilla Goat #2 » 345.7g --- Marked the watering date on the side of the cup. Also marked the saturated weight on the back. --- Placed her back into the tent. --- Decided to train and super-crop both clones. --- Bent the taller branches to lower the canopy. - [22:38]: Checked the humidifiers. --- Tanks are still full and no leaks found. --- Onwards Ensign! Day 03 - Wednesday - 10/15/25 - Total Days: 185 ----------------------------------- Daily Averages ~[+01:00] - Temps: 75.6°F [24.2°C] - Humidity: 63.8% - VPD: 1.09 kPa - Soil %: [48, 34, 35, 56, 44, 43, 44, 42] ----------------------------------- - [+01:33]: Quick night check on the 4x4 tent. --- Looking great in the dry tent! --- Also starting to smell dank! --- 7 more days until the big trim! - [+01:37]: Checked the 3x3 veg tent. --- Veg garden is healthy and growth is green! --- Both the Heady OG BX1 #1 and TKO mothers will need another topping soon. --- Clones in the propagation tray also look great and no need to water. --- The explant media is still looking sterile with no signs of contamination. --- Easy night in the garden. Nice! - [+01:40]: Checked the humidifiers. --- Tanks are still full and no leaks found. --- Okay! Tomorrow plan to dive back into tissue culture and prep more growth media. --- Onwards Ensign! Day 04 - Thursday - 10/16/25 - Total Days: 186 ----------------------------------- Daily Averages ~[+01:00] - Temps: 74.6°F [23.7°C] - Humidity: 62.2% - VPD: 1.11 kPa - Soil %: [46, 34, 35, 56, 43, 44, 44, 45] ----------------------------------- - [11:41]: Alright! Back to tissue culture and time to start another batch of establishment media! --- Took the plant growth regulators out of cold-storage (my fridge). ------ [ » SMOKES A BOWL « ] --- While the products warmed up, gathered the necessary supplies and setup my workstations. --- Currently, focusing on: ------ PHASE 01 » ESTABLISHMENT --------- » DAY 01 » MEDIA - PART 01 - Mixing the growth media --------- » DAY 01 » MEDIA - PART 02 - Sterilization of media and tools [via autoclaving] --- Going to use the same establishment formula, but doubling the yield. --- Also using RO water instead of distilled water. --- Here's the establishment media formula: --- [» VER.0001 |» INITIAL TROPICAL PLANTS FORMULA |» 0.5L (500mL) RO WATER «] ------ MS [Muashige & Skoog] --------- » 2.22g ------ Sucrose [Cane Sugar] --------- » 15g ------ BAP [6-Benzlaminopurine | Cytokinin] --------- » 0.5mg » 0.5mL » 500μL ------ IBA [Indole-3-Butyric Acid | Auxin] --------- » 0.05mg » 0.05mL » 50μL ------ AGAR [Jelling Agent] --------- » 3.5g ------ PH [Potential Hydrogen] --------- » 5.7 --- [» 1mg/mL CONCENTRATION ratio | 1mg = 1mL | 1mL = 1000μL «] - [12:59]: Time to prep the growth media! --- Made sure to turn OFF the lung-room's oscillating fan. --- Filled a measuring cup with 400mL of RO water. --- Dropped a clean magnetic mixing bar into the measuring cup. - [13:05]: Placed the measuring cup on the magnetic stirrer. --- Turned the unit ON and have the unit on LOW. - [13:11]: Using a precision scale (sensitive to 0.01g) along with a micro-pipette (1000μL capacity along with tips) and disposable (100mL) weigh boats, ------ Added 2.22g of MS [Muashige & Skoog] ------ Added 15g of Sucrose [Cane Sugar] ------ Added 500μL of BAP [6-Benzlaminopurine | Cytokinin] ------ Added 50μL of IBA [Indole-3-Butyric Acid | Auxin] ------ Added 3.5g of AGAR [Jelling Agent] ------ Then filled the measuring cup to the 500mL line before covering the top with plastic wrap. --- Alright! - [13:46]: Let the media mix on the magnetic stirrer for a bit. --- Have the unit set to LOW with a steady vortex. ------ [ » ~20 MINUTES LATER « ] - [14:09]: Okay! Time to pH the establishment media! --- Gently removed the bottom cap of the AC Infinity PH Meter PRO [AC-PHM7]. Placed the cap in the storage case for later. Covered the top with plastic wrap (KCL solution still inside the cap). --- Swirled the probe in a cup of RO water to rinse off the storage solution. --- Shook the excess water out and wiped the unit with a clean paper towel making sure all mineral buildup was removed (kept away from the very tip of the probe). --- Temporarily placed the meter back into the cup of RO water. --- Removed the plastic wrap of the establishment media. - [14:13]: Using the AC Infinity PH Meter PRO [AC-PHM7], --- Took the establishment media's initial pH reading. --- The pH was at 5.14 --- Using the micro pipette, ------ Added pH Up solution. --- Made sure to let the media solution mix for a bit before checking for pH readings. - [14:21]: Adjusted the media's pH until it stabilized to 5.58 --- For this batch, tried to go for a range of 5.4 to 5.8 pH. --- Also glad that I did not need to add PH down. - [14:43]: Poured the pH'd establishment media into separate polypropylene containers. --- Made sure to re-mix the media solution between container fillings. --- Ended up splitting the media solution into 12 containers. ------ 8x » 125mL Polypropylene Bottles [with screw cap lids] ------ 4x » 236mL (0.5pt) Glass Mason Jars [with polypropylene jamming lids] --- Have the lids of all vessels loosely on and set each aside for later autoclaving. --- Also filled 12 empty polypropylene bottles with RO water and placed the lids on loosely (4 bottles are re-used). - [14:58]: Prepped the tools for sterilization. --- Took a new 5.25in x 10in sterilization pouch and added the following tools: ------ 3x stainless steel forceps ------ 3x stainless steel scissors --- Before placing into the pouch, wiped each tool with a paper towel sprayed with 70% isopropyl alcohol. --- Sealed the bag and marked the date. --- Time to autoclave everything in the pressure cooker! --- Filled a Presto 23qt-Pressure Cooker with 12 cups of RO water. - [15:06]: Added a few aluminum foil balls to the bottom of the pressure cooker. --- Placed the first rack on top of the foil. --- Made sure the rack was level and stable resting above the water. --- Gently placed the containers of media into the pressure cooker and onto the first rack. Lids are still loose. --- Made sure to give space for each container and kept them away from the sides of the pressure cooker. --- Placed a second pressure cooker rack on top of the containers of media. --- Placed the containers of RO water onto the second rack. Lids are still loose. --- Placed the third rack on top of the containers of water. - [15:16]: Lastly, placed the sterilization bag of tools on top of the third rack. --- Took the pressure cooker lid and made sure the release vent was clear of debris before placing it on. --- Sealed and secured the lid. --- Pressure vessel has been sealed! --- Alright! Time to sterilize! --- While keeping the vessel level and straight up, moved the sealed pressure cooker to the kitchen for heating. - [15:23]: Placed the pressure cooker onto a butane-gas stove. --- Turned the stove ON and set it to HIGH. ------ [ » ~20 MINUTES LATER « ] --- Once steam was venting out of the release vent, --- Placed the metal rocker onto the vent. --- Shortly afterwards, the pressure top-lock sprung up to indicate the vessel was under pressure. --- Then the pressure gauge started to rise. ------ [ » ~10 MINUTES LATER « ] --- At 15psi, the metal rocker started to rock! - [15:56]: Turned down the stove down to LOW. --- Set a timer for 15 minutes and began monitoring the pressure gauge. --- Maintained the 15psi by making minor adjustments to the stove. ------ [ » ~15 MINUTES LATER « ] - [16:12]: Turned the stove completely OFF and waited until the pressure cooker's top-lock dropped down which indicated that pressure levels were safe to open. ------ [ » ~40 MINUTES LATER « ] --- Once the pressure cooker was at safe levels (0psi) and the top-lock was down, - [16:48]: Moved the pressure cooker into the lung room. --- The pressure cooker was still quite hot so was careful to keep the vessel straight up and level during transport. --- Used towels for insulation. --- Rested the hot pressure cooker onto a stack of 5-gallon buckets covered with layers of towels and folded paper bags. --- Gently opened the pressure cooker and set the lid aside. - [16:57]: While wearing nylon gloves, sprayed my hands with 70% isopropyl alcohol. --- Gently removed the bag of sterile tools placed it onto a Pyrex dish. --- Removed the top rack and set it aside. --- Then one container at a time, --- Gently tightened and secured the lids of each bottle of sterile water before placing onto the Pyrex dish. --- Removed the middle rack and set it aside. --- Then one container at a time, --- Gently tightened and secured the lids of each bottle and jar of sterile media before placing onto the Pyrex dish. --- Throughout the entire process, kept the gloves on and sprayed my hands regularly with 70% isopropyl alcohol. --- Decided to store all the bottles in the Pyrex dish. - [17:16]: Have the dish resting on a shelf in the lung room. The jars of media are set right next to the Pyrex dish on a towel. --- To prevent dust, covered everything with towels. --- Done for now and will check on the growth media tomorrow. --- If all goes well, should be taking new explant cuttings in a couple days! - [17:39]: Night check on the 3x3 veg tent. --- Looking beautiful and healthy in the veg garden! --- All moms are getting bushy and getting pretty close to the grow light. --- Since I plan to take explant cuttings soon, not going to top or train quite yet. --- Clones also looking healthy and seem unaffected by the super-cropping. Nice! - [17:57]: Checked the Ecowitt soil moisture sensor data: ------------------ [ 4x4 MAIN TENT ] --------------- ------ 45% - [CH01 FT » G30 - Heady OG BX1 #1] ------ 34% - [CH02 FB » G30 - Heady OG BX1 #1] ------ 35% - [CH03 BT » G20 - TKO] ------ 55% - [CH04 BB » G20 - TKO] ------------------ [ 3x3 VEG TENT ] ---------------- ------ 43% - [CH05 BL » GR7 - TKO] ------ 45% - [CH06 BR » GR7 - Gorilla Goat #1] ------ 42% - [CH07 FL » GR7 - Heady OG BX1 #1] ------ 44% - [CH08 FR » GR7 - Garlic Budder OG#1] --------- Veg: 38% - 45% | Flower: 45% - 55% --------- General: 30% [Dry] «| 45 - 60% [Moist] |» 70% [Wet] - [17:59]: Checked the 4x4 main tent. --- Ca-Caw!! I got Headies! --- Wow! Heady OG BX1 #1 is drying along beautifully and she is smelling dank! --- Also no signs of mold and RH levels look stable! --- 6 more days until the big trim! - [18:11]: Checked the humidifiers. --- Tanks are still full and no leaks found. --- Wow what a day! --- Still gots more to do! --- Let’s go! Let’s grow! --- Onwards Ensign! Day 05 - Friday - 10/17/25 - Total Days: 187 ----------------------------------- Daily Averages ~[+01:00] - Temps: 76.0°F [24.4°C] - Humidity: 62.0% - VPD: 1.16 kPa - Soil %: [48, 34, 35, 55, 44, 44, 44, 42] ----------------------------------- - [22:57]: Night check on the 4x4 tent. --- Ca-Caw! Headies is smelling dank! --- RH levels are getting a bit dry, but are okay. --- Wow buds are frosty with trichomes! --- With 5 days until trim day, getting stoked! - [23:04]: Checked the Ecowitt soil moisture sensor data: ------------------ [ 4x4 MAIN TENT ] --------------- ------ 47% - [CH01 FT » G30 - Heady OG BX1 #1] ------ 34% - [CH02 FB » G30 - Heady OG BX1 #1] ------ 35% - [CH03 BT » G20 - TKO] ------ 55% - [CH04 BB » G20 - TKO] ------------------ [ 3x3 VEG TENT ] ---------------- ------ 46% - [CH05 BL » GR7 - TKO] ------ 40% - [CH06 BR » GR7 - Gorilla Goat #1] ------ 45% - [CH07 FL » GR7 - Heady OG BX1 #1] ------ 50% - [CH08 FR » GR7 - Garlic Budder OG#1] --------- Veg: 38% - 45% | Flower: 45% - 55% --------- General: 30% [Dry] «| 45 - 60% [Moist] |» 70% [Wet] - [23:11]: Checked the 3x3 veg tent. --- Looking healthy in the veg garden! --- Mothers are getting bushy and tall! --- Super-cropped and trained the taller branches down to lower the canopy. --- Plan to take tissue culture cuttings tomorrow so glad there are plenty of tops to choose. Still deciding on which mother to preserve next. --- Clones in the propagation tray look healthy! --- The original Garlic Budder #2 clone needs watering. - [23:26]: Here is the starting initial watering range: ------ Garlic Budder OG#2 » 256.4g → 300.2g --------- General Solo Range: [Dry] «| [Initial Cup Weight] + ~55-100g |» [Wet] --- Took the starting weight before watering, ------ Garlic Budder OG#2 » 258.9g --- While on a scale, --- Gently misted her straw mulch with RO water. --- Tried to keep the top growth dry. --- Misted 5-10 sprays. Waited a few seconds, then misted again. --- Made sure to reference the watering weights. --- Repeated this process until the cup weighted at least 300g. --- There was no runoff. - [23:40]: Took the saturated weight after watering, ------ Garlic Budder OG#2 » [000.0]g --- Marked the watering date on the side of the cup. Also marked the saturated weight on the back. --- Placed her back into the tent. - [23:45]: Checked the humidifiers. --- Tanks are still full and no leaks found. Day 06 - Saturday - 10/18/25 - Total Days: 188 ----------------------------------- Daily Averages ~[+01:00] - Temps: 76.8°F [24.9°C] - Humidity: 60.3% - VPD: 1.25 kPa - Soil %: [47, 34, 35, 55, 44, 44, 44, 47] ----------------------------------- - [15:19]: Decided to decrease the VPD level a bit. --- Within the AC Infinity App, --- Changed the schedule name from 'Flower [12/12]' to 'Drying [0/24].' Oops. --- For the Main Tent [4x4] controller, --- Adjusted the 'Drying [0/24]' Schedule for the exhaust fan. ------ Decreased the VPD LOW trigger value from 1.5kPa to 1.4kPa --- Adjusted the 'Drying [0/24]' Schedule for the humidifier. ------ Decreased the VPD target value from 1.5kPa to 1.4kPa --- This should increase the relative humidity a bit and will maintain a 60-65% range - [16:59]: Evening check on the 3x3 veg tent. --- Wow the veg garden is raging with healthy growth! --- Even with the lower veg temps, growth has been perky and bushy! --- The TKO mother has been looking a bit on the purple-side, but I plan to increase the temps back after trim day. - [17:23]: Okay! Time to continue the tissue culture journey! --- Checked on the sterilized media, water, and tools. --- Ooo yea! The growth media in the glass jars have solidified nicely! --- The media in the bottles also look great! Found only one that did not gel properly. --- Hmm. The sterile water bottles are not looking sterile. Unlike the first batch (using distilled water), each RO bottle had tiny white particles floating in the water. --- I think this was due to the water source. The RO water used was from the plant reservoir. For the next sterilization, will try using water straight from the tap. Will discard the entire batch and try again later. - [17:34]: Anyways! Time to cut and sterilize another batch of explant cuttings. --- Using the similar protocols as last time, but with a few changes. --- Instead of distilled, using reverse-osmosis (RO) water. --- Also simplifying the workflow and will not be using the sterile water. --- Only taking cuttings from one cultivar. --- Today, attempting to preserve Heady OG BX1 #1 --- Unlike the last attempt, going to be cutting apical nodes and will leave all leaf growth on. --- Last attempt was more for monsteras and not cannabis. - [17:35]: Made sure the lung room's oscillating fan was OFF during the entire process. --- Put on a fresh pair of nitrile gloves. --- Okay! Let's grow Ensign! - [17:47]: Filled a glass beaker with 180mL of RO water. --- Using a micro-pipette, ------ Added 20mL of Clorox bleach --- Mixed the solution. - [17:52]: Poured the bleach solution into a glass mason jar. ------ Added 1 drop of Dawn dish soap. --- Dropped a magnetic mixing rod into the jar before setting it onto the magnetic stirrer. --- Turned the unit ON and set it to a low setting. --- Placed a polypropylene lid loosely on. - [18:02]: Rinsed and filled the glass beaker with 70% isopropyl alcohol. --- Filled another glass beaker with RO water before adding a drop of Dawn dish soap. Mixed the solution. --- Okay! Time to take the cuttings! --- Using a clean pair of trimmers, - [18:09]: Gently cut two clone cuttings from the Heady OG BX1 #1 mother. --- Stripped each cutting down to 2-inch apical nodes making sure to leave about 0.5 inch of stem growth for planting. ------ Prepared a total of 2 nodal cuttings. --- Dropped the nodal cuttings into the cup of soapy water. --- Swirled the cuttings in the soapy water for a bit. --- Opened the jar containing the 10% bleach solution. --- Using clean tweezers, --- Took each cutting out of the RO water and carefully submerged it into the beaker of 70% isopropyl alcohol for about 30 seconds. --- Then transferred the cutting from the isopropyl alcohol straight into the jar of bleach solution. --- Once both cuttings were in the jar, sealed the top with the polypropylene lid. - [18:23]: Flipped and set the entire bleach jar upside down onto the magnetic stirrer. --- Started using the magnetic stirrer. --- But the cuttings were getting hit by the bar so ended up turning the unit OFF. --- Instead, made sure to swirled the bottle every few minutes to agitate the cuttings. --- For a proper sterilization, the cuttings should be agitated in the hypochlorite (bleach) solution for at least 20 minutes. --- While waiting for the explants to sterilize, prepped the still air box. - [18:39]: Unfolded and placed a Safloga still-air box onto my desk. --- Thoroughly misted the inside of the air box with 70% isopropyl alcohol making sure to coat the entire chamber. --- Then isopropyl misted and placed the following items inside of the still air box, ------ x1 » Jar of Establishment Media ------ x1 » Bottle of Establishment Media ------ x1 » Glass-Bead Sterilizer ------ x1 » Roll of Plastic Wrap [pre-cut] ------ x1 » Sterilization Bag Containing: --------- x3 » Stainless Steel Forceps --------- x3 » Stainless Steel Scissors --- Made sure to fully coat the outside of the tool bag and each of the containers with 70% alcohol. --- The bag had a torn corner (Oops), so made sure to spray the inside with a few mists of isopropyl alcohol. --- For the glass-bead sterilizer, ------ Wiped the entire unit with isopropyl alcohol. ------ Before filling the unit with the included beads, misted the heating chamber with a spray of isopropyl alcohol. ------ Misted the glass beads again with a spray of isopropyl alcohol. --- Set the cleaned glass-bead sterilizer into the still air box. - [19:02]: Still air box fully prepped for explants! --- Okay! Explant nodal sterilization complete! --- While still wearing gloves, --- Misted the outside of the explant jar with 70% isopropyl alcohol before placing it into the still-air box. --- Turned the glass-bead sterilizer ON. --- Made sure to re-seal the chamber. - [19:05]: Okay! Finally time to start the tissue culture transplant! --- Let's go Ensign! --- Sprayed my gloved hands with 70% isopropyl alcohol (also put on a pair of cloth arm sleeves), --- Placed my hands through the arm holes and into the still air box to begin the process. --- Started by laying out my initial workspace: ------ » Far Left Quadrant » Jar of Sterile Establishment Media ------ » Far Center » Bottle of Sterile Establishment Media ------ » Far Right Quadrant » Glass-Bead Sterilizer ------ » Mid Center » Bleach Jar with Explant Cuttings [Main Workspace] ------ » Near Left Quadrant » Empty [Trash Area] ------ » Near Right Quadrant » Bag of Sterile Tools & Roll of Plastic Wrap --- Opened the bag of tools and placed the forceps and scissors into the pre-heated glass-bead sterilizer. --- Set the bag in the trash area (near left quadrant). --- Loosened the lids of both containers of sterile media but did not remove the lids. The lids were resting on top and could easily be lifted. --- Also took lid off of the bleach jar and gently set it on the table. --- Took the jar of sterile media and set it in the center of my workspace (to the right of the bleach jar). --- Using my left hand, took a set of scissors from the glass-bead sterilizer and gently cut the bottom of the first cutting. --- Once the bottom cut was made, placed the scissors back into the glass-bead sterilizer. --- Using my left hand, lifted the lid off of the jar of sterile media and inserted the trimmed end of the cutting straight into the growth media (using my right hand). --- Covered the jar with the lid and placed the forceps back into the glass-bead sterilizer. --- Tighten the lid of the jar and set it aside. ------ [ » REPEATED THE ABOVE PROCESS FOR THE BOTTLE OF GROWTH MEDIA « ] --- Once the last cutting was transferred from the bleach jar into the sterile media, --- Turned the glass-bead sterilizer OFF. --- Cleaned up my workplace and placed the scrap stem tips and bleach jar out of the way (near left quadrant). - [19:28]: Wrapped the lid of each explant container with plastic wrap before setting it in the center of the workspace. --- Explant transplant completed! - [19:59]: Using a label printer (Brother DT410), made a set of labels for each container: ------ Heady OG BX1 #1 | 04.24.25 | Photo | Reg ------ Formula: v0001 | ExBatch: 0002 | Lot: 01 | Pod: 01 ------ Establishment Media | Sealed On: 10/18/25 --- Opened the still air box. --- Then one container at a time, took an explant out and wrapped the lid with a label. --- Set the labeled containers onto the propagation tray (in the 3x3 veg tent). - [20:07]: Done! ------ The explants are around 37 μmol/m²/s which gives a DLI of 2.40 mol/m²/d under an 18/6 light cycle. --- Will check daily for contamination. --- Ca-Caw!! Ahh yea! --- Heady OG BX1 is now officially my first true attempt at cannabis tissue culture! --- Using this new workflow, I may try reusing the TKO media. Do plan to take new cuttings soon. May even try using the liquid media. --- Shout out to microclone and Bill Graham! His 'Tissueponics' video contains tips and tricks of the trade that have straight up changed the way I think of DIY cannabis tissue culture. --- Plan to further refine my process and will continue to refine the workflow with each attempt. - [20:15]: Checked the Ecowitt soil moisture sensor data: ------------------ [ 4x4 MAIN TENT ] --------------- ------ 54% - [CH01 FT » G30 - Heady OG BX1 #1] ------ 34% - [CH02 FB » G30 - Heady OG BX1 #1] ------ 35% - [CH03 BT » G20 - TKO] ------ 55% - [CH04 BB » G20 - TKO] ------------------ [ 3x3 VEG TENT ] ---------------- ------ 43% - [CH05 BL » GR7 - TKO] ------ 48% - [CH06 BR » GR7 - Gorilla Goat #1] ------ 42% - [CH07 FL » GR7 - Heady OG BX1 #1] ------ 45% - [CH08 FR » GR7 - Garlic Budder OG#1] --------- Veg: 38% - 45% | Flower: 45% - 55% --------- General: 30% [Dry] «| 45 - 60% [Moist] |» 70% [Wet] - [20:56]: Checked the 4x4 tent. --- Ca-Caw! Looking great my ladies! --- Humidity levels are still a bit on the dry side, but still okay. - [21:08]: Checked the humidifiers. --- Tanks are still full and no leaks found. --- Wow what a day! --- Oh yea, 4-more days until trim day!! Ca-Caw! Let’s go! Day 07 - Sunday - 10/19/25 - Total Days: 189 ----------------------------------- Daily Averages ~[+01:00] - Temps: 76.7°F [24.8°C] - Humidity: 59.4% - VPD: 1.27 kPa - Soil %: [48, 35, 35, 55, 44, 43, 44, 42] ----------------------------------- - [07:08]: Quick morning checked on the 3x3 veg tent. --- The veg garden is healthy and perky! --- All moms and clones are healthy and raging with growth! --- Both Heady OG BX1 #1 explants also look alive and green! - [19:26]: Night check on the 4x4 tent. --- Ca-Caw! We got MENDO DOPE in the trunk! --- Wow terps are getting loud and buds are drying along nicely! --- Looking frosty and coated in trichomes! --- Three more days until trim day!! - [19:33]: Checked the Ecowitt soil moisture sensor data: ------------------ [ 4x4 MAIN TENT ] --------------- ------ 46% - [CH01 FT » G30 - Heady OG BX1 #1] ------ 35% - [CH02 FB » G30 - Heady OG BX1 #1] ------ 35% - [CH03 BT » G20 - TKO] ------ 54% - [CH04 BB » G20 - TKO] ------------------ [ 3x3 VEG TENT ] ---------------- ------ 40% - [CH05 BL » GR7 - TKO] ------ 43% - [CH06 BR » GR7 - Gorilla Goat #1] ------ 47% - [CH07 FL » GR7 - Heady OG BX1 #1] ------ 41% - [CH08 FR » GR7 - Garlic Budder OG#1] --------- Veg: 38% - 45% | Flower: 45% - 55% --------- General: 30% [Dry] «| 45 - 60% [Moist] |» 70% [Wet] - [19:35]: Checked the 3x3 veg tent. --- Vegging along beautifully in the garden! --- Mothers are getting taller and probably could train, but will wait until tomorrow. --- Clones and explants also look healthy and green! --- Gorilla Goat #2 needs watering! - [19:44]: Here is the starting initial watering range: ------ Gorilla Goat #2 » 255.4g → 300.3g and was last watered 5 days ago. --------- General Solo Range: [Dry] «| [Initial Cup Weight] + ~55-100g |» [Wet] --- Took the starting weight before watering, ------ Gorilla Goat #2 » 244.9g --- While on a scale, --- Gently misted her straw mulch with RO water. --- Tried to keep the top growth dry. --- Misted 5-10 sprays. Waited a few seconds, then misted again. --- Made sure to reference the watering weights. --- Repeated this process until the cup weighted at least 300g. --- There was no runoff. - [20:04]: Took the saturated weight after watering, ------ Gorilla Goat #2 » 345.6g --- Marked the watering date on the side of the cup. Also marked the saturated weight on the back. --- Placed her back into the tent. - [21:41]: With a few days before the big trim, decided to sample a few buds! --- Cut and trimmed branch for sampling and wow she’s got terps! --- Buds are dense and have a gassy diesel funk! Ca-Caw!! Wow! --- Without even curing, pretty sure she’s the one! --- Plan to grow out another cycle (in clone of the same pheno), but I think I found my female for my first breeding project! - [22:01]: Checked the humidifiers. --- Tanks are still full and no leaks found. --- Ahh yea! Three more days until the big trim! --- Also next week will be the last for this log. --- But already stoked for the next! --- Planning on popping more seeds and continuing the pheno hunt for another female! --- Since I lost TKO this harvest cycle, plan to grow a clone cutting of the same pheno (#2). --- As for seeds, popping more regulars and going to attempt to grow some of Mr. Grow-It’s Chillout OG! --- Got a pack of F3s and am stoked to give them a try! --- Also going to sprout some beans of Dead Ops OG from Zaza Genetics! --- Chillout OG, Dead Ops OG, and another round of TKO! Let’s go! Let’s grow! --- Hunters of the dank! Ca-Caw! --- Anyways! --- Onwards to next week! [END OF WEEK 26]
Likes
10
Share
In they’re final homes, 4 days without the makeshift incubators. Looking good
Likes
8
Share
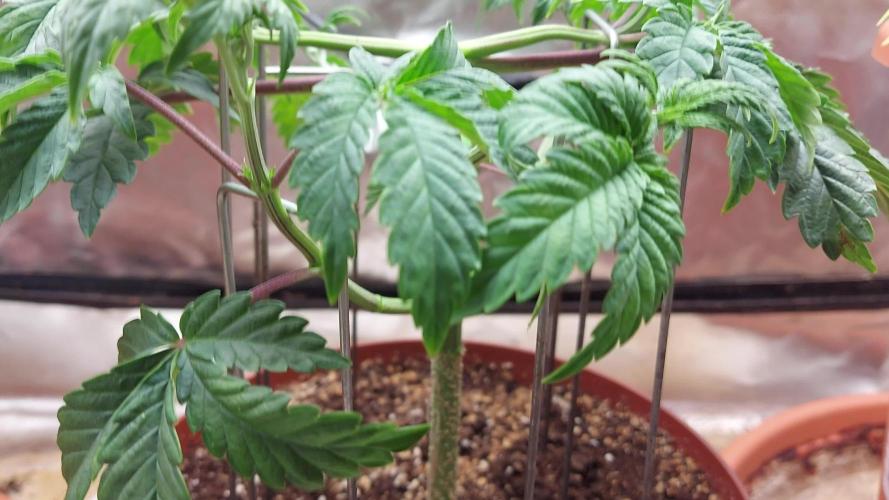
What does this yellowing indicate? Maybe im overwatering? The soil has been hot for the entire grow but never yellowed on the bud leaves.. Decided to take off the budz hanging off the edges of the pot for samples 40g wet, 22g dried and now curing. smoke report coming soon.
Likes
54
Share
Hey guys :-) The lady is developing very well. She made a nice push. In the coming days they will be repotted in 8 l fabric pots :-) . After repotting, I spontaneously consider whether I will use training or not. It's all a question of how full the flowering tent will be :-) Watering was done twice this week with 0.4 l each. Have fun with the update and stay healthy 💚🙏🏻 👇🏼👇🏼👇🏼👇🏼👇🏼👇🏼👇🏼👇🏼👇🏼👇🏼👇🏼👇🏼 ‘Powered by GreenHouse Feeding’ Copy the link for 10% off all Nutrients 👇🏼 https://shop.greenhousefeeding.com/affiliate/MadeInGermany_PassionGrower 👇🏼👇🏼👇🏼👇🏼👇🏼👇🏼👇🏼👇🏼👇🏼👇🏼👇🏼👇🏼 You can buy this strain at : https://www.amsterdamgenetics.com/product/choco-cheesecake/ 👇🏼👇🏼👇🏼 Use the coupon code: madeingermany for 10% on all Amsterdam Genetics seeds Water 💧 💧💧 Osmosis water mixed with Cal/Mag (24 hours stale that the chlorine evaporates) to 290 ppm and Ph with Ph- to 5.8 - 6.4 MadeInGermany
Likes
48
Share
@PapaNugs
Follow
Everything went well over vacation! The girls are doing okay overall. They needed bigger pots and it's starting to show overall. Another reason not to use autos cause I can't lollipop. But the watering process is going well. She's not doing hot! The strawberry is looking rough still. I'm considering using synthetic nutrients in this grow to start giving for power. And this girl is the reason for it. Dimmed to 80% Here are the lights details: Medic Grow Mini Sun-2 150W LED Model: MN150-022 Spectrum mode: V1 Efficacy: 2.8 umol/J Thanks for stopping by! You can find the light on Grow Diaries: https://growdiaries.com/grow-lights/medic-grow/mini-sun-2-150-watts You can find the light on Medic Grow's website: https://medicgrow.com/
Likes
12
Share
@ciansta
Follow
So the Northern Lights free seed from RQS ended up out living all 3 of the Dosidos’ “USA Premium” seeds that all died within the first week of sprouting, hopefully an explanation will be found for this as I have not been able to come to any conclusion as to what happened. Long live the lights amiright
Likes
19
Share
Alright Then REMINDER I DO 2 UPDATES PER WEEK 👉WEEKLYROUNDUP👈👉MIDWEEKLY UPDATE👈 We just hit week 3 and all is well , have to admit she's ahead of all the others of same age , nice Growth in just 21 days😃 ....... Middle of last week I decided to start a little training by pulling her over to the side 👌 I was happy with the internode spacing but not the branching , begun heavy LST to try and bring the internode branching up👌 and I'm glad to report that it did workout and I decided to top her 👈 Very little water given ,so far and rain water to be used entire growth Lights being readjusted and chart updated .........👍 I GOT MULTIPLE DIARIES ON THE GO 😱 please check them out 😎 👉I WISH GD HAD DISCORD SERVER SO GROWMIES COULD HAVE A PLACE TO HELP AND TALK THINGS RELATED TO GROWING IN REAL TIME.....👈 👉SO I CREATED ONE ALL YOU NEED IS TO JOIN THE GROWDIARIES DISCORD SERVER !!!!!!!!!!!👈 LINK IS 👉 https://discord.gg/zQmTHkbejs AND SEE HOW IT PLAYS OUT !!!!!!!
Likes
25
Share
Realy looking forward to this grow. Two of my all time favourite blueberry and cheese combined in one plant. Thank you royal queen seeds lol. So I decided to give RQS starter pack a go. But I did modified it a bit. It’s a simple starter you make up 1l of water add the sachets stir then soak the tray for 10 secs and put seeds 5mm into the soil then wait 5 days. Well I grow in hydroponics with jiffy cubes as starting cubes so I just soaked jiffy cubes in the solution then placed seeds right in. Blow me down 3 days and 3 of the lady’s are out the soil well Impressed how well it worked and easy for this noobie grower. So far impressed with RQS got my eye on their pineapple Kush for next gen or the hulkberry maybe even north thunderfuck... to many to pick from will have to think it over lol. But happy with this starter kit and all going good so far.
Likes
153
Share
@Ju_Bps
Follow
Hello growmies 👩‍🌾👨‍🌾🌲🌲, 👋 The flowering is in progress This plant is still happy and healthy, Pistil are already turning orange/brown. 💧 Give water each 2/3 days. 1l Water + RQS Easy Plus 1,5l Water + RQS Bio Flo Pack + Sugar Royal PH @6 - Bio Flowering Booster Pack Thicker Flowers 1 ml/l Bigger Flowers 1 ml/l Sweeter Flower 0.5 ml/l - Easy Plus Micronutrients 1 tabs for 6l water 💡Mars Hydro - SP 3000 100% 55 cm. 🔥 Thanks community for follow, likes, comments, always a pleasure 👩‍🌾👨‍🌾💚🌲. Mars Hydro - SP 3000 💡💡 https://www.mars-hydro.com/sp-3000-samsung-lm301b-greenhouse-led-grow-light RQS - Epsilon F1🌲🌲 https://www.royalqueenseeds.com/f1-hybrid-cannabis-seeds/620-epsilon-f1.html
Likes
24
Share
@Kirsten
Follow
26.1.25: I have had a mistake 😕 i spilt some Fish Mix as I was experimenting with a syphon from some aquarium tubing I have. Unfortunately, I forgot to take the syphon out! Ugh 😣 However, it is fish emulsion and very thick consistency. Therefore, I was able to scrape it up with 2 of my business cards up off the counter. So added this extra into the next 2 ltr solution I mixed. All plants were watered with at least 1ltr of dechlorinated water PH'd to 6.3. Containing the following nutrients;- ♡ 3ml Seachem Seaweed ♡ 4ml Biobizz Fish Mix ♡ 4ml Biobizz Bio-Grow ♡ 3ml Biobizz Bloom ♡ 2ml Xpert Nutrients Bloom Booster ♡ 2ml Xpert Nutrients Cal-Mag ♡ .25g Ecothrive Biosys. ♡ 2.5g of Bicarbonate of Soda as PH UP. Unfortunately I have broken my PH pen too. Accidentally submerged it under water, then the readings went crazy. I'm leaving it to dry by standing it up but I'm most likely going to need a new one, which is extremely annoying 😑 I'm going start implementing the Scrog net probably some point next week if I let the plants that are in flower to just grow up now, as I do believe that I stunted Watermelon 🍉 by using too strenuous LST. Hopefully the plants still are able to grow upwards at this stage during flower for all the Purple Punch P1, P2 and P3. We will soon see! 28.1.25: My PH pen has packed up 😣 I've got to wait to get another. It's super annoying 😑 so I'm just judging by memory how to regulate it. Unfortunately, that's my only choice! I'm also out of the dechlorinator 😕 things are not going very well this week so far 😅 I guess we will have to make do, until I can get replenished. 29.1.25: I removed all the plants, hoovered, and disinfected the tent. There were several accidents when watering, causing some debris and splashes. I decided to just go ahead and get a few other things done. It's crazy how quickly things can become neglected! 😣 So I defoliated moderately on all plants except Gorilla Cookies seedling. I have absolutely dropped the ball on my lighting situation! My light was much further away than I thought! I turned it up to 100% and dropped it down to just under 2 feet away. After I reset the tent, I set up my scrog net. I removed 80% of all LST pegs. I am planning on letting the scrog net take over the training from here. I really want to minimise the risk of mould, so I decided to start using my dehumidifier. It has raised up to 73% RH this week, so it's necessary. Hopefully, I will be able to get my dechlorinator and PH pen soon! That's kind of essential to me. It's been a little bit of a stressful day in the garden, to be honest 😅 30.1.25: So I am expecting the arrival of my new PH pen today, as well as my new bottle of Ecothrive neutralise. It is supposed to measure the TDS and EC in addition to the standard TEMP and PH, which I had previously. Obviously, time will tell if it's any good or not. I realise, much too late now, that my lighting is very insufficient for this many plants. I need double the watts at least, and coverage is very poor. I remembered I had an old LED floor lamp, which was in a corner being unused. I decided to take the stand off, and Zip tied the pole onto the tent pole at the back left corner. I have no idea what the wattage is, and it's quite pathetic 😅 but I mean, I might as well use it, being as I definitely cannot afford more lights! 😣 Next grow, I will probably only grow 2 plants, max 4, and just use larger 7-10 Gallon pots. Being as I ran out of dechlorinator, I only watered some plants properly because I only had enough to make 6 litres. When my pen arrives, I will get everything properly watered. 31.1.25: The leaves of several plants are showing signs of iron deficiency. This is likely due to my PH pen packing up earlier. I now have a new pen. Due to this, I decided to use my Seachem Prime, which I use for my aquariums. As I wanted to get them watered properly, and my Ecothrive Neutralise hasn't arrived yet. I watered each plant with 1ltr of dechlorinated water PH'd to 6.0. I added .25g Ecothrive Biosys to the water. May give them a breather on the nutes and just use the Cal-Mag and Biosys. Being as I've just topped dressed with rich fertilisers, I'm sure that will be OK for the next several waterings. 1.2.25: Watermelon 🍉 has started flowering. The size and shape of her is quite laughable 😅 Retrospectively I started the LST too early and went in too heavy with it too. That obviously wasn't a great idea. Still, this is my first run attempting to do LST, and I have a whole bunch to experience and learn from here! 😅 We may get lucky with a stretch. Who knows right. I remember this one was supposed to finish really early, like 10 weeks or something so hopefully will get at least a bit bigger 🤞 Also the new growth is still a little bleached out. Hopefully the switch to a functional PH meter will correct the imbalance which may have occurred due to my previous one packing up. Snipped another couple leaves which were annoying me 😅 I realised this is one of the pots I put my clay pebbles the bottom of. So I've probably not been watering enough, as she's right at the back, and assuming all was good because the pot was heavier. Removed a couple of leaves from Bubble Kush
Likes
20
Share
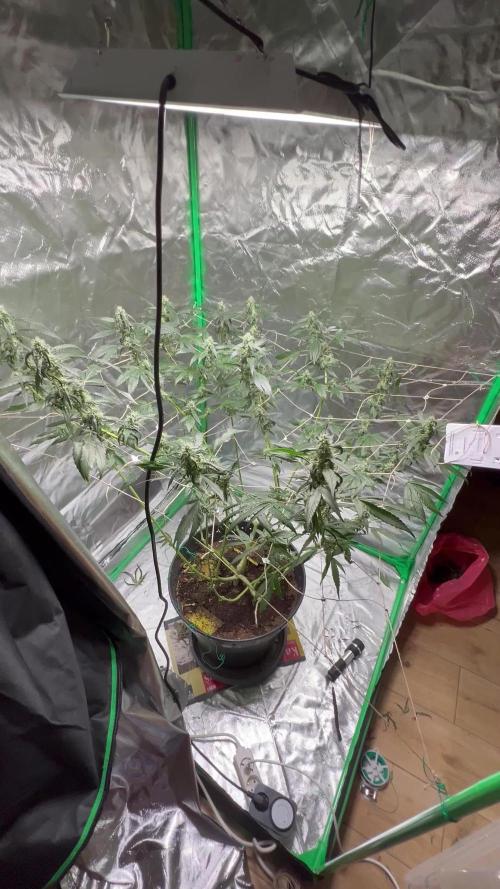
Such a beautiful week with the girls. I moved them in a larger tent(120x120x200), they deserve it :) The buds are taking nice shape, it felt like it took for ages since I flipped them. The Criticals were more vigorous, but now the GZs seem to be catching up :D They turned a bit dark green, so I will go back to 750ppm. Next week I will focus the time-lapse on the GZs, as I feel they are more trendy.
Likes
16
Share
Flipping to flower Topped a week ago with 50/50 all purpose and power bloom Watered with microbial tea that was brewed for 18 hours.
Likes
4
Share
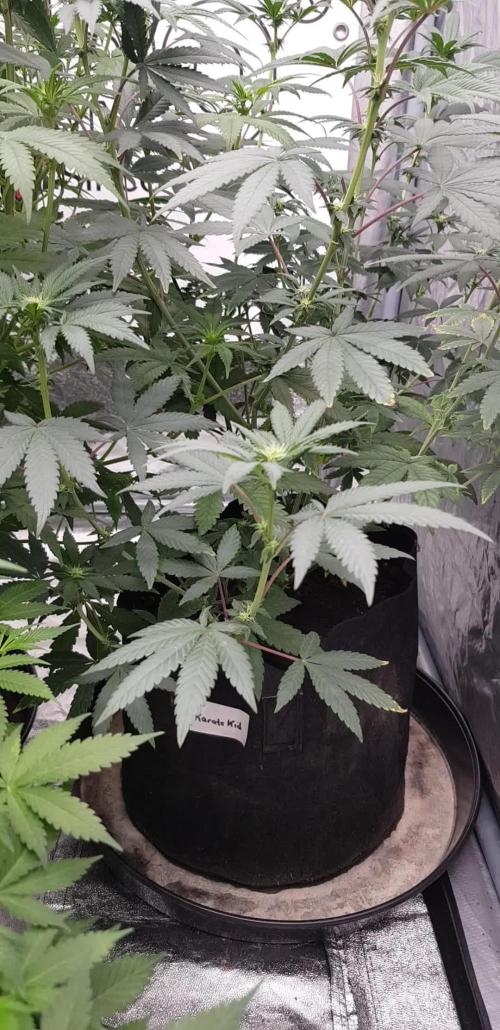
Great harvest and a easy grow fast say about 65 to 70 days. Lst is a must next go around with this one. After week 3 she Hungry for nutes for sure. So iv smoked it and let me say 10/10 I'm talking. Ghost rider Johnny blaze wow. Smelled like cat piss and then under arms as it dried gassy gas. High is spacey stoned body high for sure as it creeps to your eyes. Don't smoke before work for sure. Create's apatite like no other
Likes
19
Share
Undicesima settimana.siamo arrivati quasi al traguardo.la vendemmia si prepara... .il profumo invade tutta la mia stanza.. delizioso,😂😉🤣🤤🤤🕉️
Likes
111
Share
@Kanndera
Follow
20 неделя (8 неделя цветения) подошла к концу. Практически всю неделю поливал только чистой водой. Соответственно на листьях вылезла нехватка кальция, калия и фосфора. По листу большего ничего не даю. Снизил вчера на осушителе настройки, теперь на 35% влажность поставил. За последние сутки прямо много забирает влаги. 16 литров за день! Растения пить стали меньше, перевел их на дозировку по 1 литру в день на клон и на мать 3 литра. Но вот с пониженной влажностью стало заметно почва быстрее высыхать, сегодня стал лить снова 1,5 литра на клон и 4 литра на мать. Запах еще стал сильнее, но все в пределах нормы. Что-то похожее на сладкую вишневую-черничную жевачку. Трихомы через микроскоп 60х уже молочные. Вероятно следующая неделя будет последней. Даже по листьям видно, начали опускать их, они стали тоньше из-за нехватки элементов и светлее. Набухание шишек прекратилось, только постепенно темнеют стигмы. Некоторые нижние ветки под тяжестью тоже упали или согнулись, закрепить их уже гораздо сложнее. Решил не трогать, пусть так дозреют. Вот так поливаю в палатке, пластиковая трубка с воронкой, аккуратно подносишь между листьев до горшка и льешь )) После полива влажность повышается примерно на 1-2 часа. Потом осушитель выравнивает в сторону 35%. Стараюсь поливать раньше, чтобы к ночи уже испарения воды было меньше. Стало холоднее и теперь ночью у меня около 22 градусов! Днем 27-28.